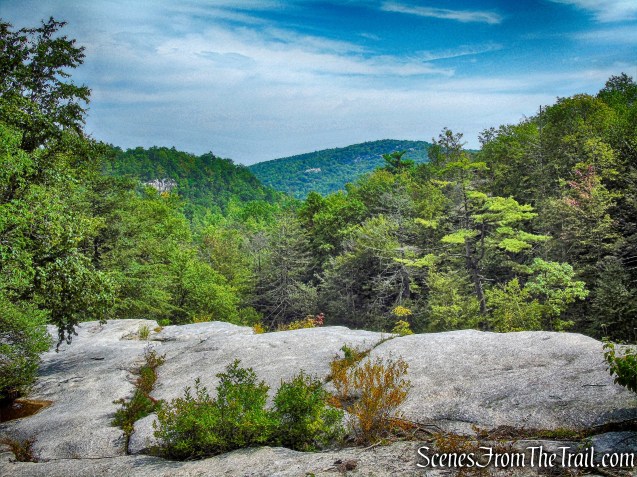
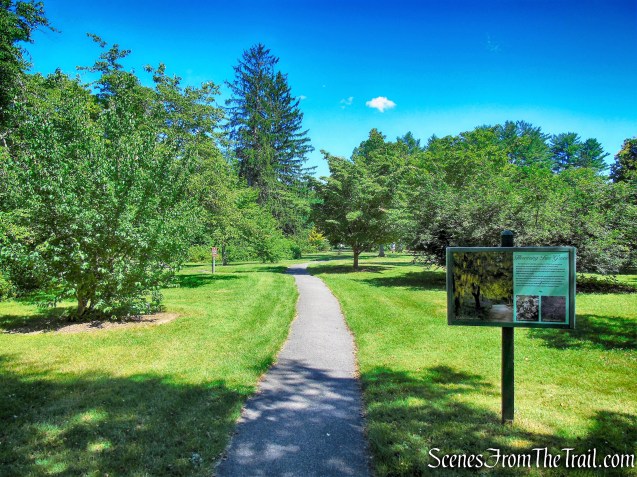
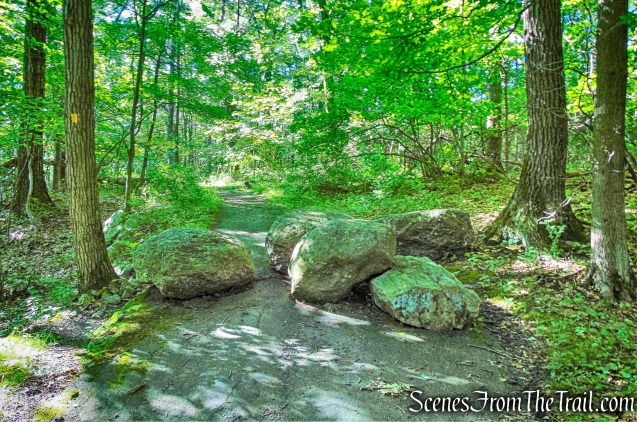
Occupying the former grounds of one of Newport’s grandest estates, Brenton Point State Park affords its visitors one of the most commanding and spectacular views on the East Coast. The park is located at the point of land where Narragansett Bay meets the Atlantic, midway along renowned Ocean Drive. The state took possession in 1969 as part of Governor John Chafee’s Green Acres program; it was then dedicated as a state park in 1974. The park opened to the public in 1976.
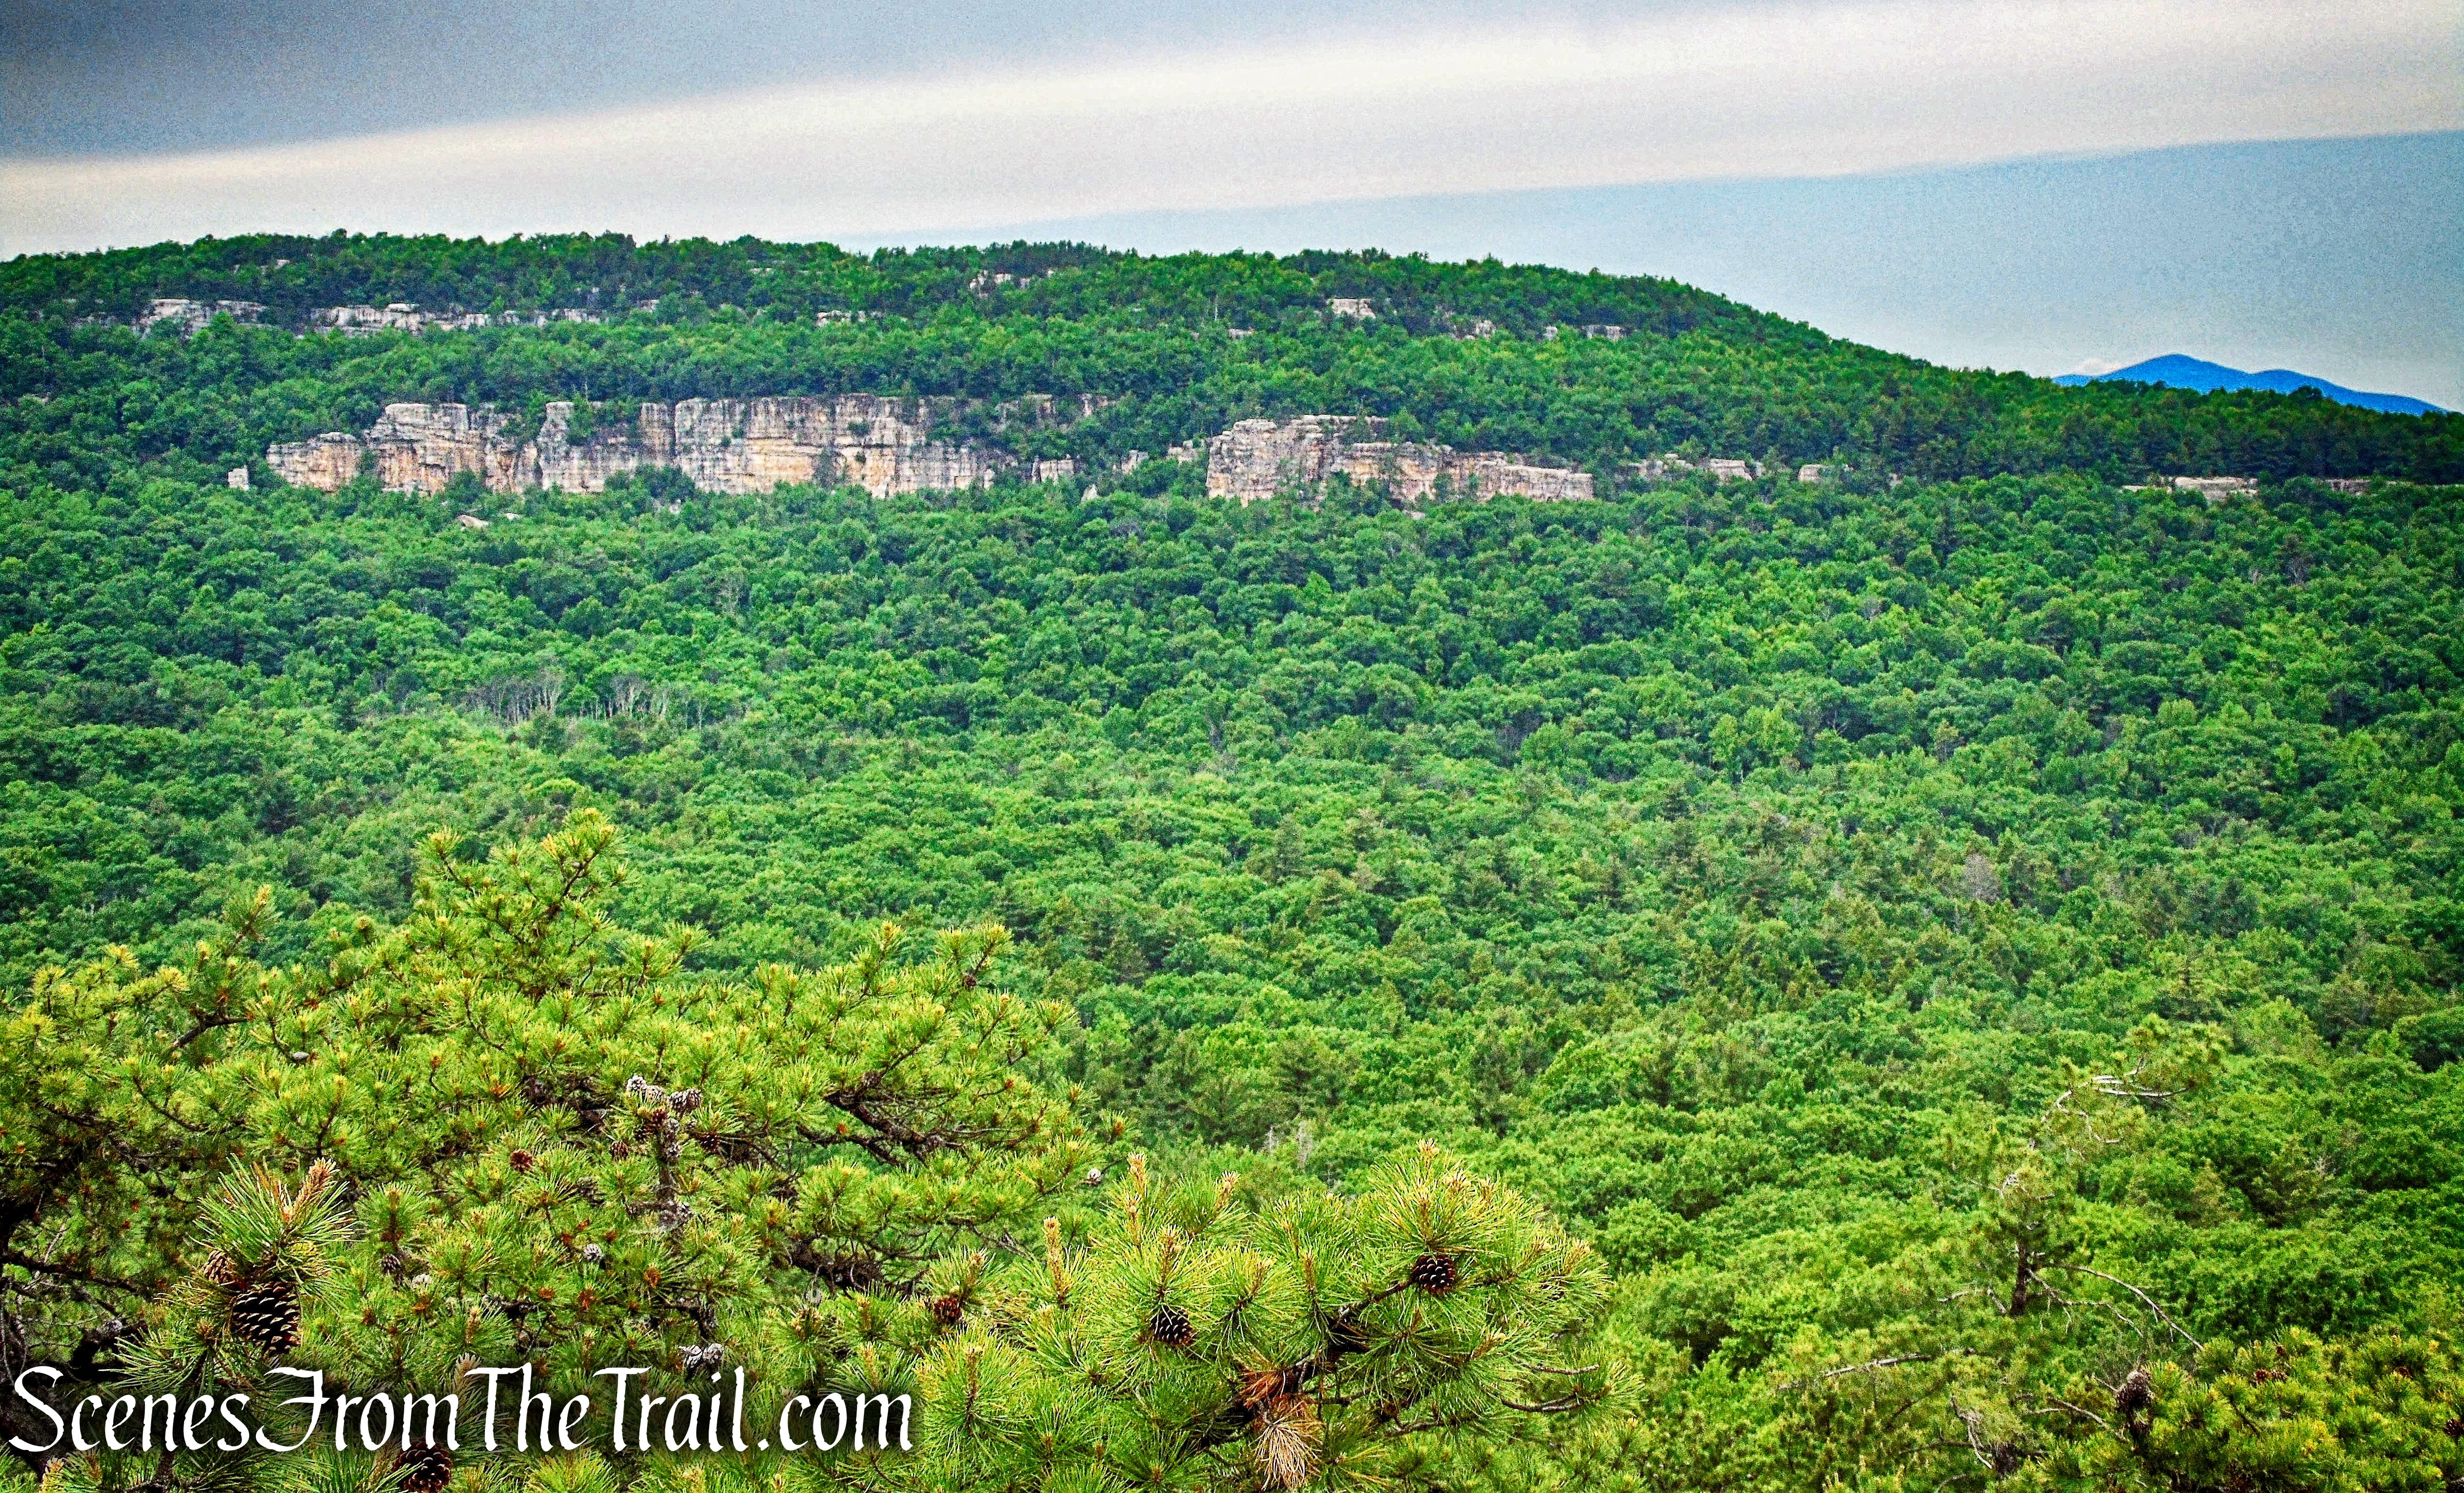
Brenton Point State Park
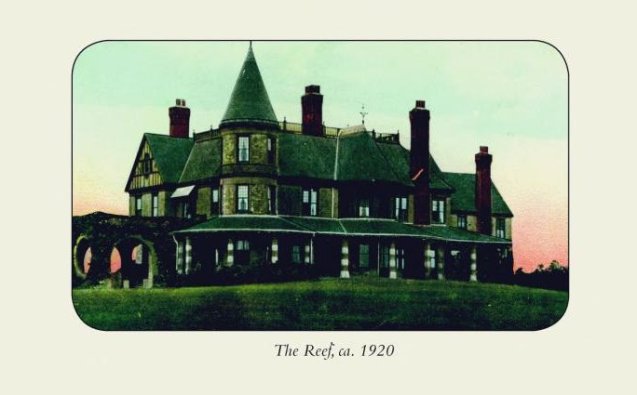
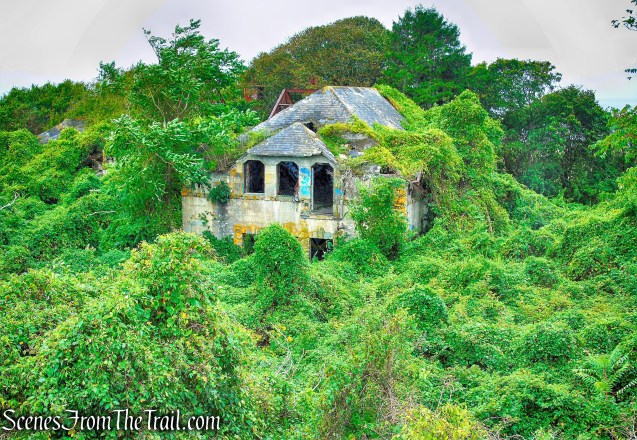
Theodore M. Davis, copper magnate, author, collector, and renowned Egyptologist, built “The Reef” (later “The Bells”) at the southernmost tip of Aquidneck Island. The Boston architectural firm of Sturgis & Brigham created an elegant shingle and stone clad Queen Anne villa destined to house Davis’ collection of Old Master paintings, largely bought through the art consultant Bernard Berenson, and later bequeathed to the Metropolitan Museum of Art in New York.
The Bells – Brenton Point State Park
Following Mr. Davis’ death in 1915, Mr. and Mrs. Milton J. Budlong of Providence purchased the eighteen-acre estate. The Budlongs divorced in 1928 and the property was placed in contention. The house, never again lived in by the family, passed to Miss Frances Budlong. During World War II, anti-aircraft gun emplacements were set up around the house, which housed gunnery personnel. Vandalized throughout the 1950’s, the villa was set on fire in 1961 and demolished on May 25, 1963.
The Reef circa 1920
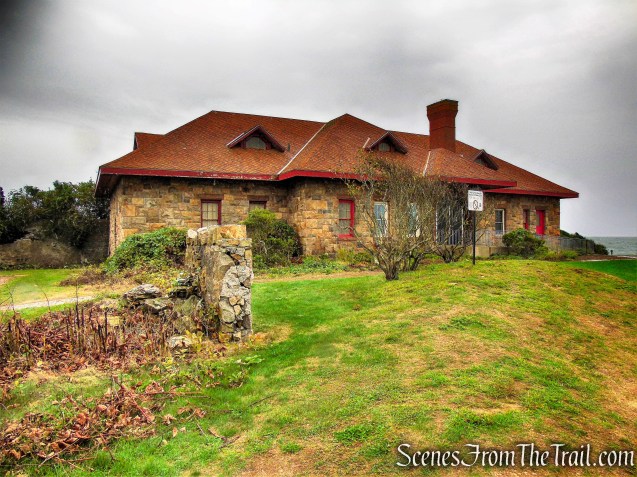
The former laundry/servants’ quarters building serves as the park’s visitor center and rangers office.
visitor center – Brenton Point State Park
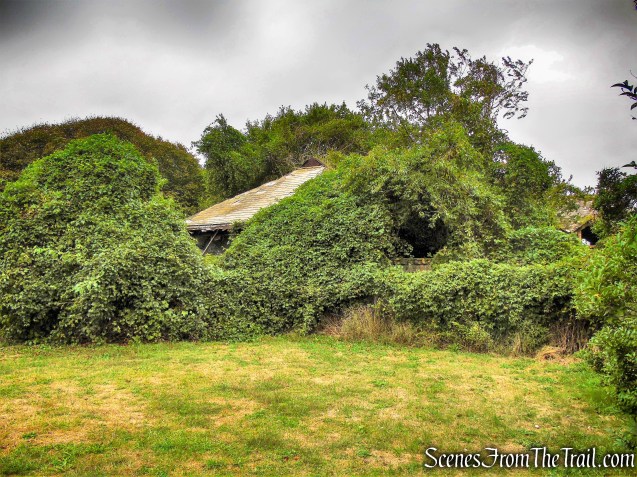
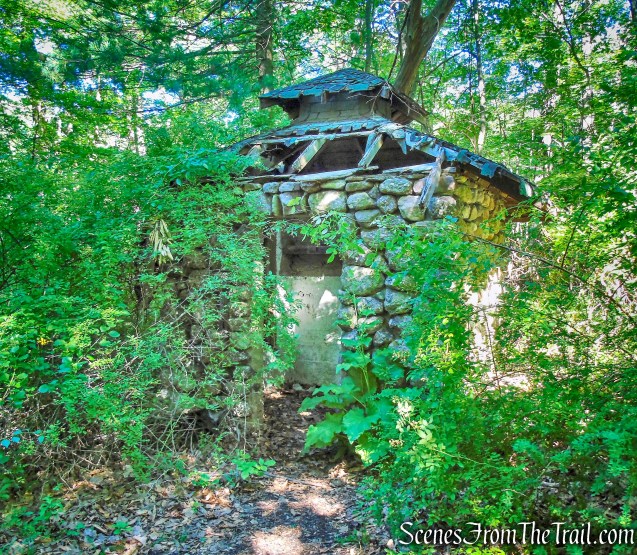
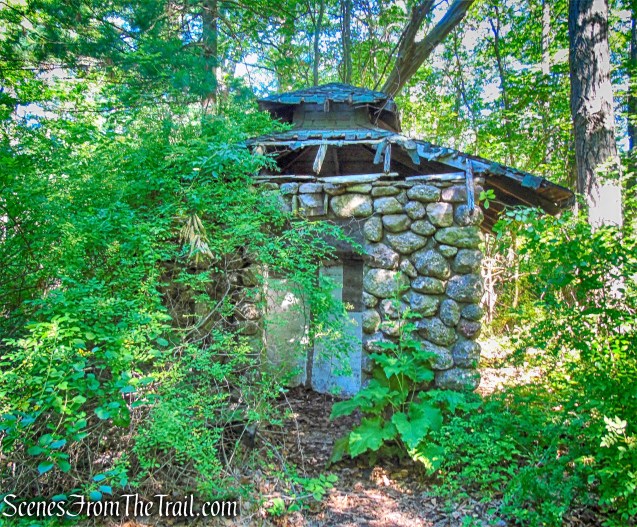
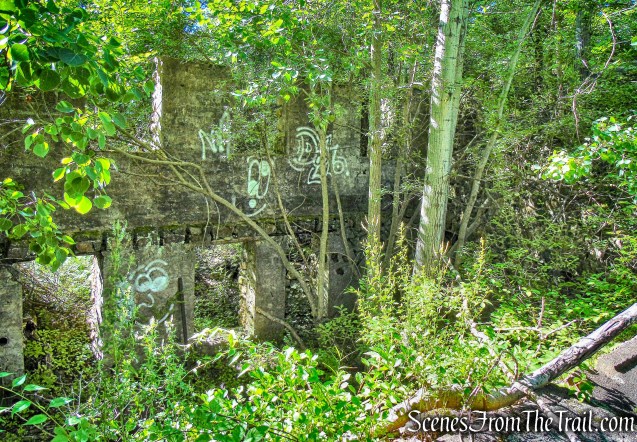
The mansion’s now-derelict carriage house and stables still stand, though they have been fenced off and are routinely patrolled by park rangers.
carriage house – Brenton Point State Park
carriage house – Brenton Point State Park
The carriage house/stable was built by the architect Theodore Davis Boal of Washington.
carriage house – Brenton Point State Park
carriage house – Brenton Point State Park
carriage house – Brenton Point State Park
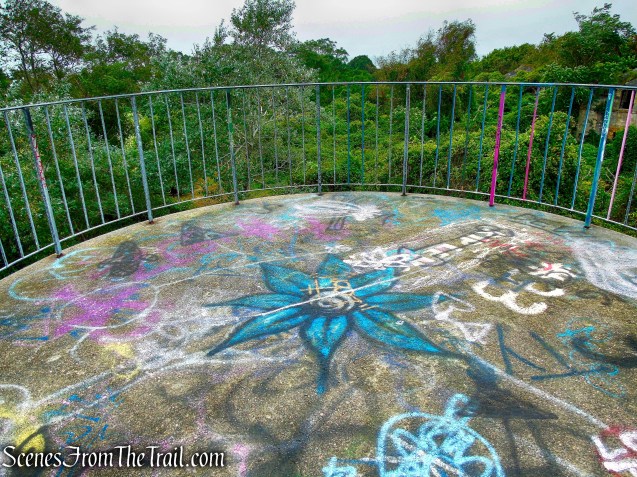
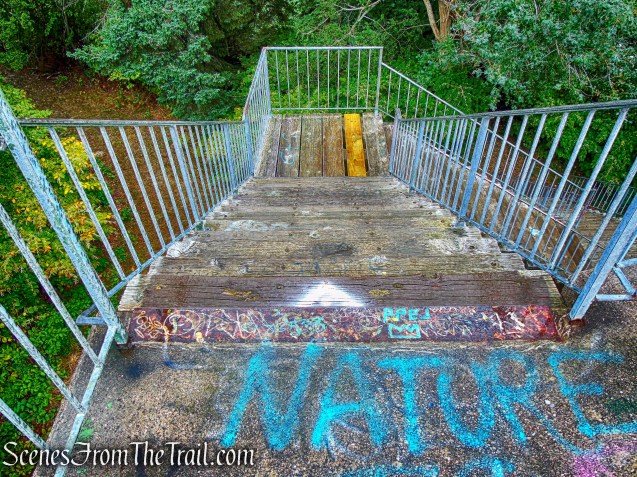
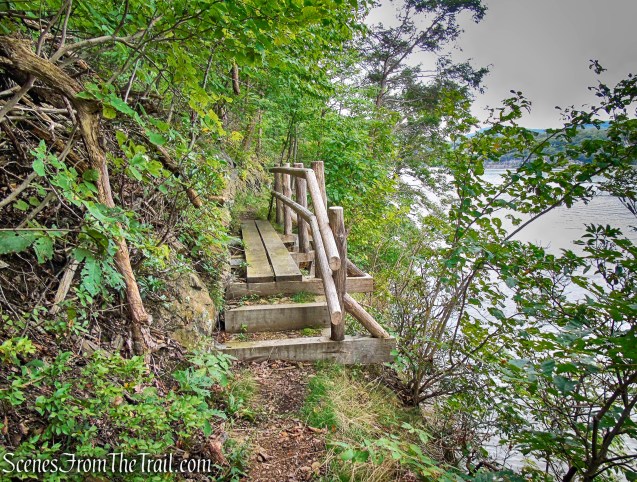
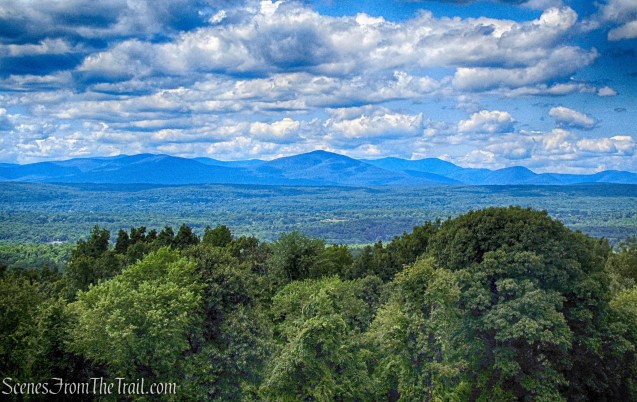
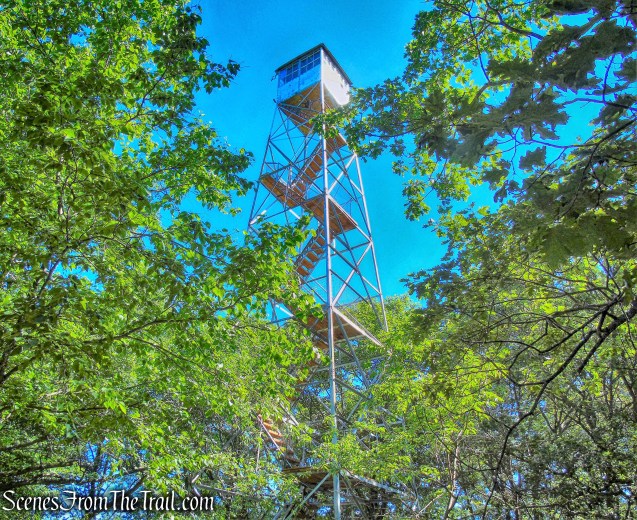
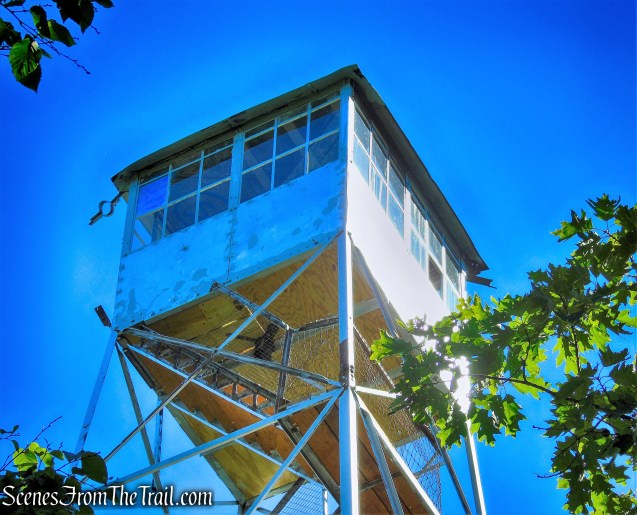
A stone observation tower is used by park rangers and tourists to view the forest and ocean. At one point in time a stone staircase wound itself around the tower to the top, but many of the lower stairs were broken off over time.
observation tower – Brenton Point State Park
observation tower – Brenton Point State Park
observation tower – Brenton Point State Park
A newer staircase was constructed beside the tower so that visitors might still have a chance to experience the view from the top.
observation tower – Brenton Point State Park
observation tower – Brenton Point State Park
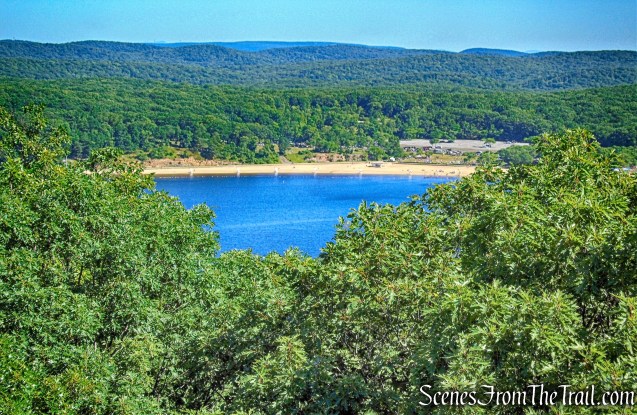
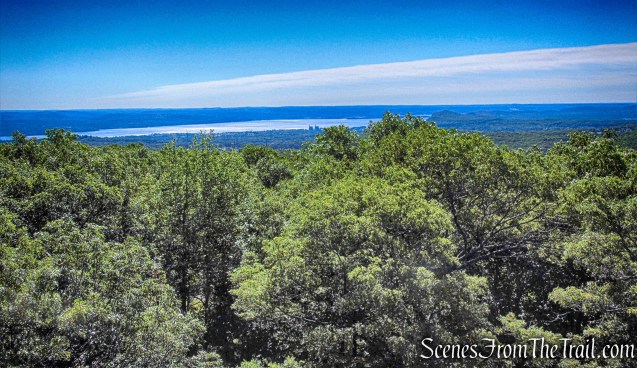
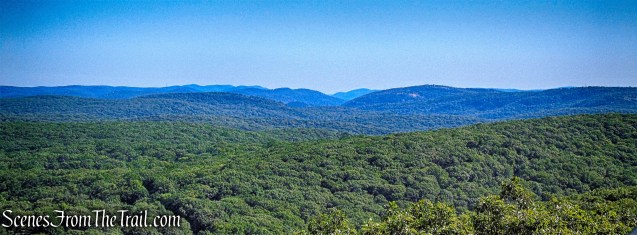
At the top, on a clear day, one can see far over the trees, out over the Atlantic Ocean.
observation tower – Brenton Point State Park
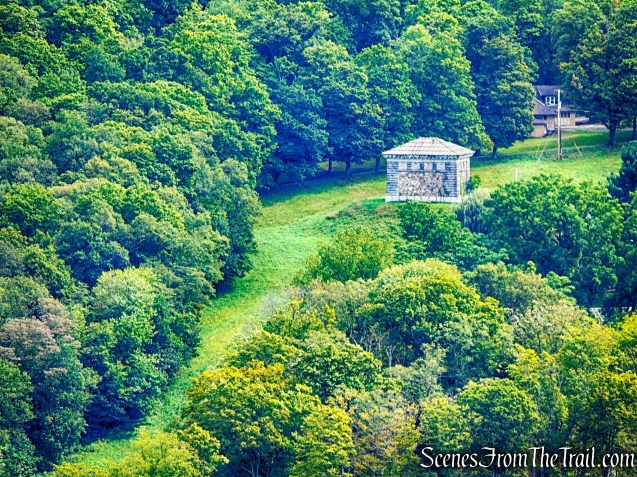
From the tower, the Carriage house is visible over the tops of the trees surrounding it. Stretching all around is a dense forest of lush green trees.
view of carriage house from observation tower – Brenton Point State Park
observation tower – Brenton Point State Park
observation tower – Brenton Point State Park
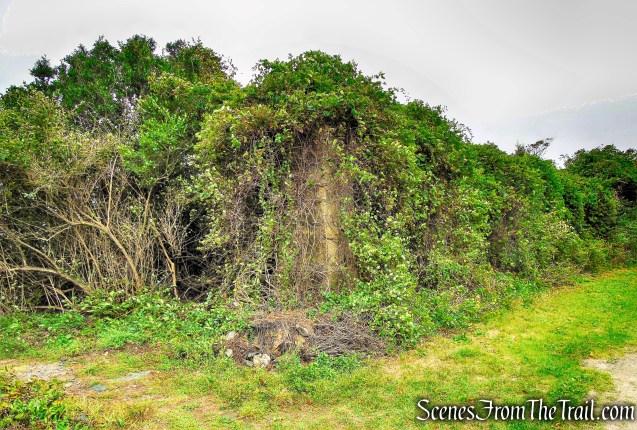
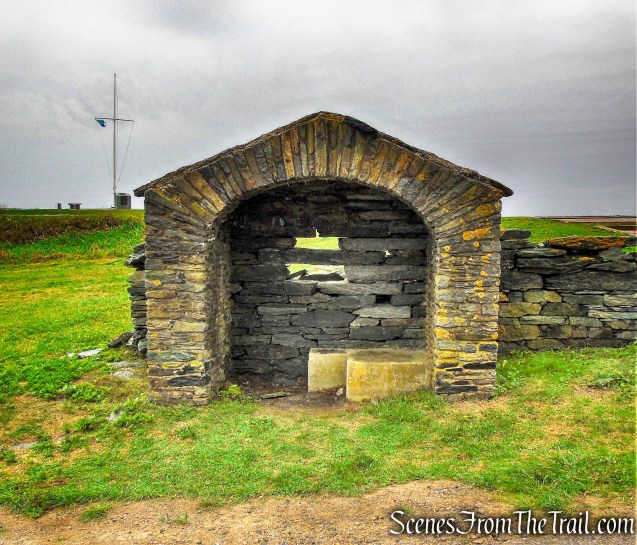
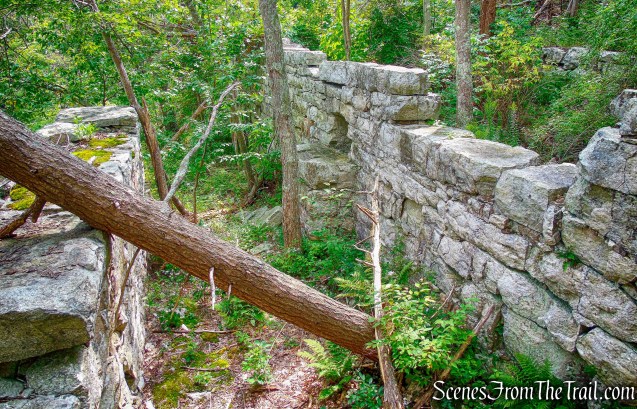
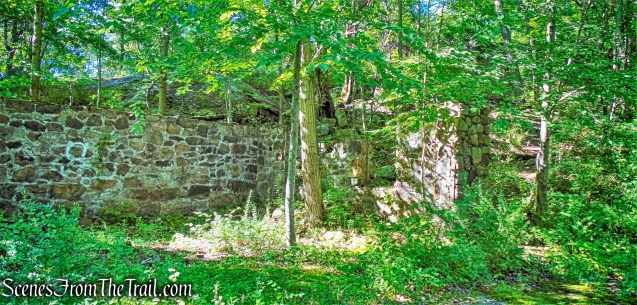
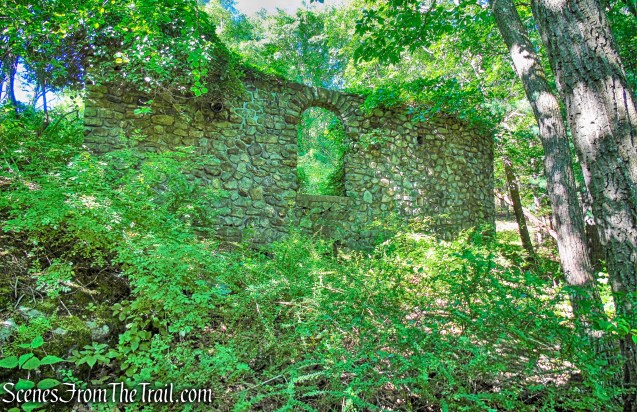
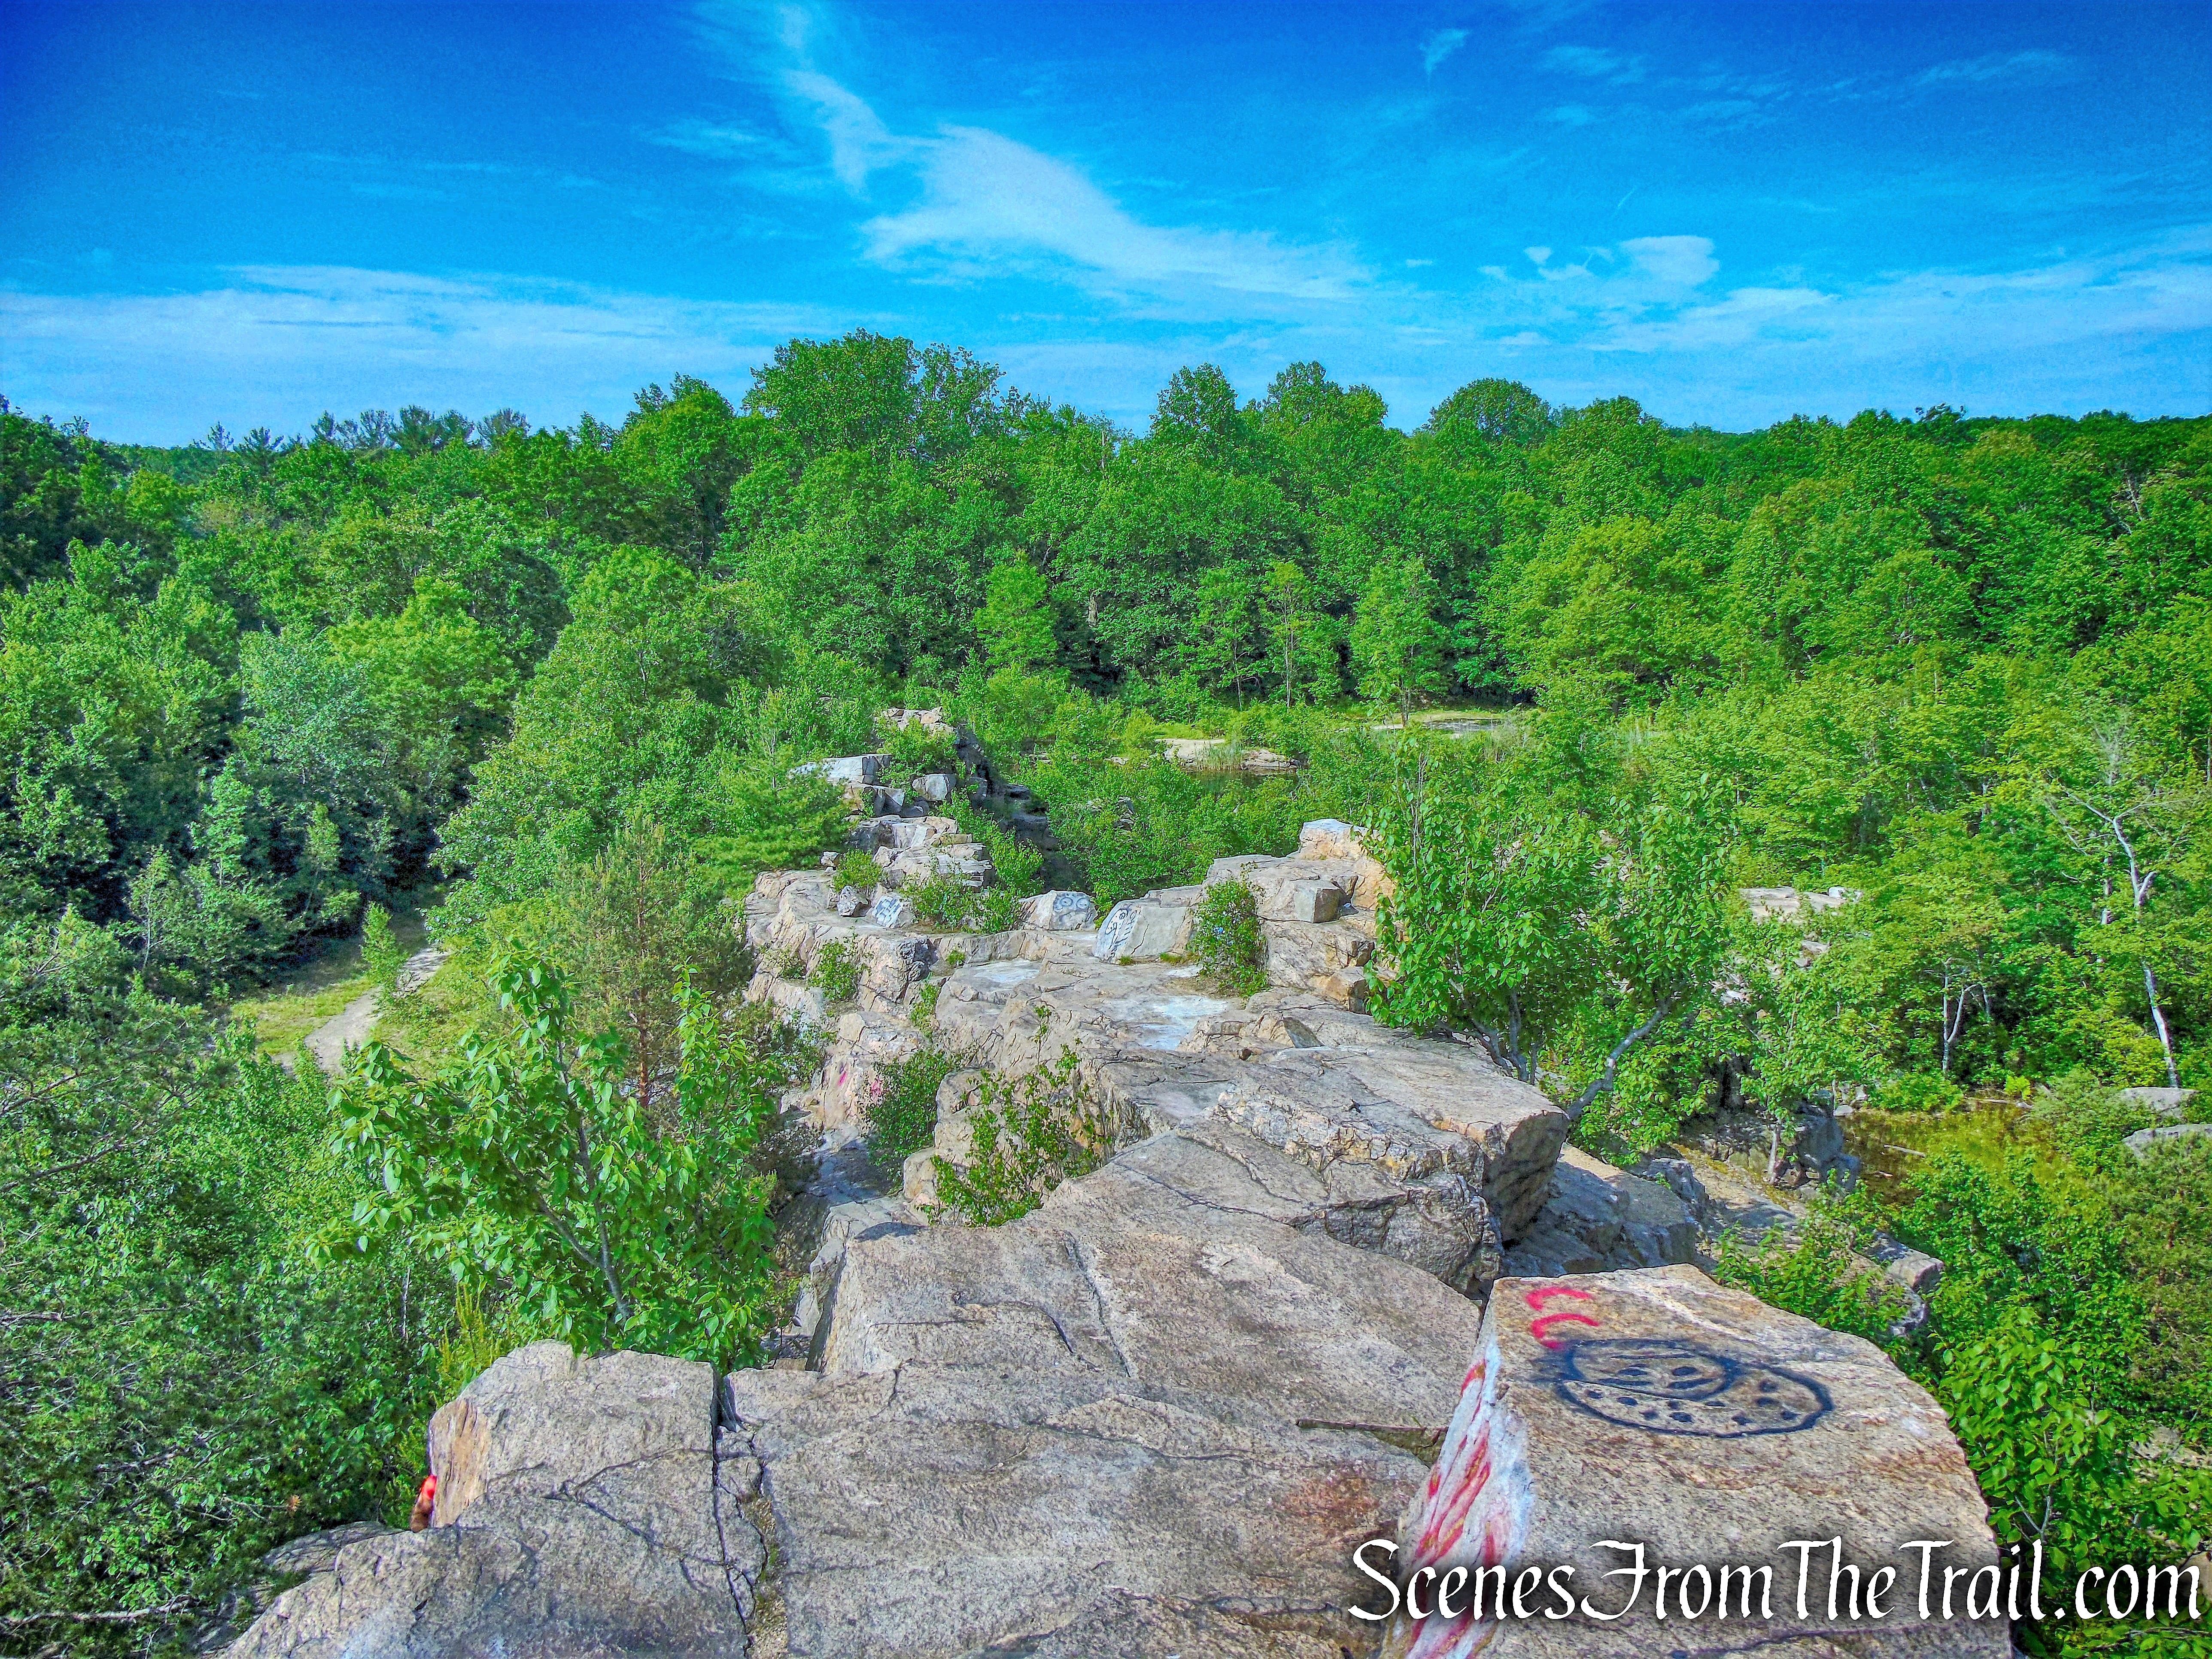
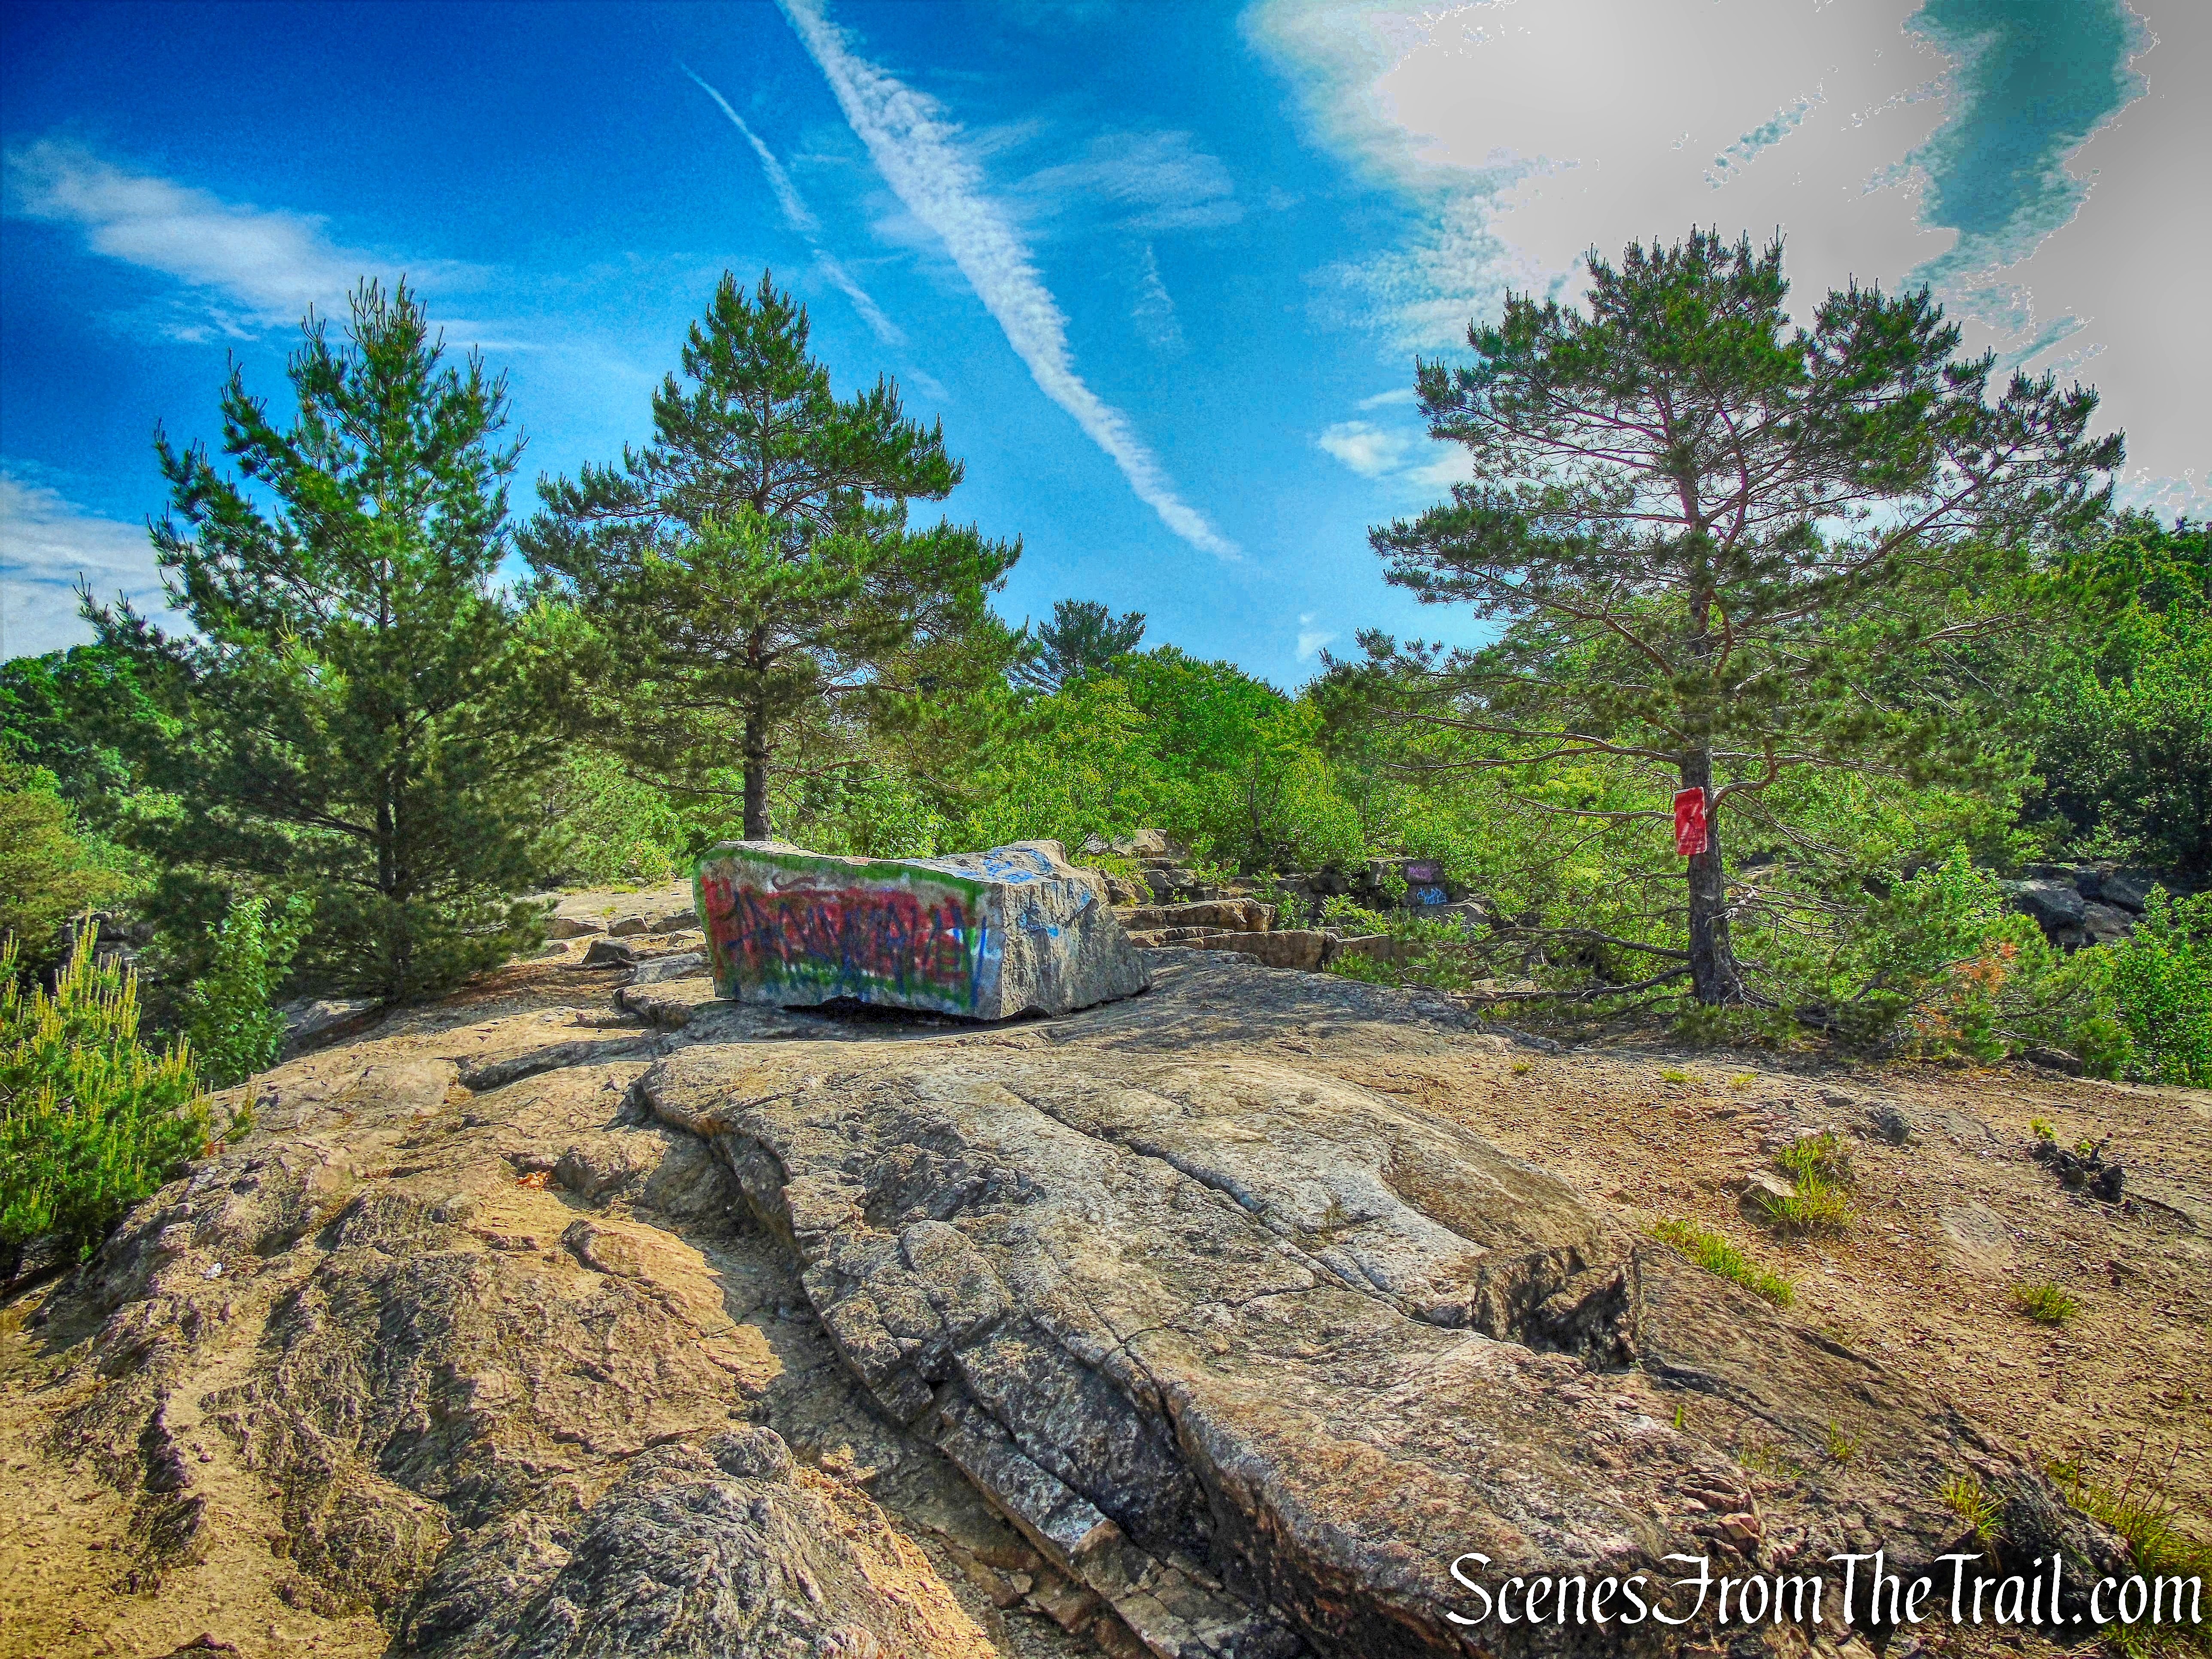
Stone walls, in varying degrees of ruin, that once used to surround the estate.
Brenton Point State Park
Brenton Point State Park
Brenton Point State Park
Brenton Point State Park
Brenton Point State Park is open year round from Sunrise to Sunset (Restrooms Open May 1st Through October 31st). Visitors can enjoy picnicking, hiking, fishing, or just relaxing with the cool breezes and majestic views of the Atlantic Ocean.
Also called the Old Stone Tower, Touro Tower, Old Stone Mill or, simply, The Tower, standing near the west end of Touro Park in Newport, Rhode Island. The round stone structure and its park owe their existence to the generosity of Judah Touro, who in 1854 gave the City of Newport $10,000 to buy the land so that it would not be developed into home sites. Founded in 1639, the town of Newport had grown, up the hill from Narragansett Bay and Newport Harbor to engulf the meadows that lay above the shore. Judah Touro and others ensured that this tiny scrap of land was preserved and the Newport Tower has stood in Touro Park, undisturbed since.
Newport Tower
In 2004, a member of the Newport Historical Society explained, “We’re 99.9 percent sure the tower was built as a windmill by Governor Benedict Arnold in the 17th century.” This 17th-century windmill near Chesterton, England shares many characteristics with the Newport Tower.
17th-century windmill near Chesterton, England
This curious structure is circular, constructed of mostly unworked local stones set in mortar of several different types, owing to repairs over the years. At ground level are eight round columns connected by eight round arches made of flat stones set on edge so that the bases form a smooth curve on the arches’ undersides.
Newport Tower
Its inner face includes beam-holes for at least two floors above ground level; four windows, three of which are double-splayed; seven niches; and a fireplace built into the east wall, with one large, blackened stone as a hearth, and an overhead arch resembling the eight main arches. Nothing remains of any interior wooden structures.
Newport Tower
Subject of great controversy and debate, the 28-foot tower’s origins remains mysterious. No one knows who built the tower or when it was constructed. Several theories have been put forward. Some have suggested the tower was built by the Norse as a church between the 11th and 14th centuries, citing many architectural features obsolete by the 17th century.
Newport Tower
Other theories include:
That it was built by the Chinese in 1421 as either a lighthouse or an observatory.
That it was built in the late 15th century, by lost Portuguese navigators Miguel Corte-Real and his brother Gaspar, as a watchtower.
That the the Newport Tower was built by medieval Scottish Templars led by Scottish earl Henry Sinclair as part of an alleged voyage to New England about a hundred years before Columbus, but such a voyage has been vigorously disputed.
Address: Seaside State Park 36 Shore Road, Waterford, Connecticut
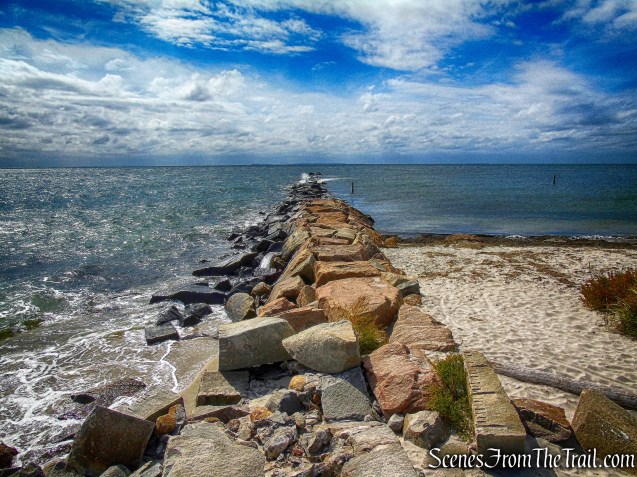
Seaside State Park is a 36-acre park overlooking Long Island Sound in Waterford, Connecticut. In 2014, Governor Dannel Malloy designated the property as a state park by way of Executive Order.
Seaside State Park
Back in the 1930’s, it was believed that sunshine along with the sea air and soothing waves of Long Island Sound could cure children with bone and glandular Tuberculosis.
Seaside State Park
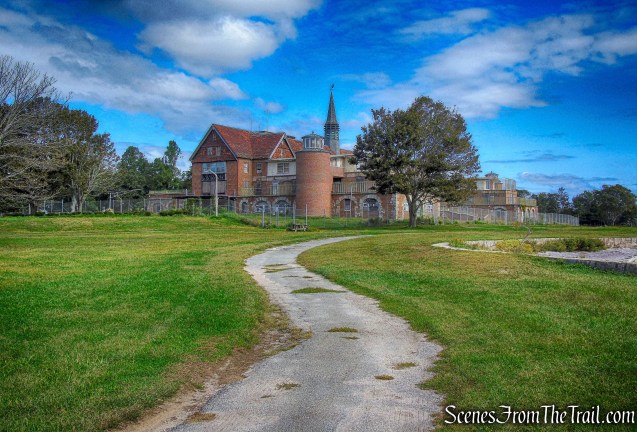
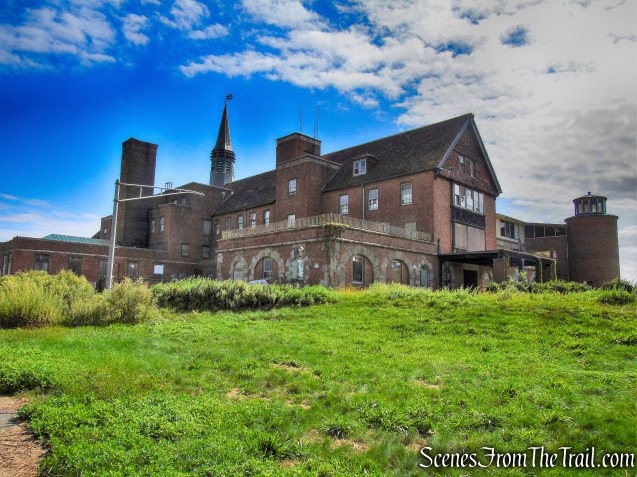
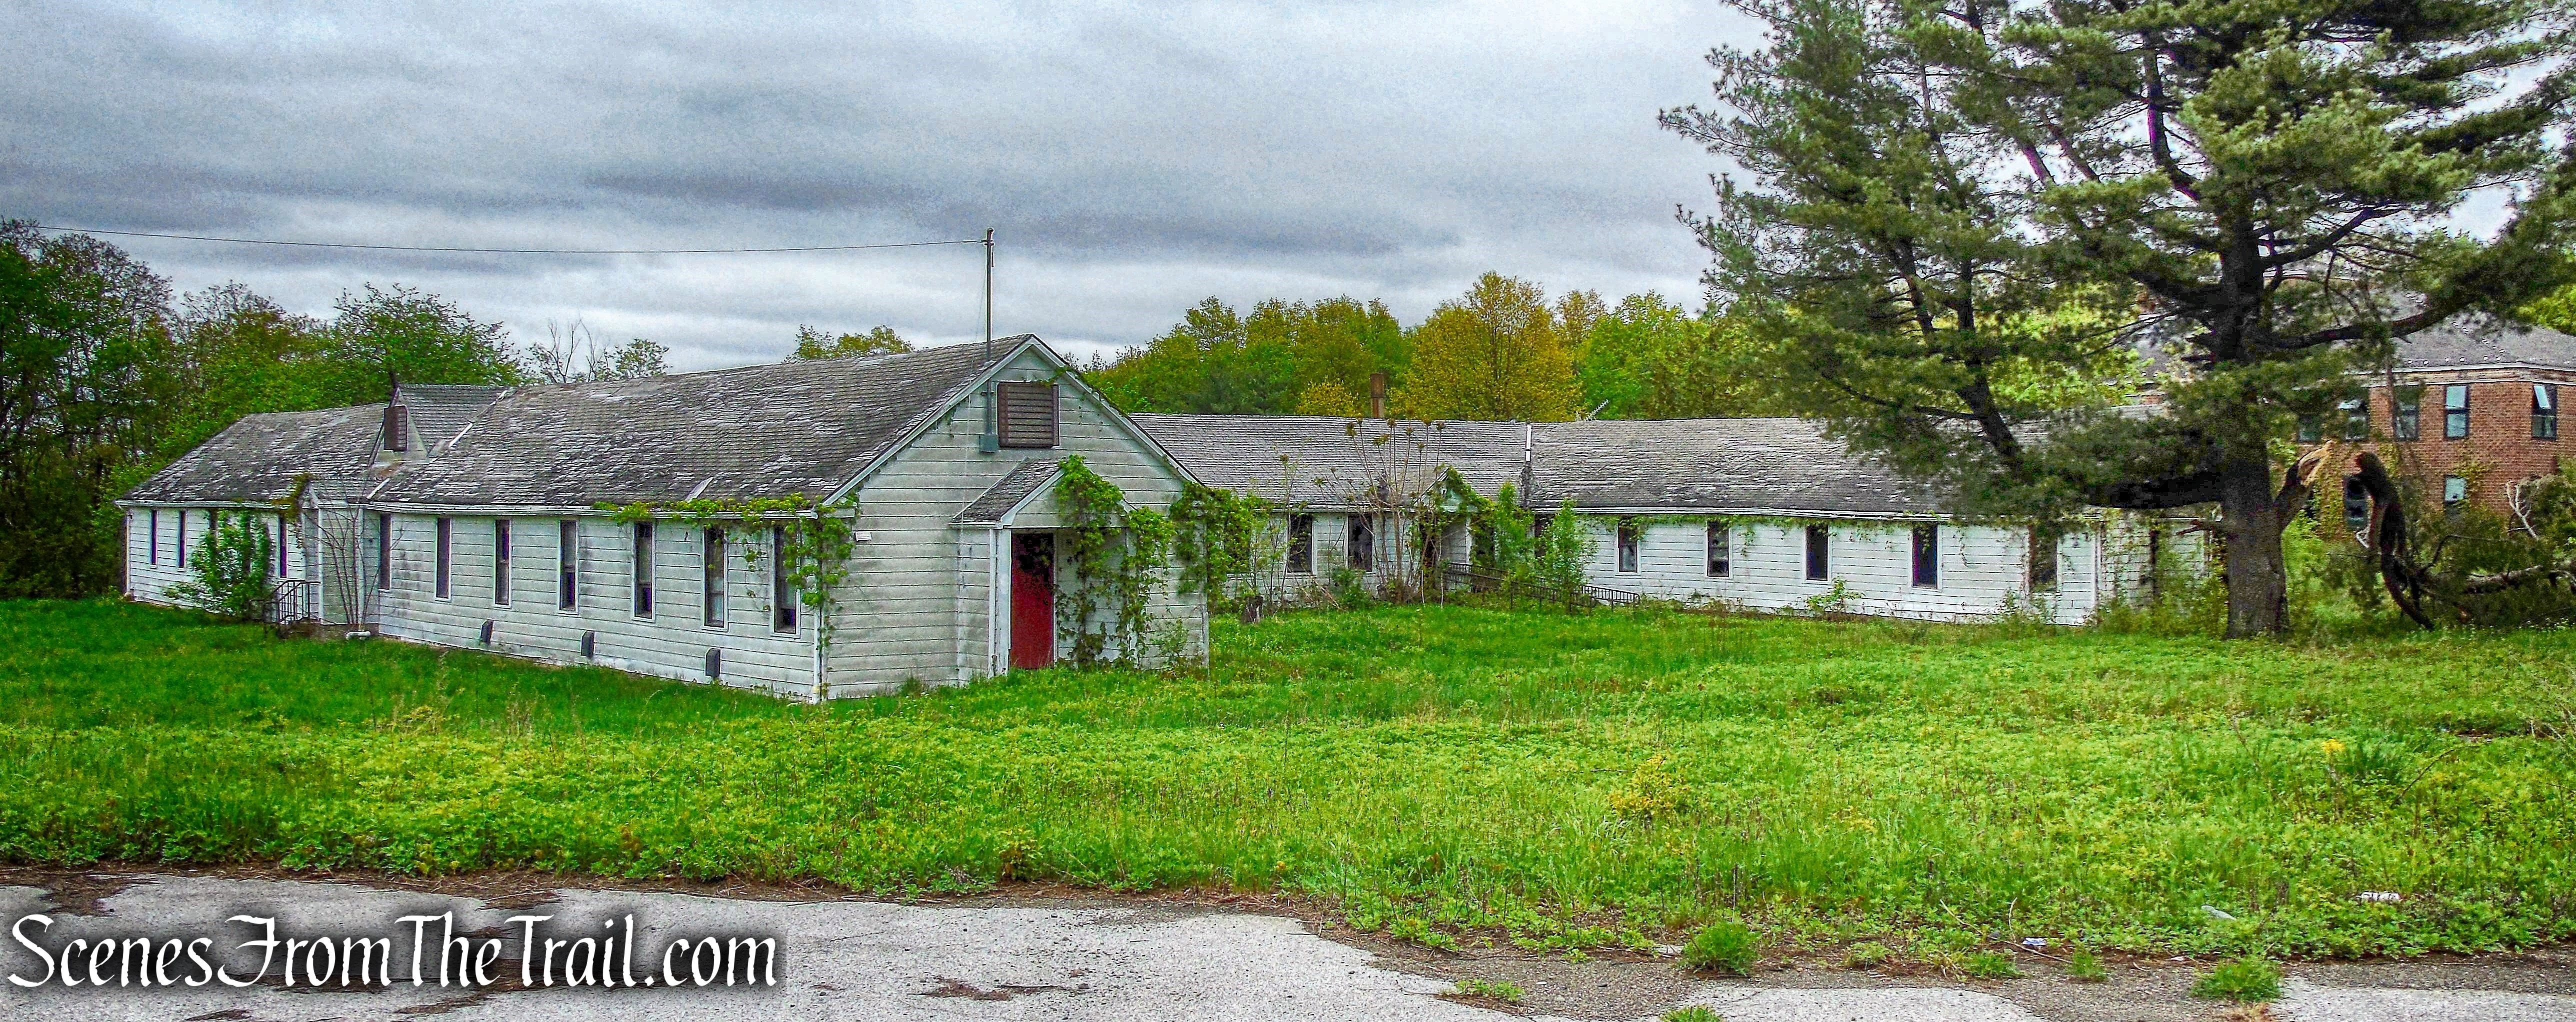
The state decided to build the Seaside Sanatorium on Magonk Point in Waterford overlooking the Sound, and opened it during the summer of 1934.
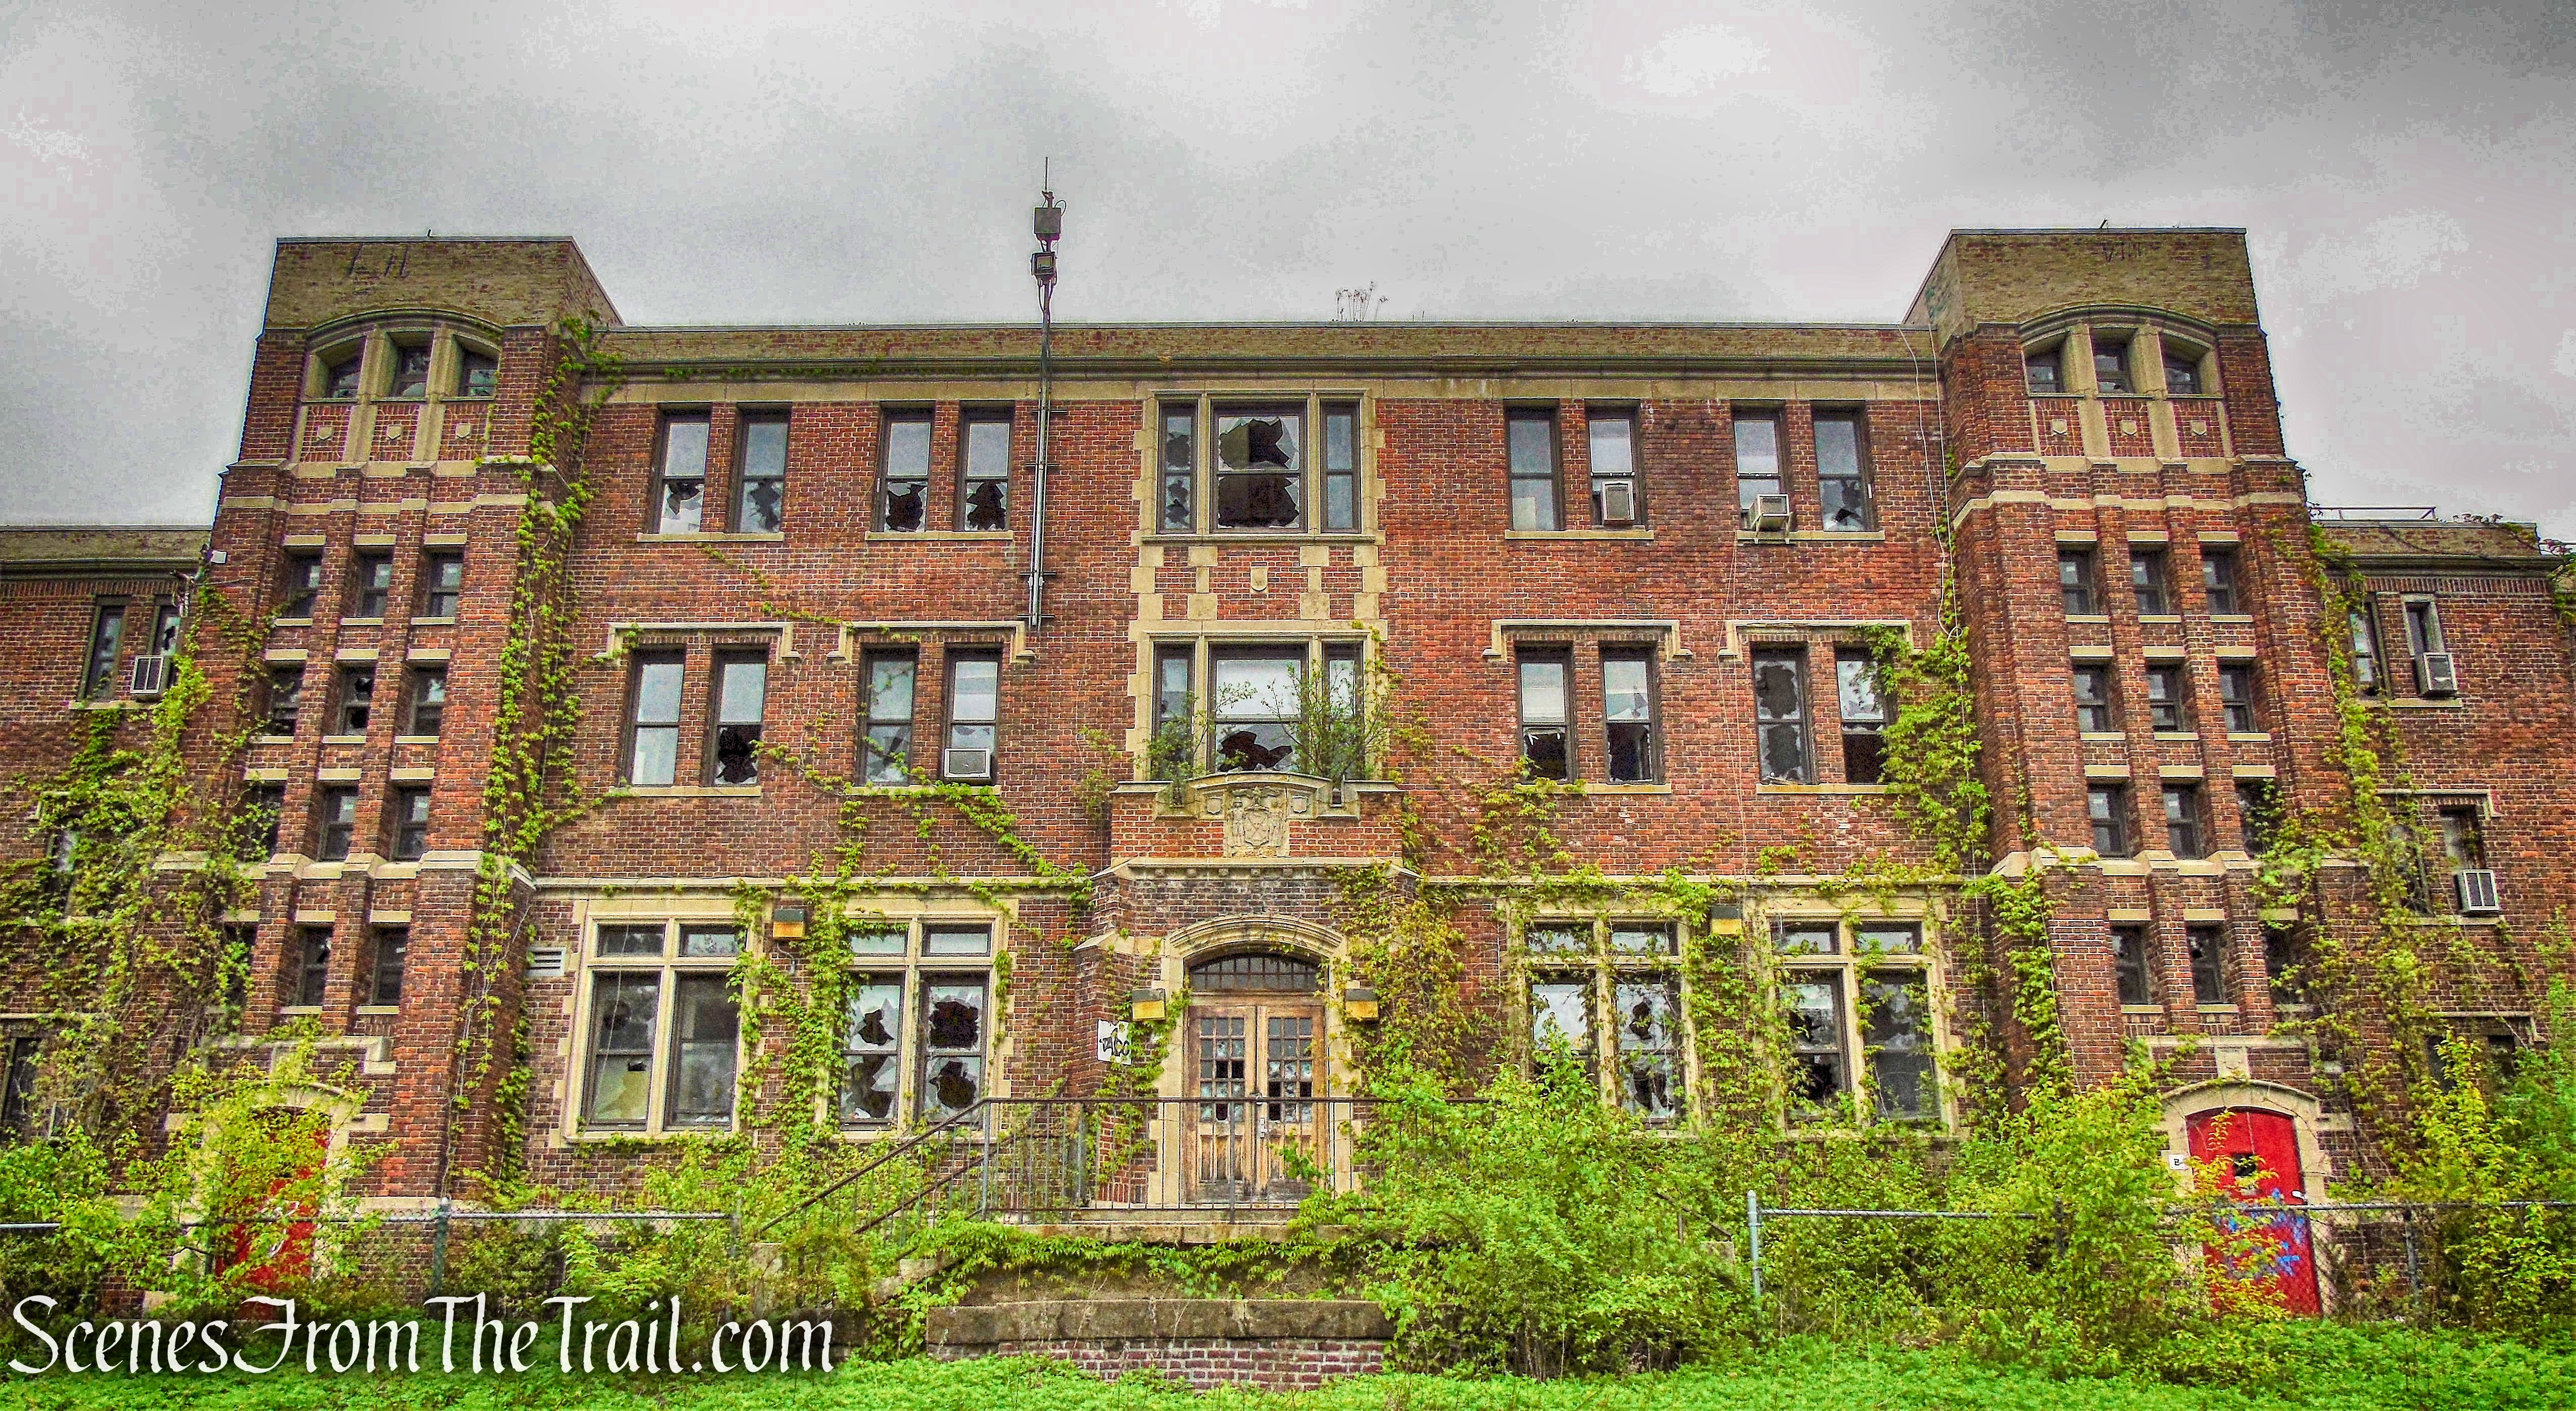
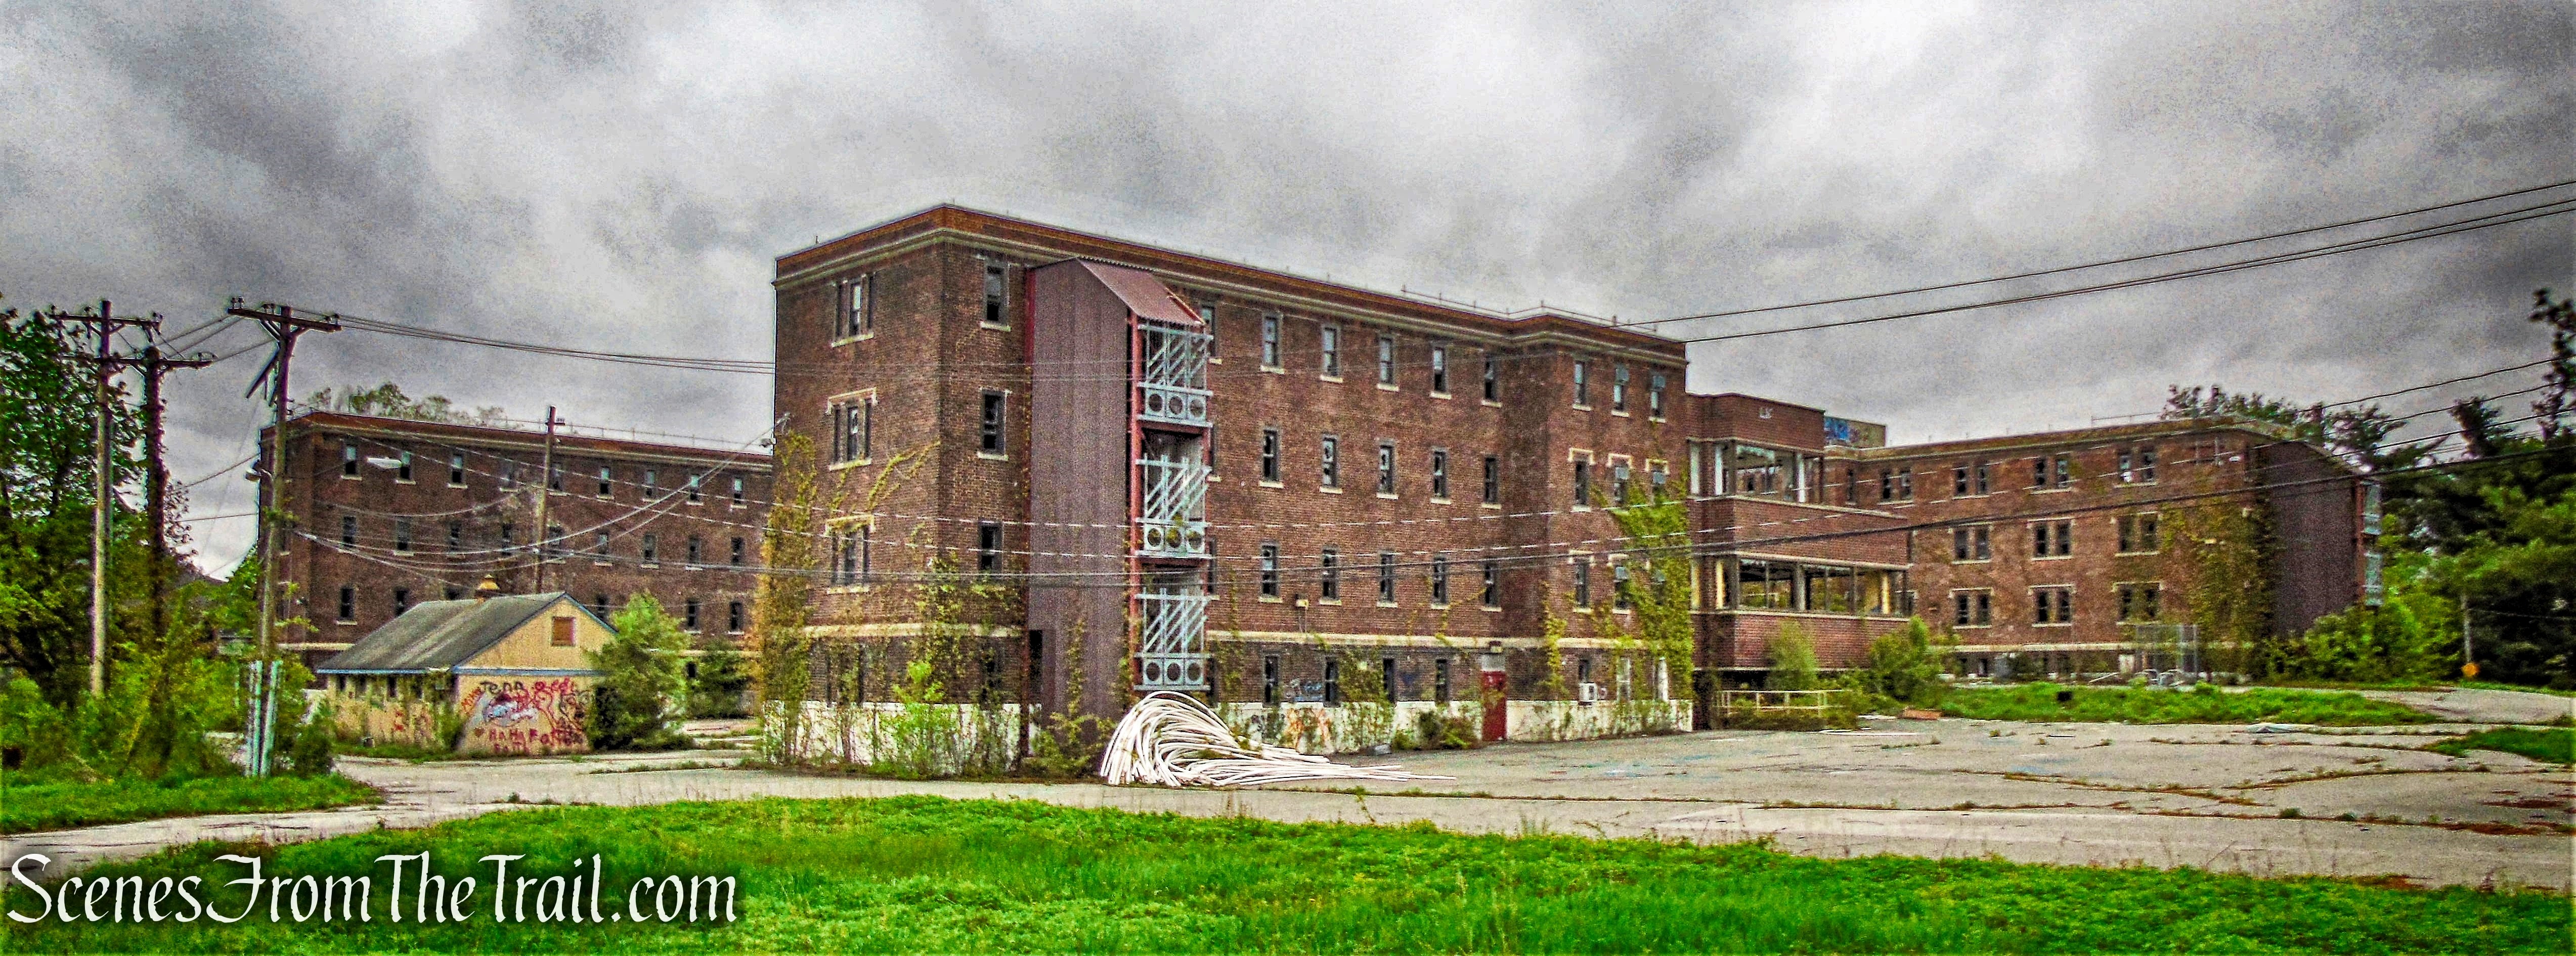
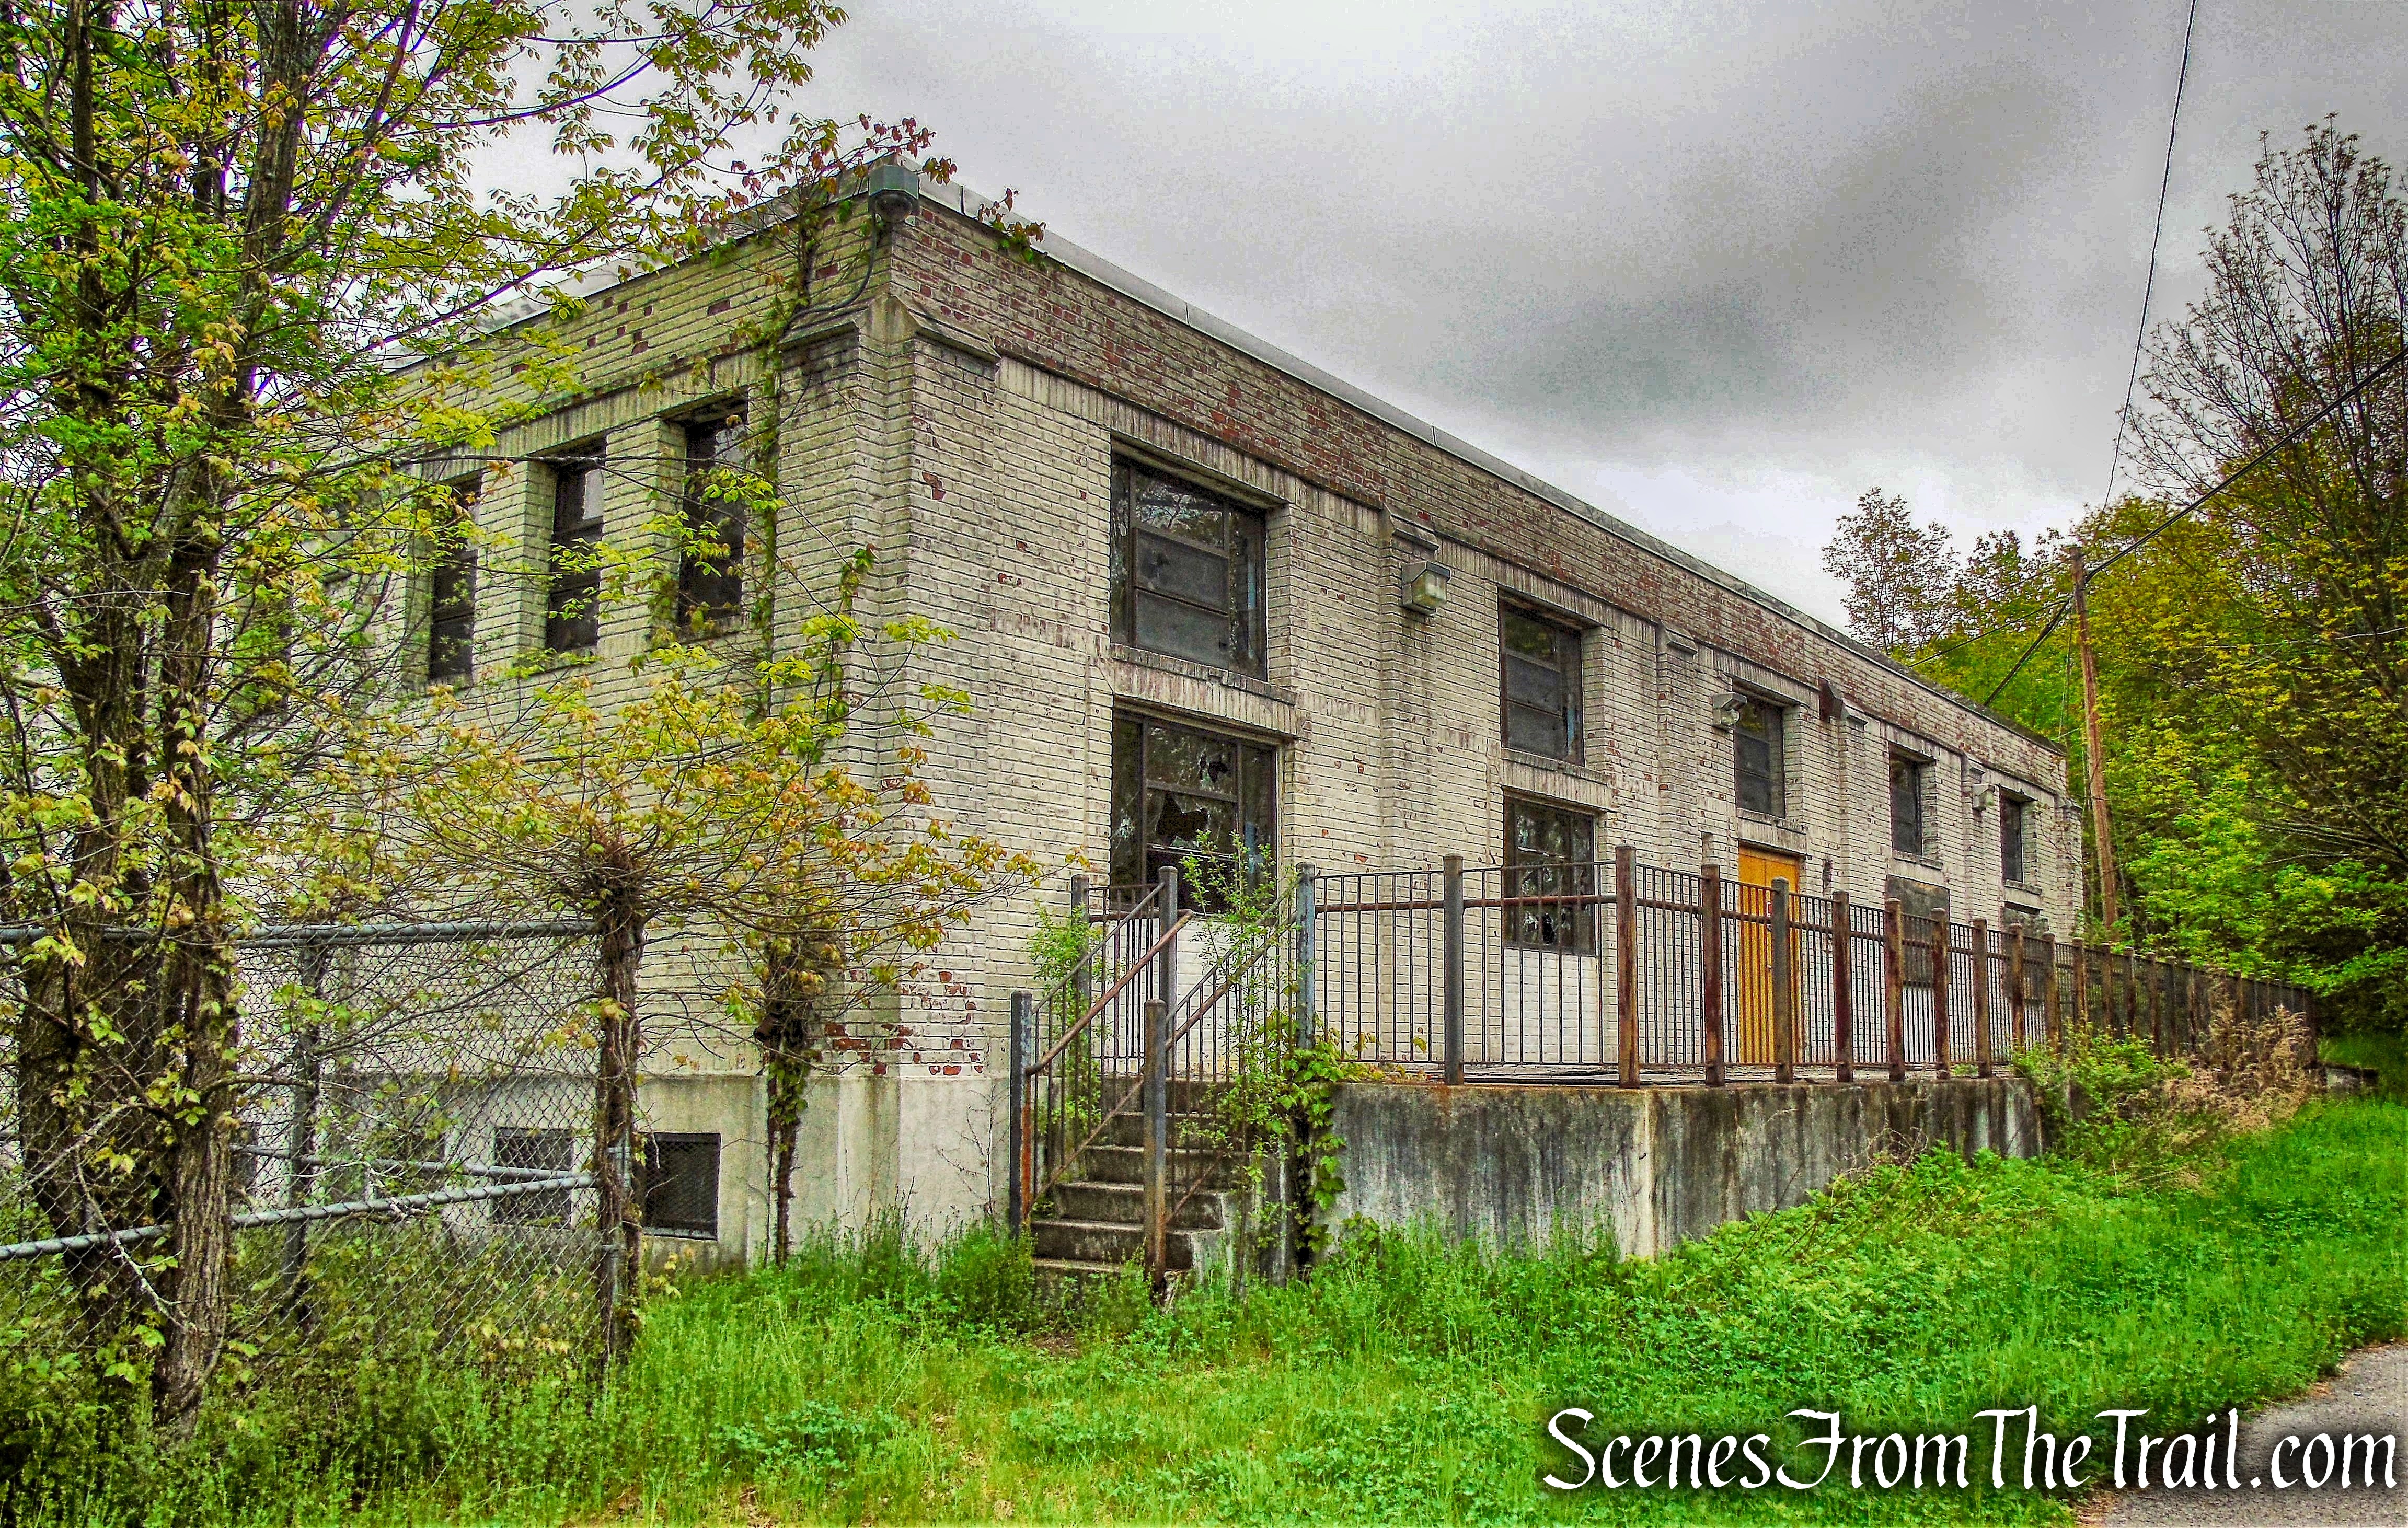
Hospital Building – Seaside Sanatorium
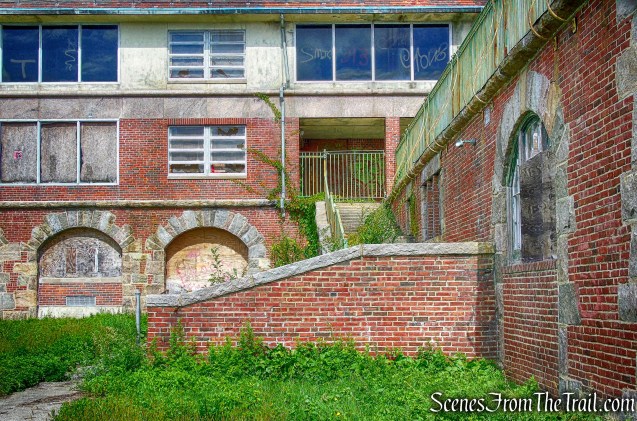
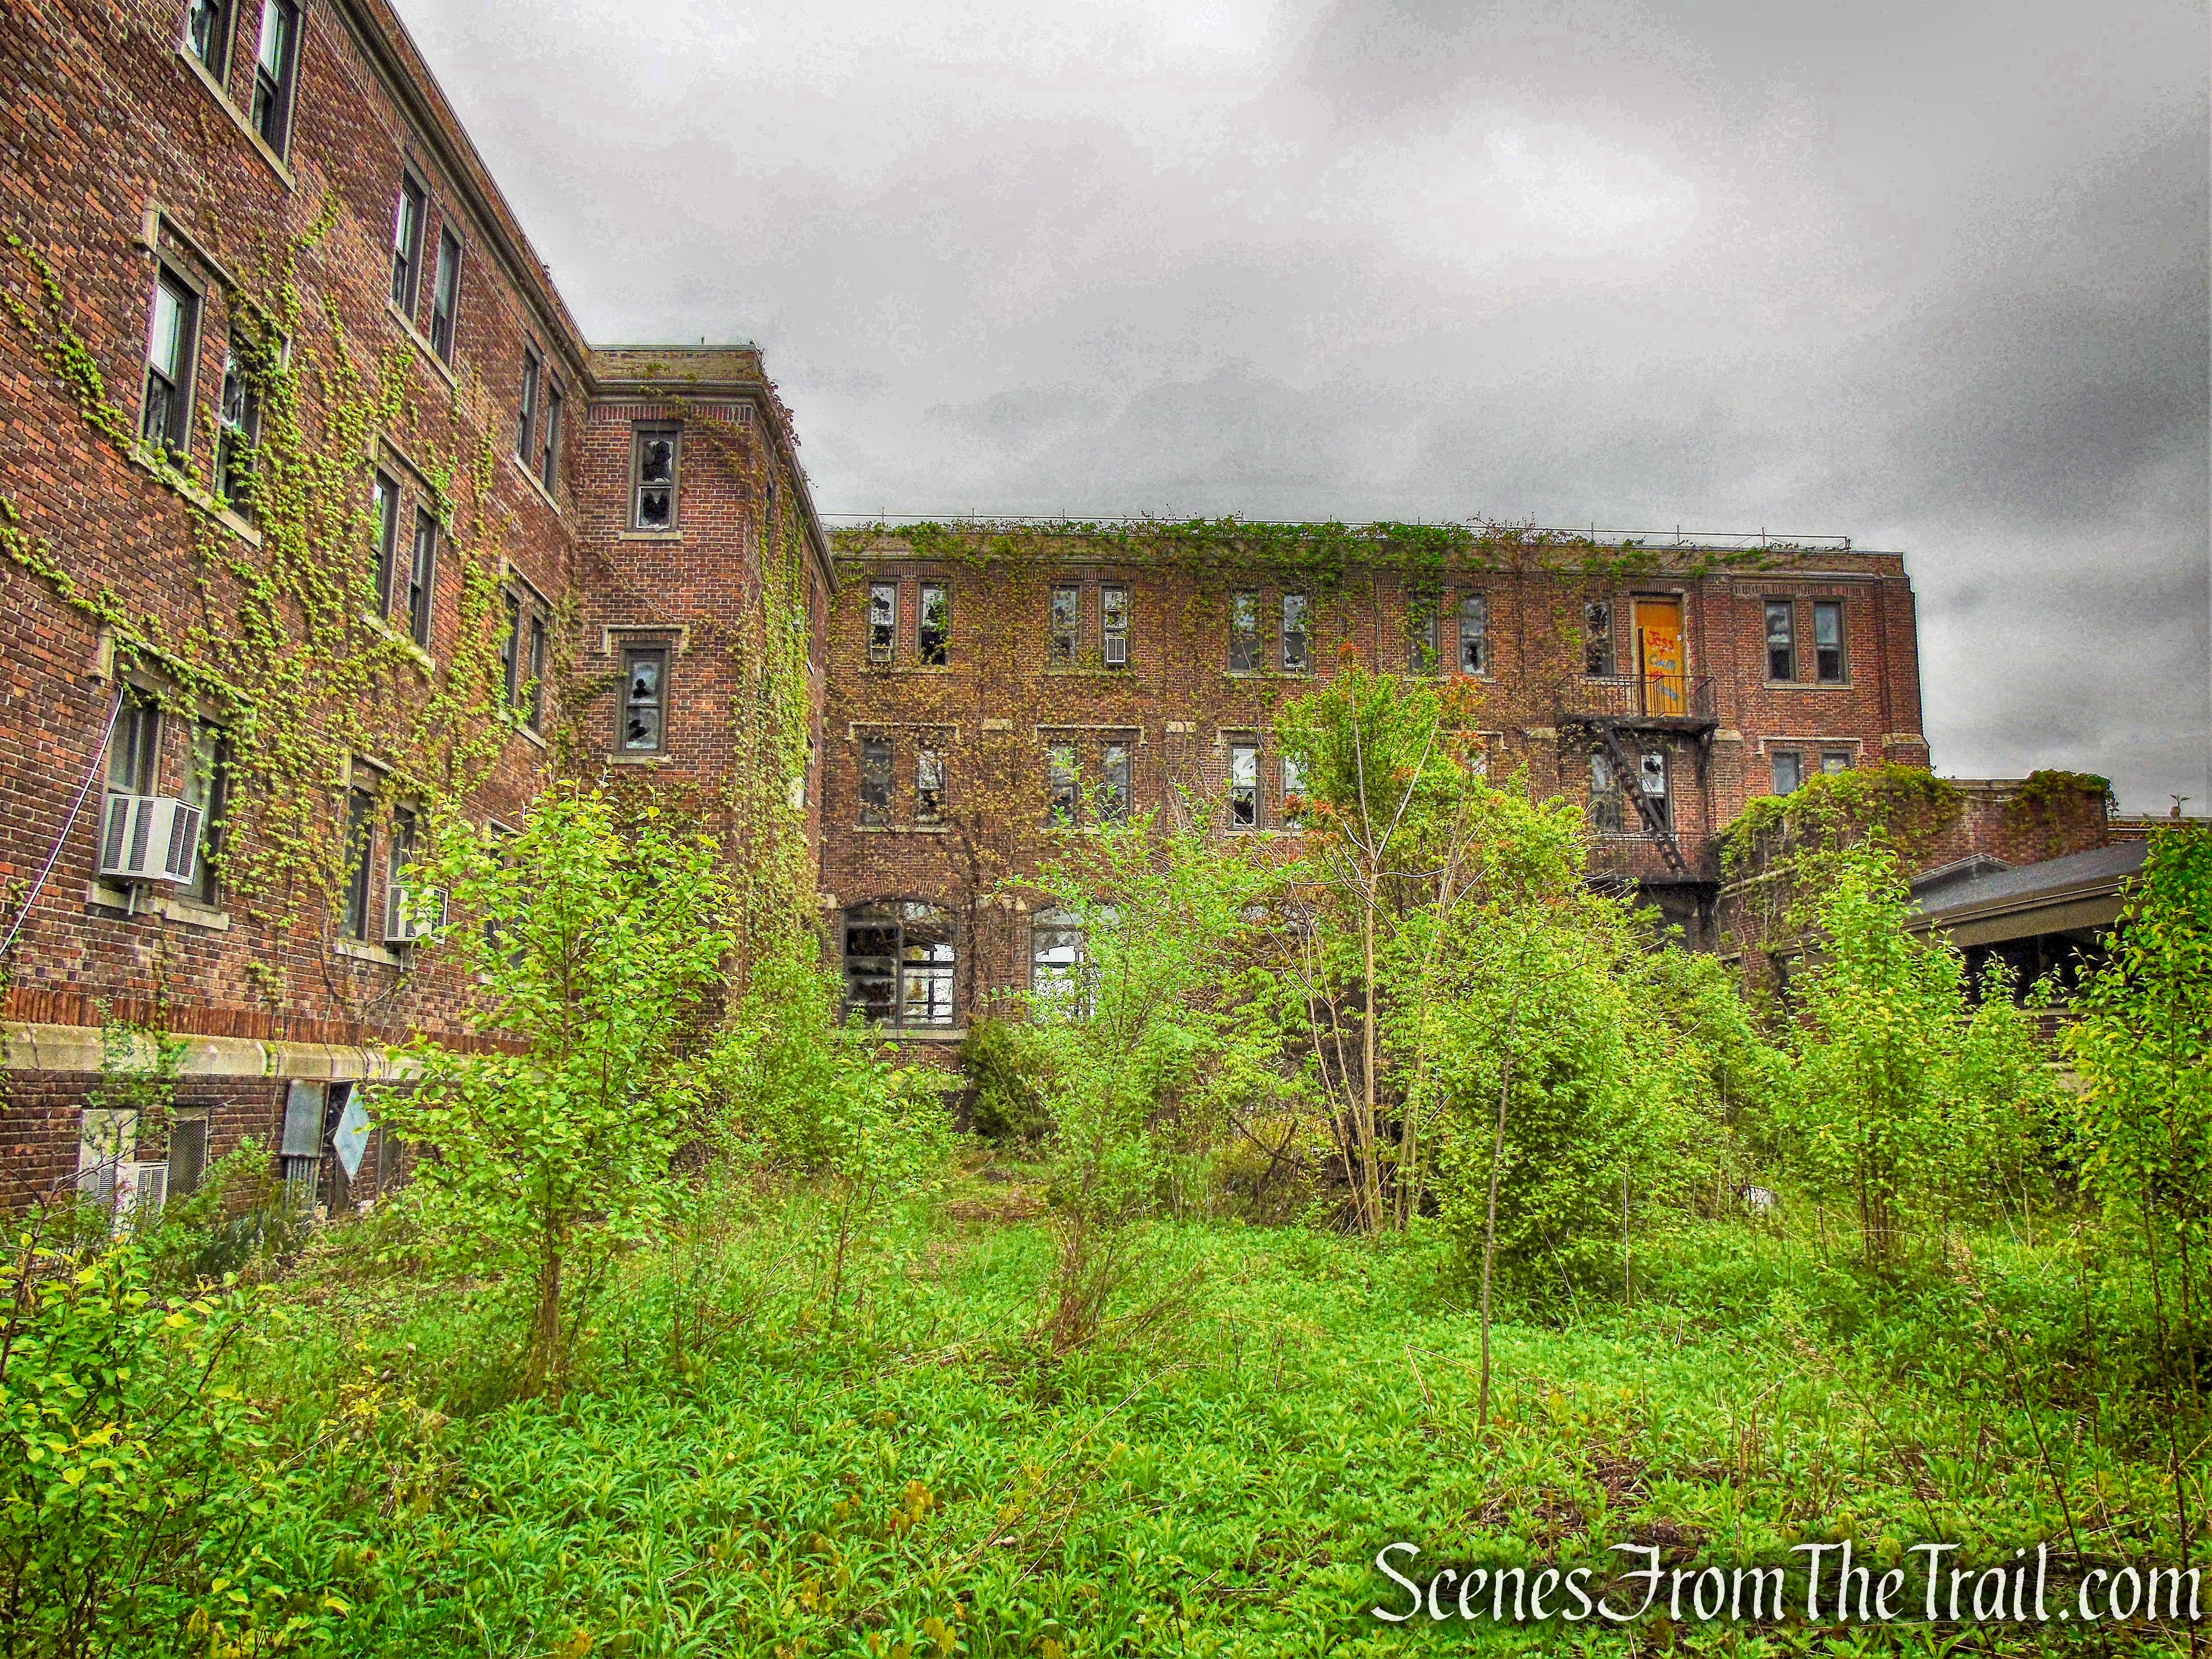
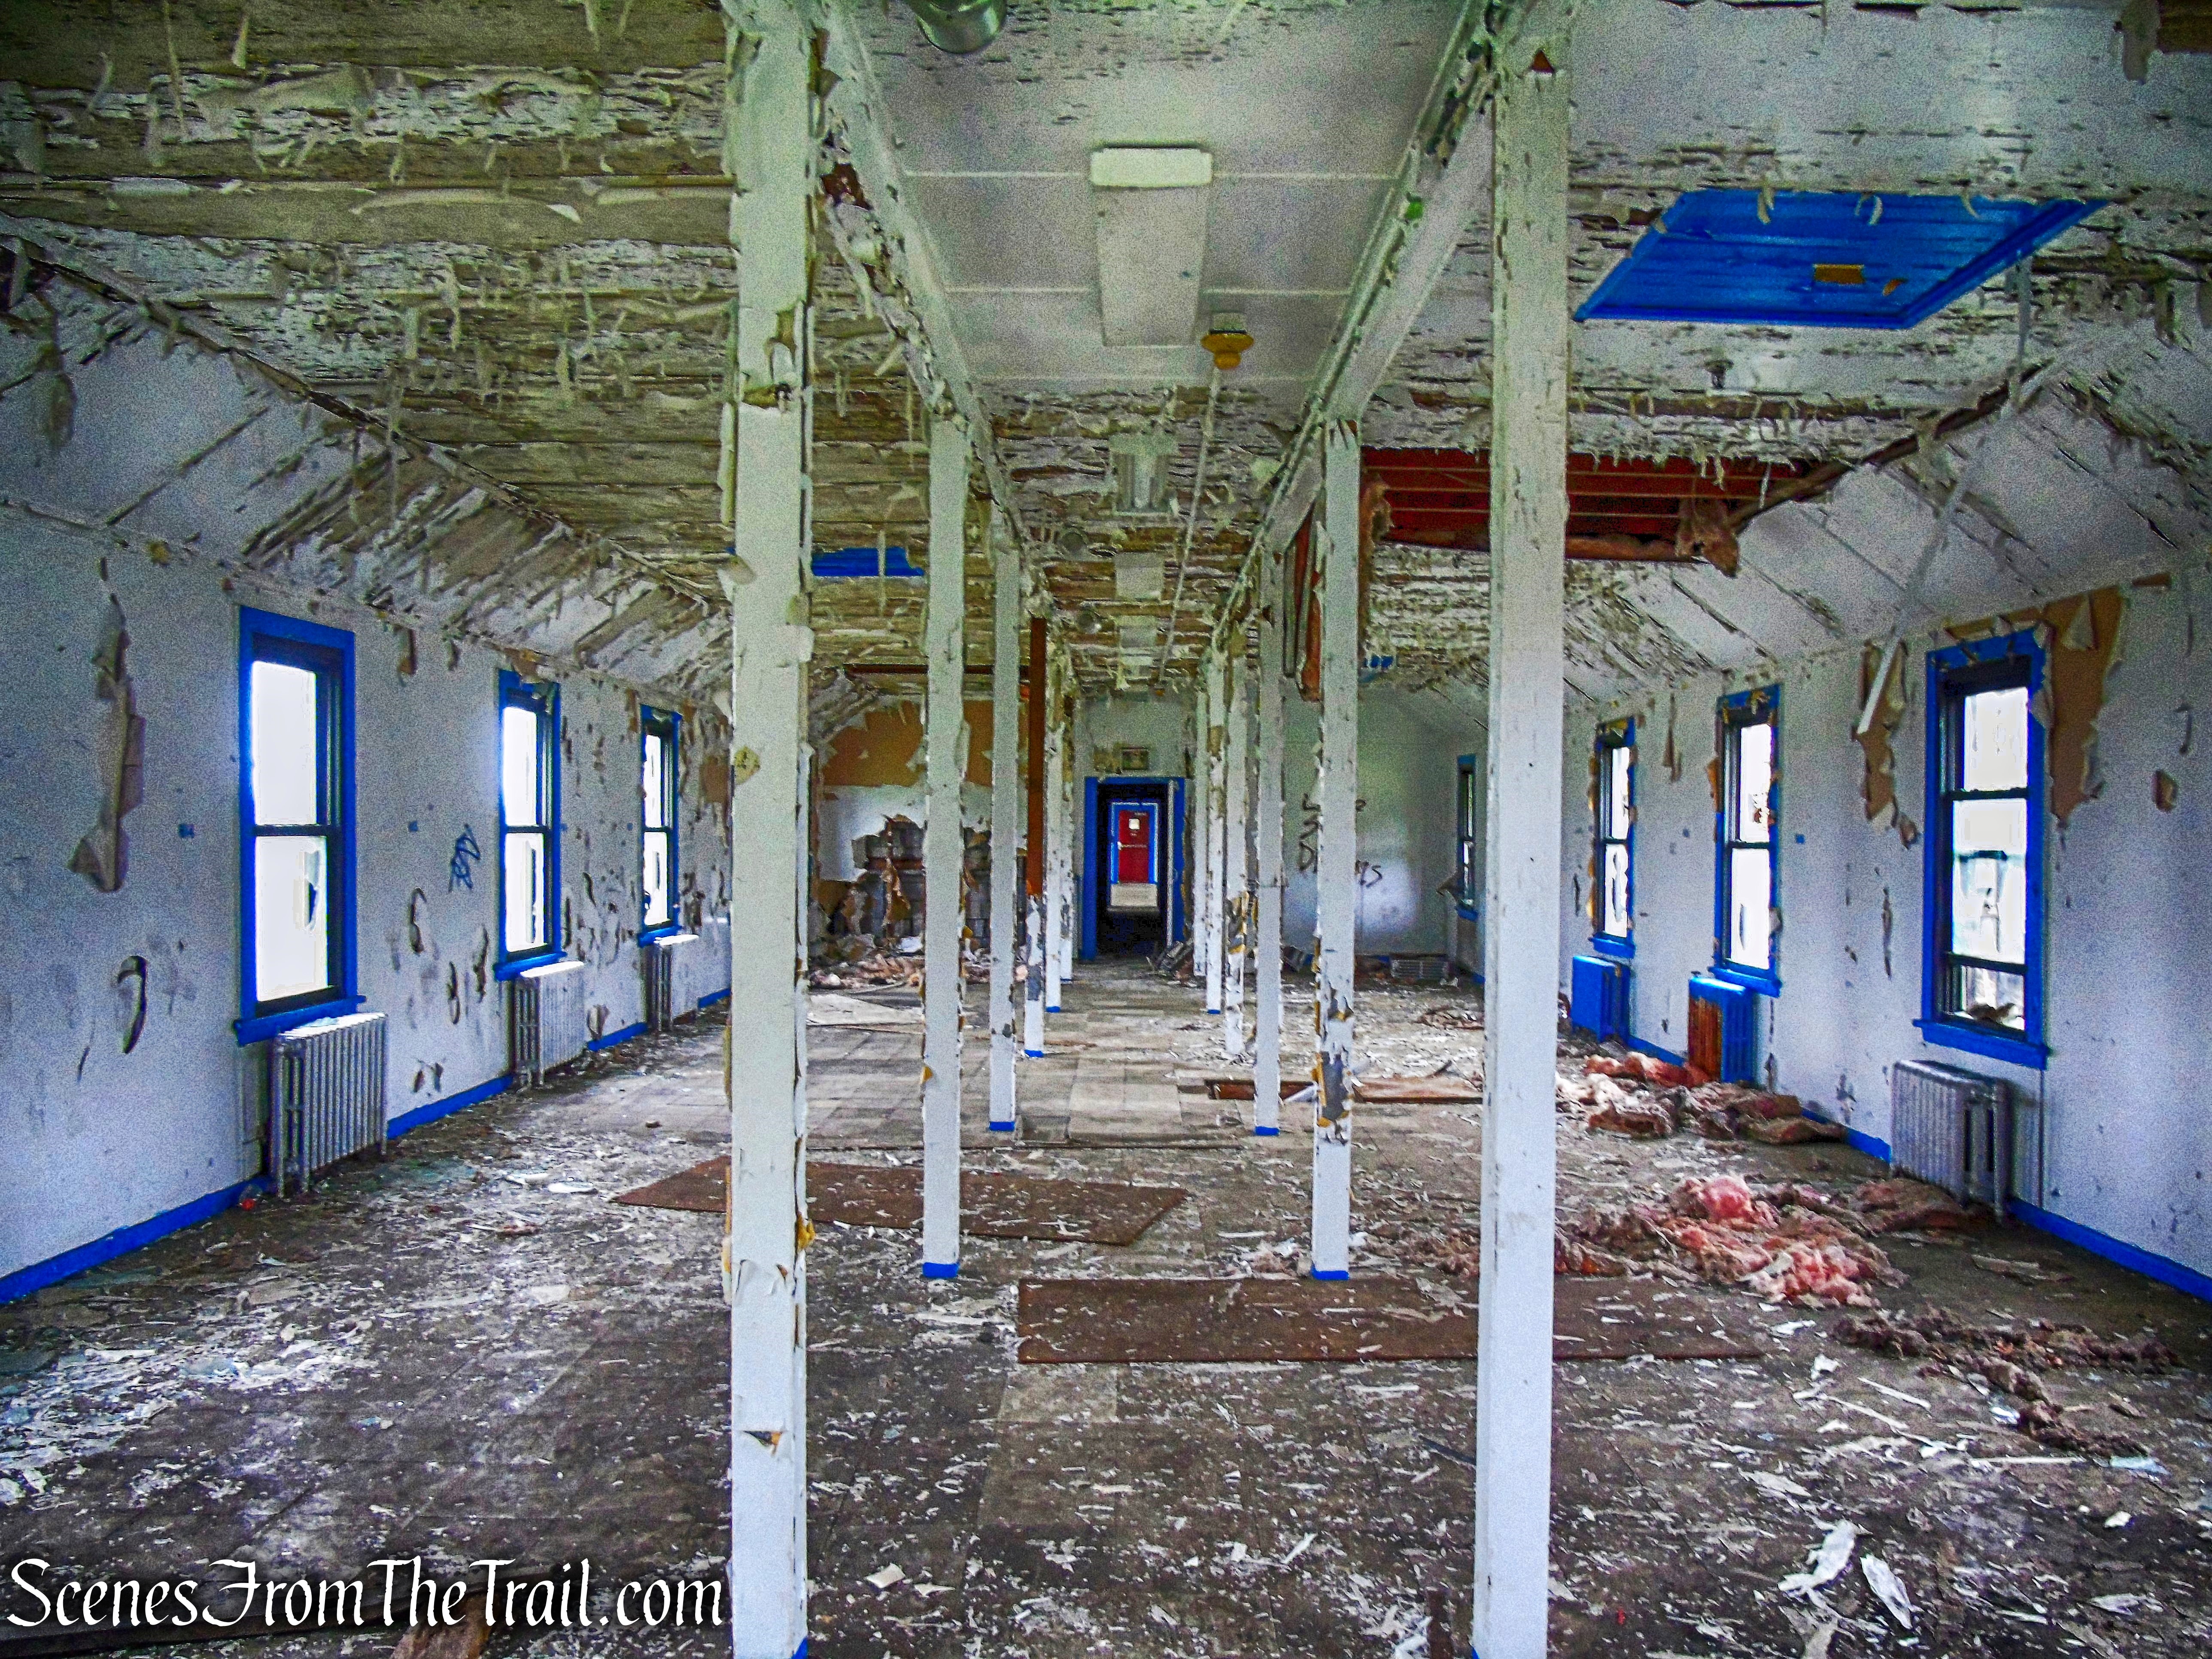
The salt air and waves ended up not being a cure for the disease and the Sanatorium closed in 1958. It eventually reopened as the Seaside Regional Center for Mentally Retarded in 1961. The site was closed for good in 1996 and left abandoned. Vandals, squatters, Urban Explorers and the New England elements became its only tenants.
Hospital Building – Seaside Sanatorium
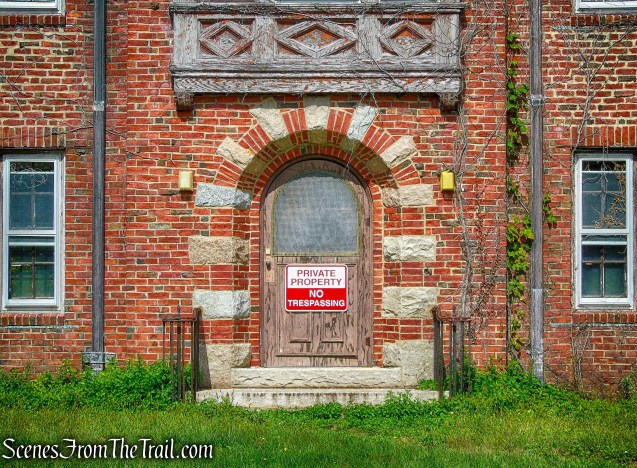
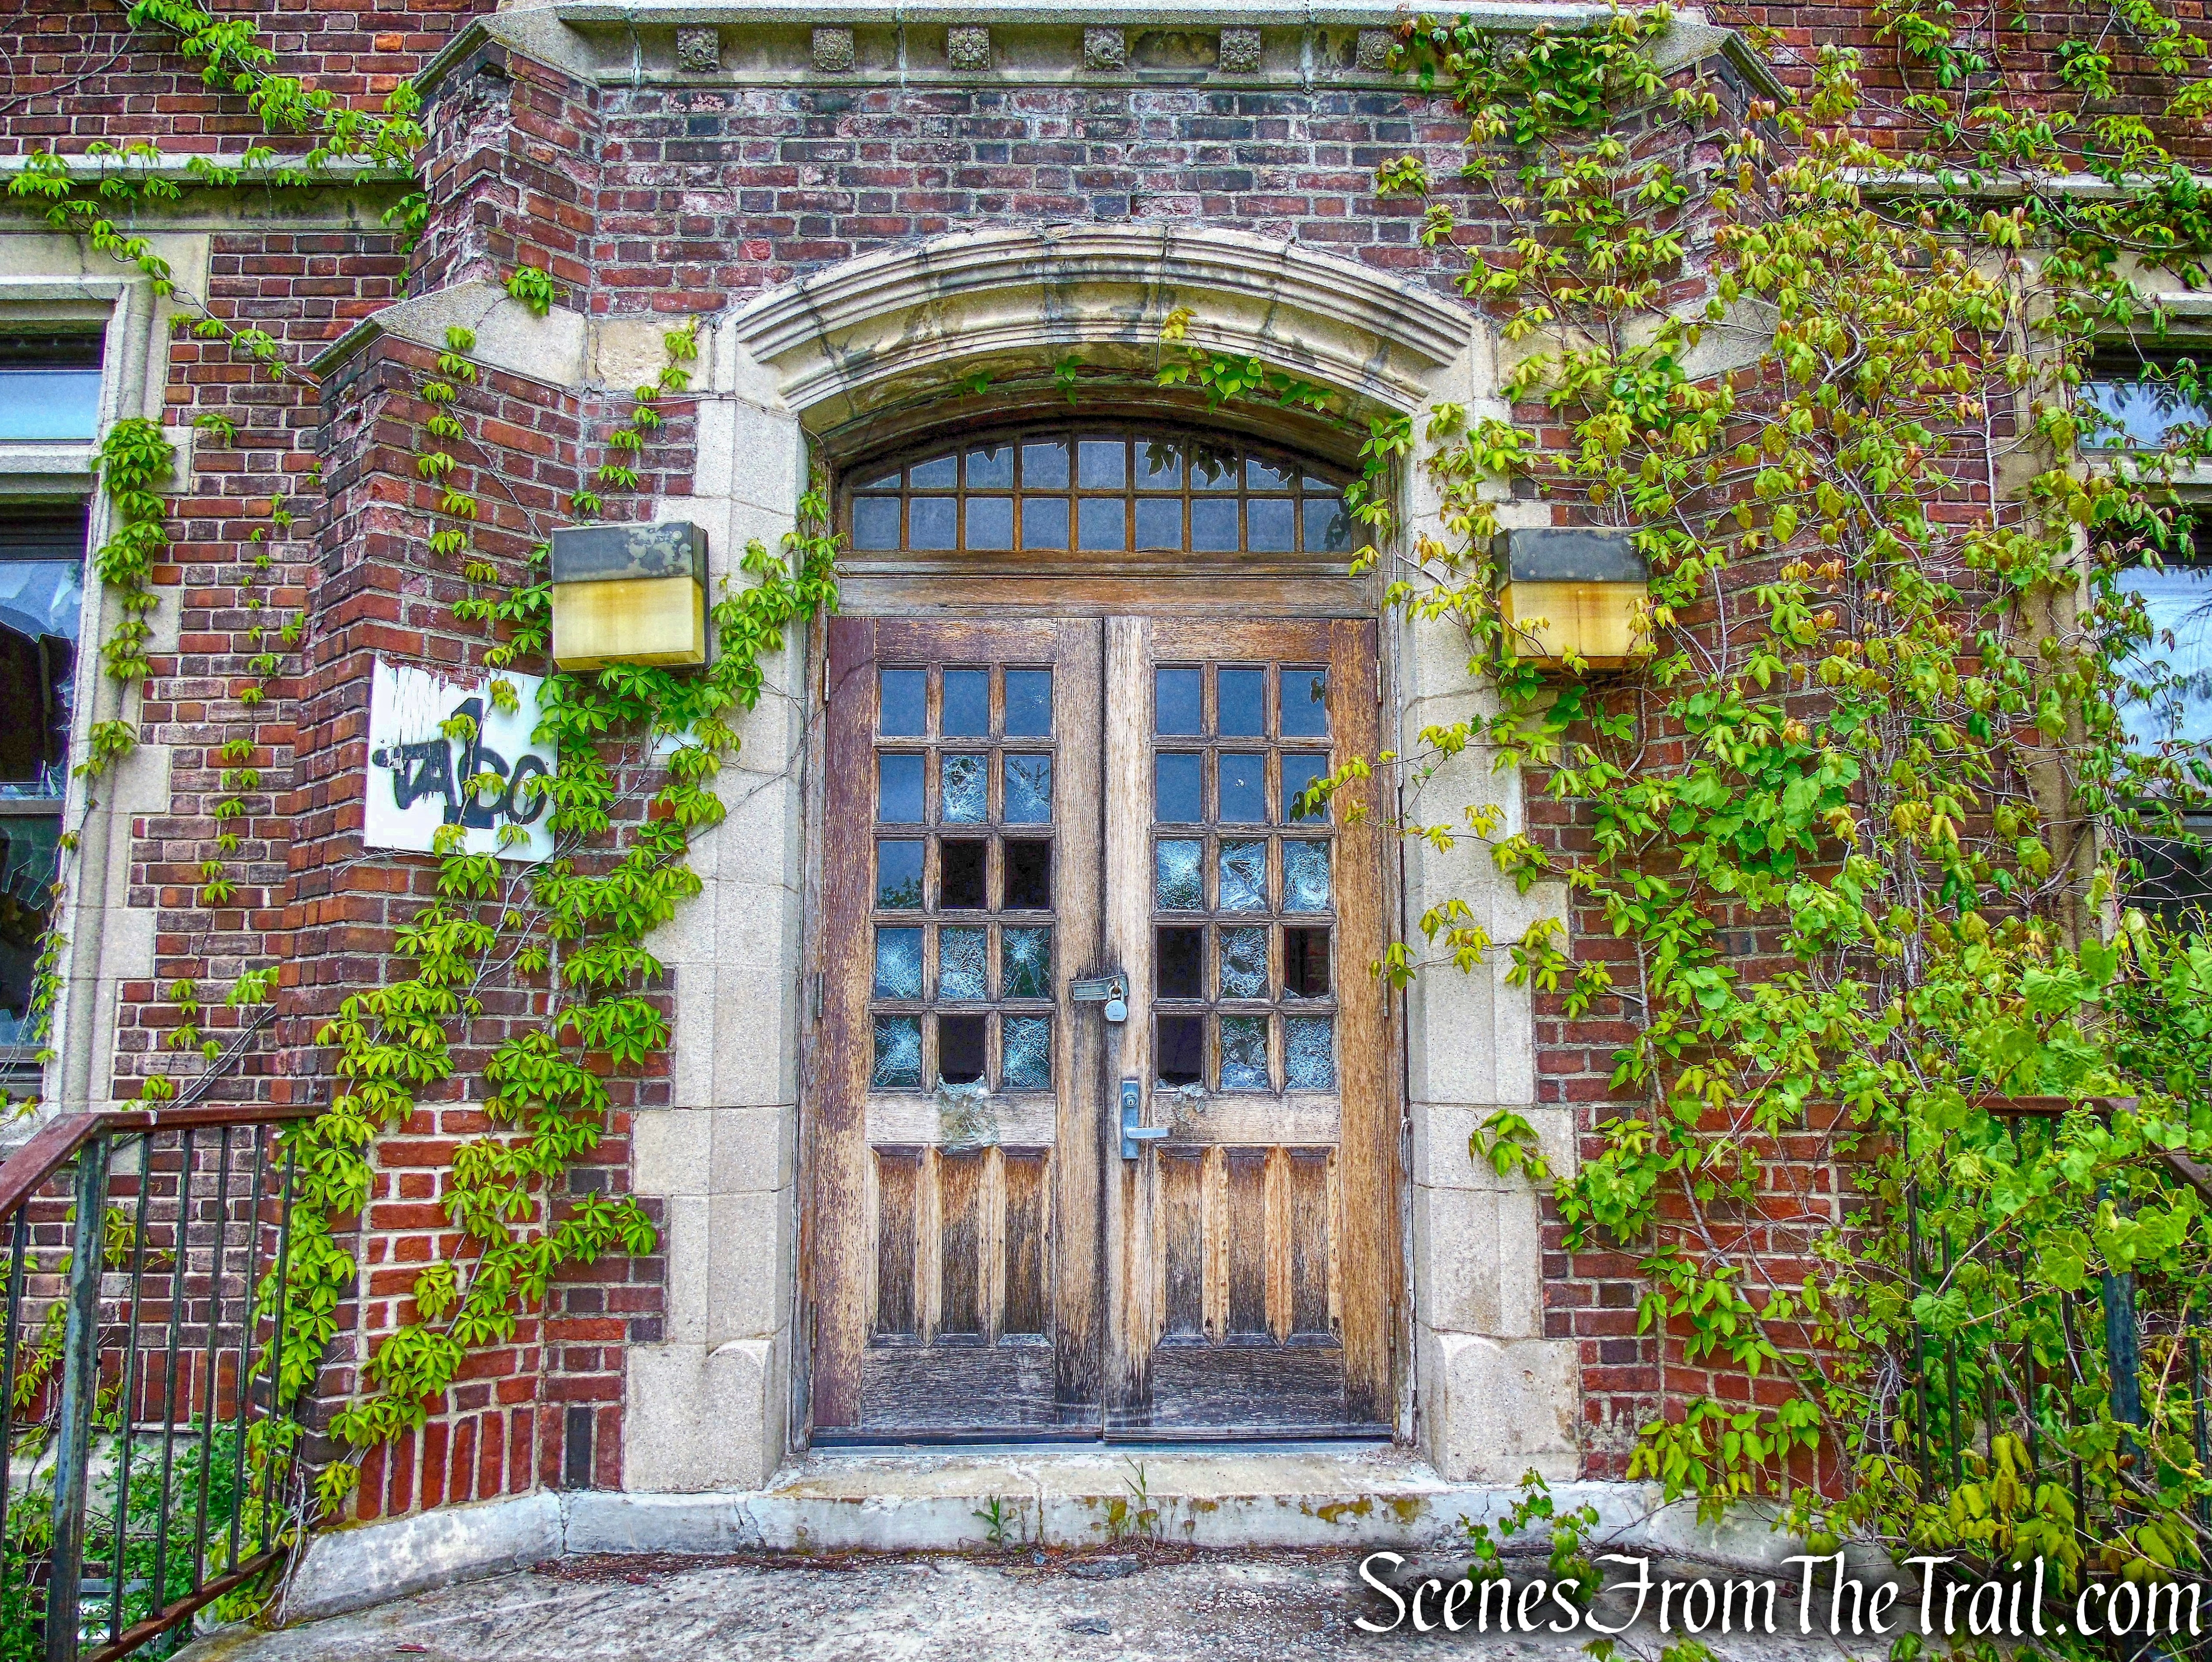
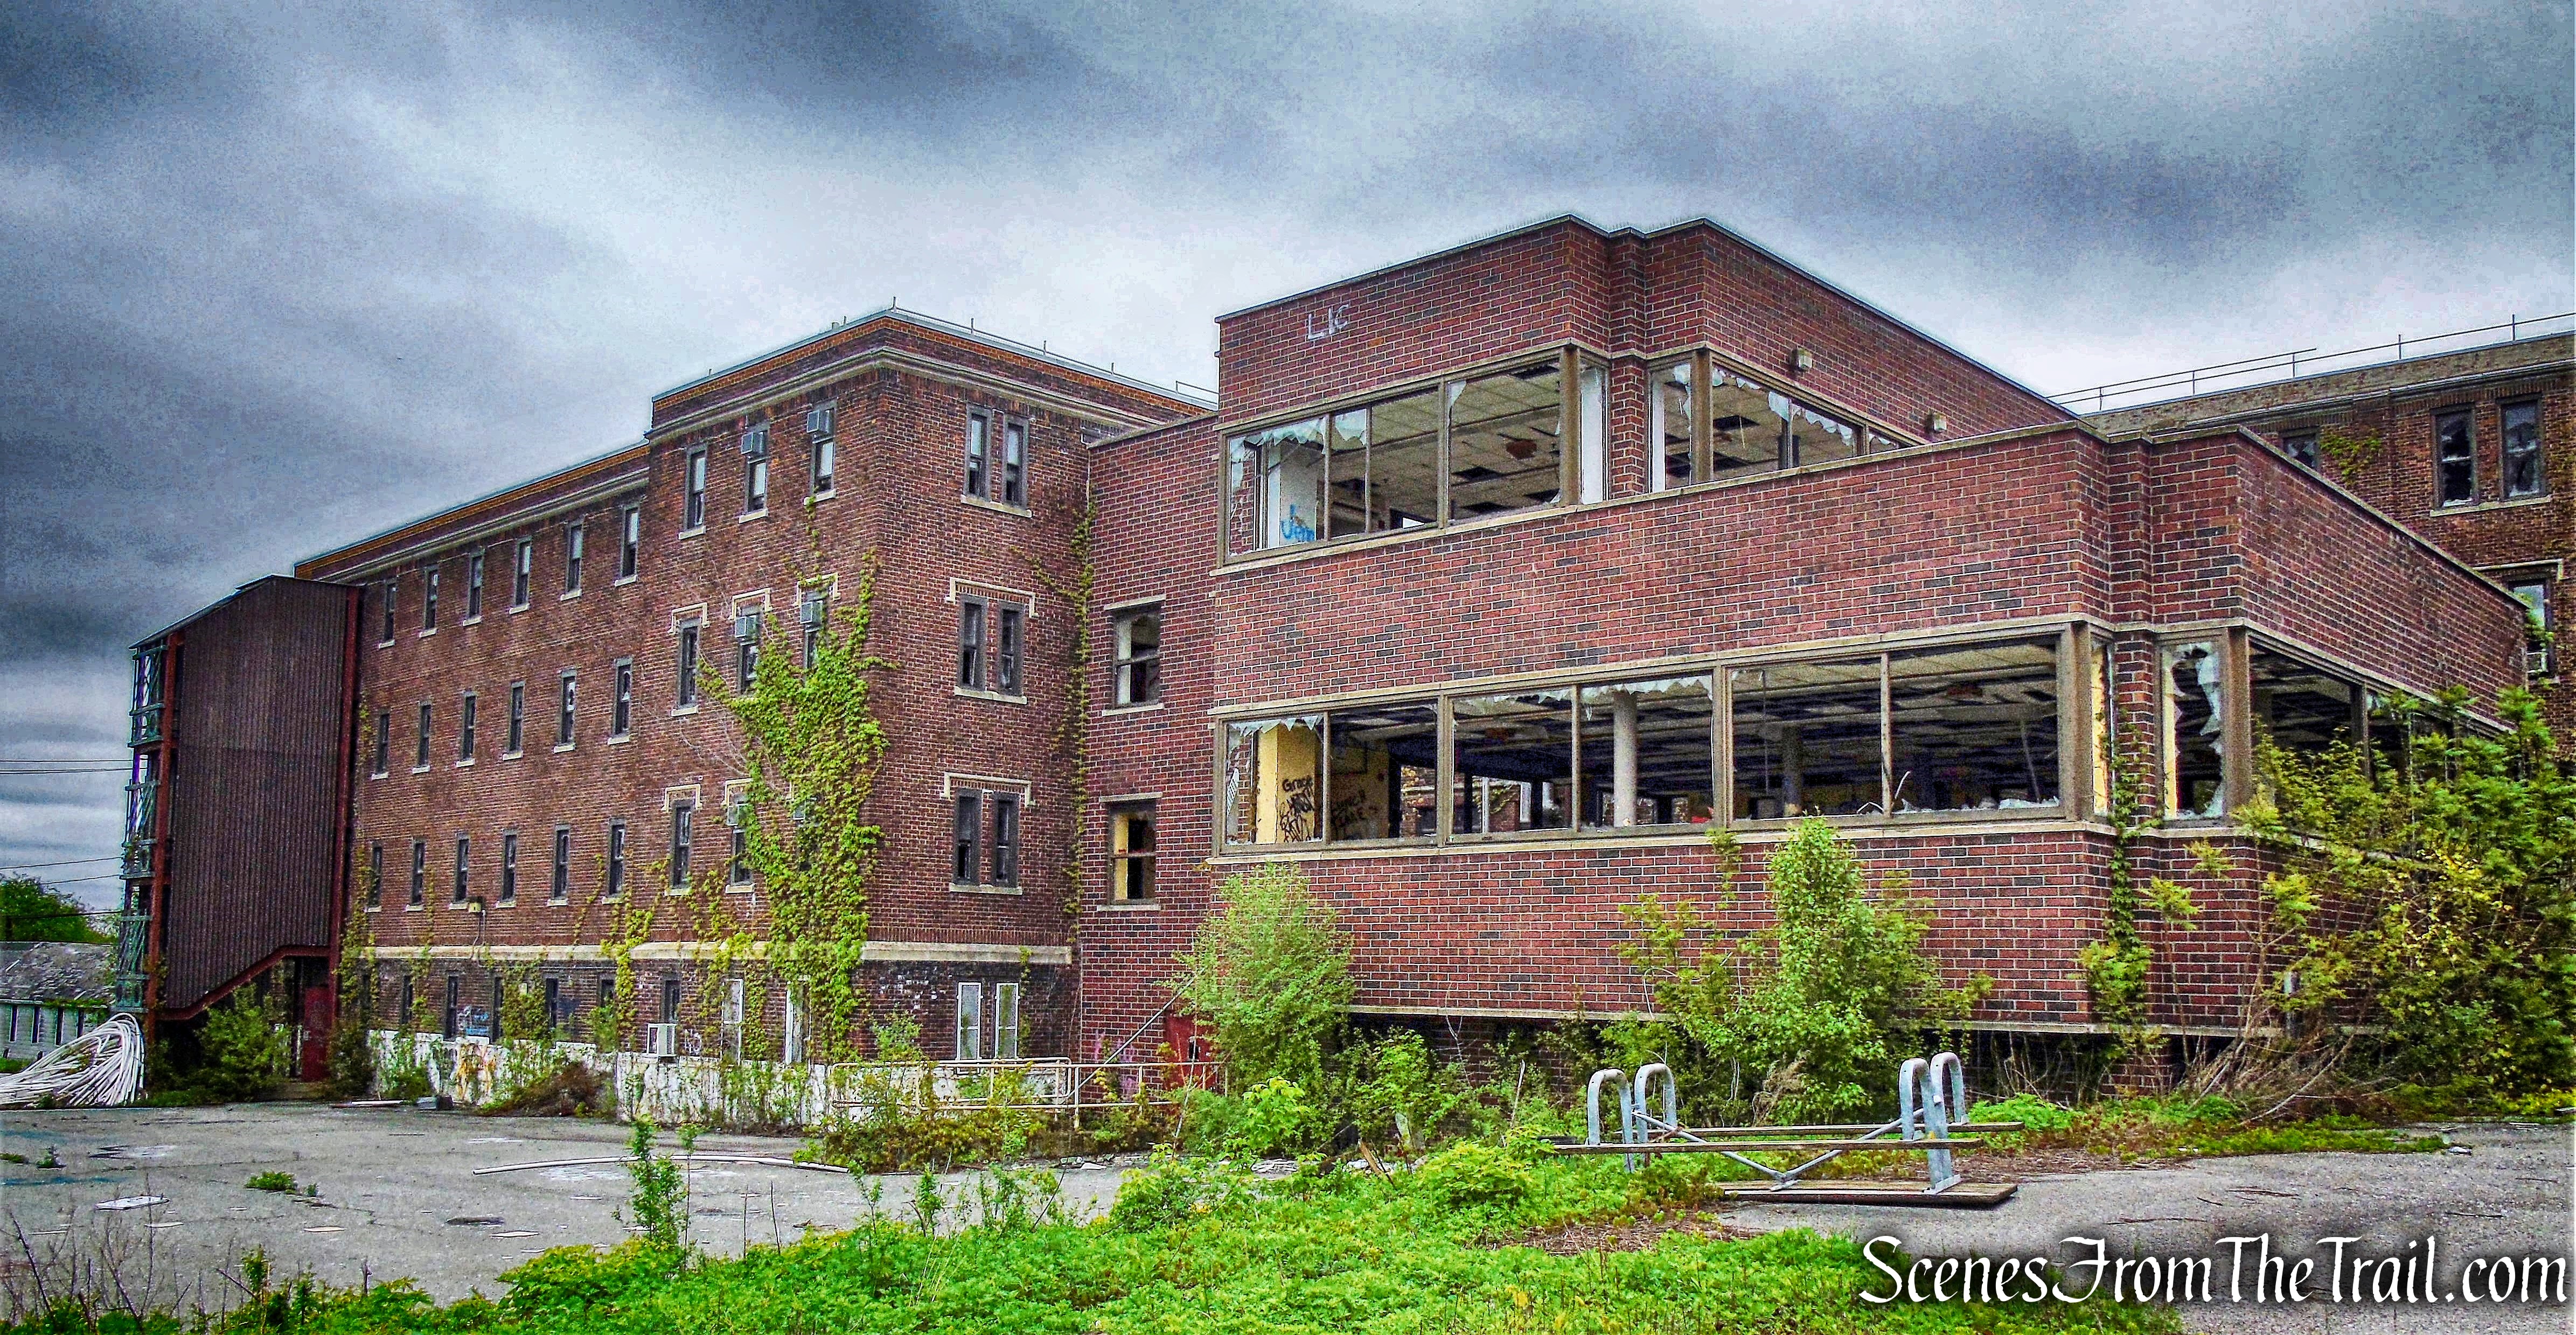
The abandoned hospital now sits in disrepair with plywood covering most of the broken windows and doors.
Hospital Building – Seaside Sanatorium
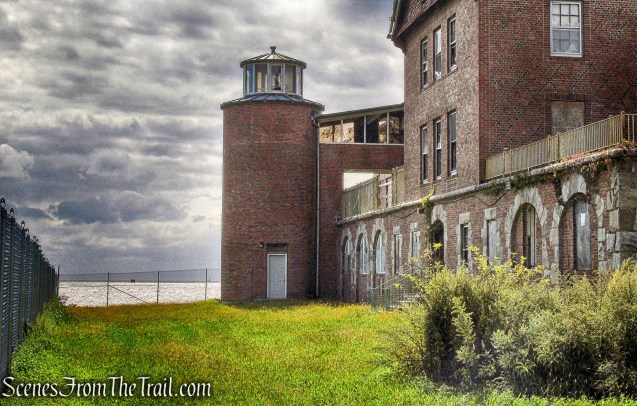
A copper weather vane of a large sailing ship tops a huge spire.
weather vane – Hospital Building
Famed architect Cass Gilbert was commissioned to design the buildings. Gilbert also designed the U.S. Supreme Court in Washington D.C., the famed Woolworth Building in New York City and the landmark Union Station in New Haven.
Employee Building – Seaside Sanatorium
The location of the center, the first of its kind in the nation, was chosen because of the fresh sea air and ample sunlight. At the time it was thought that fresh air and lots of sunshine could help cure tuberculosis.
Seaside Sanatorium
The children, all 14 and under would spend their days outside sunning as part of their heliotropic treatment. By the end of the 1940’s, advancements in drug therapies were being made and the usefulness of sanatoriums declined.
Hospital Building – Seaside Sanatorium
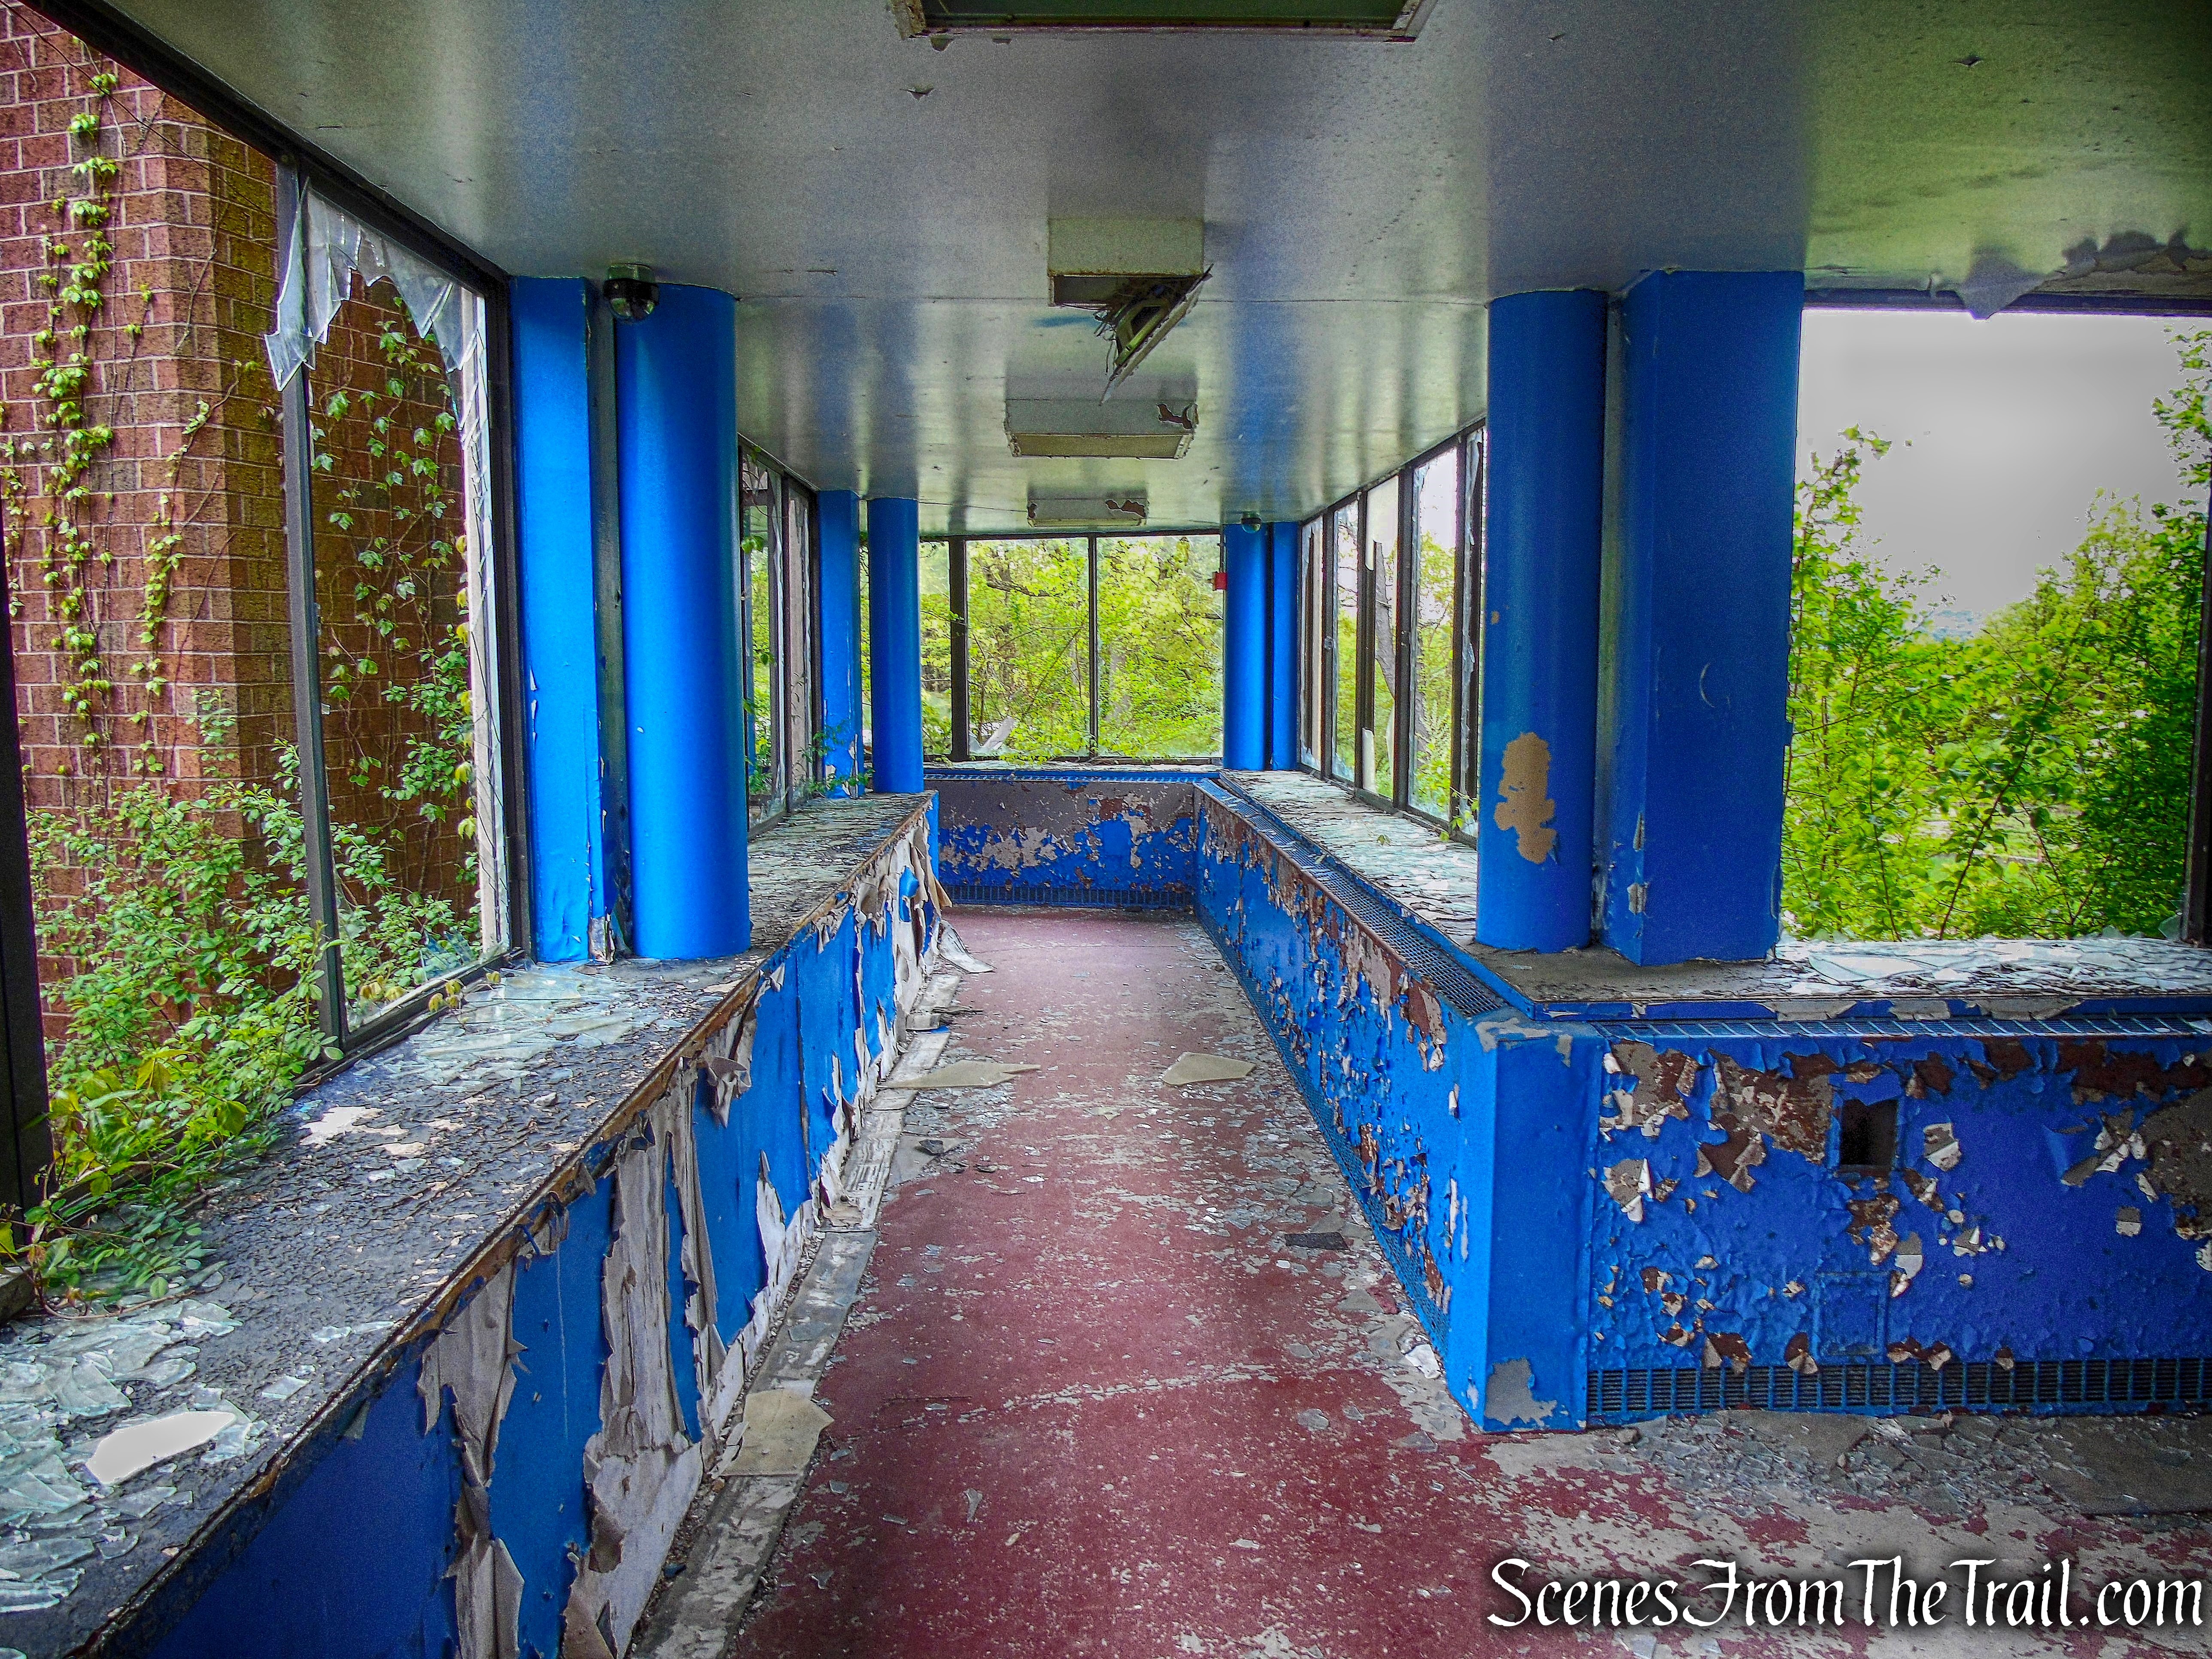
The terraces facing the ocean, wrap around the main building, so the children could try to sun themselves to health.
Hospital Building – Seaside Sanatorium
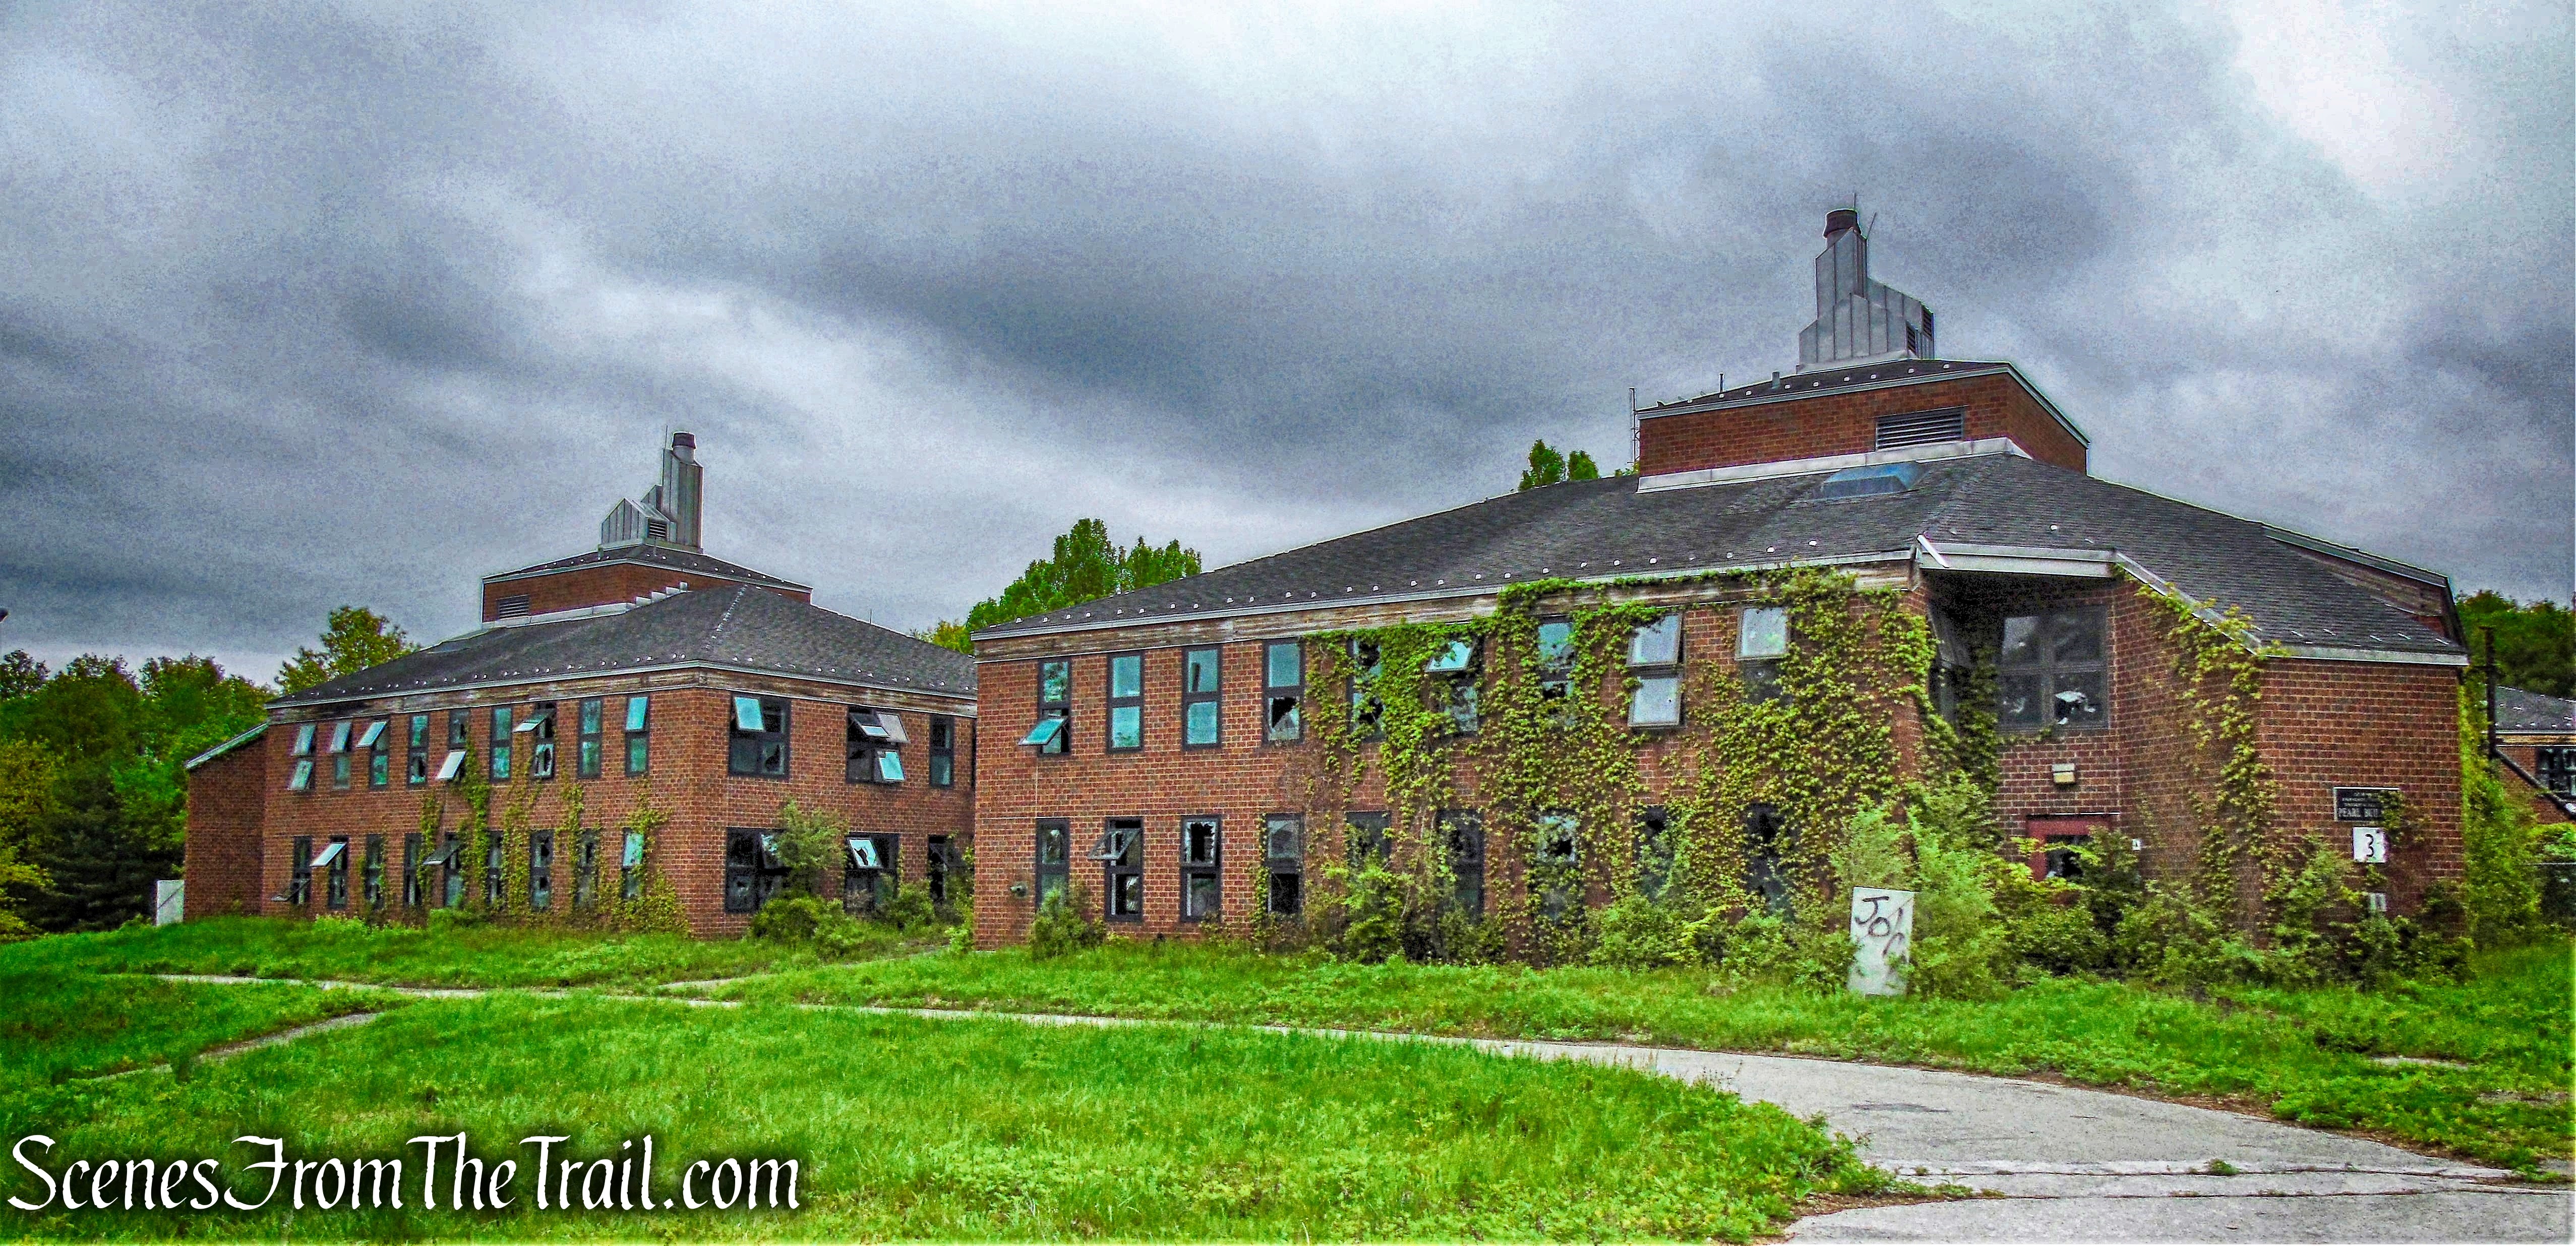
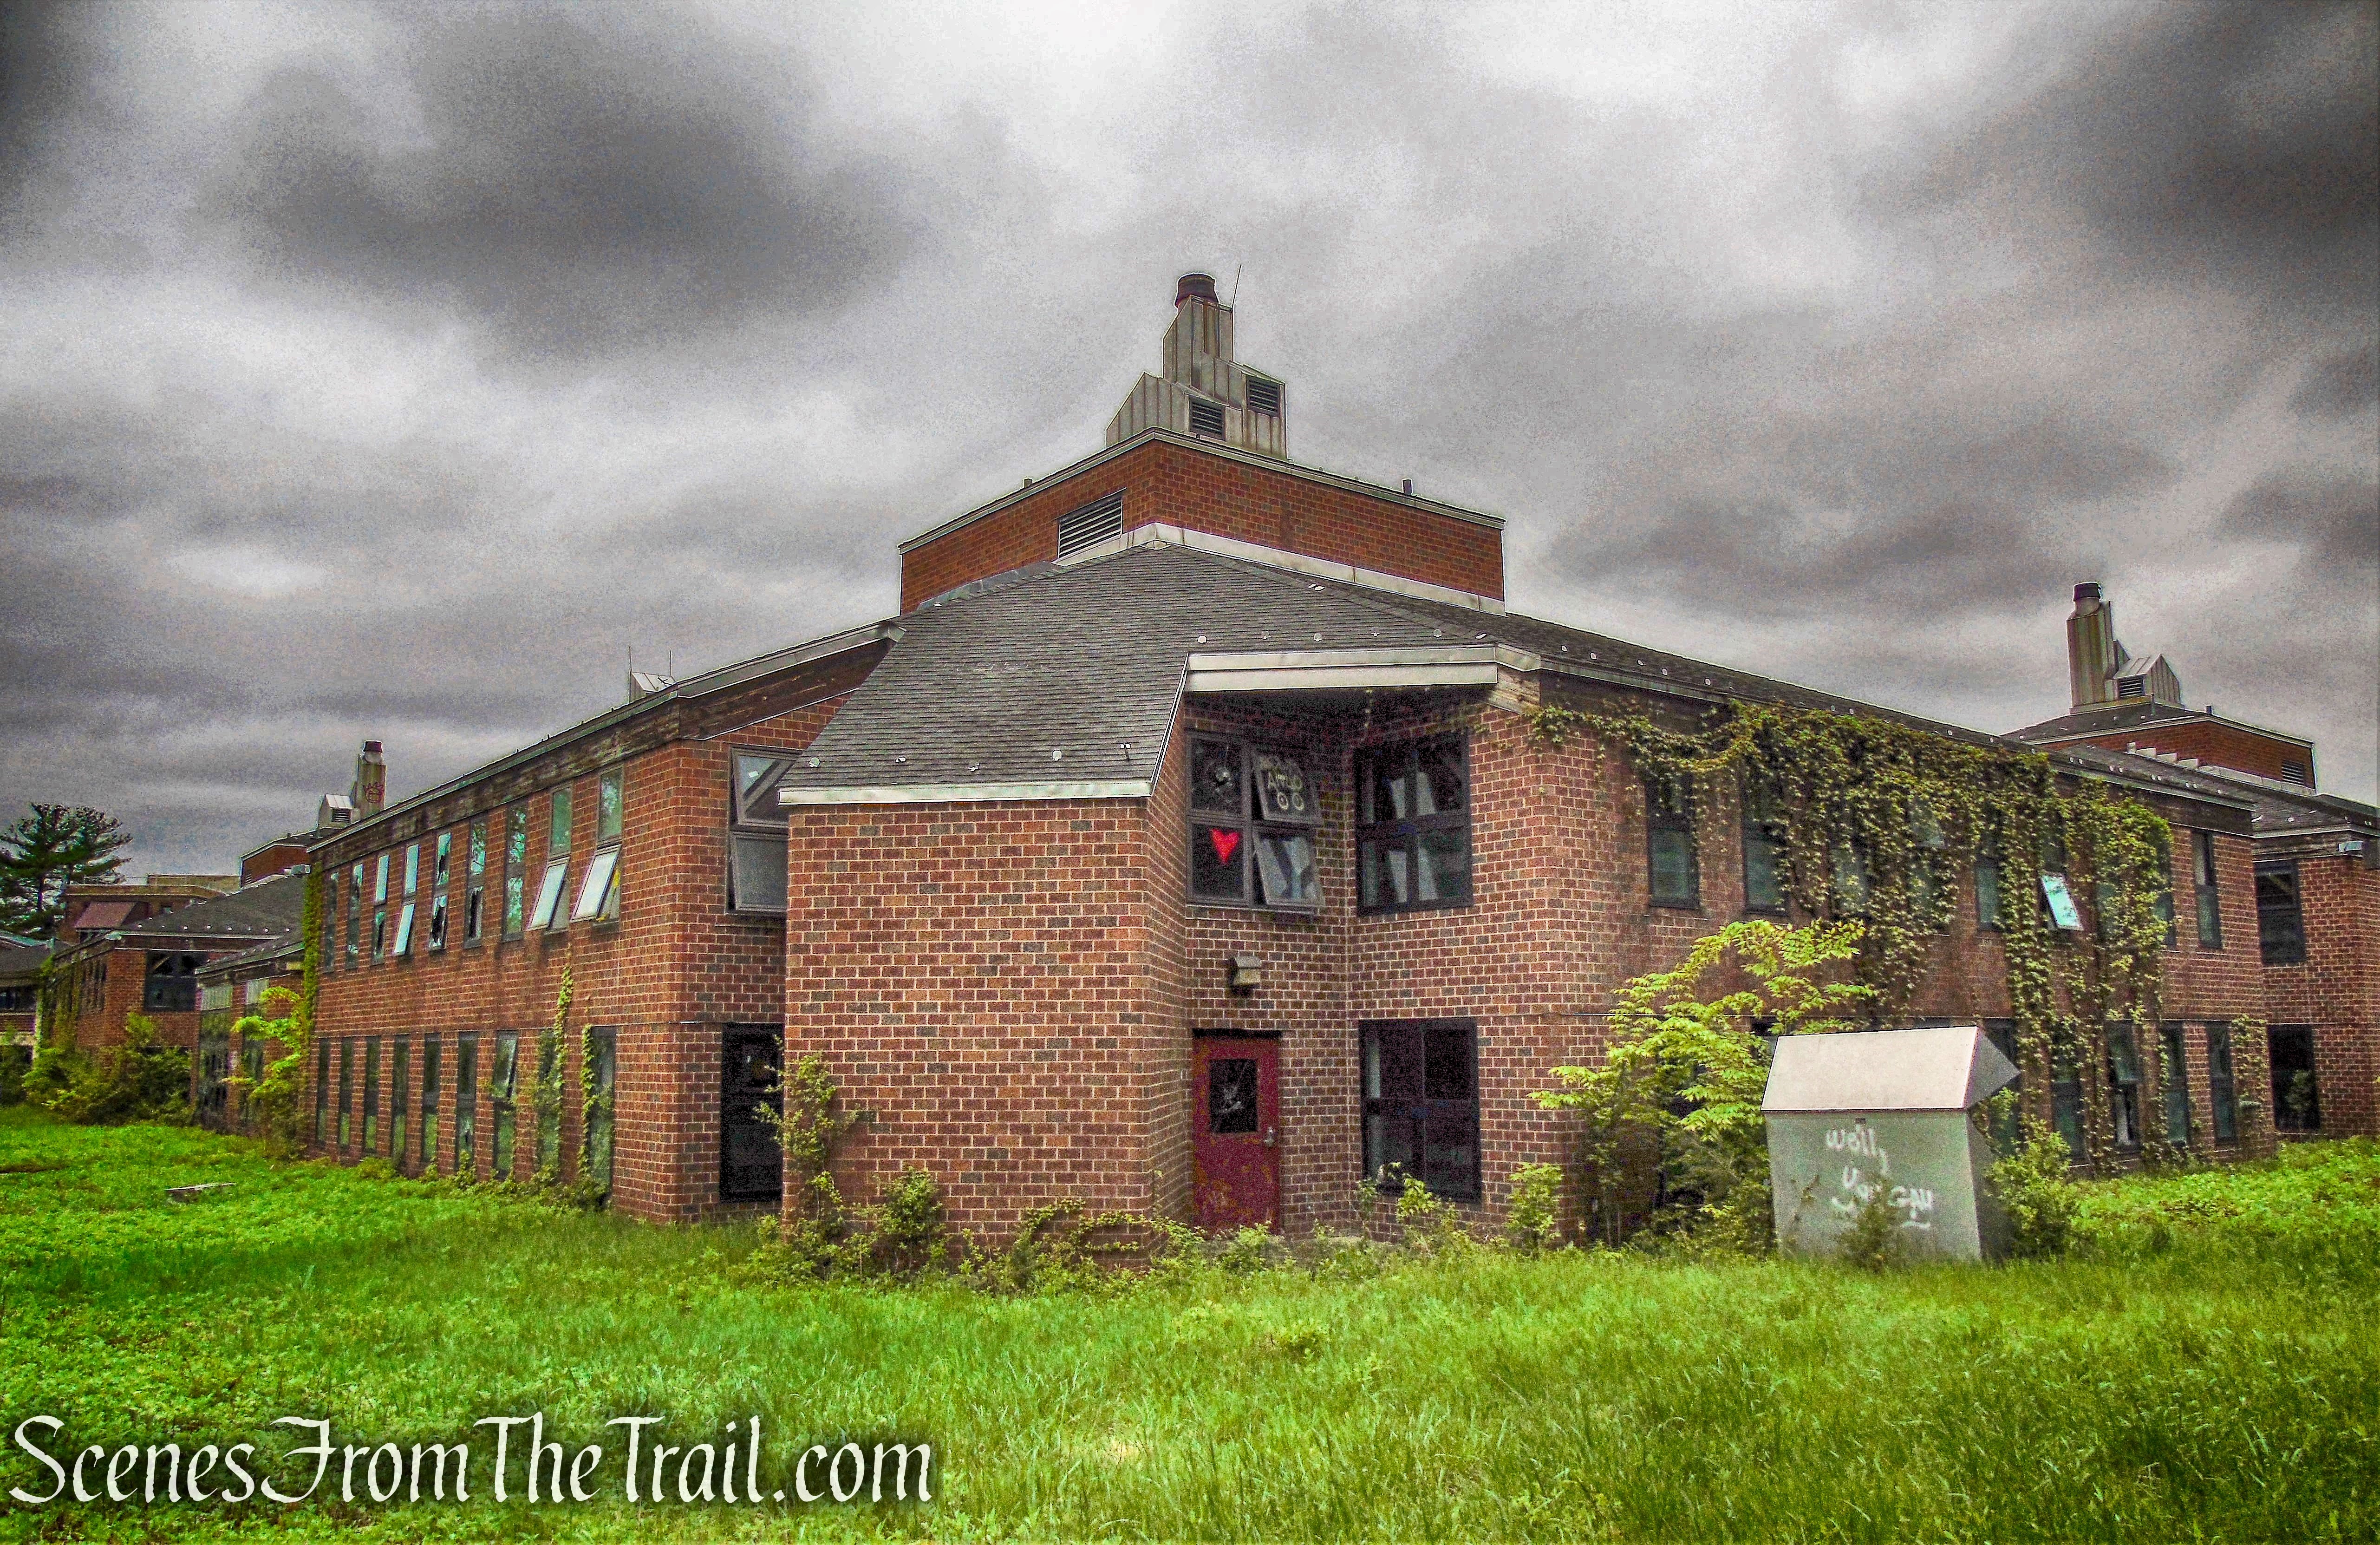
In the 1970’s during its last period of operation as the “Seaside Regional Center for Mentally Retarded,” allegations of abuse surfaced. By the 1990’s the hospital became notorious for its high mortality rate. It closed for good in 1996.
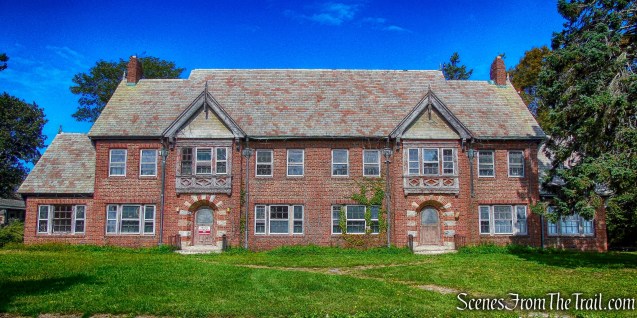
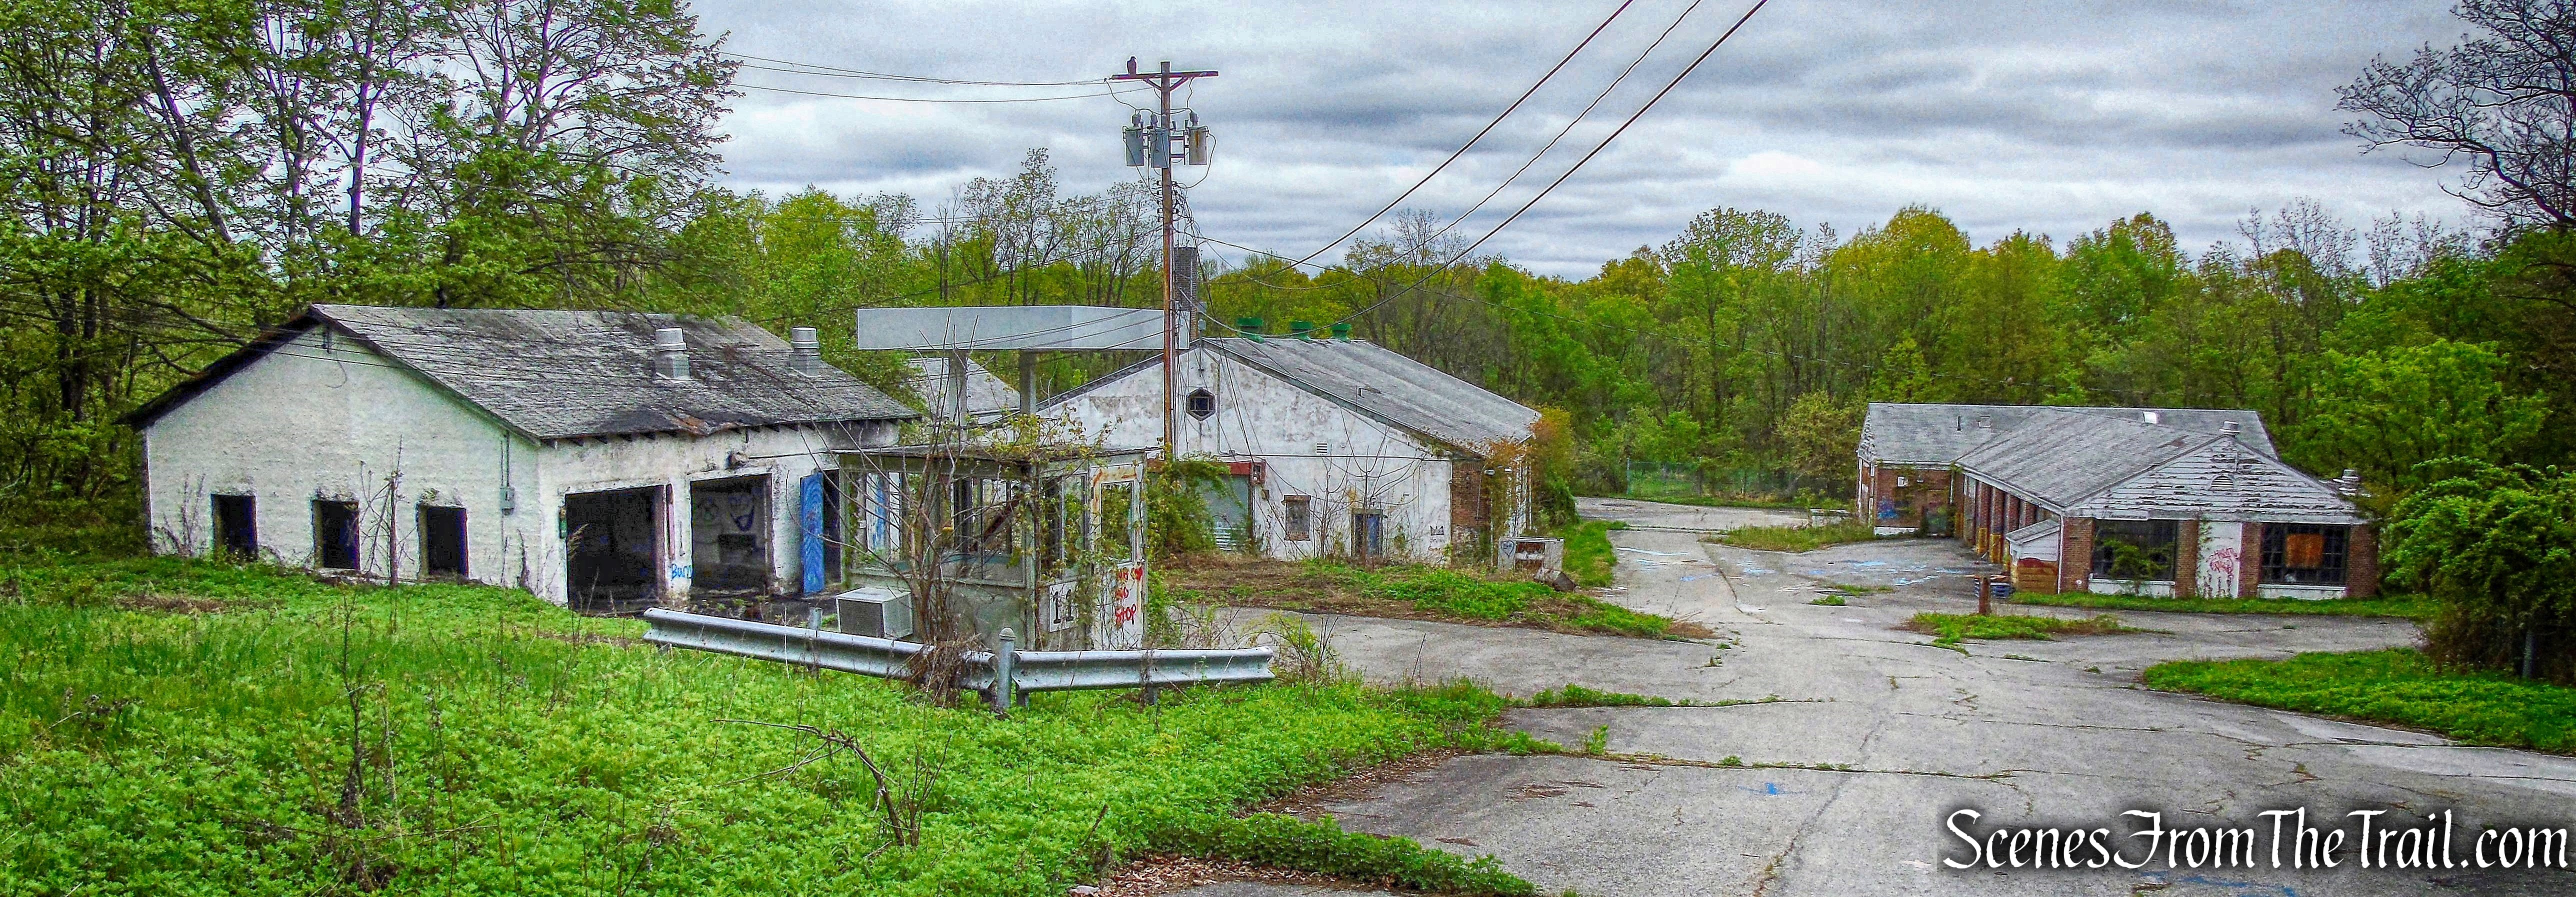
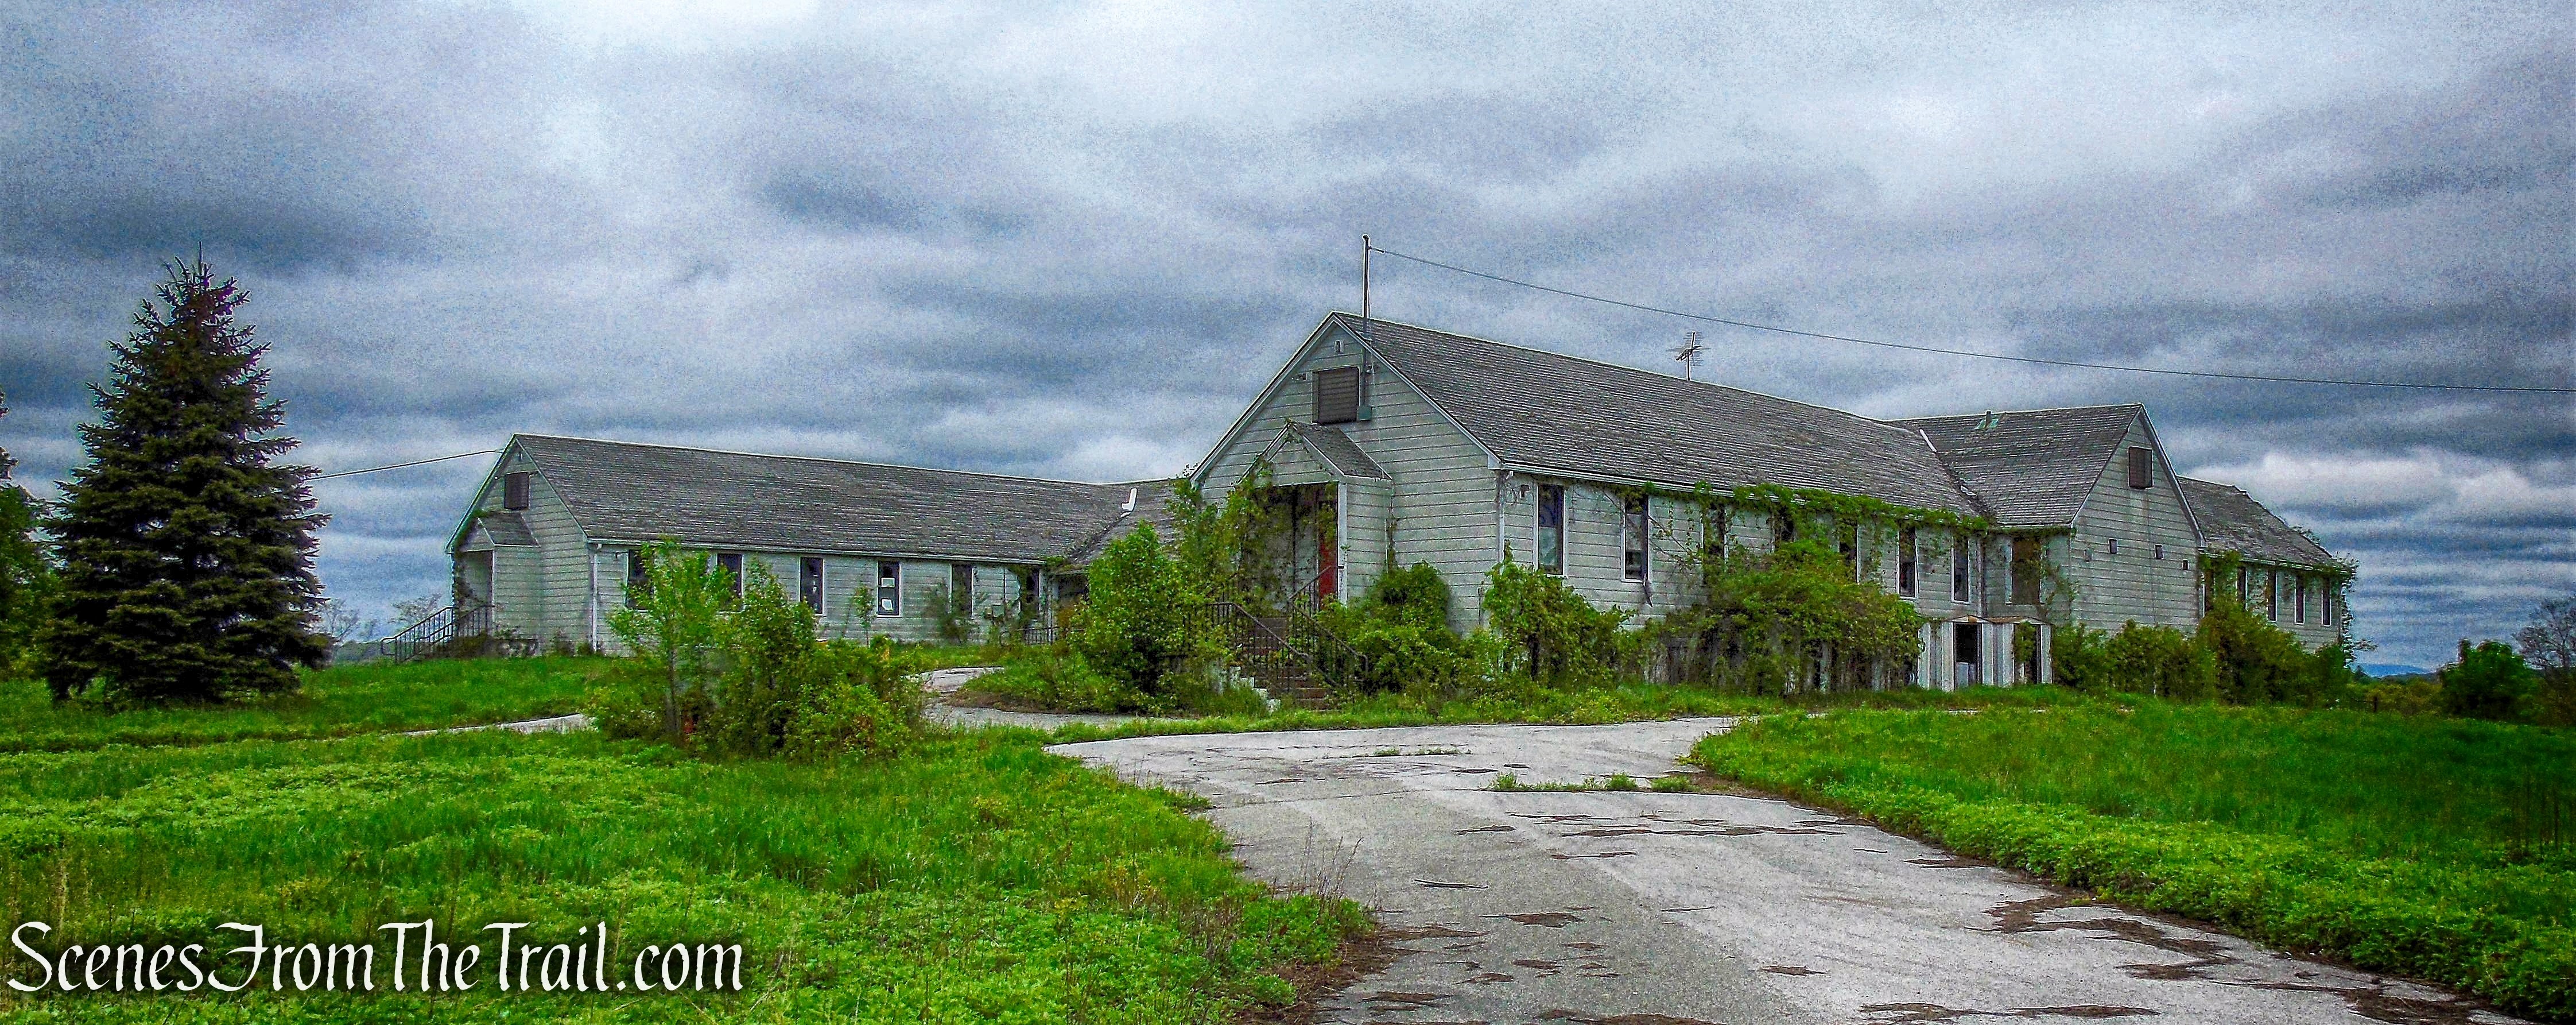
Duplex – Seaside Sanatorium
Its buildings “comprise an exceptional collection of fully realized and generally well-preserved Tudor Revival-style institutional architecture,” which were designed by Cass Gilbert. The property was listed on the National Register of Historic Places in 1995.
Employee Building – Seaside Sanatorium
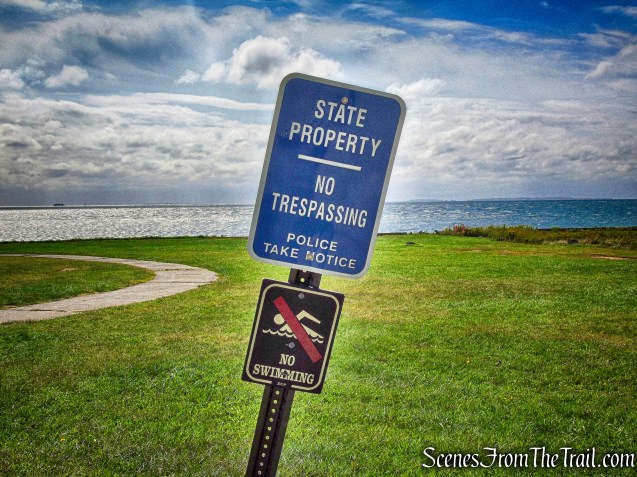
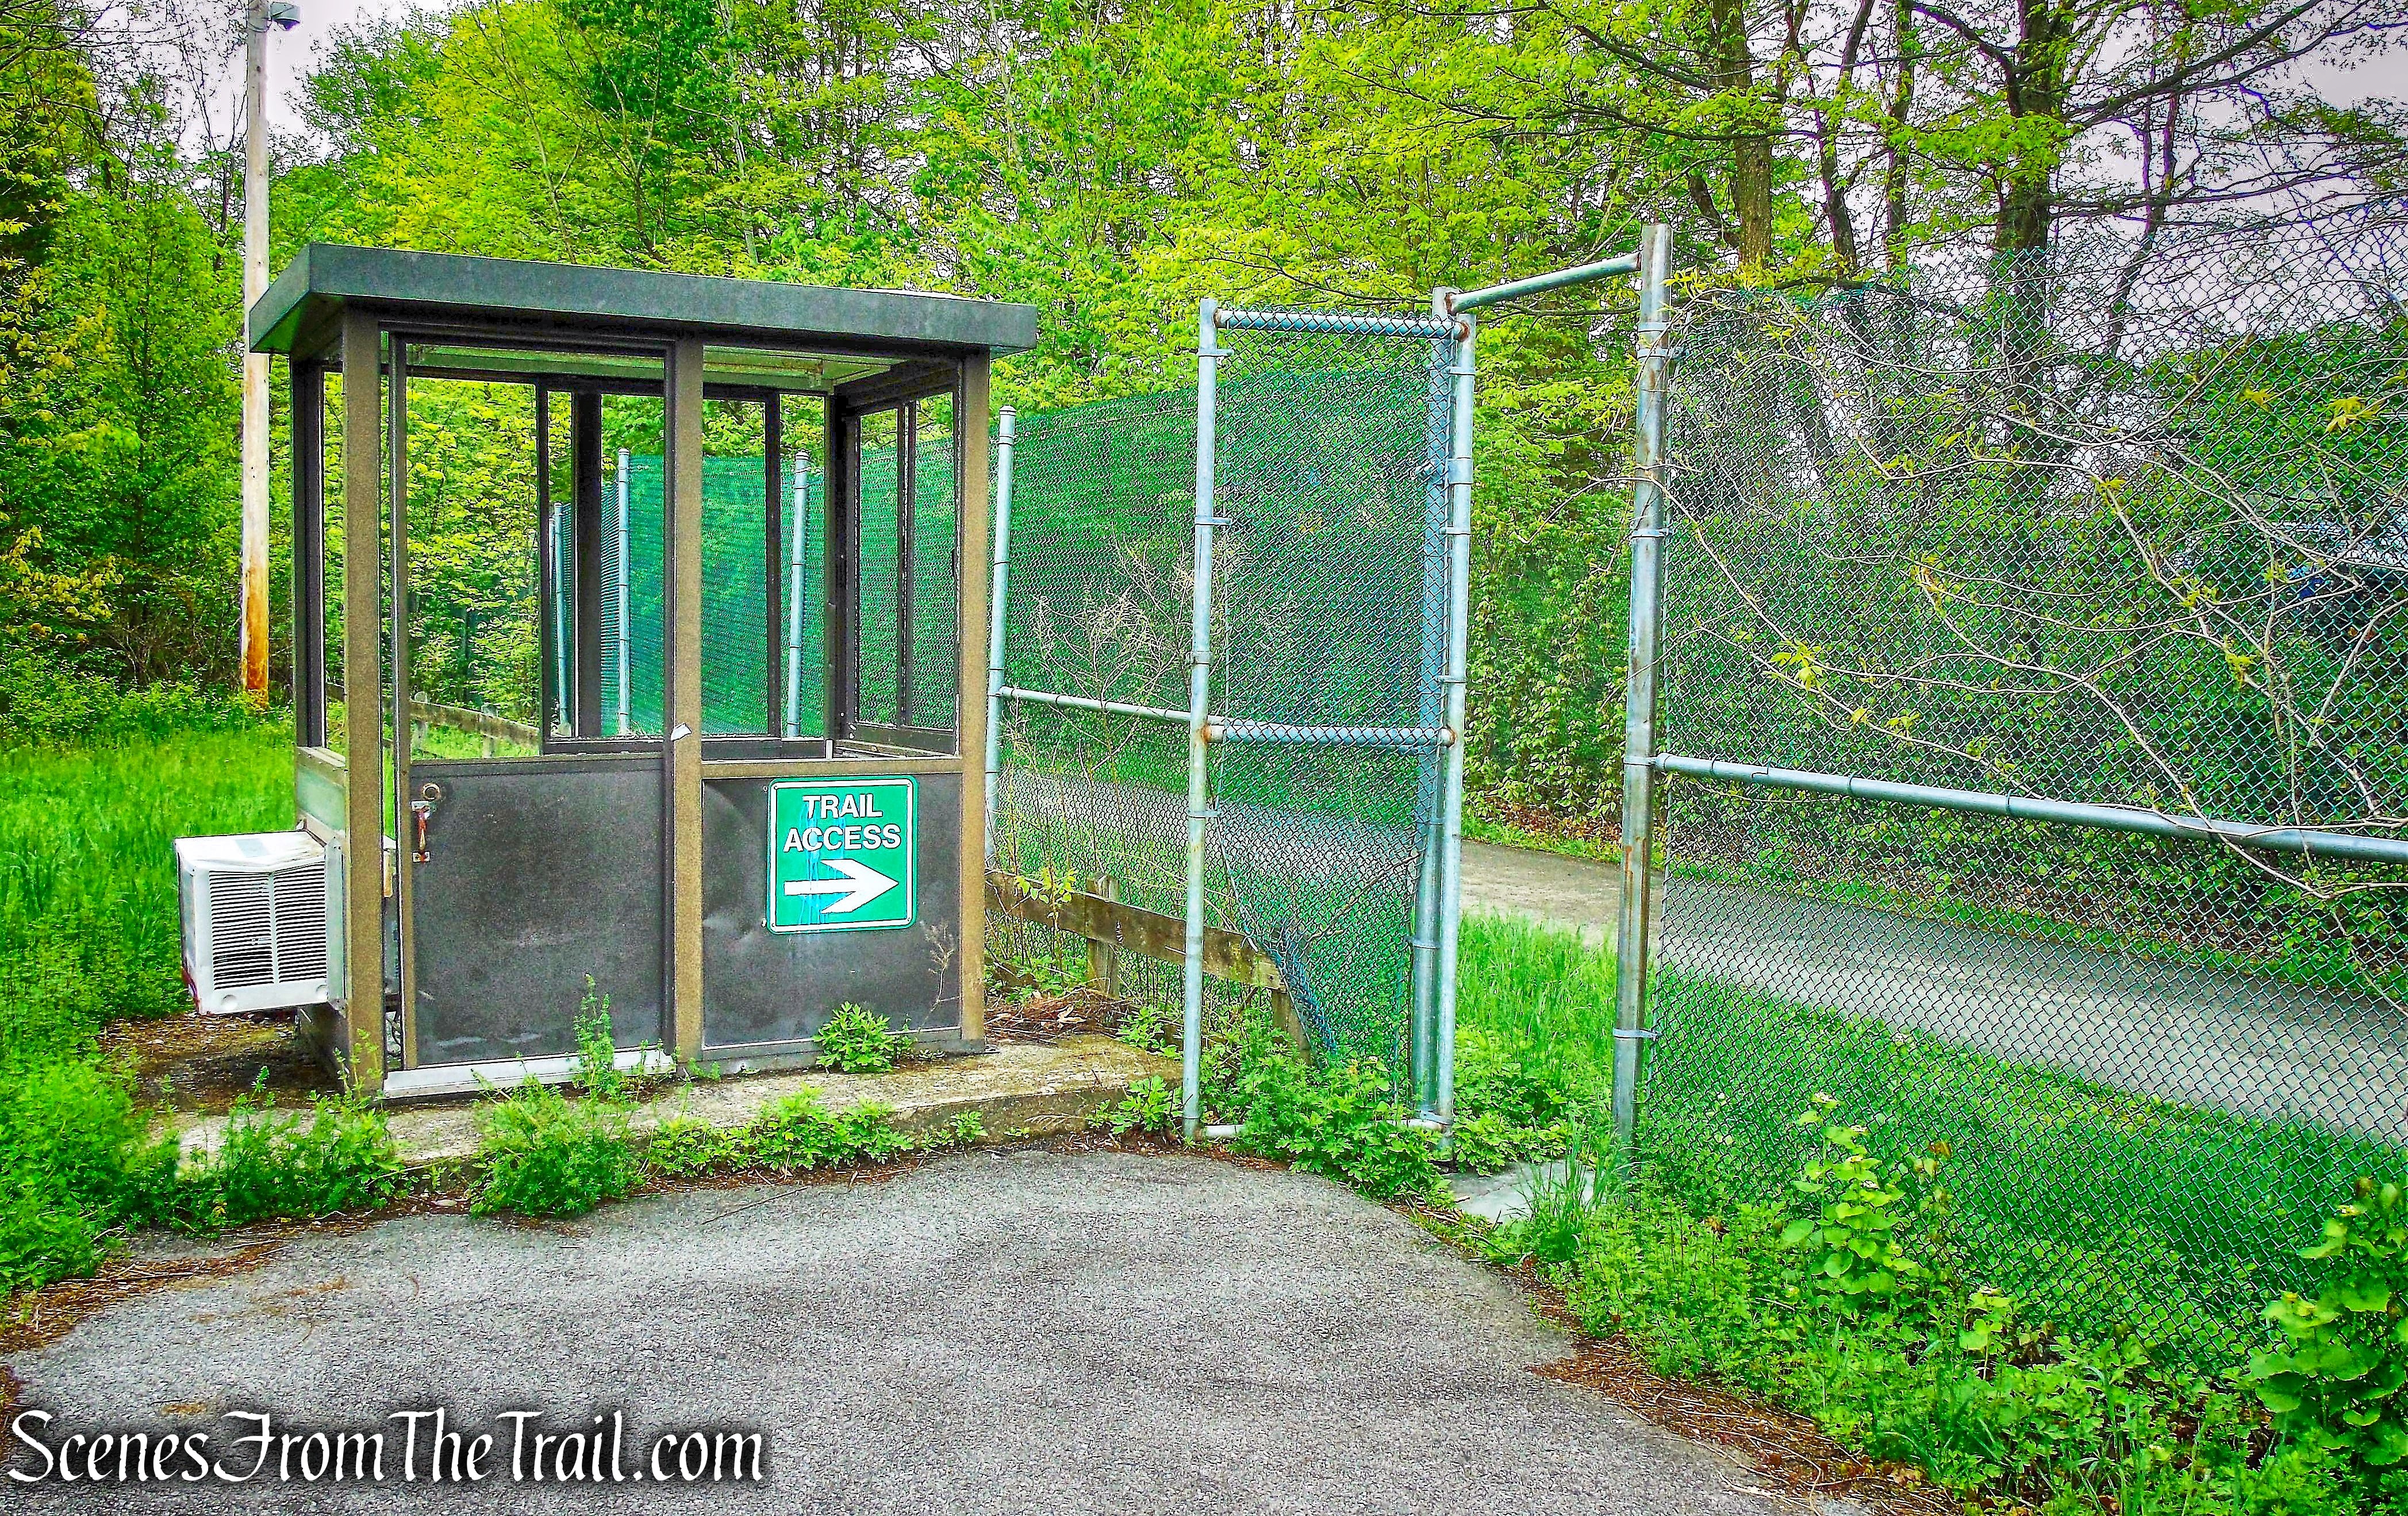
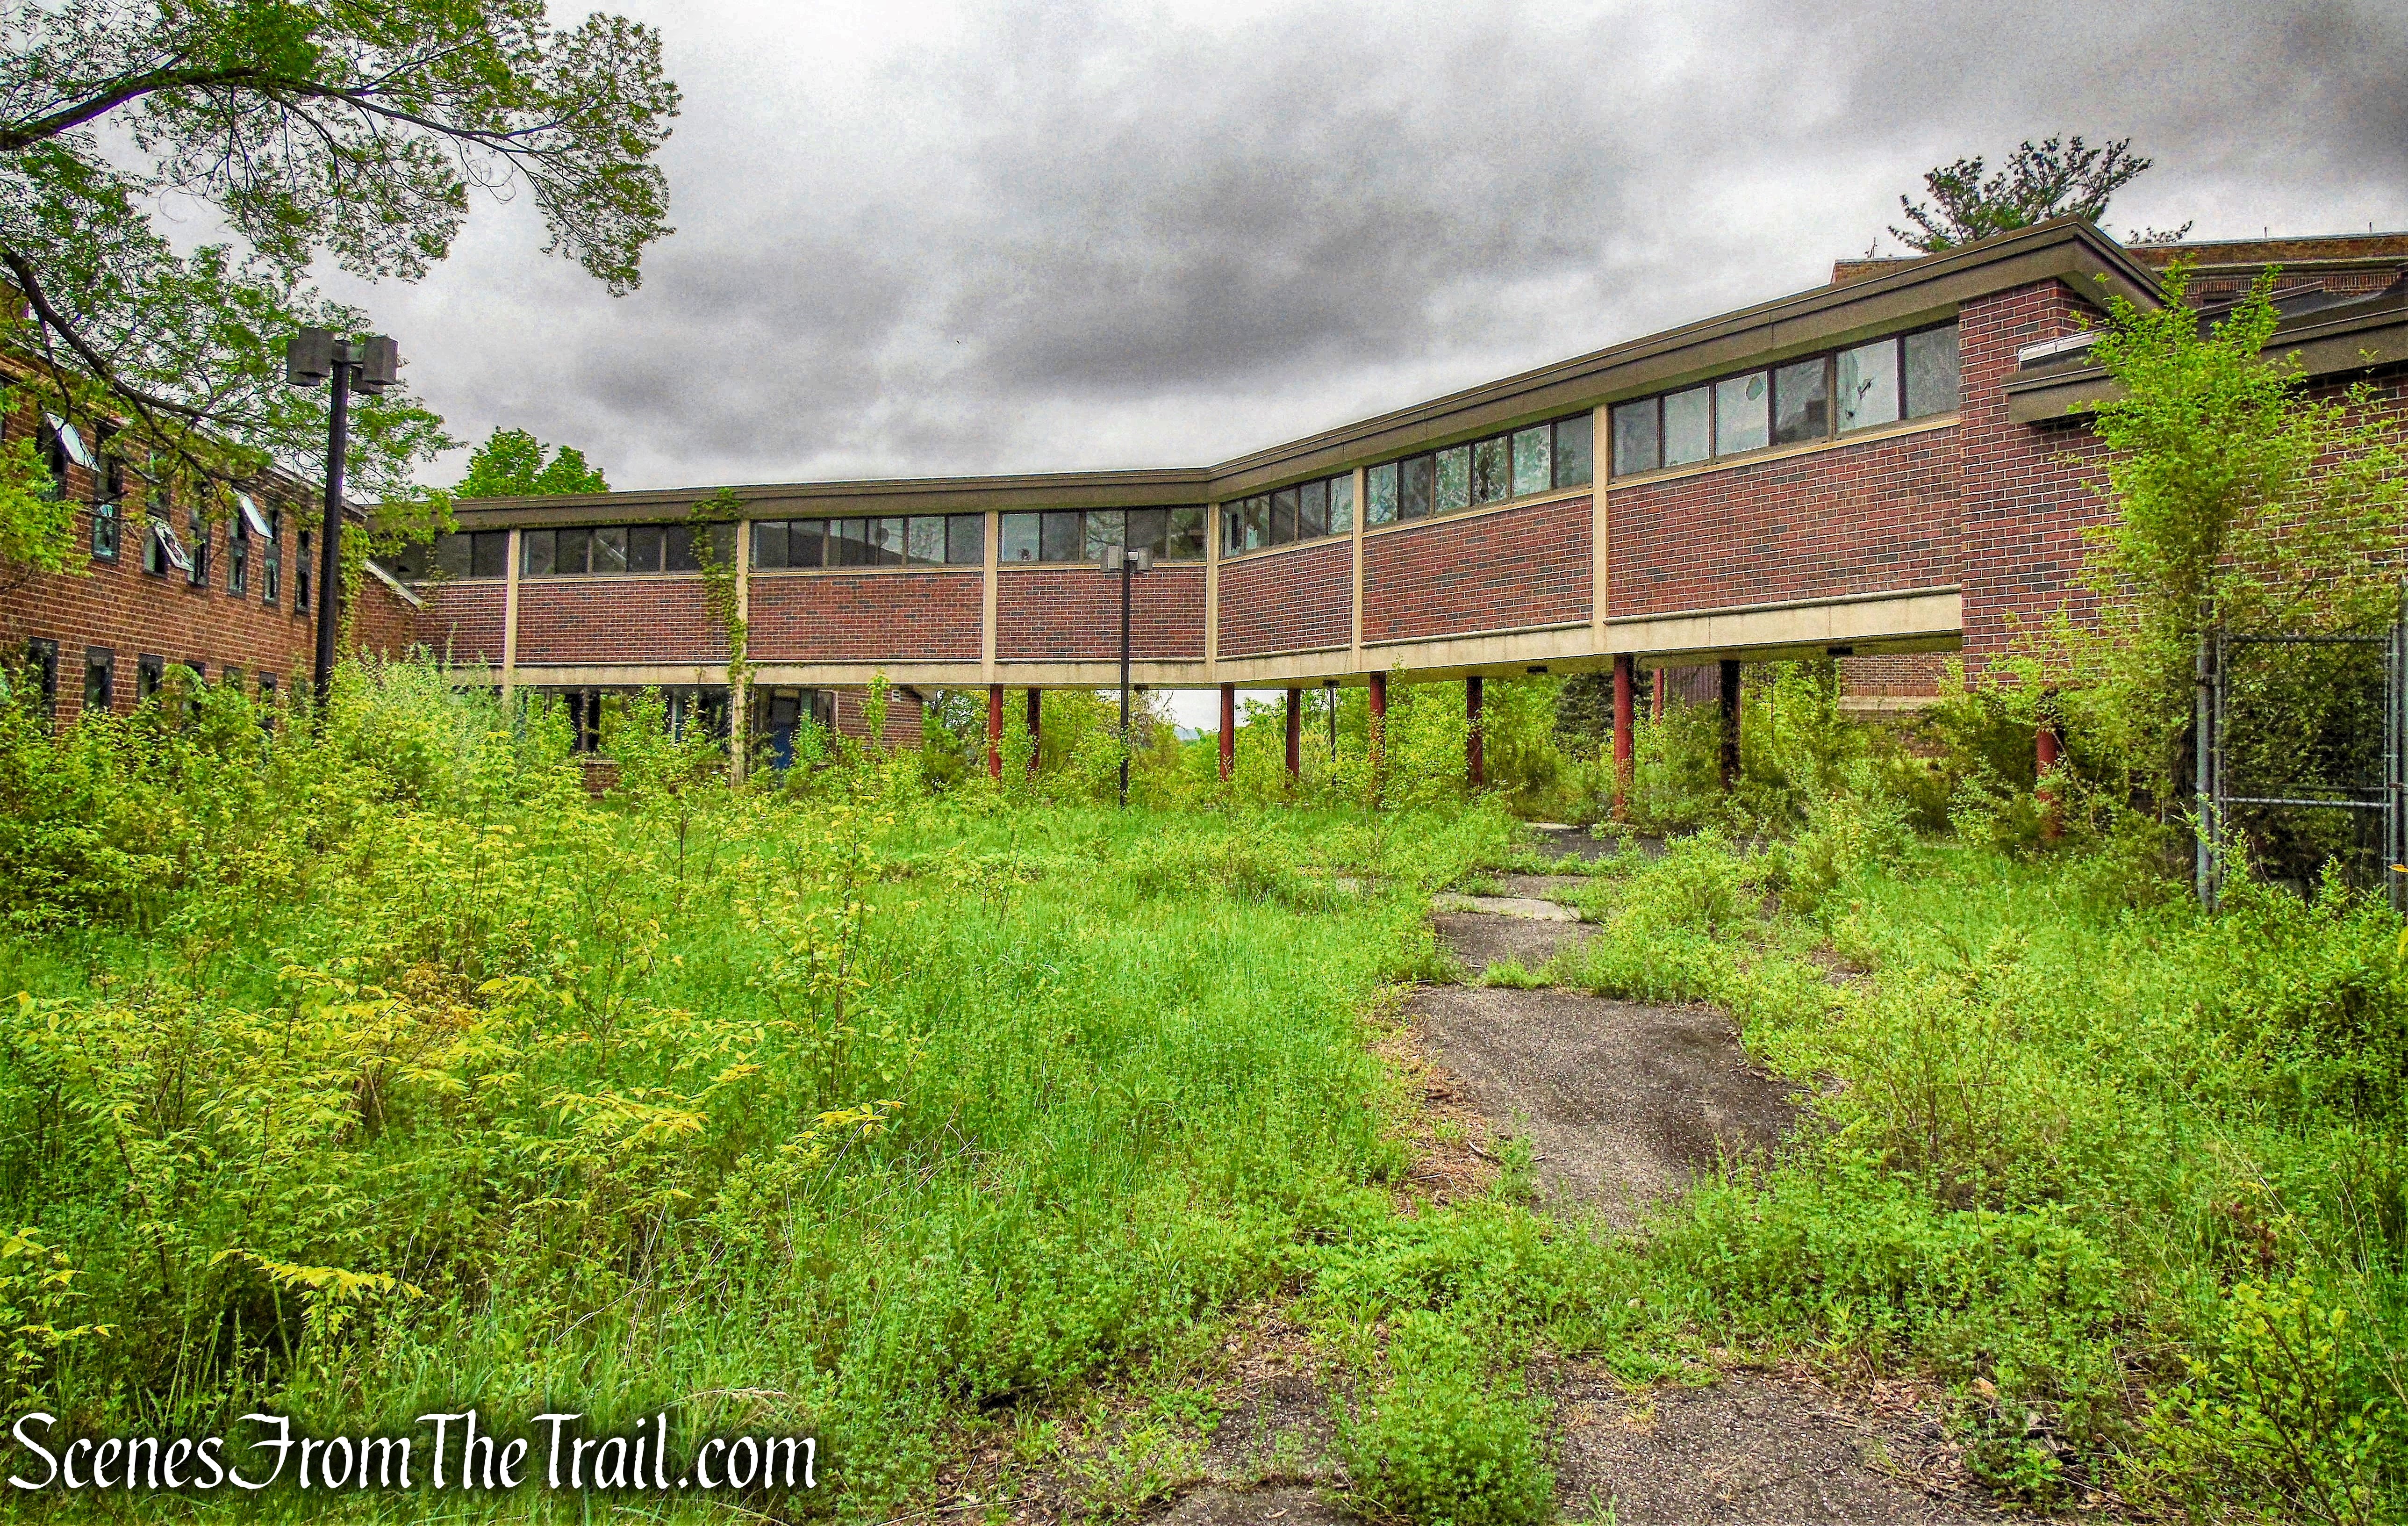
As a state park, the grounds are open to the public, but the employee and hospital buildings are surrounded by a chain link fence.
Hospital Building – Seaside Sanatorium
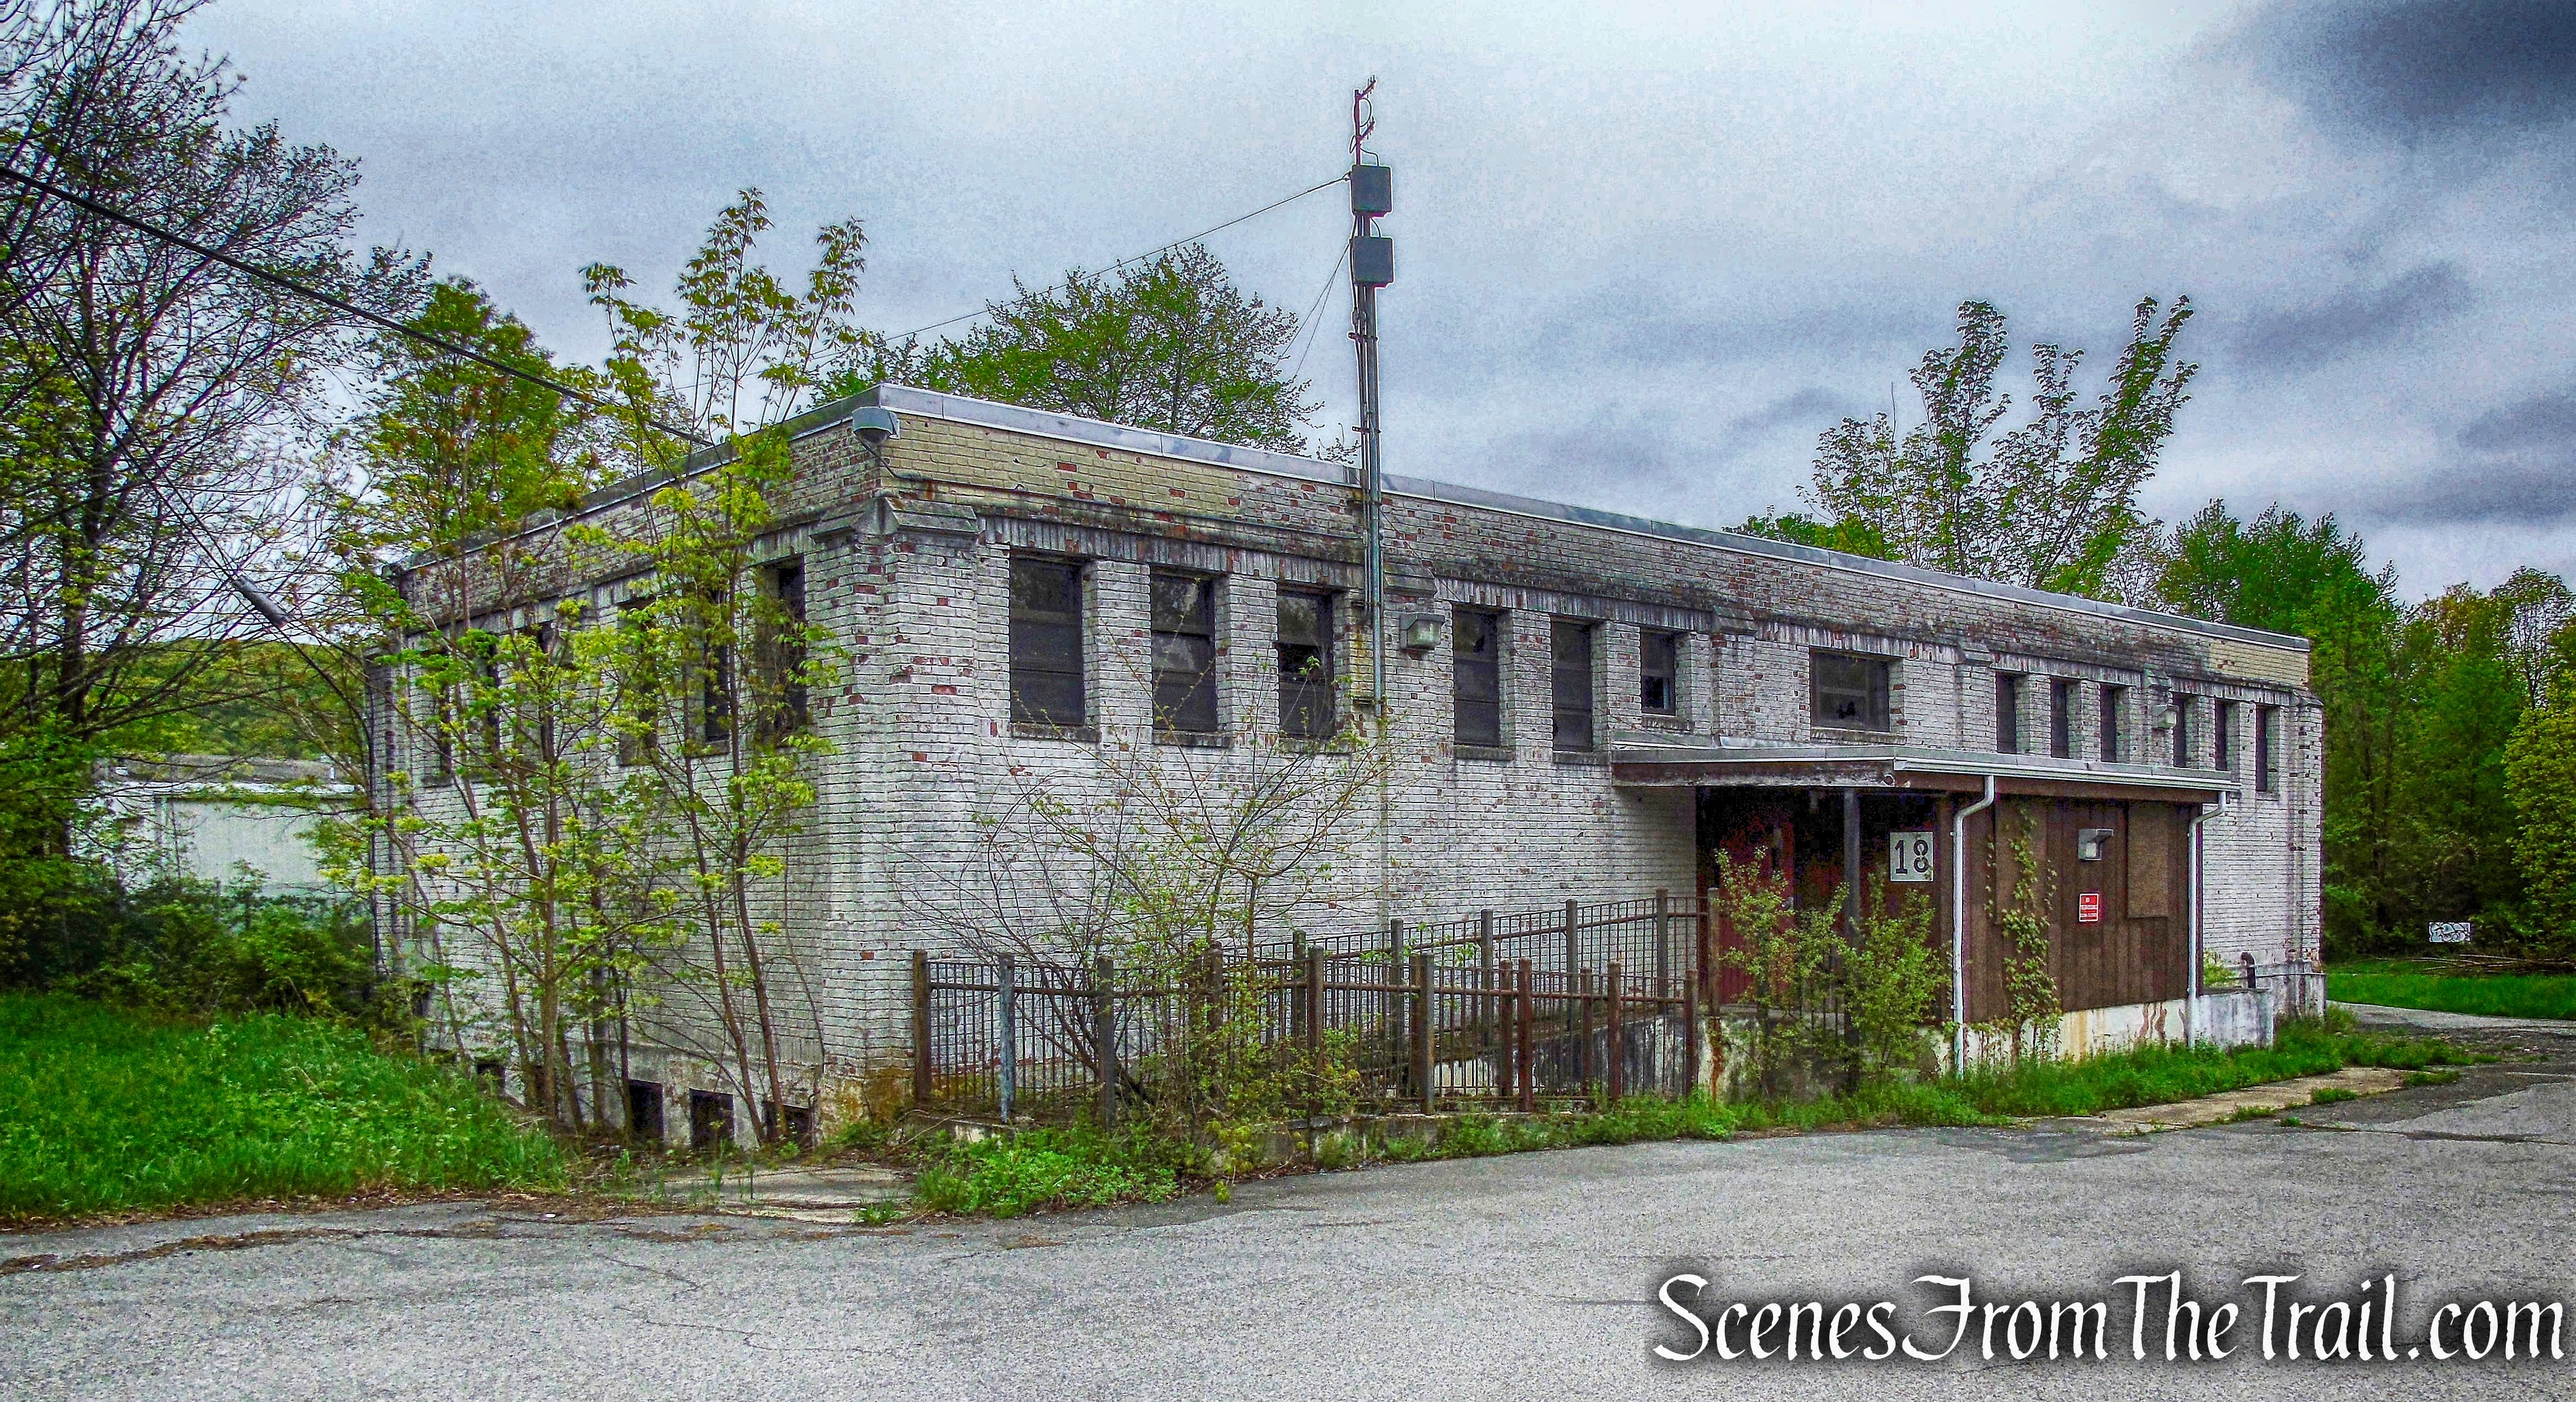
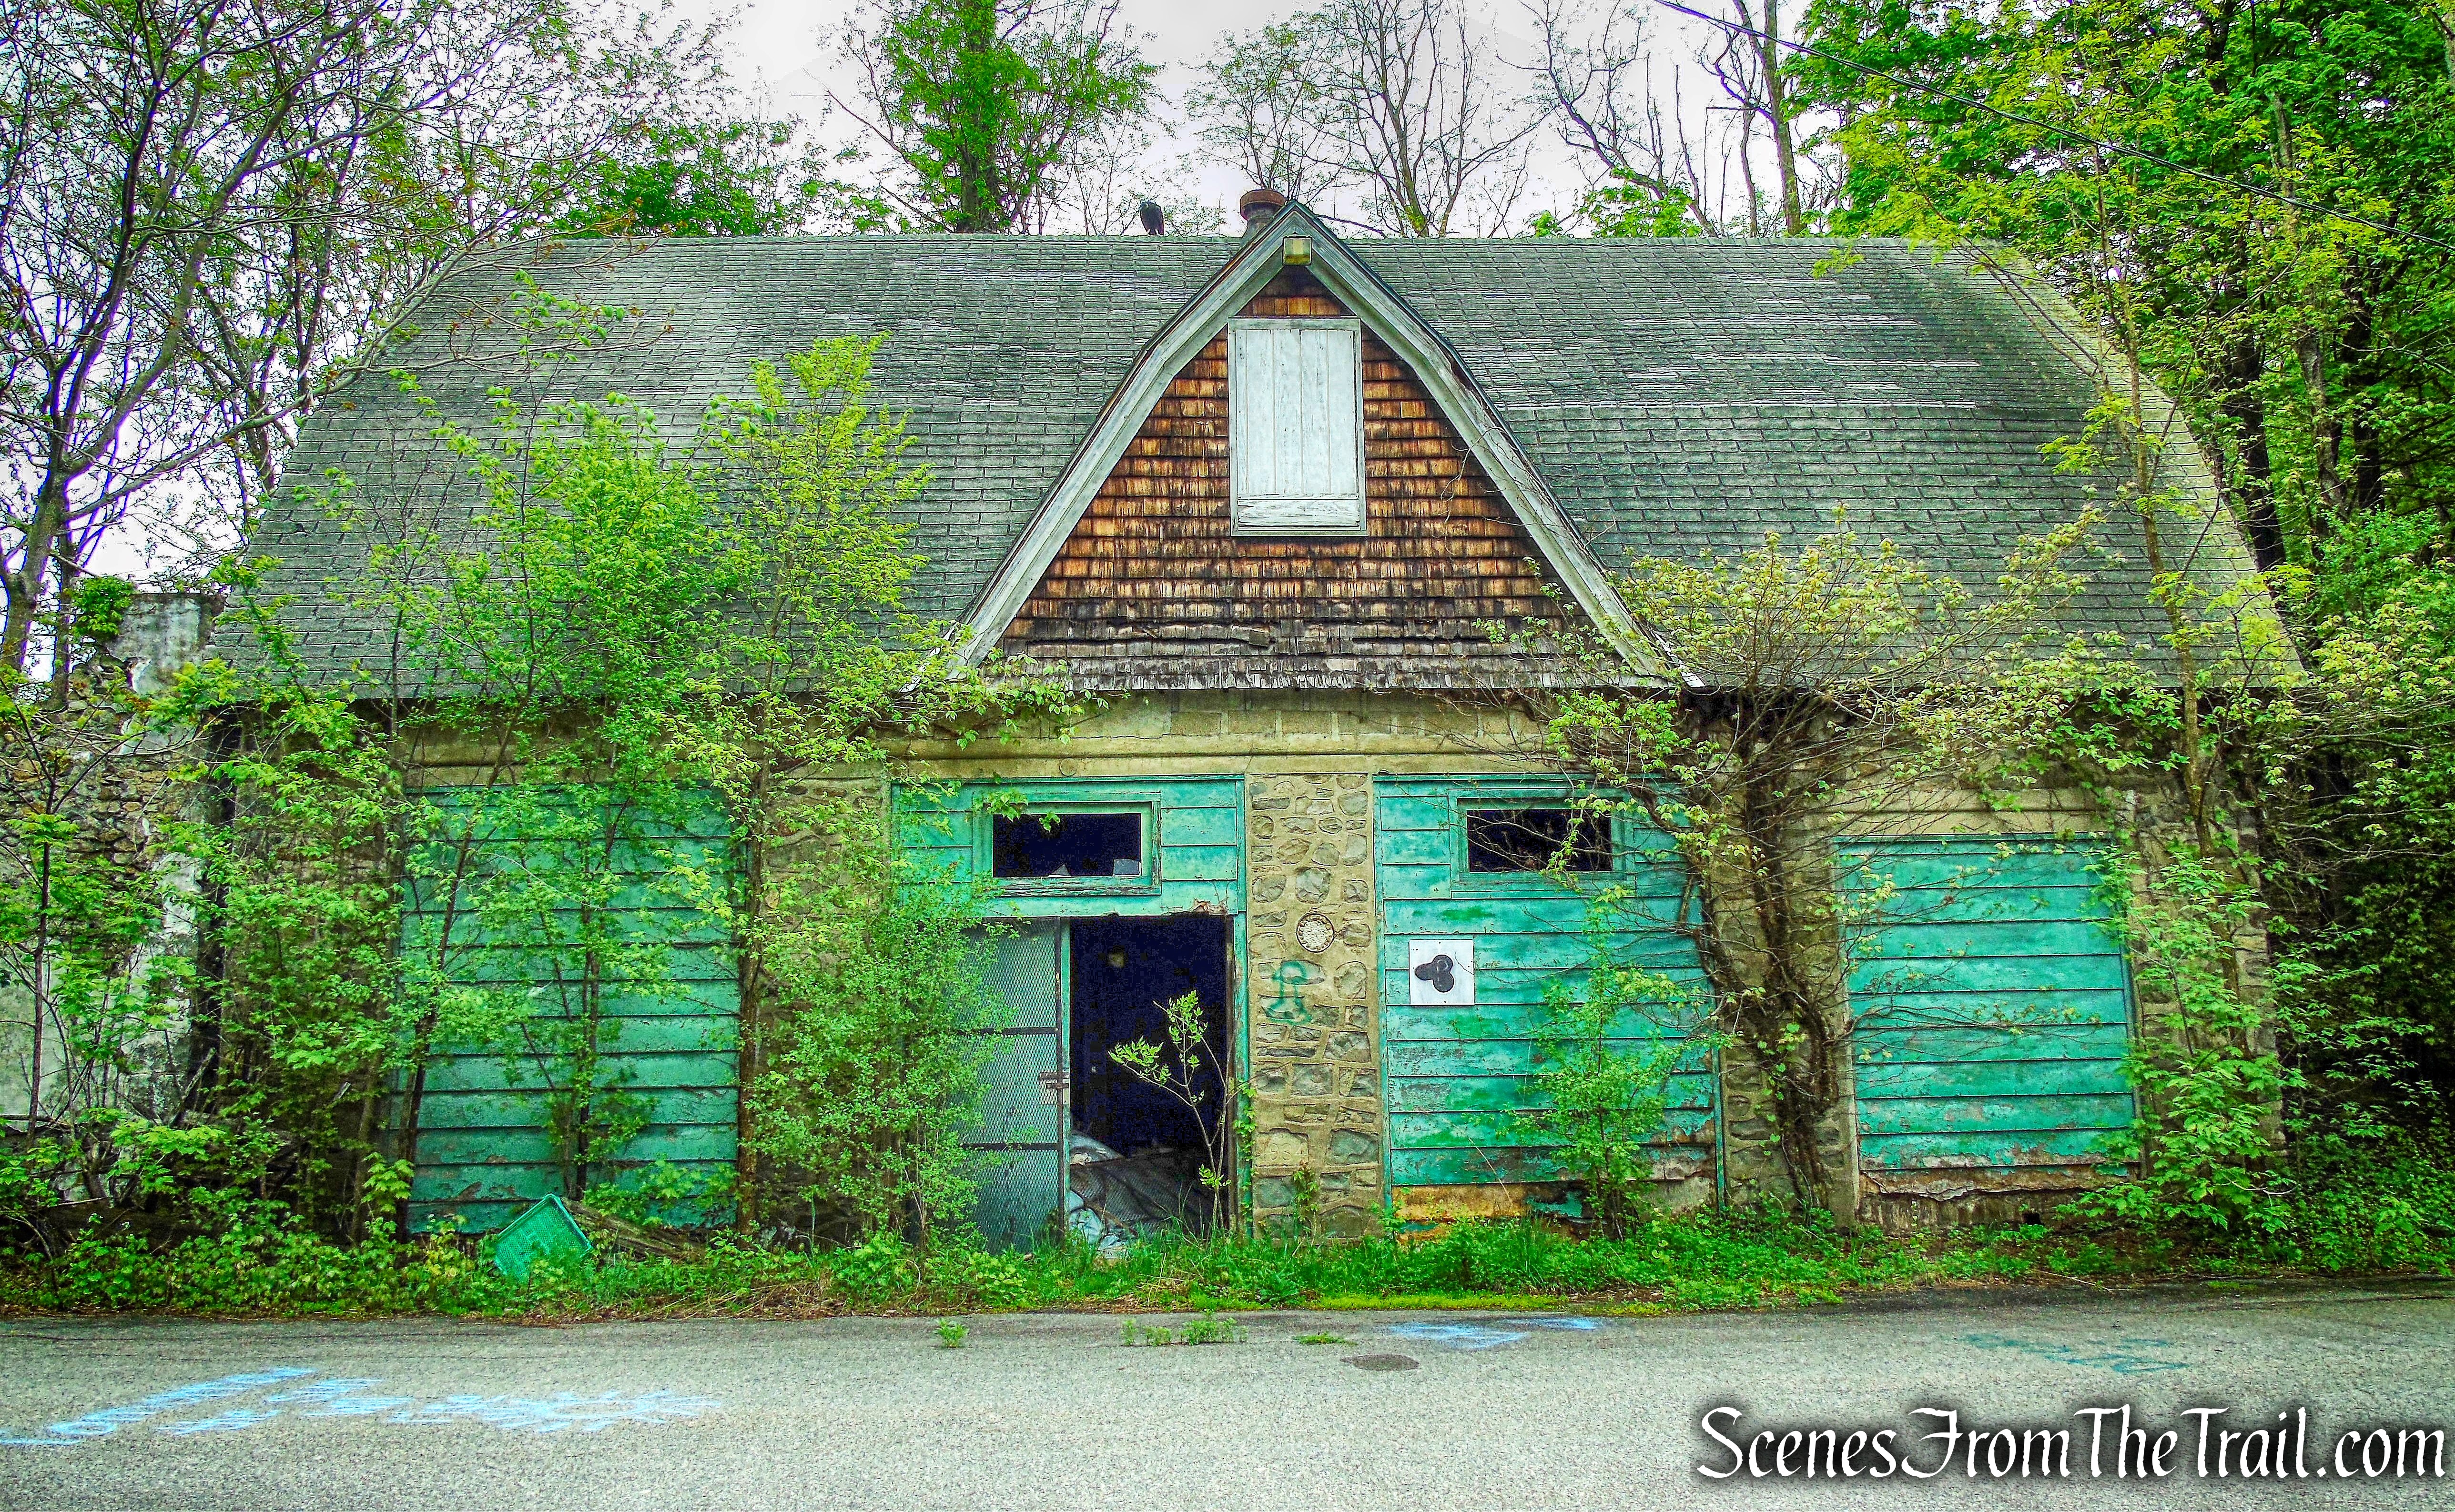
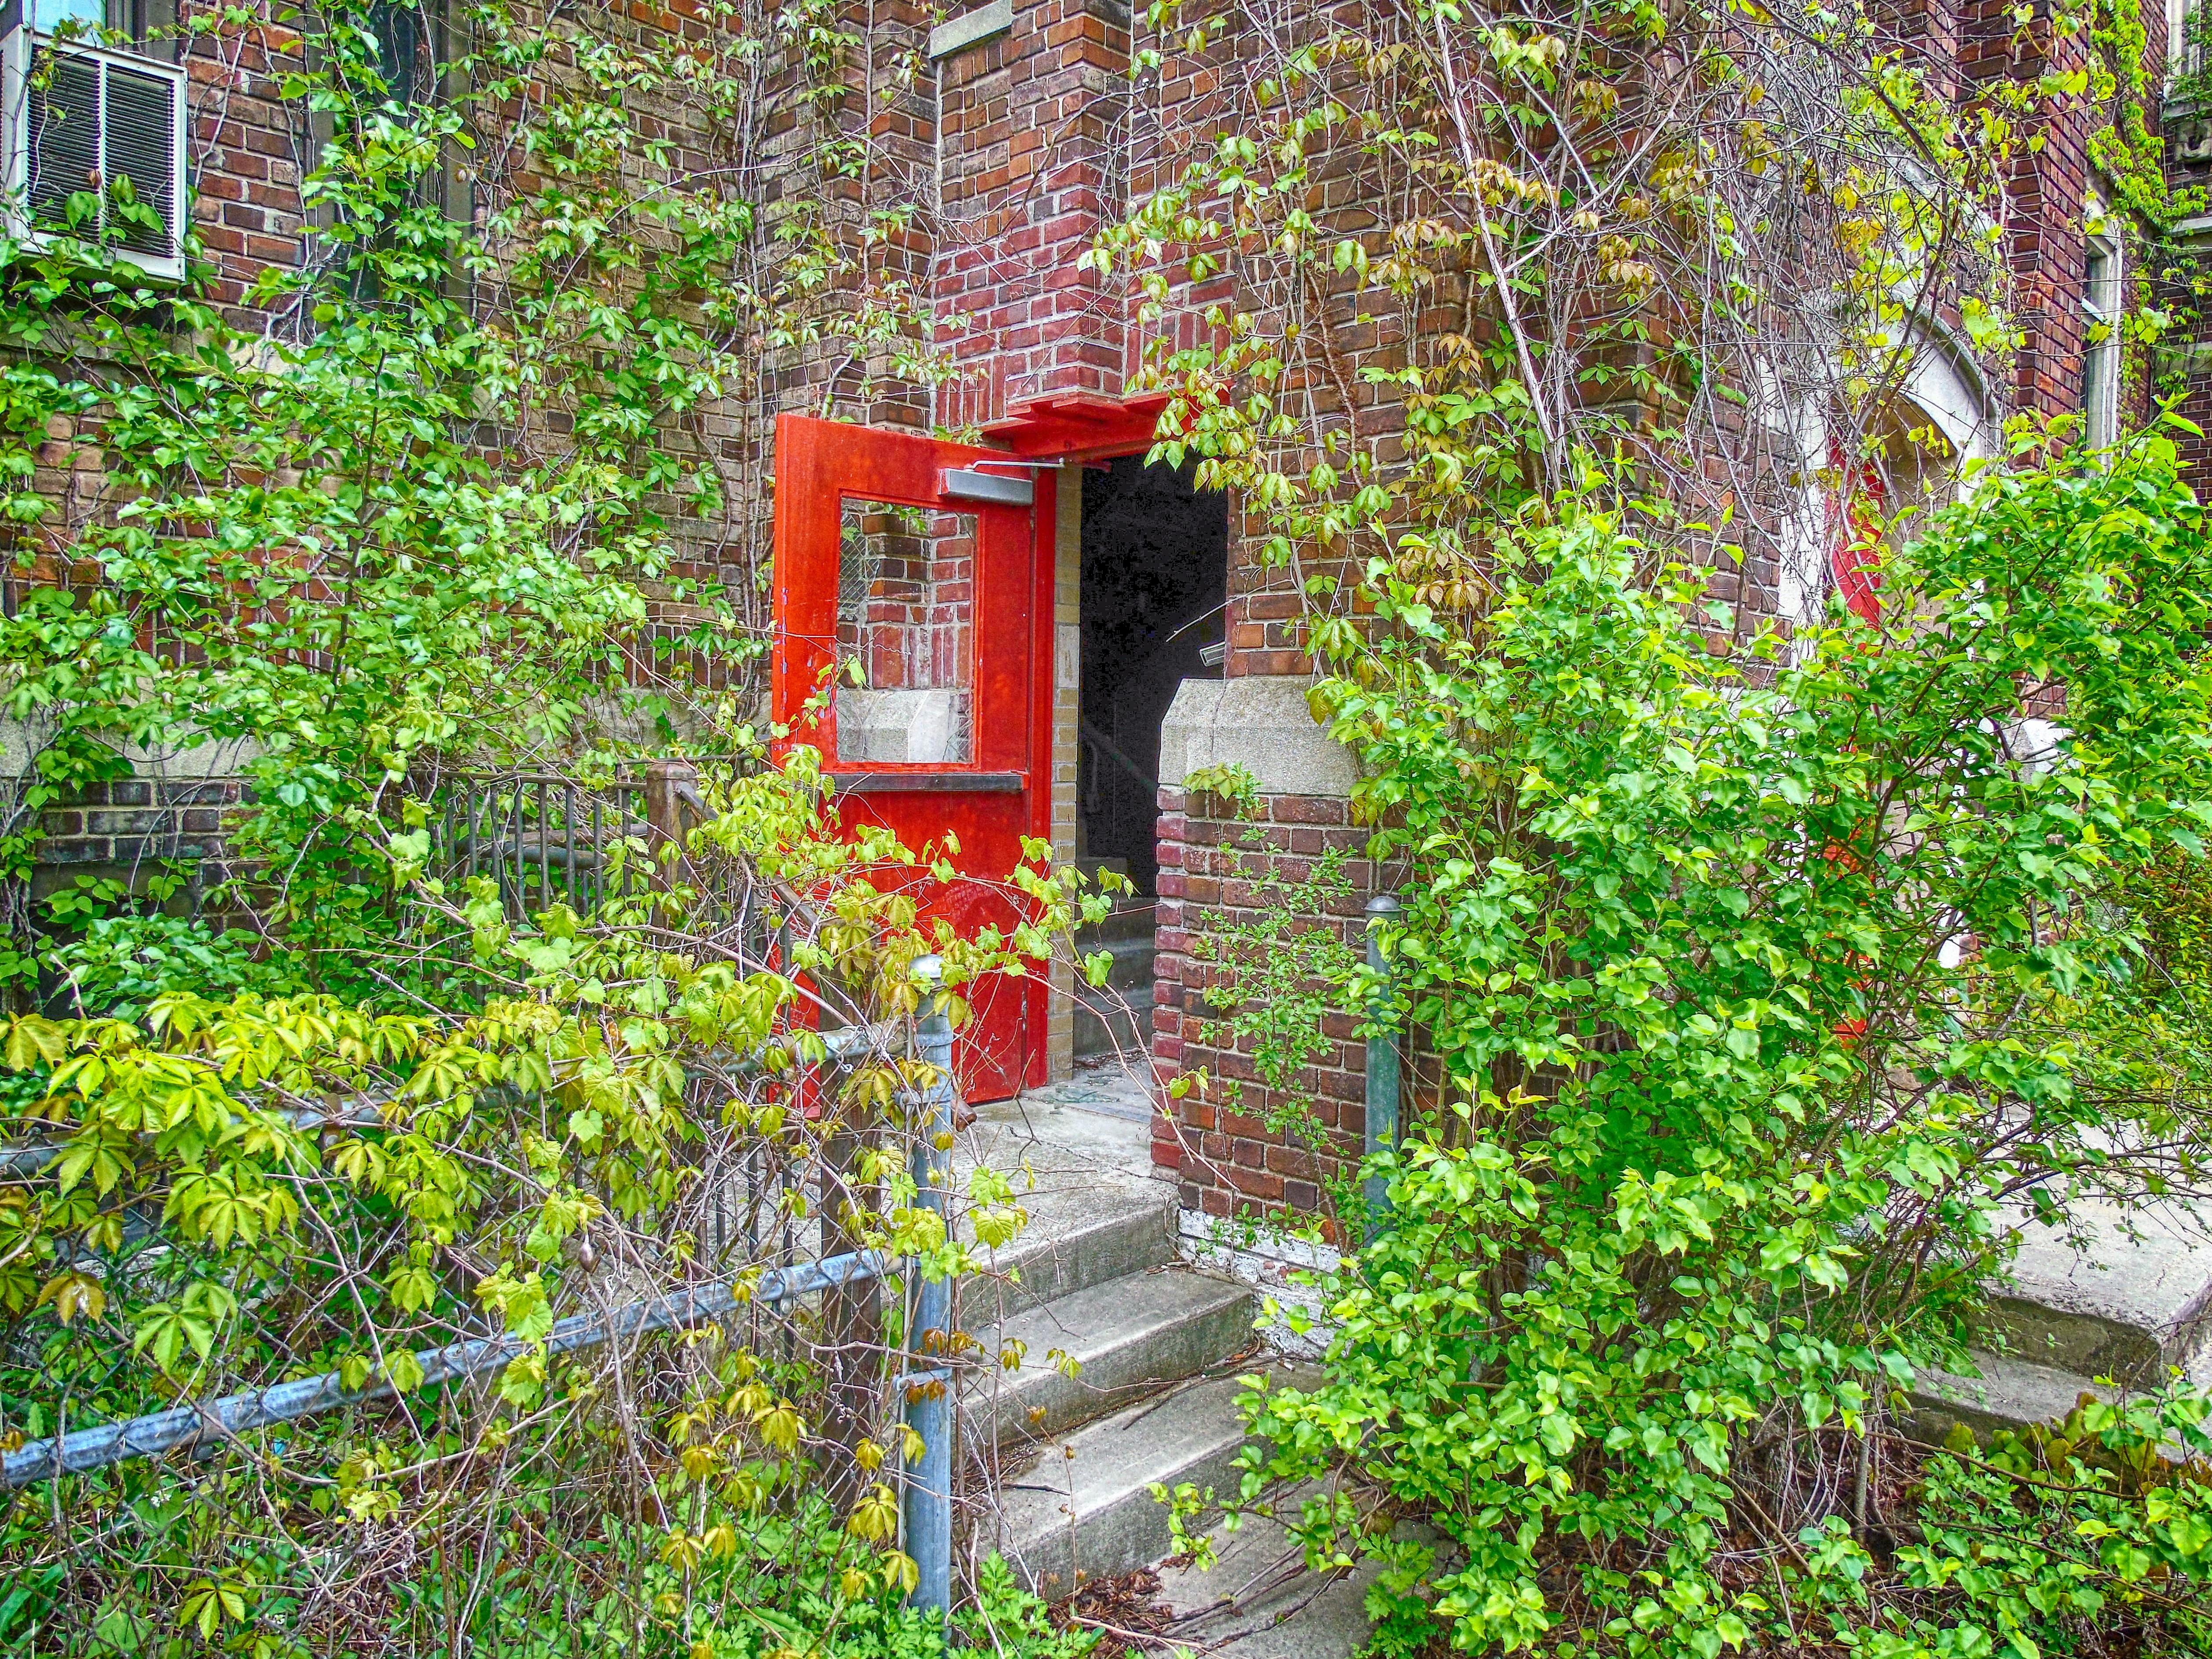
Other structures located not far from the main buildings are not fenced off. However, they are in close proximity to neighboring residential homes.
Superintendent’s House – Seaside Sanatorium
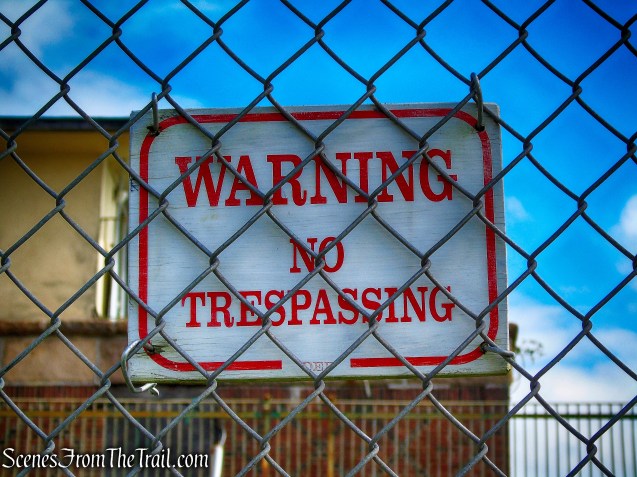
There is an abundance of warning signs throughout the park. I have read that this place is heavily patrolled, but with the exception of a half dozen or so park goers, I didn’t encounter any security.
Seaside State Park
Since its closure, the property has had various owners, but very little has been done to the abandoned buildings.
Duplex – Seaside Sanatorium
Developers have been faced with legal battles and the sanatorium continues to remain abandoned on this attractive oceanfront parcel
Seaside State Park
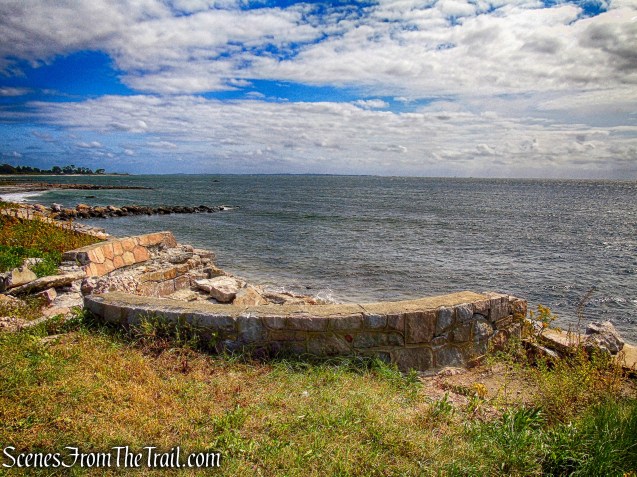
The historical aspect of this place makes it worth a visit. Take a walk along this scenic stretch of Connecticut coastline and admire the architecture from afar. The interior of the buildings are off limits.
Hospital Building – Seaside Sanatorium
After its tumultuous demise, Seaside has once again returned to the tranquil place it started out to be. Now get out and explore!
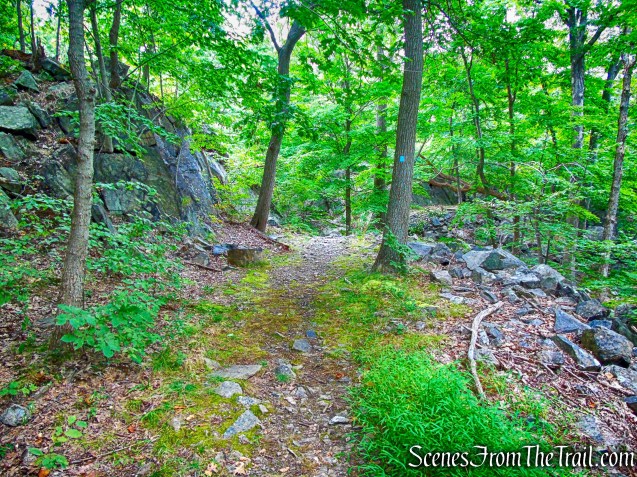
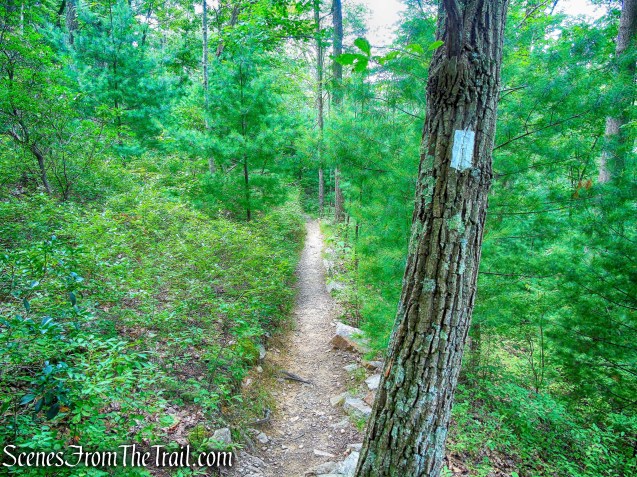
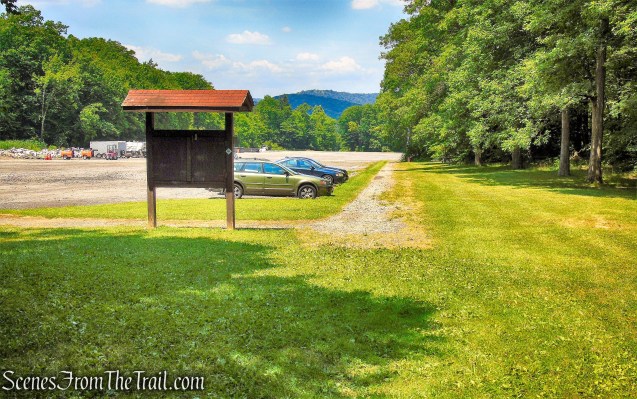
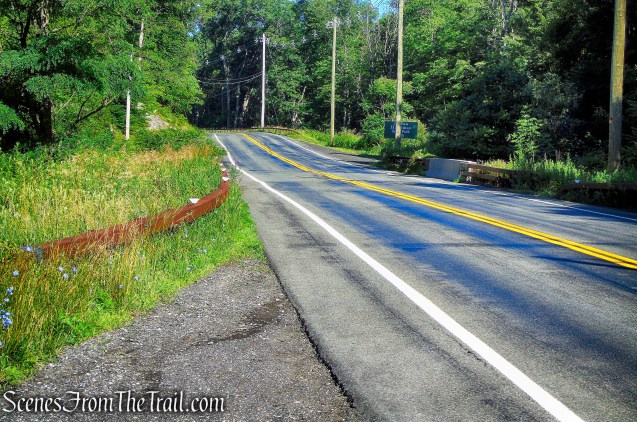
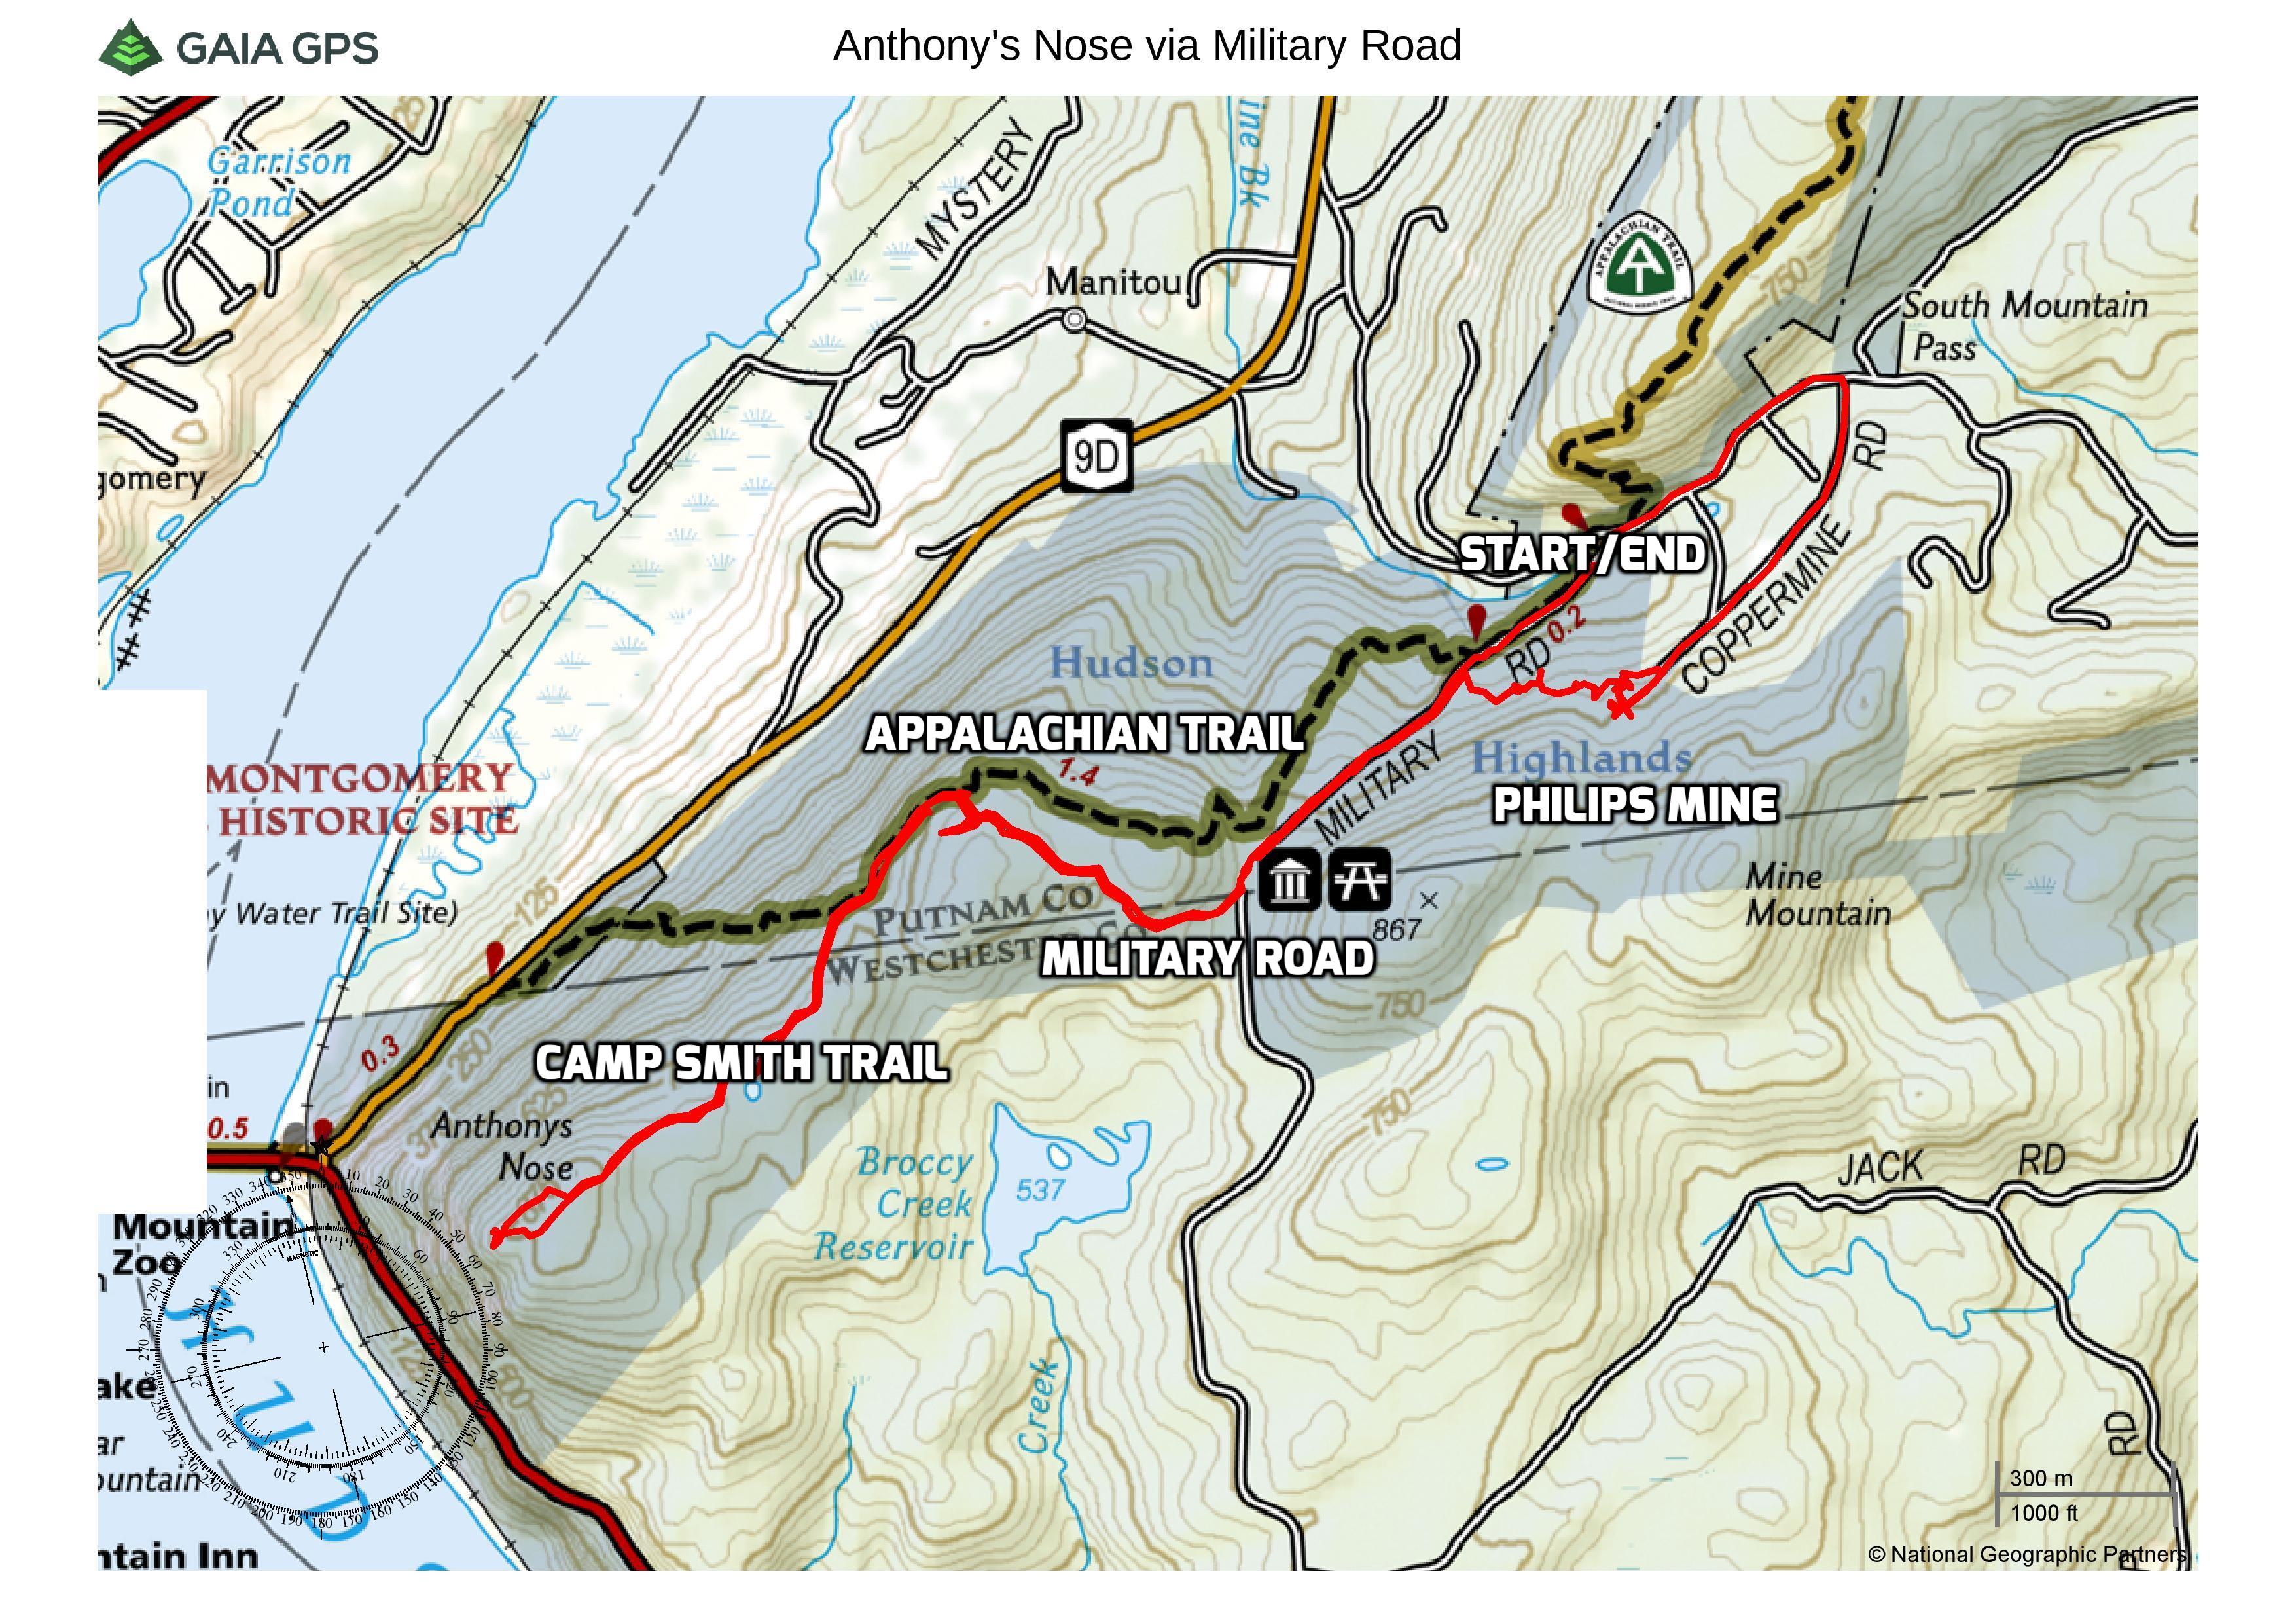
Trailhead Parking: Opposite 29 Secor Street – Cold Spring, NY 10516 (pull off parking for 3 cars)
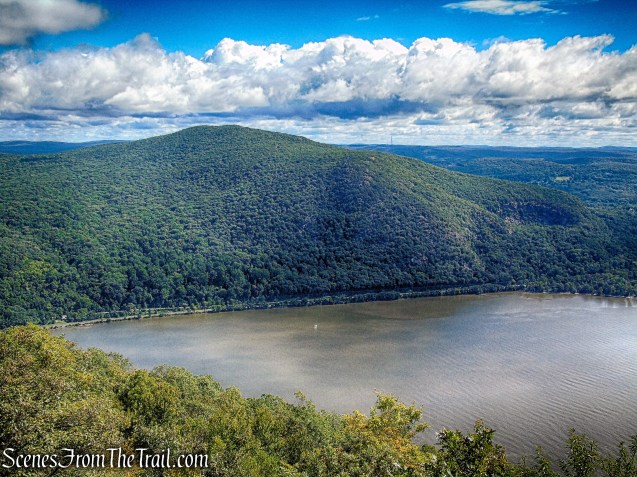
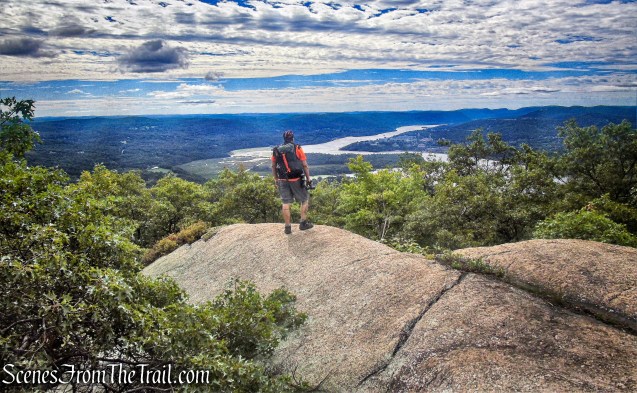
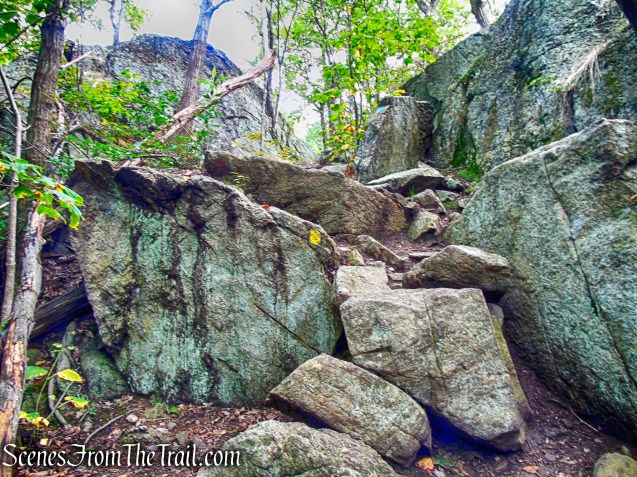
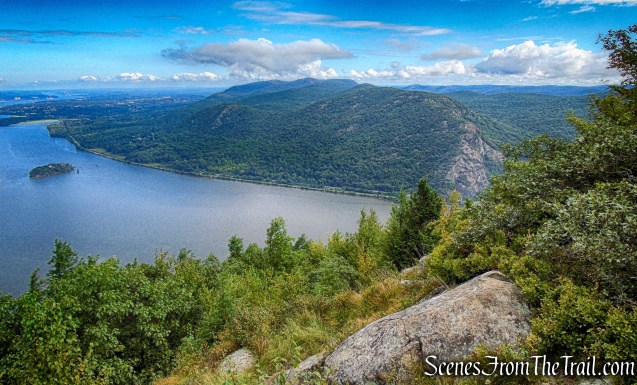
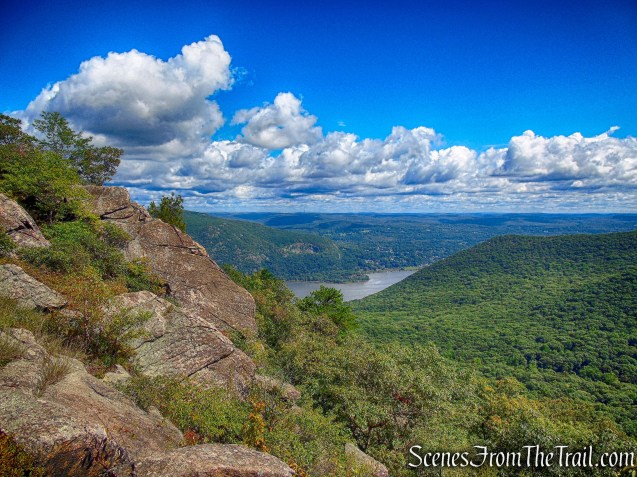
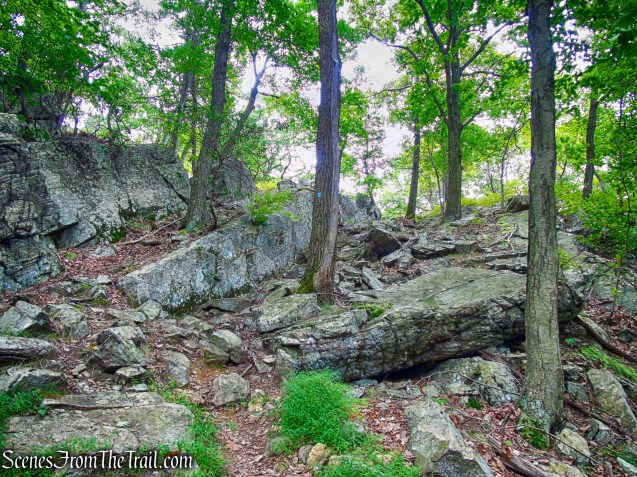
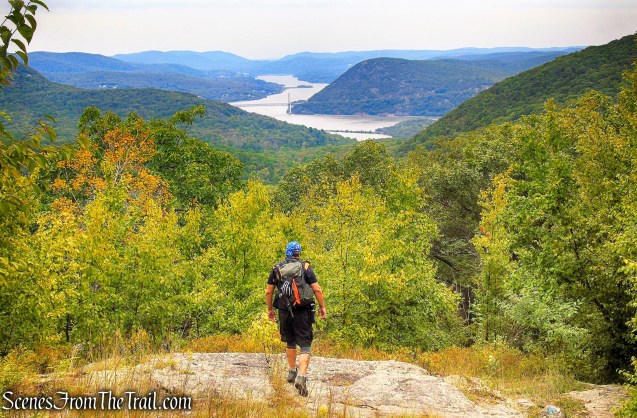
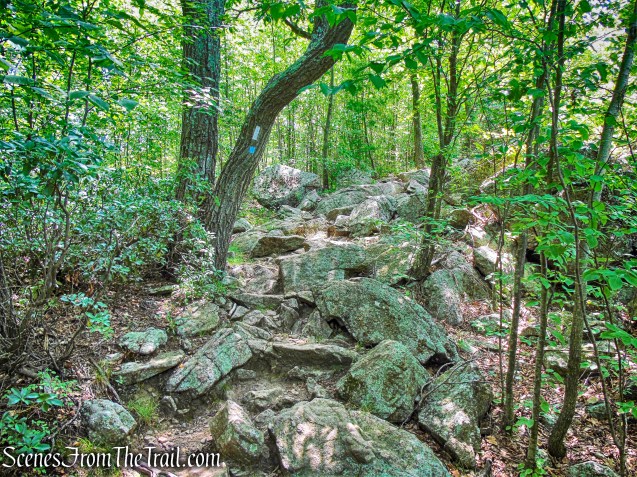
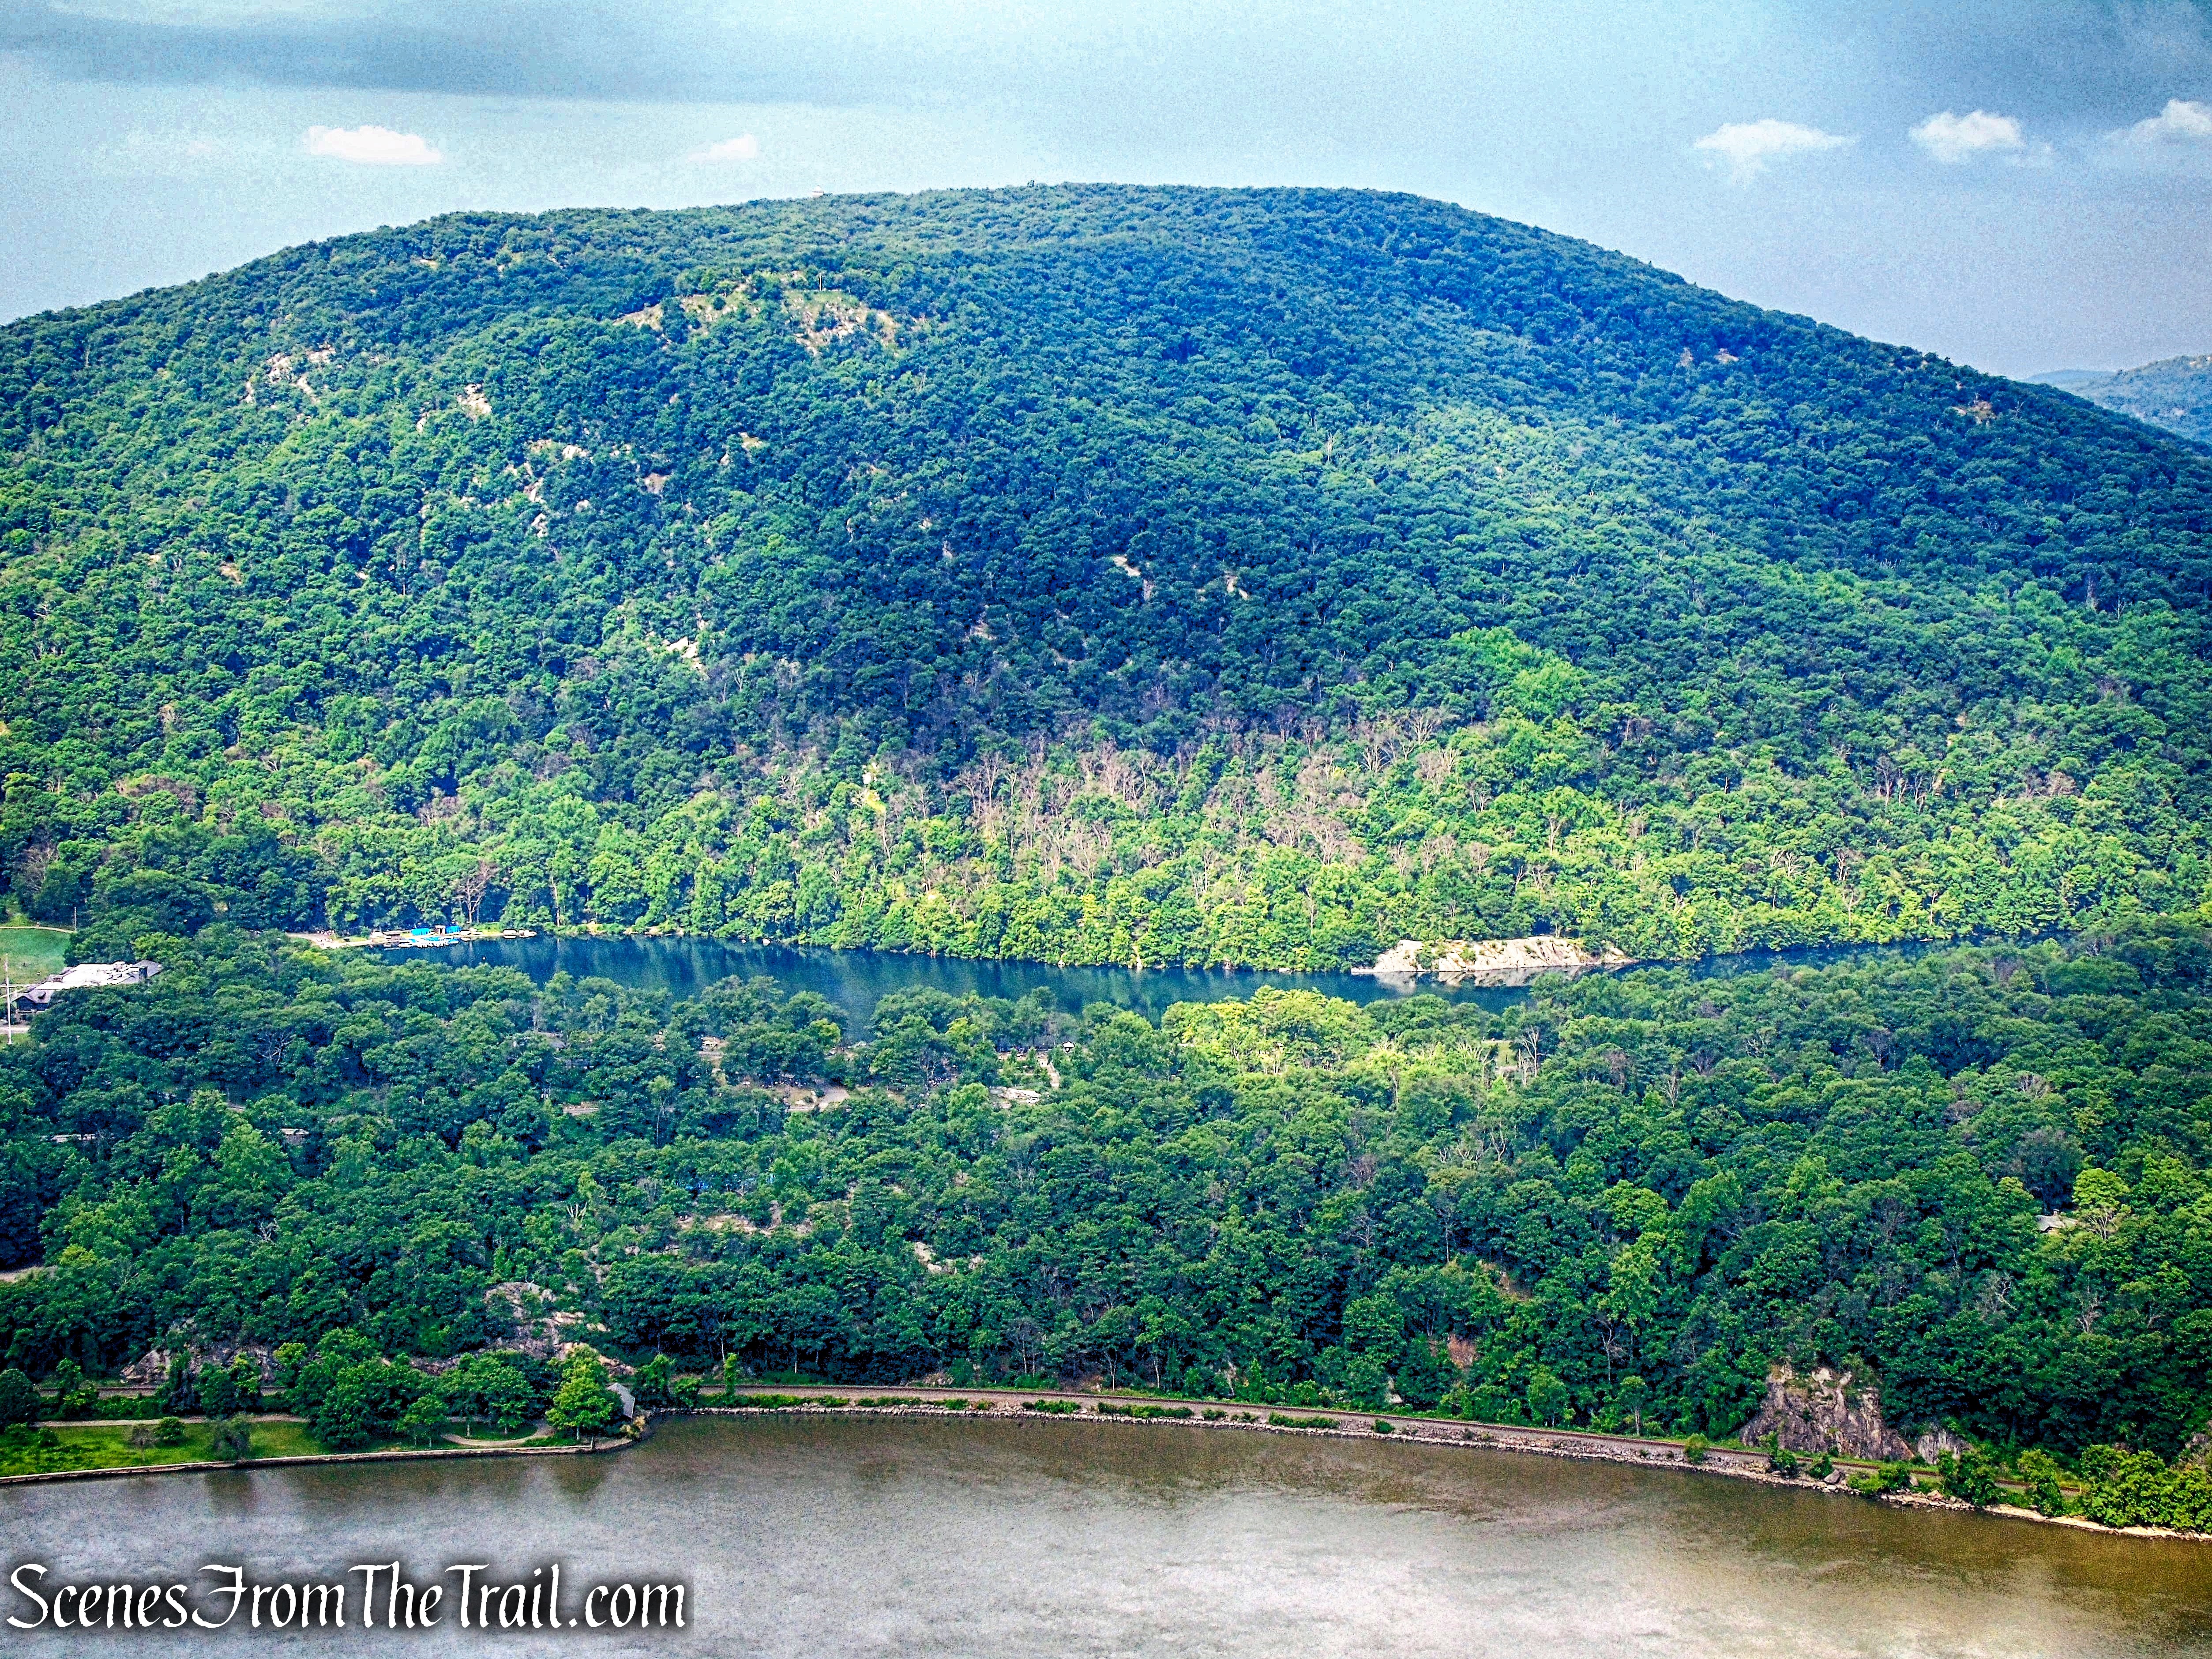
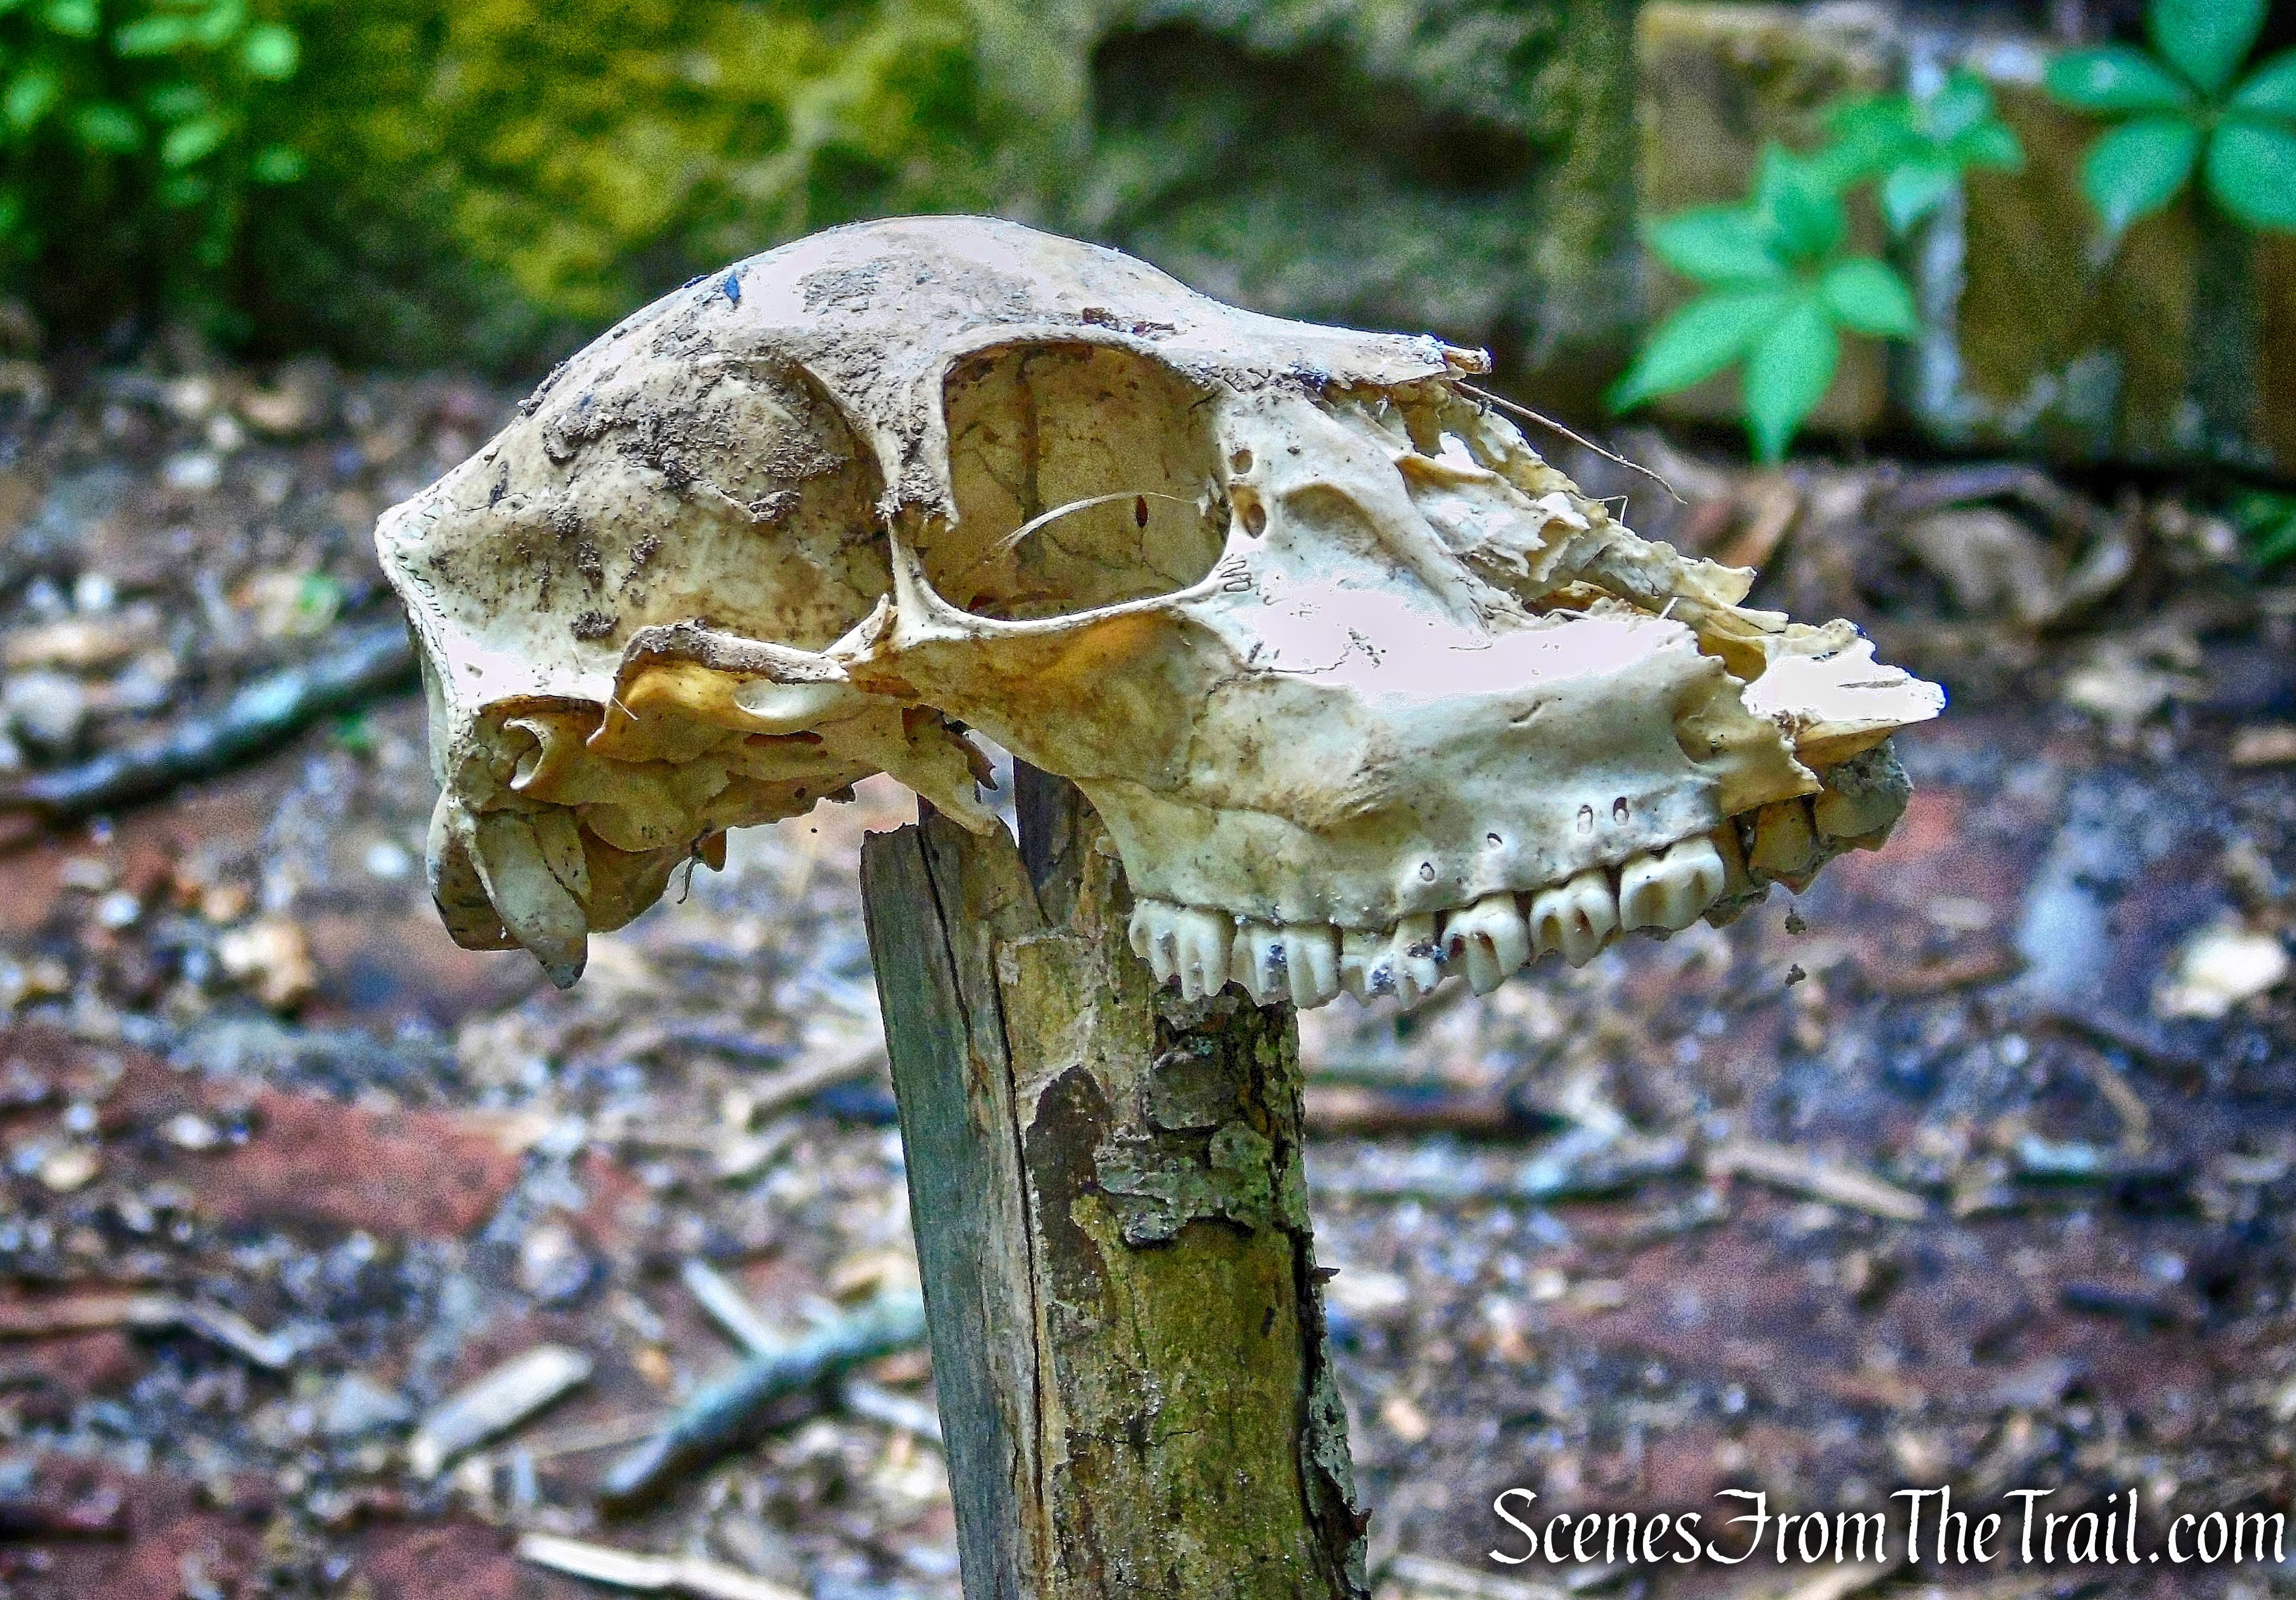
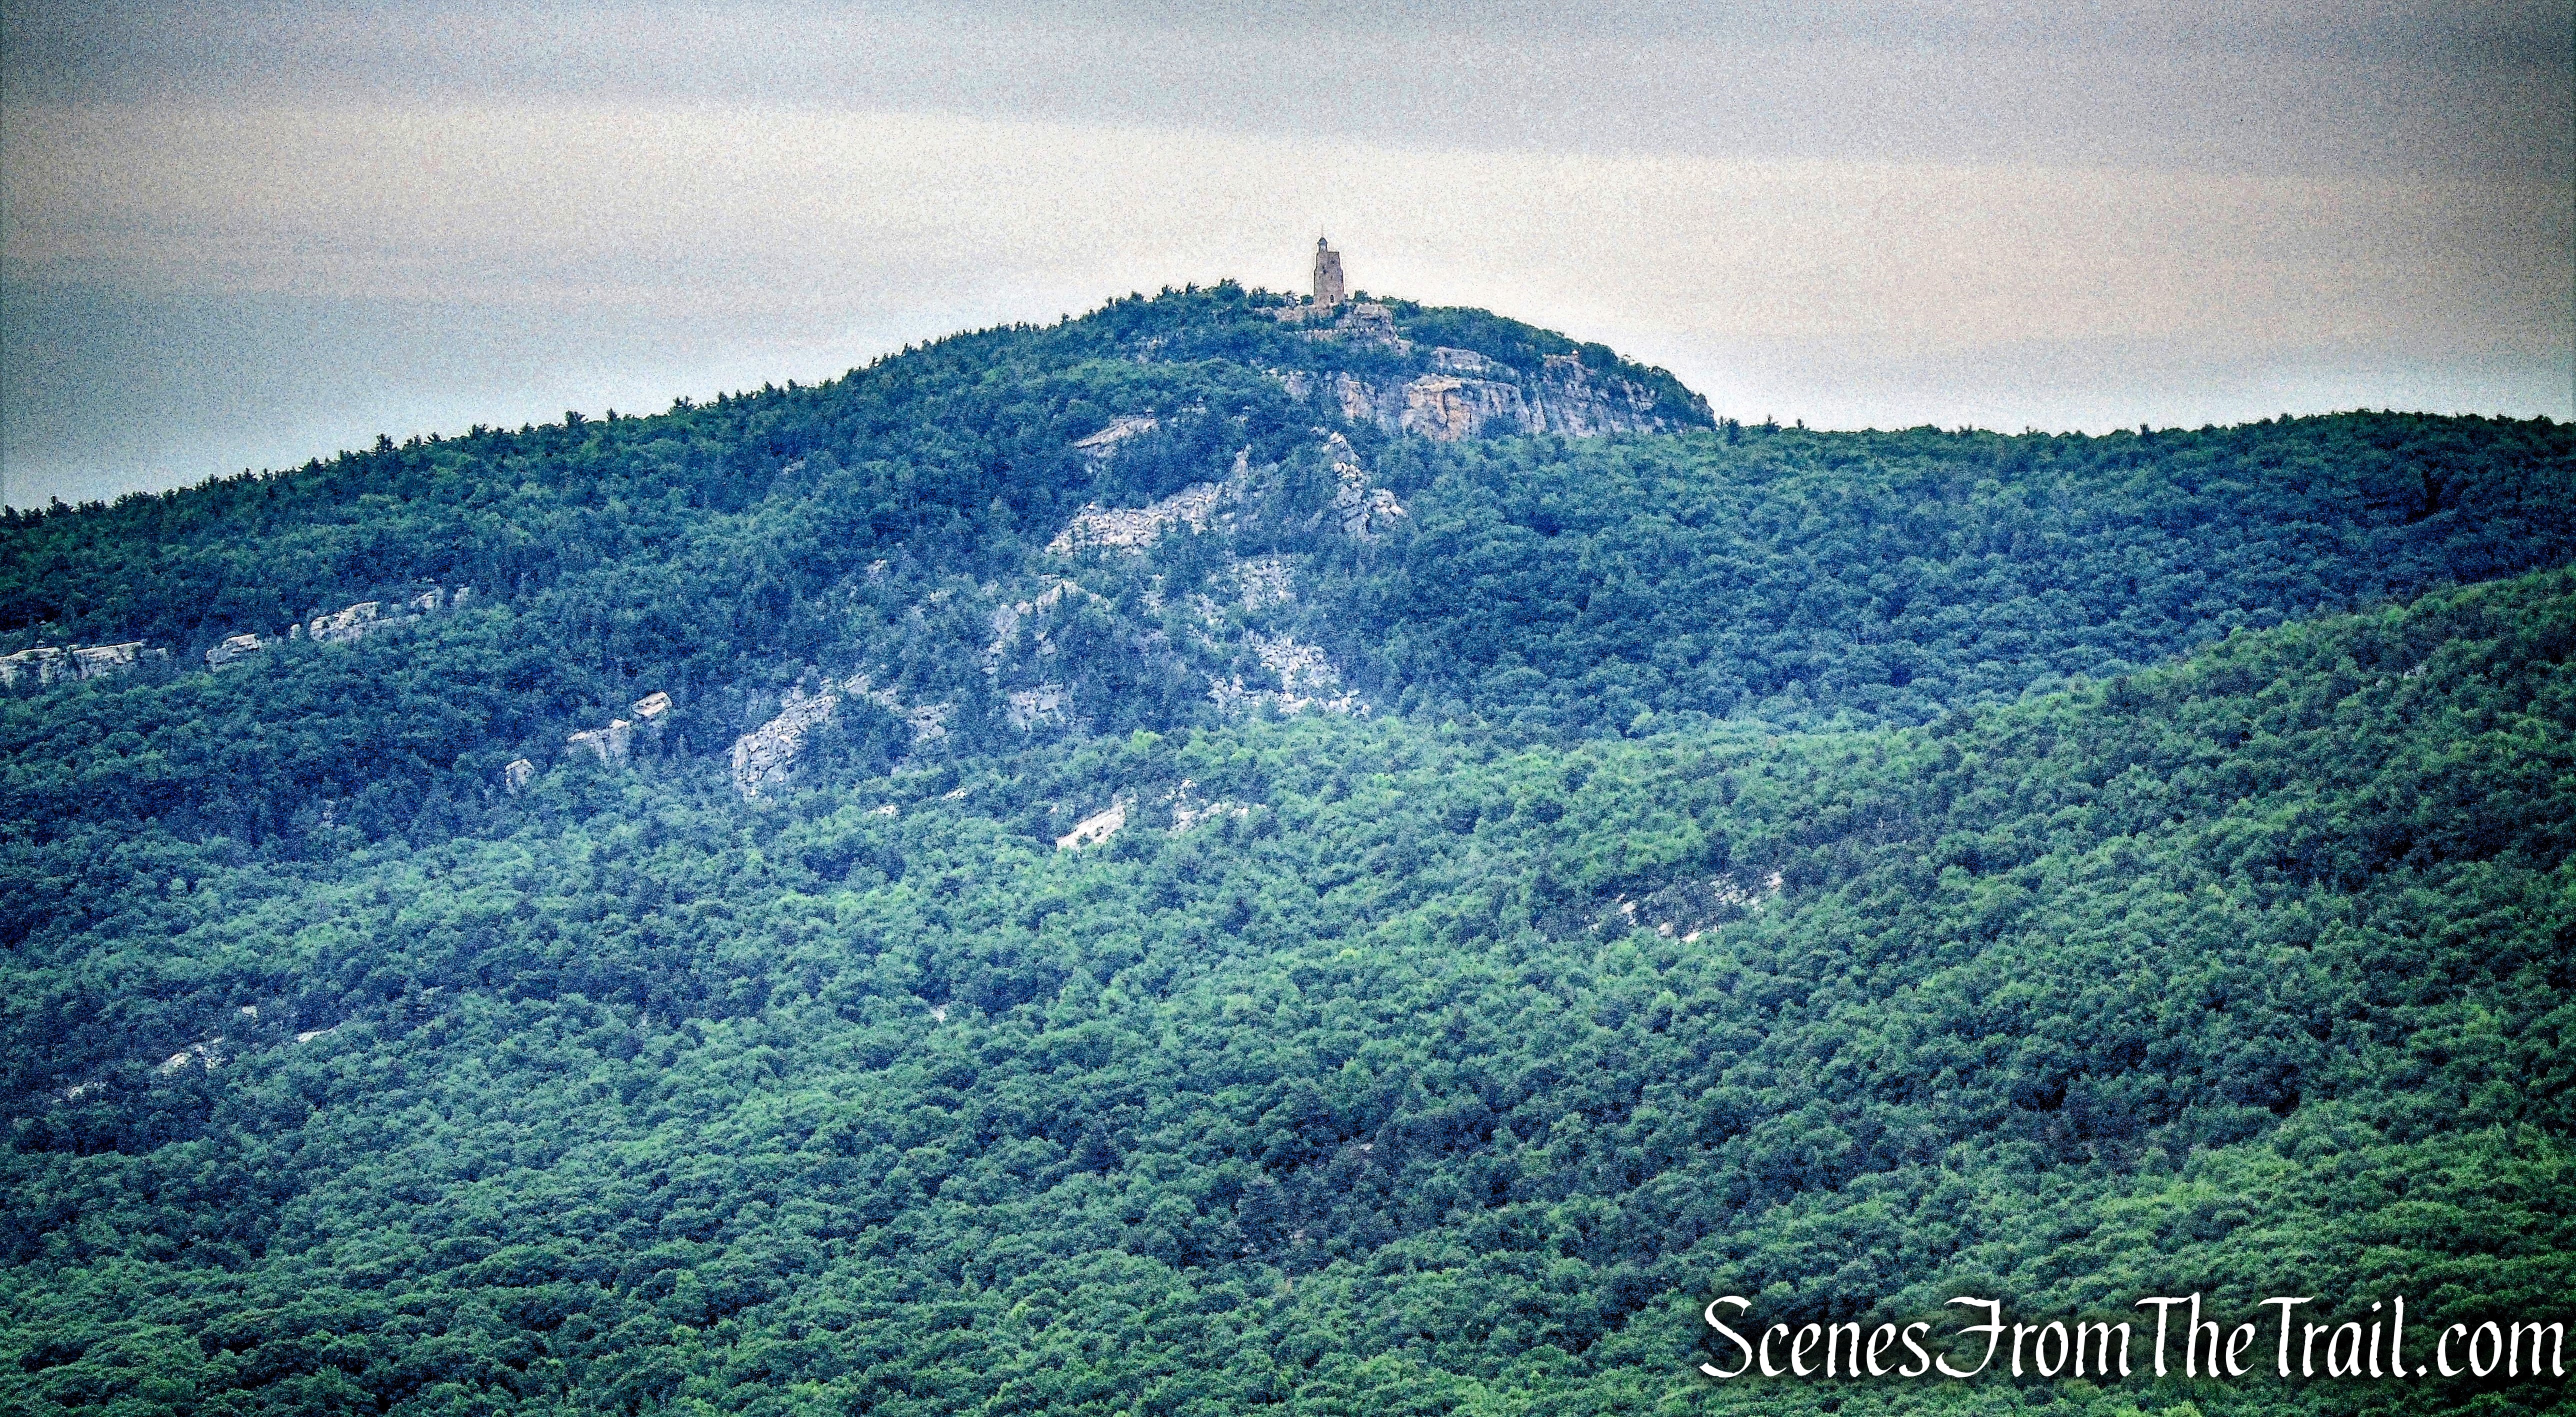
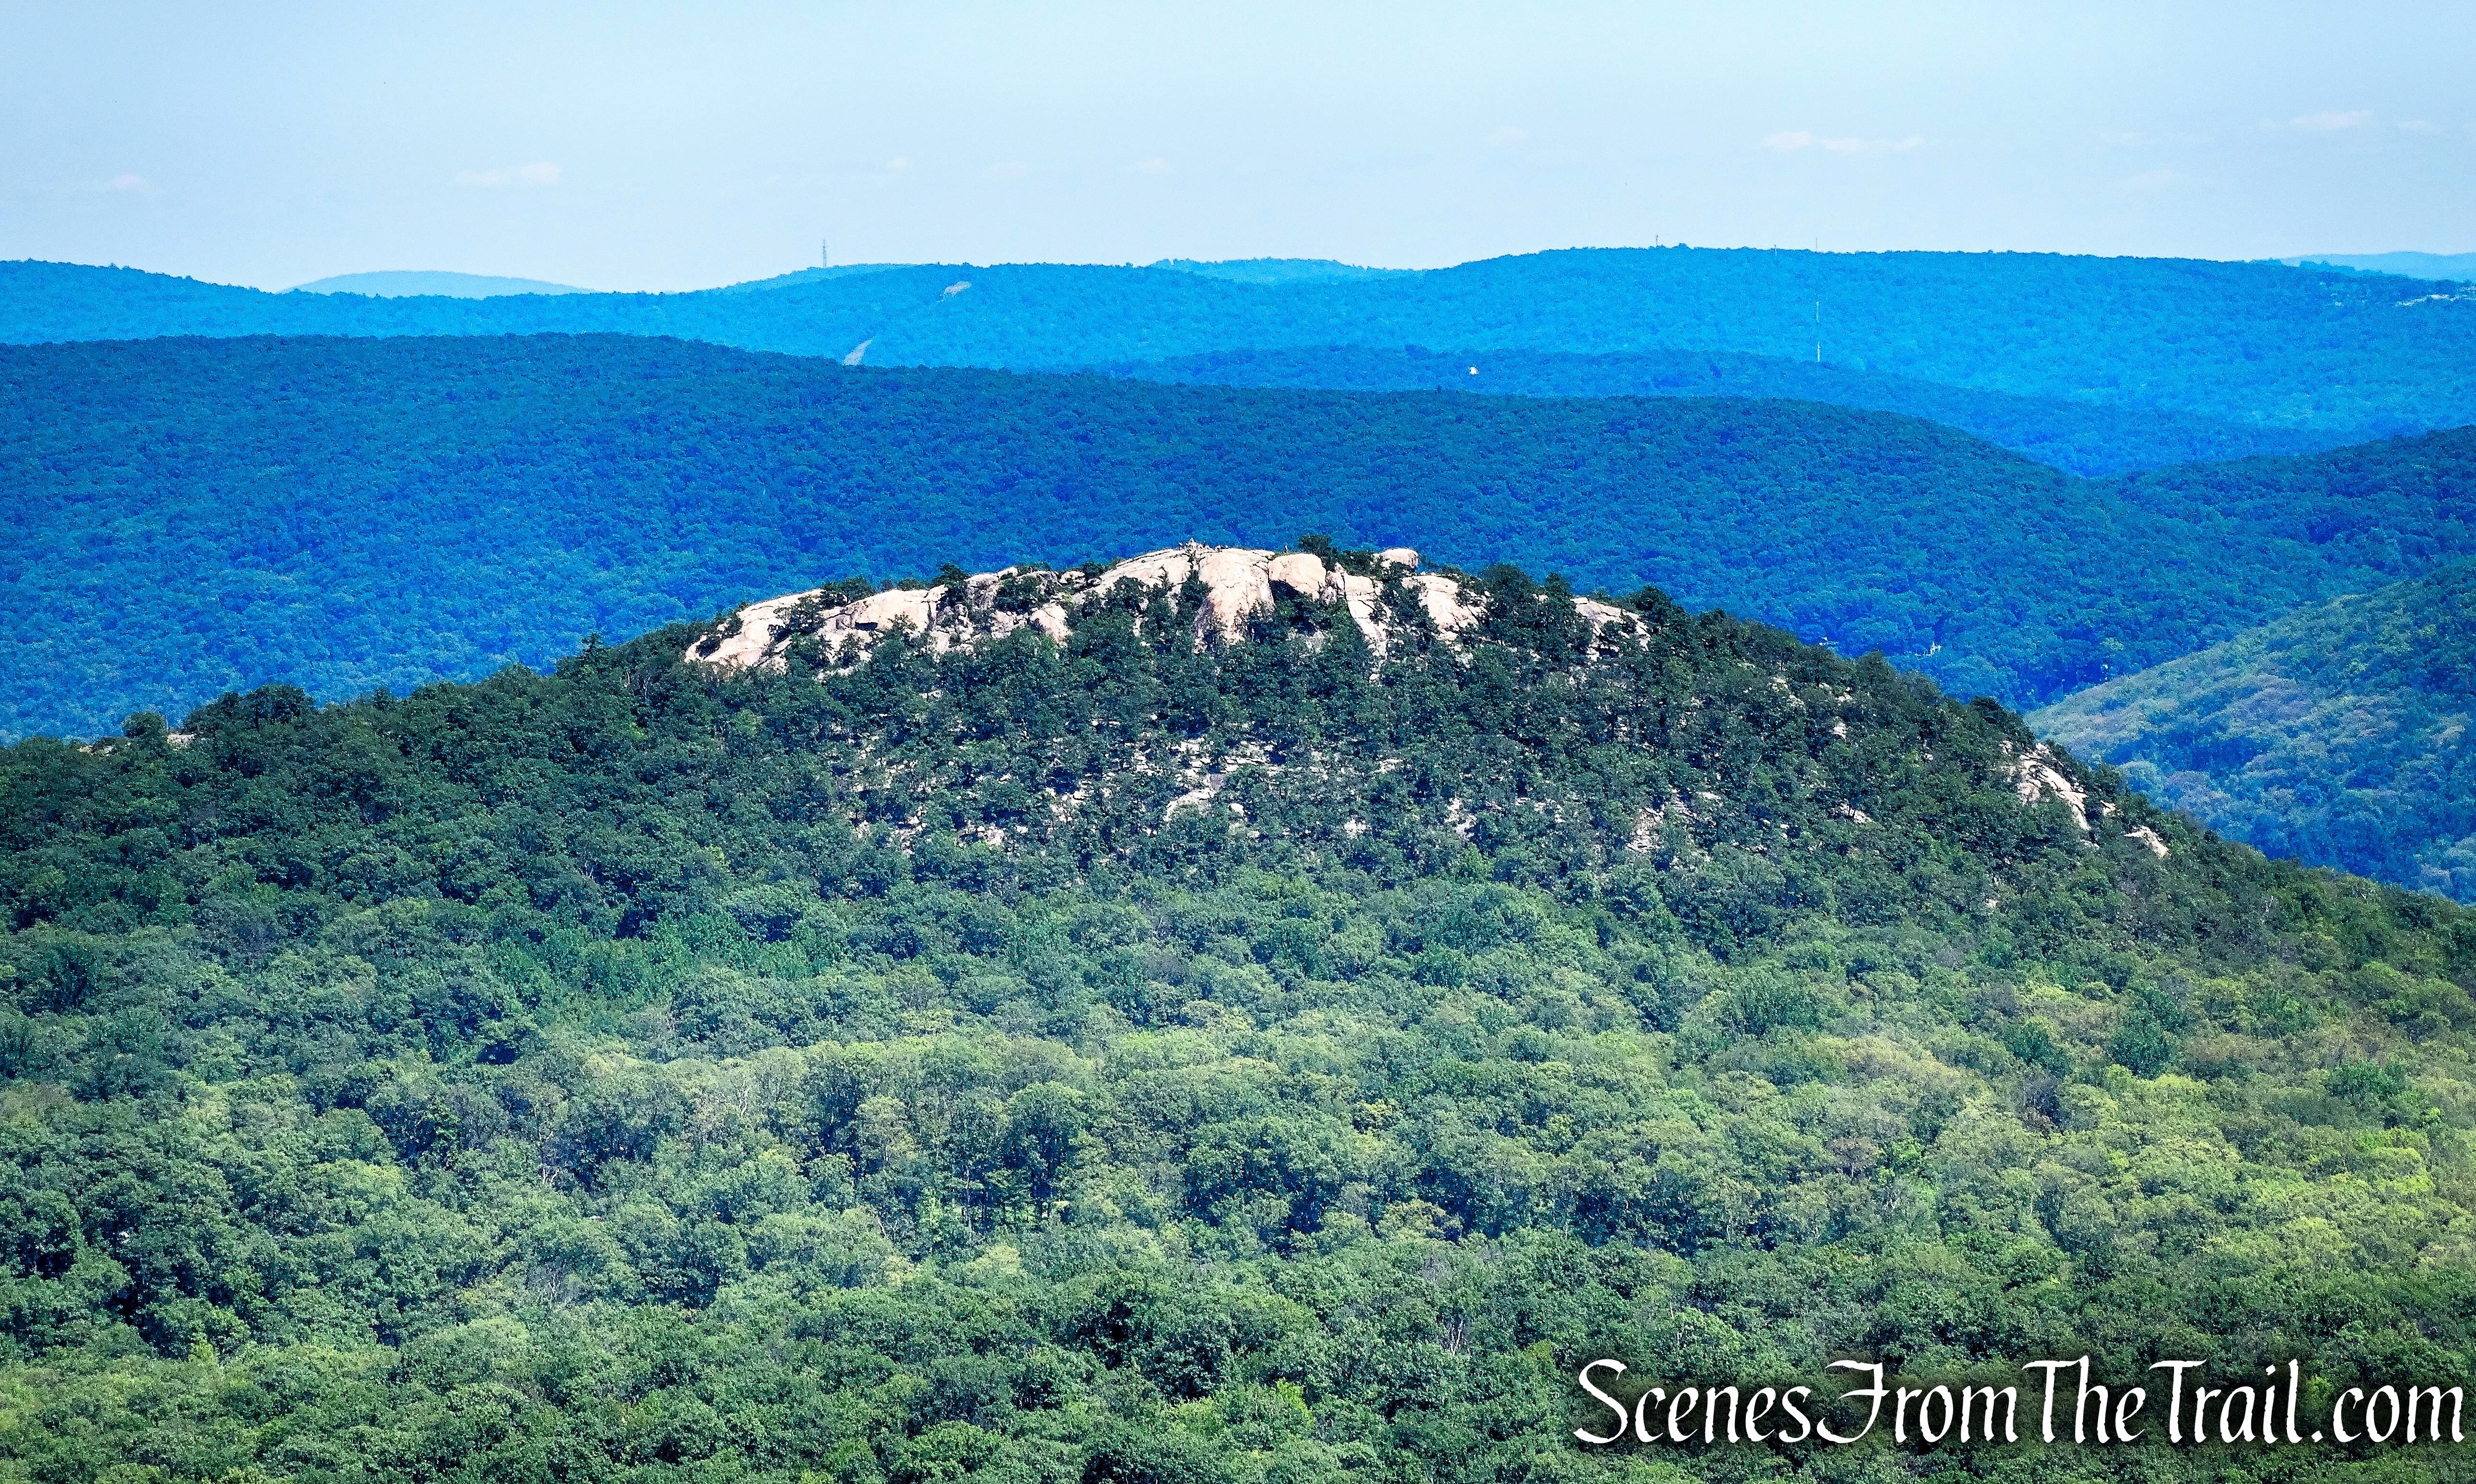
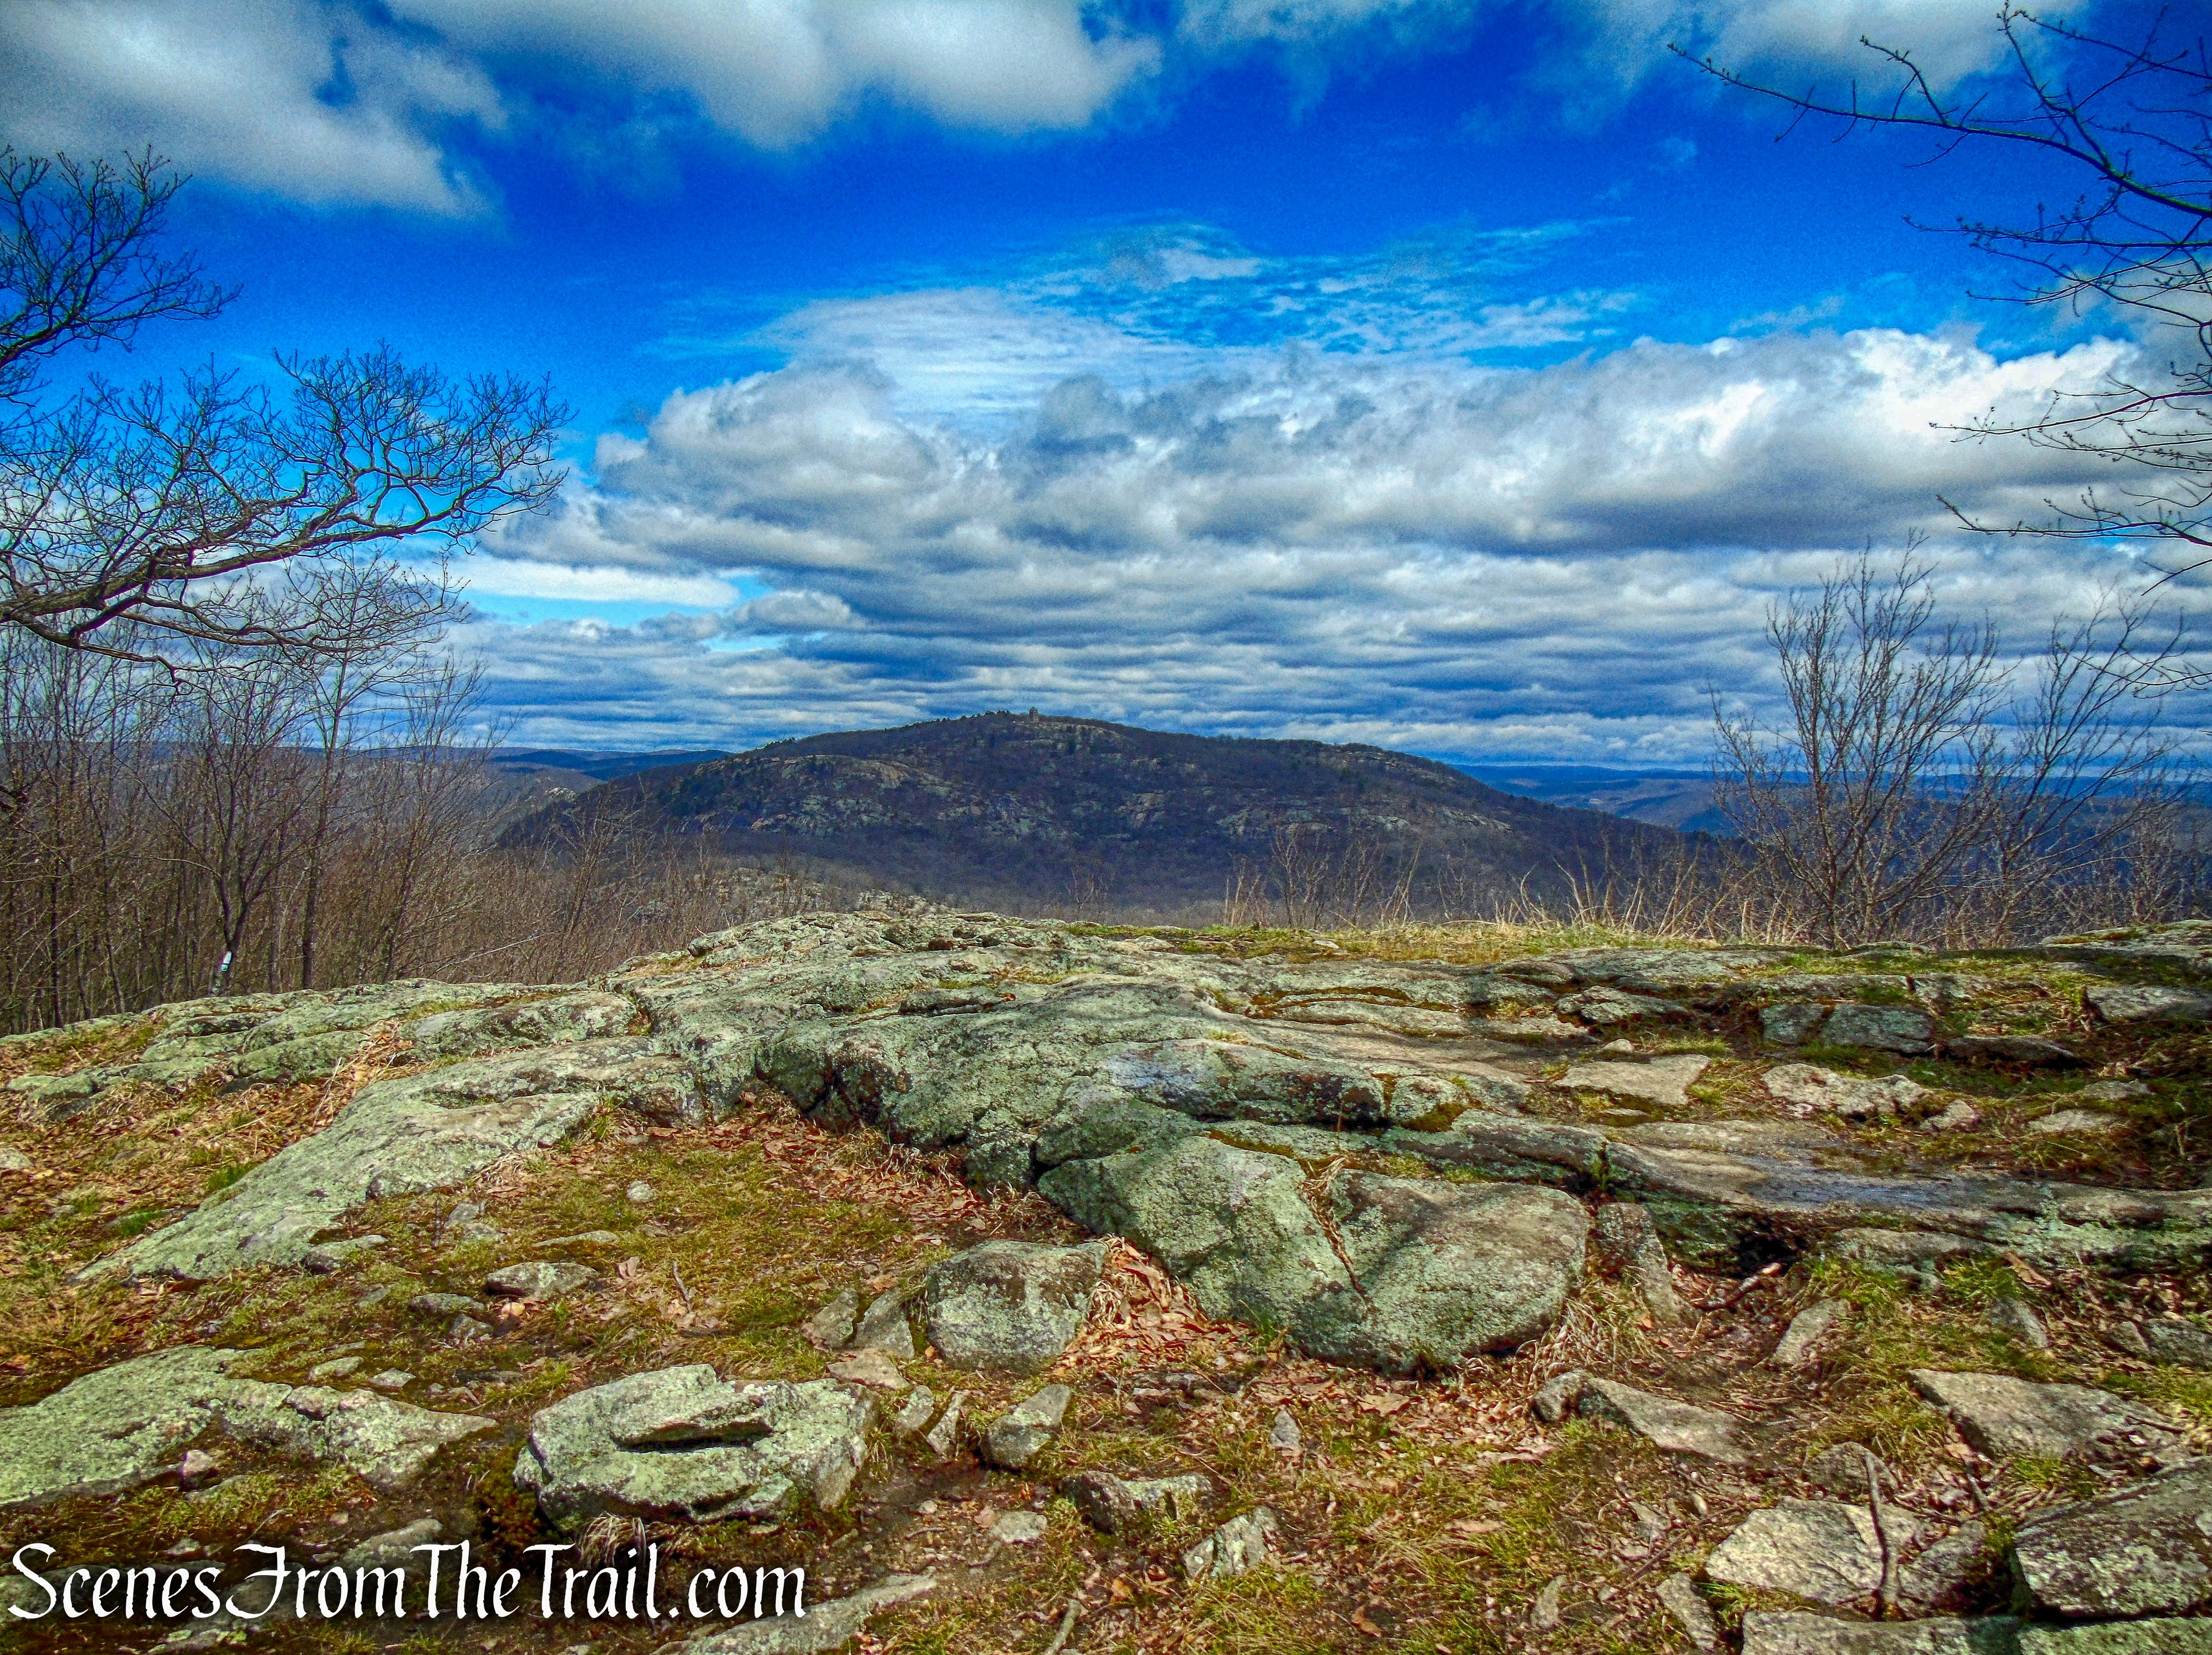
Bull Hill also known as Mount Taurus, is in the village of Cold Spring on the Hudson River in Putnam County in the State of New York. It is part of the mountain range known as the Hudson Highlands. The original name came after a bull that used to terrorize the mountain was chased by indignant inhabitants. A hunting party drove the bull over the hill. In an attempt to flee the mountaineers, the bull plunged out into space and fell down. Its broken and shapeless mass on the rocks was memorialized in the name of the mountain the bull used to haunt. Bull Hill has an extensive trail system and offers hikers sweeping views of the river and neighboring peaks from rock outcrops near its wooded 1,421-foot summit. Don’t let the name fool you. This is a mountain, not a hill.
Bull Hill as viewed from Storm King Mountain – September 15, 2018
Hudson Highlands State Park Preserve encompasses much of the eastern side of the Hudson River gorge. Totaling 7,400 acres, it has many sections, all administered by the New York Office of Parks, Recreation and Historic Preservation. Many of these sections have dramatic scenery or history, often both. The area was strategically important during the Revolutionary War, resulting in fortifications on both sides of the river, and provided the backdrop for several key events from that era. Trails in this park often include steep climbs and panoramic views of the Hudson River.
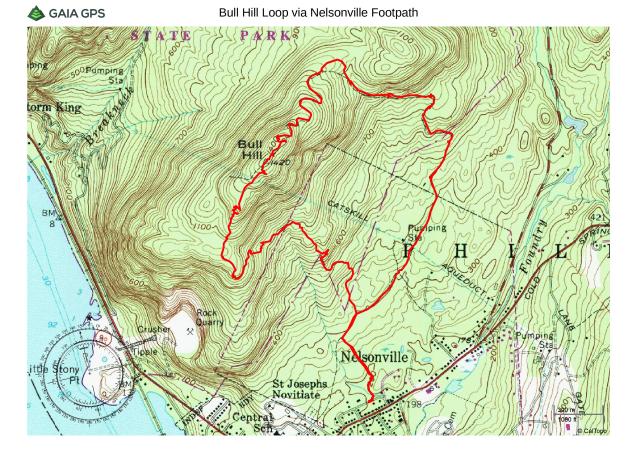
I hiked Bull Hill via the Washburn Trail in December 2016. It was a frigid day and the strong wind coming off the river cut like a knife. The Washburn Trail (2.3 miles) is a very strenuous trail that ascends 1400 feet from the river, up the western slope, to the summit of Bull Hill. Climbing Bull Hill with my back to the river, I missed several viewpoints. On this hike I wanted to descend as the river appears in front of me, in order to scope out any views available. Starting the hike on the Nelsonville Footpath (2.6 miles), although still steep is a much more gradual approach than the Washburn Trail. This Lollipop Loop was done in a counterclockwise fashion, beginning in the Nelsonville Nature Preserve.
Trails used: The distances shown are approximately the distances traveled during this hike and not necessarily the total length of the actual trails.
Nelsonville Footpath (green) – 2.6 miles
Washburn Trail (white) – 1.2 miles
Undercliff Trail (yellow) – 1.25 miles
Bull Hill Loop via Nelsonville Footpath
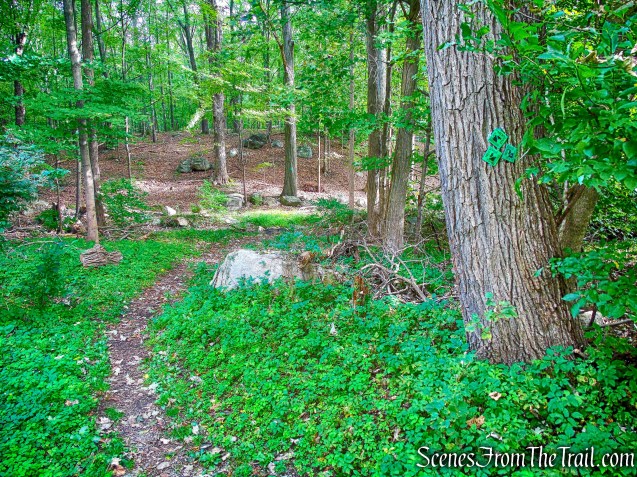
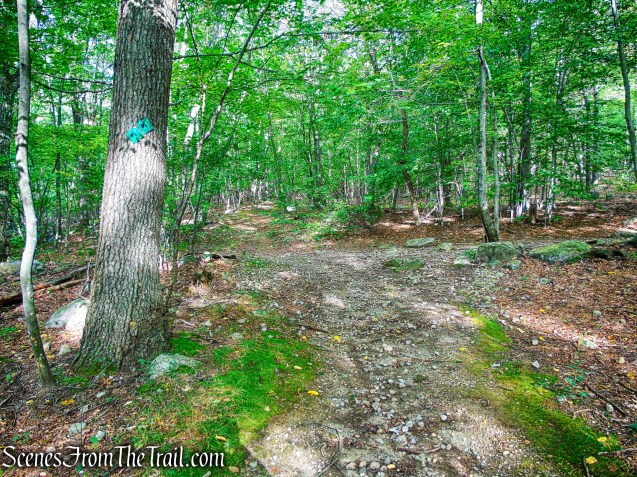
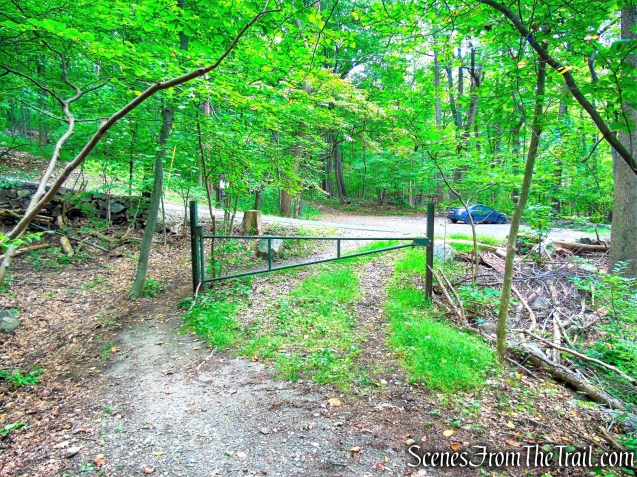
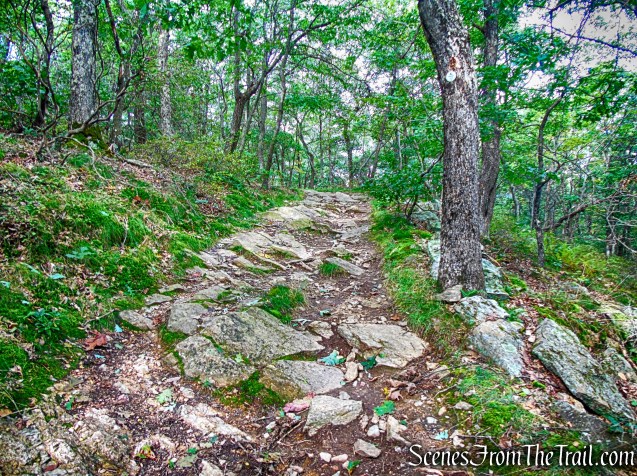
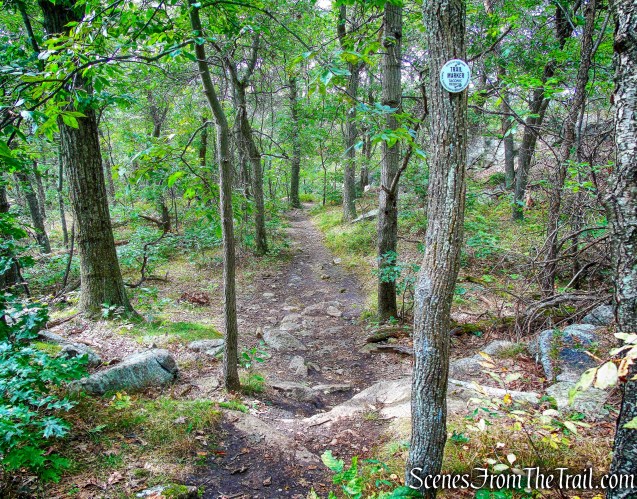
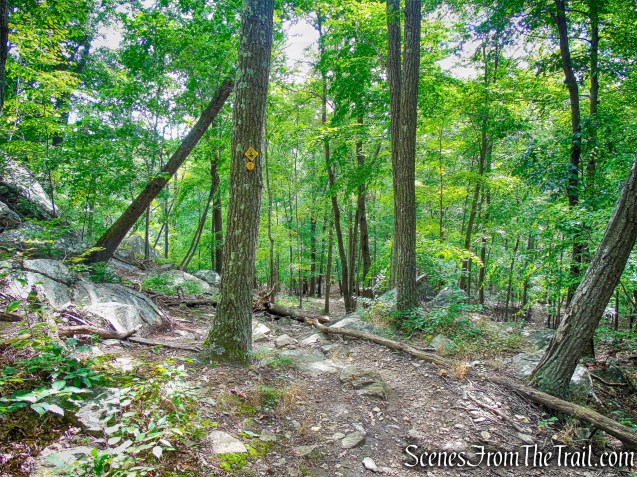
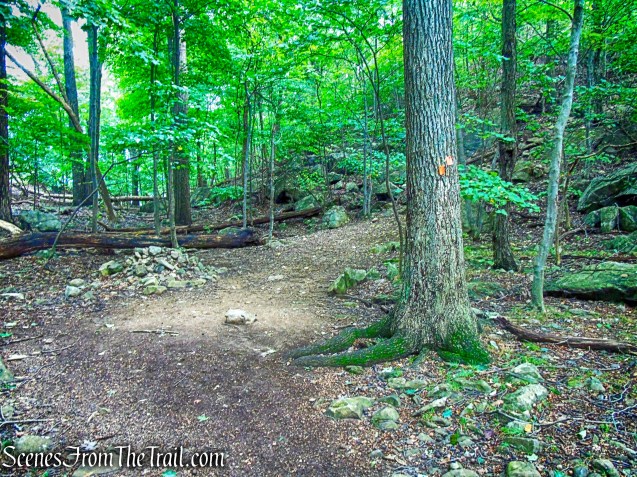
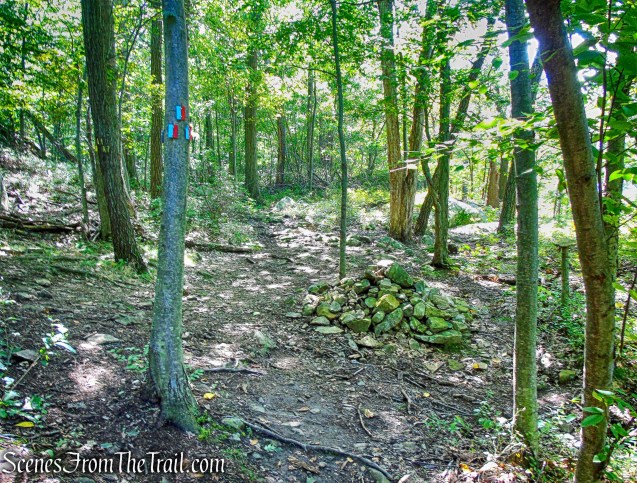
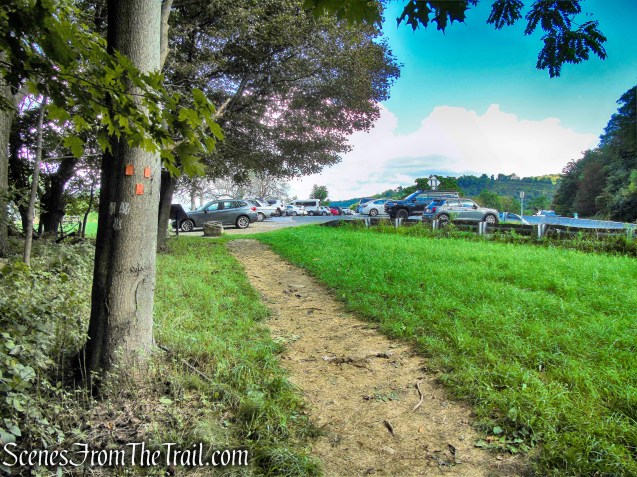
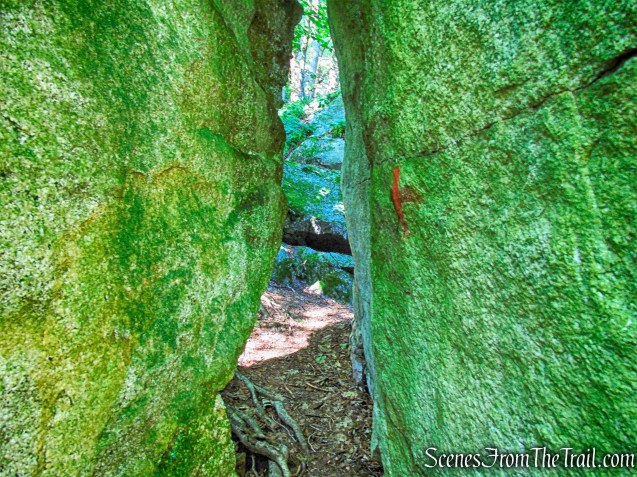
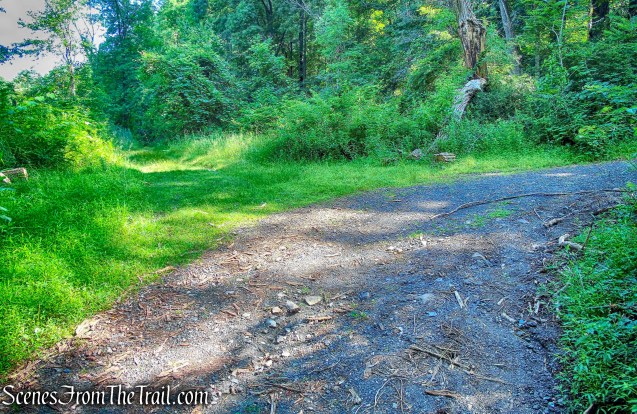
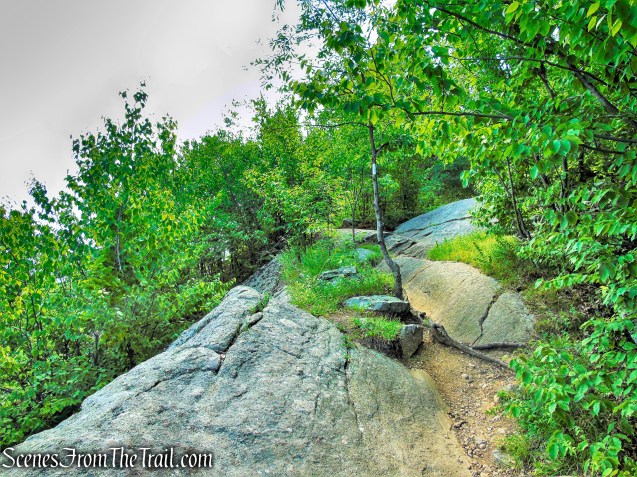
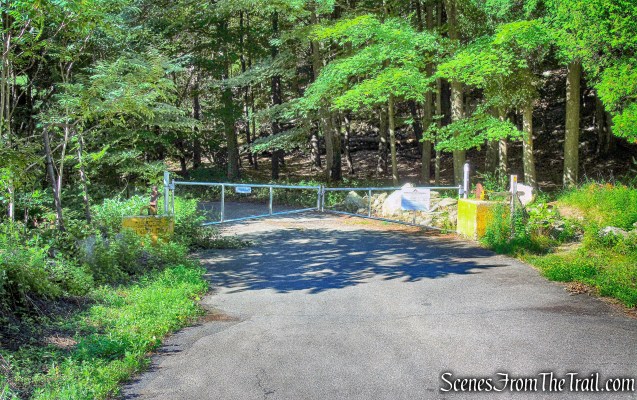
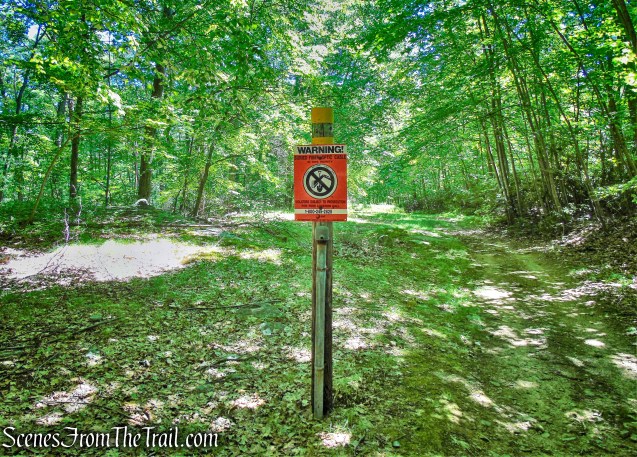
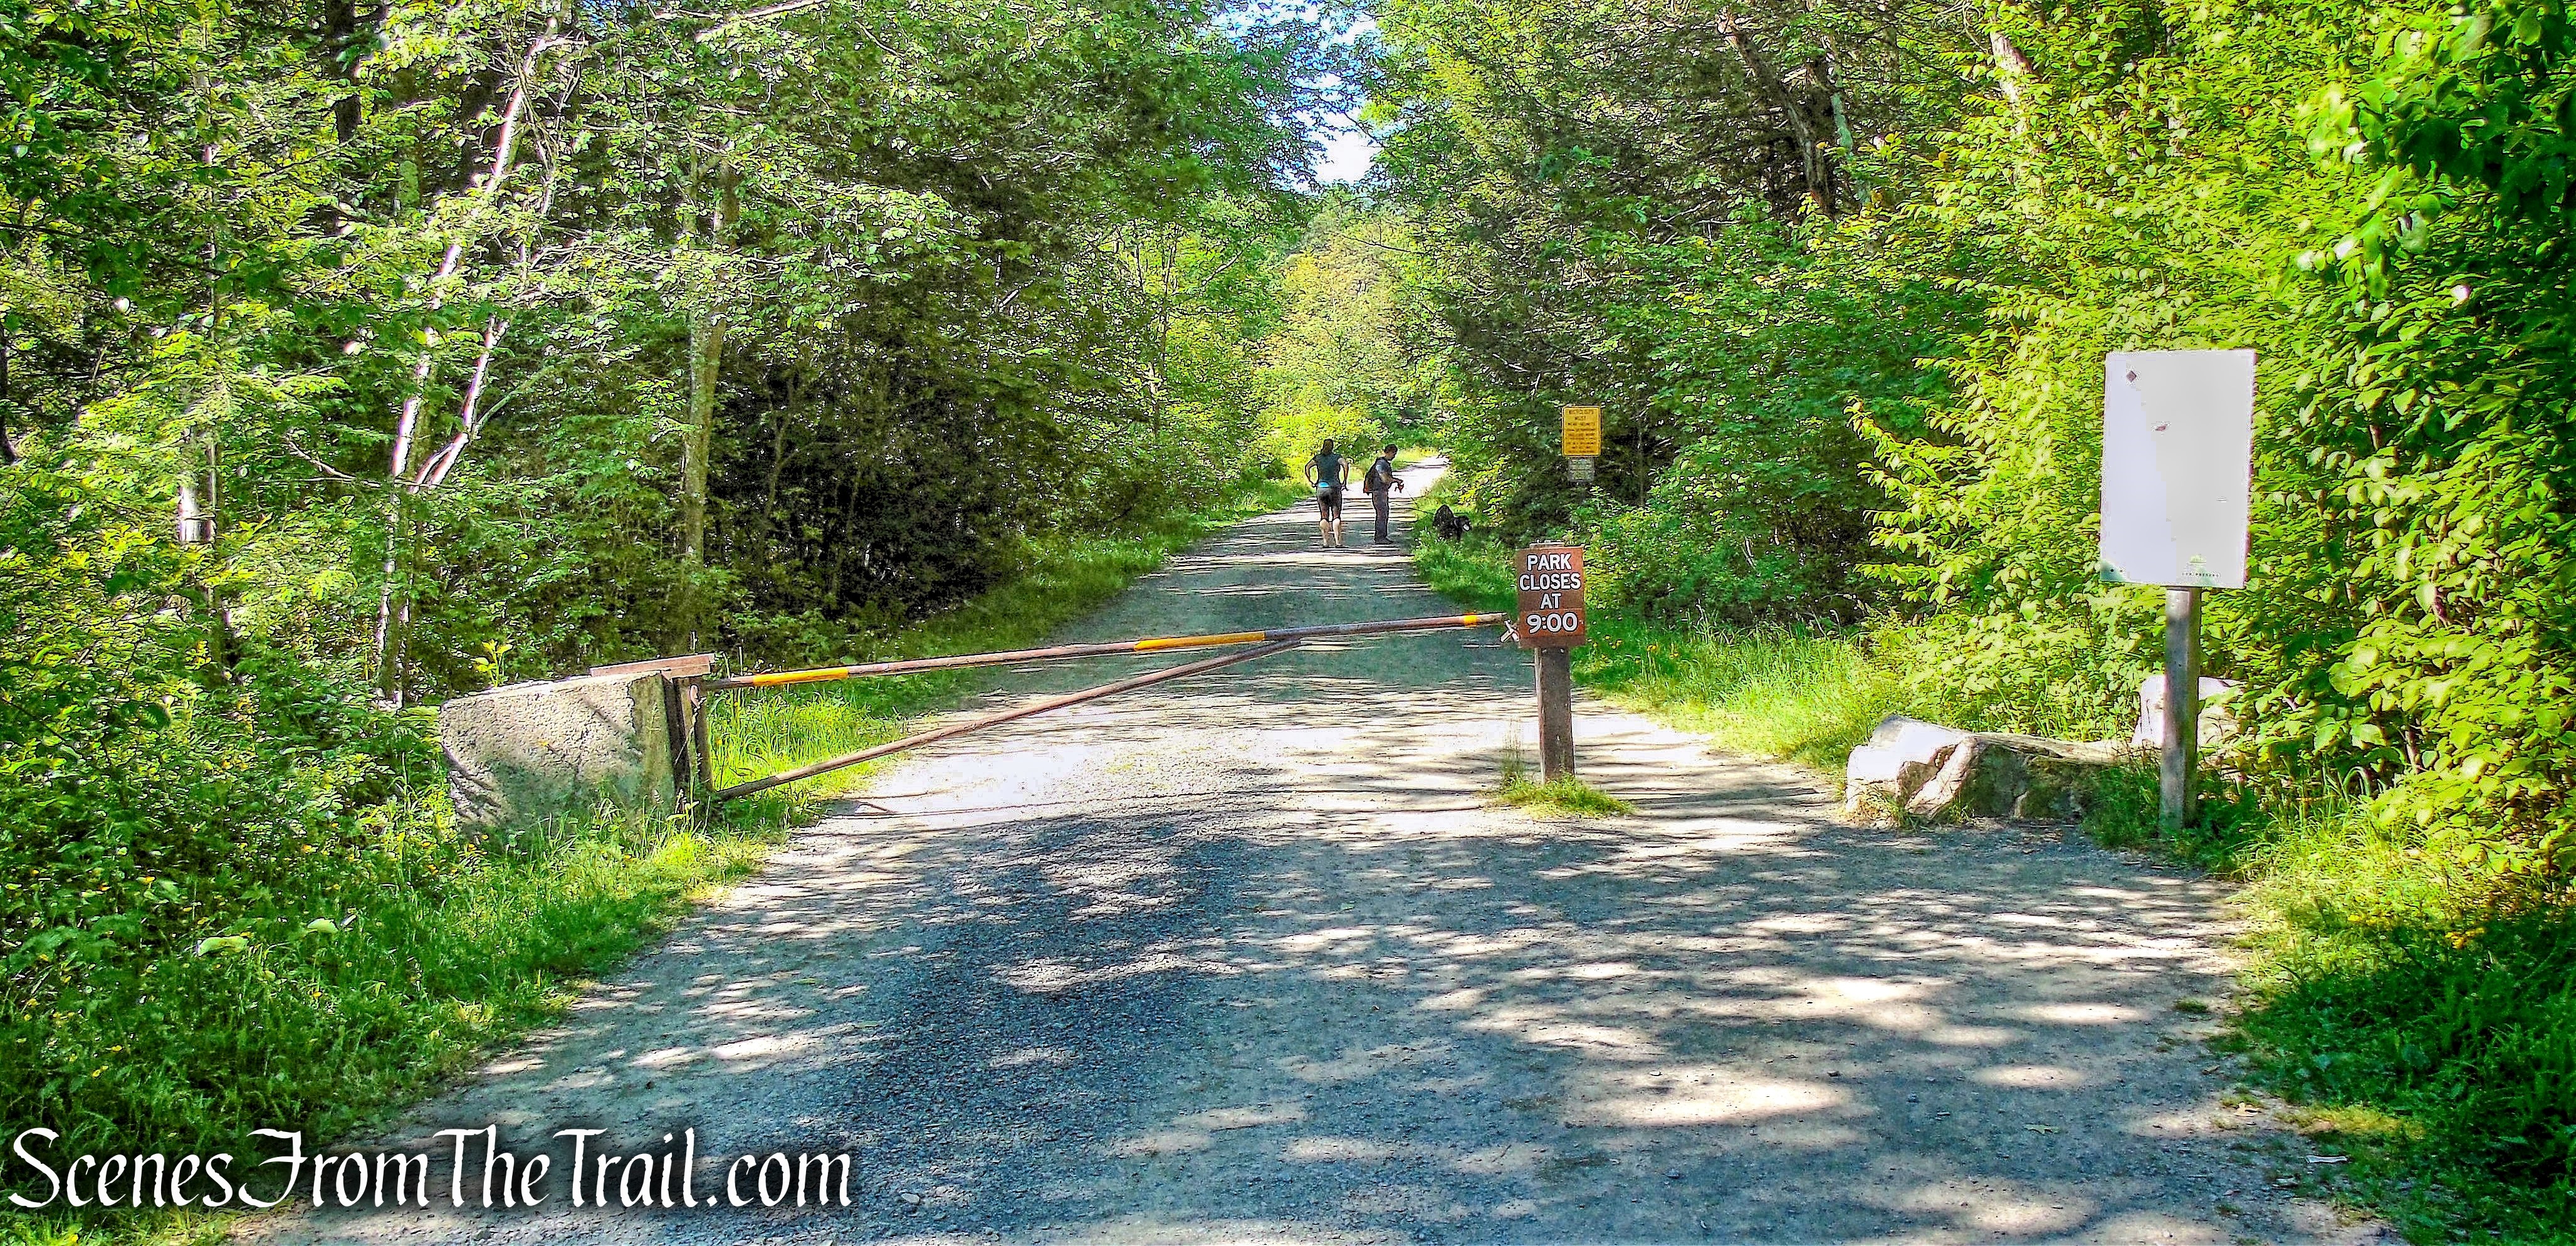
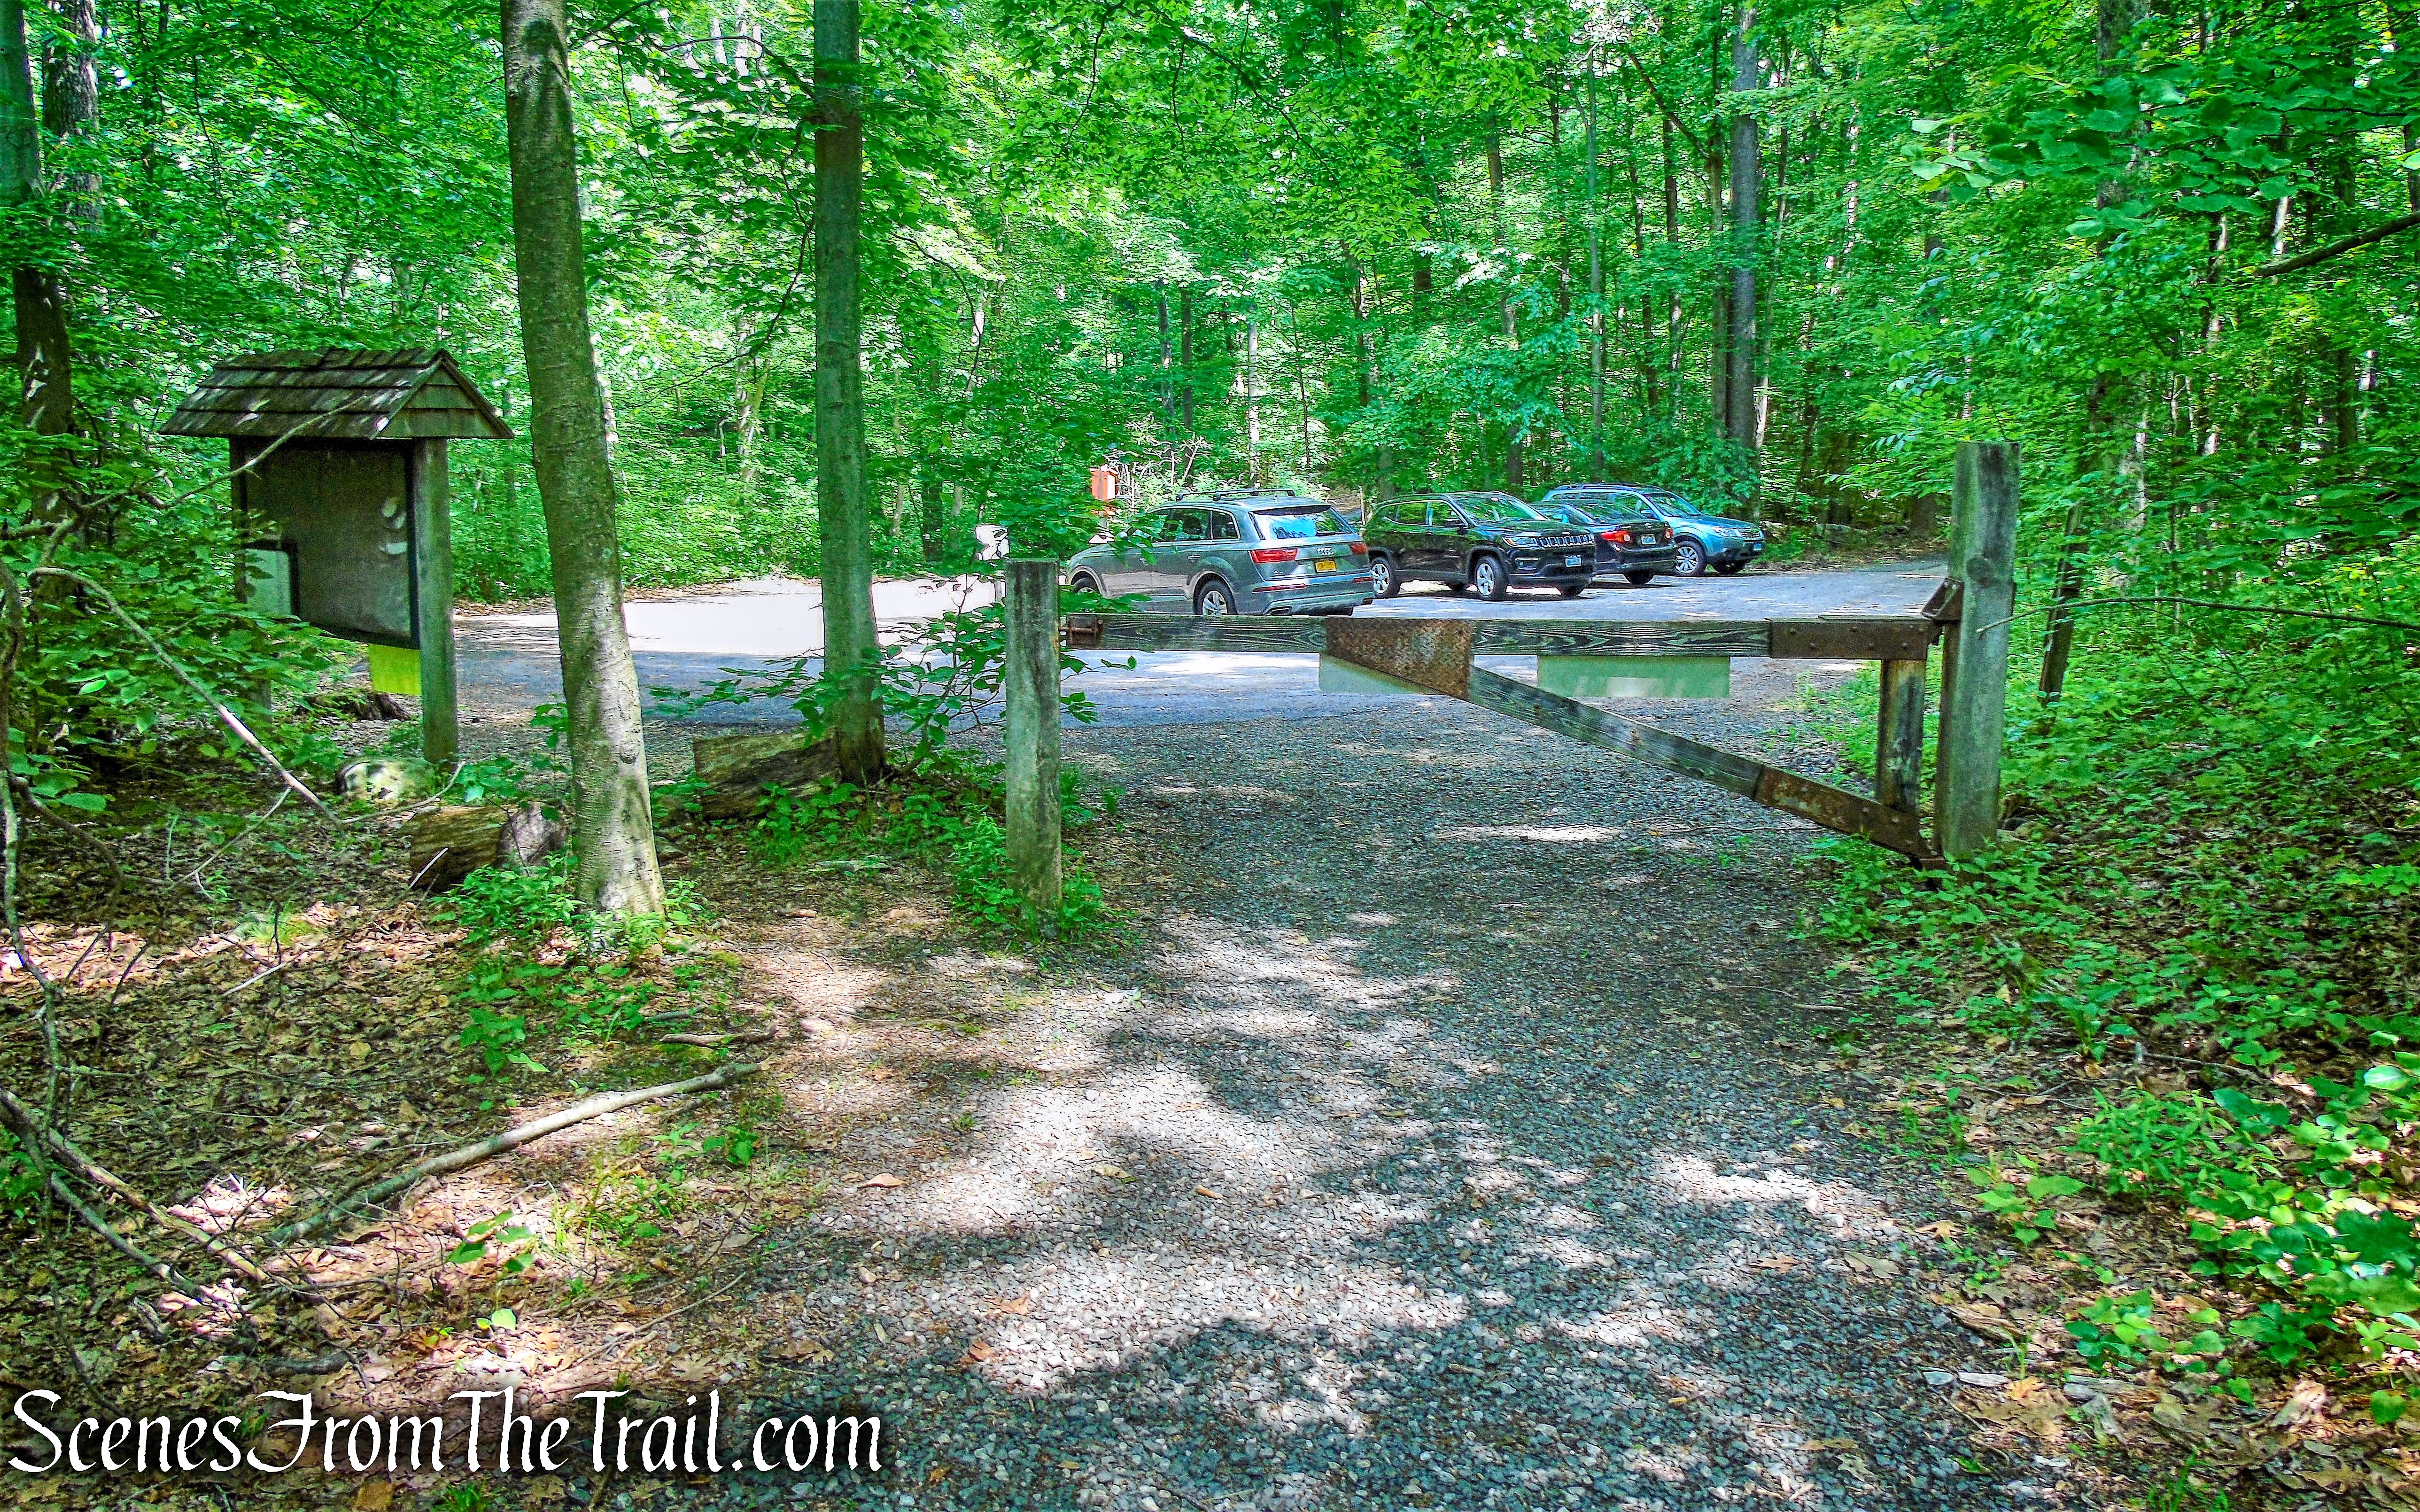
While researching this hike, it was indicated on the trail map and on other hiking websites, that parking was allowed in the Masonic Lodge lot on Secor Street. That is also the trailhead for the yellow-blazed Undercliff Trail which begins at the back of the lot. Upon arriving on the Saturday morning of this hike, that didn’t seem to be the case. There are signs throughout the lot that read: “NO PARKING and NO TRESPASSING.” I was confused and there was no one around to ask. Not wanting to take any chances, we decided to park on the street. Directly across from 29 Secor Street is the start of the green-blazed Nelsonville Footpath. There is pull off parking for three cars right by the entrance to the trail. There is also street parking available nearby.
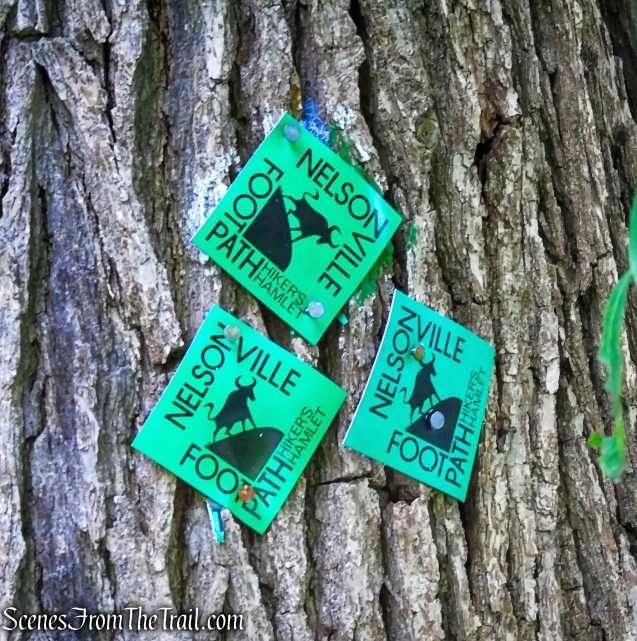
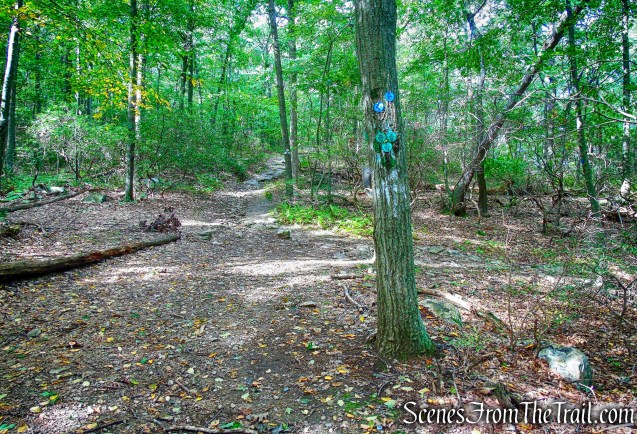
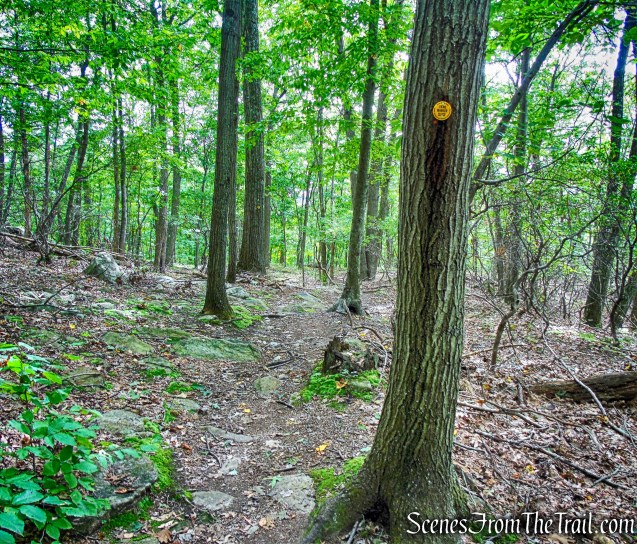
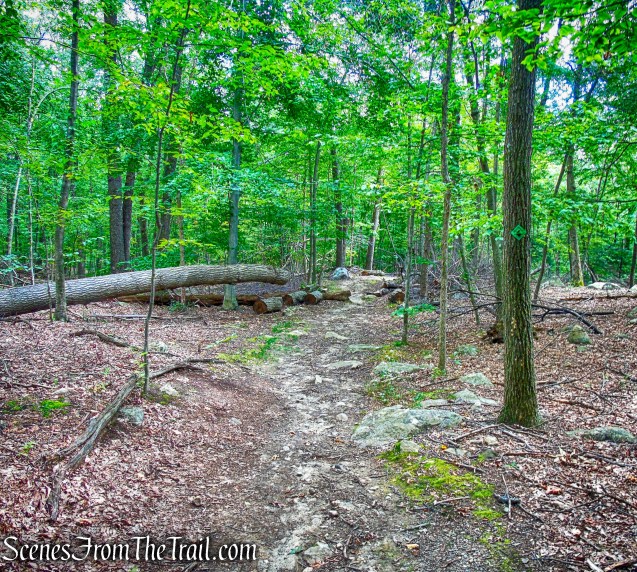
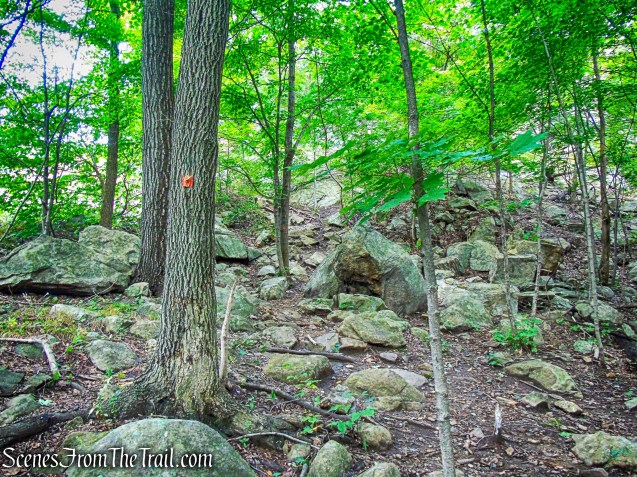
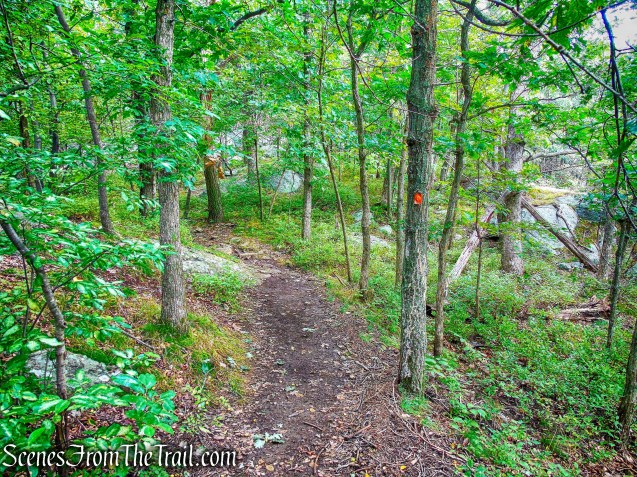
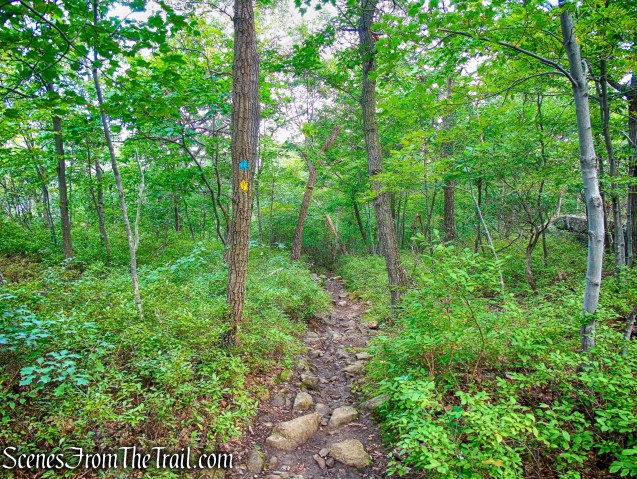
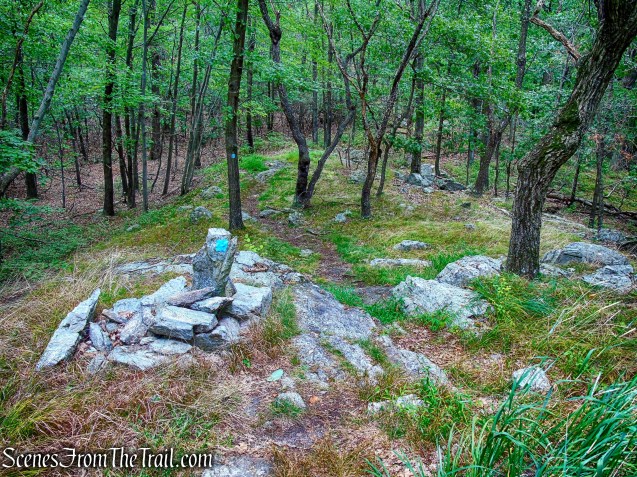
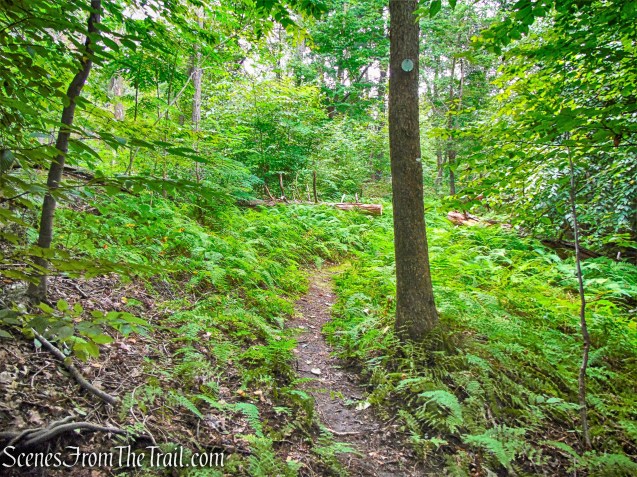
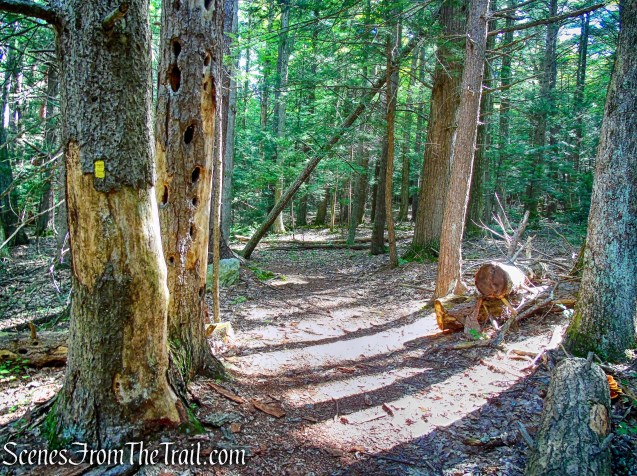
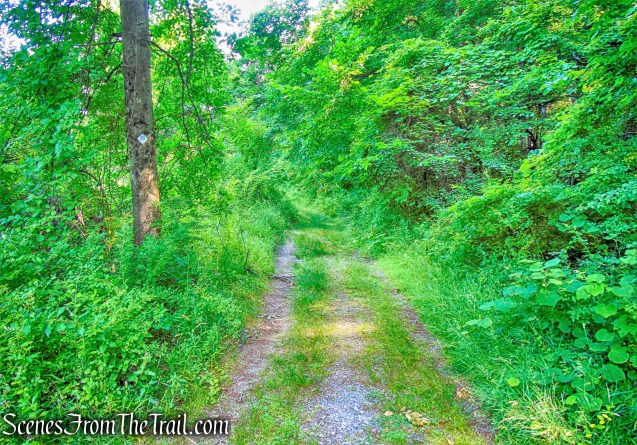
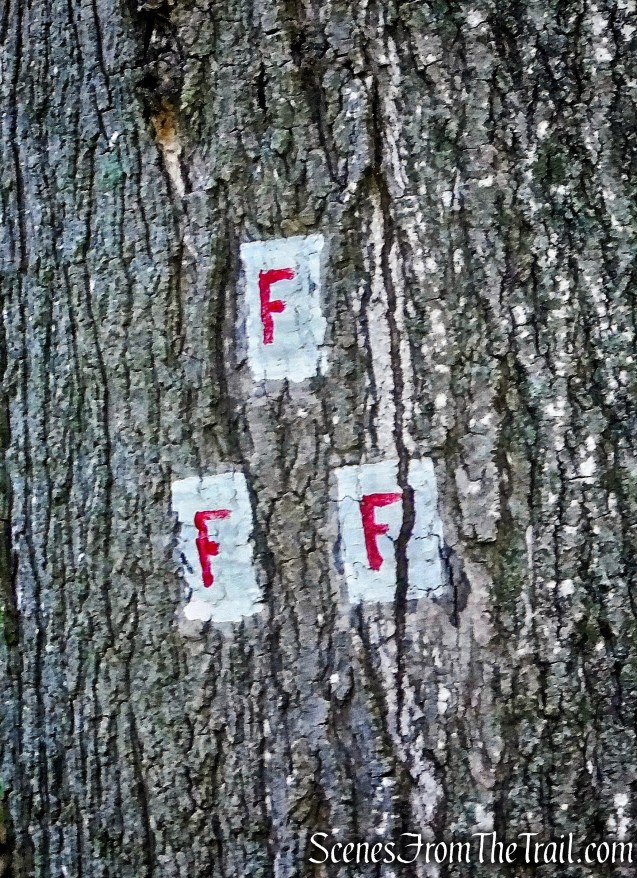
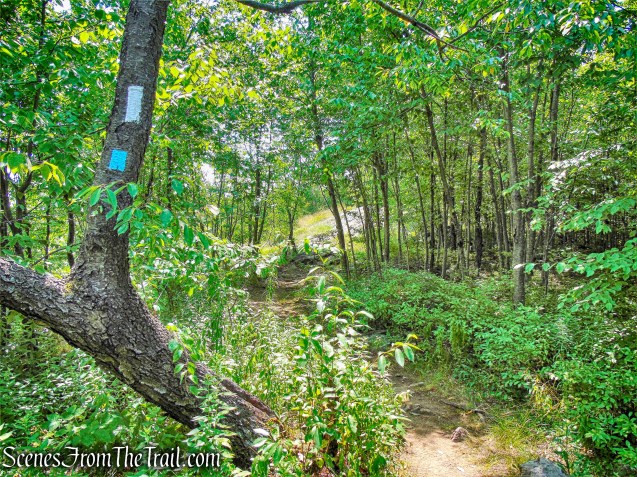
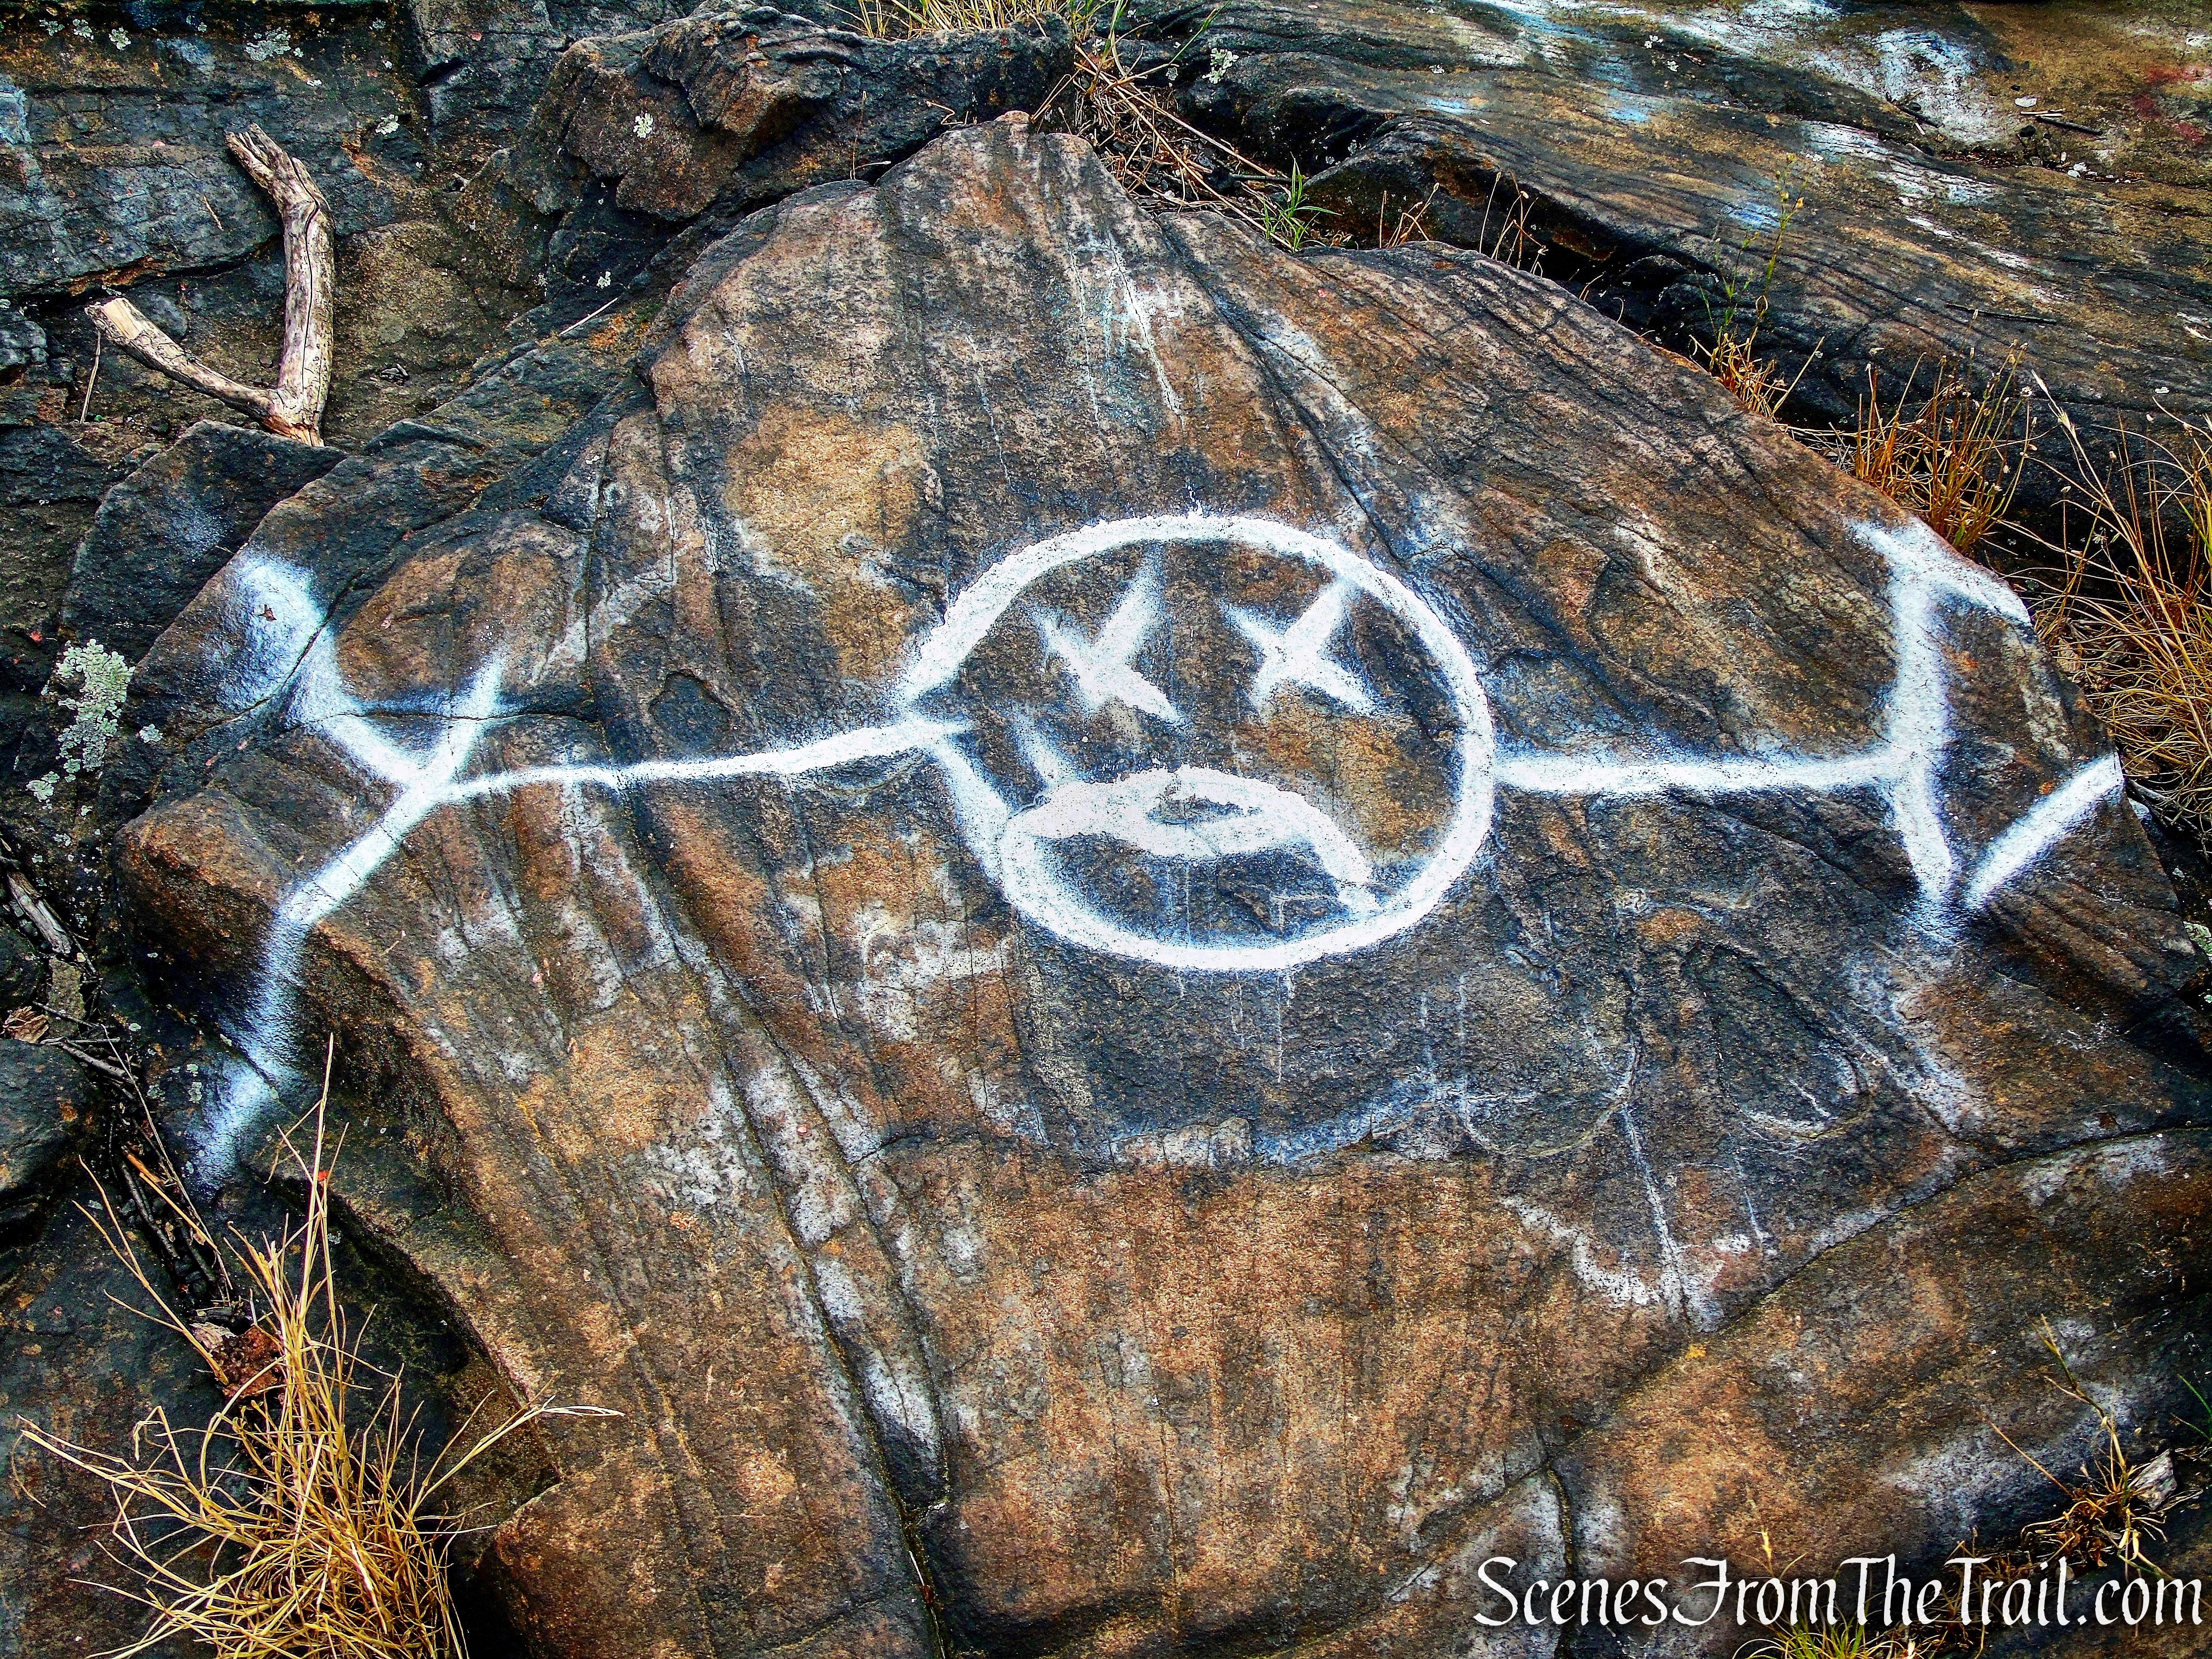
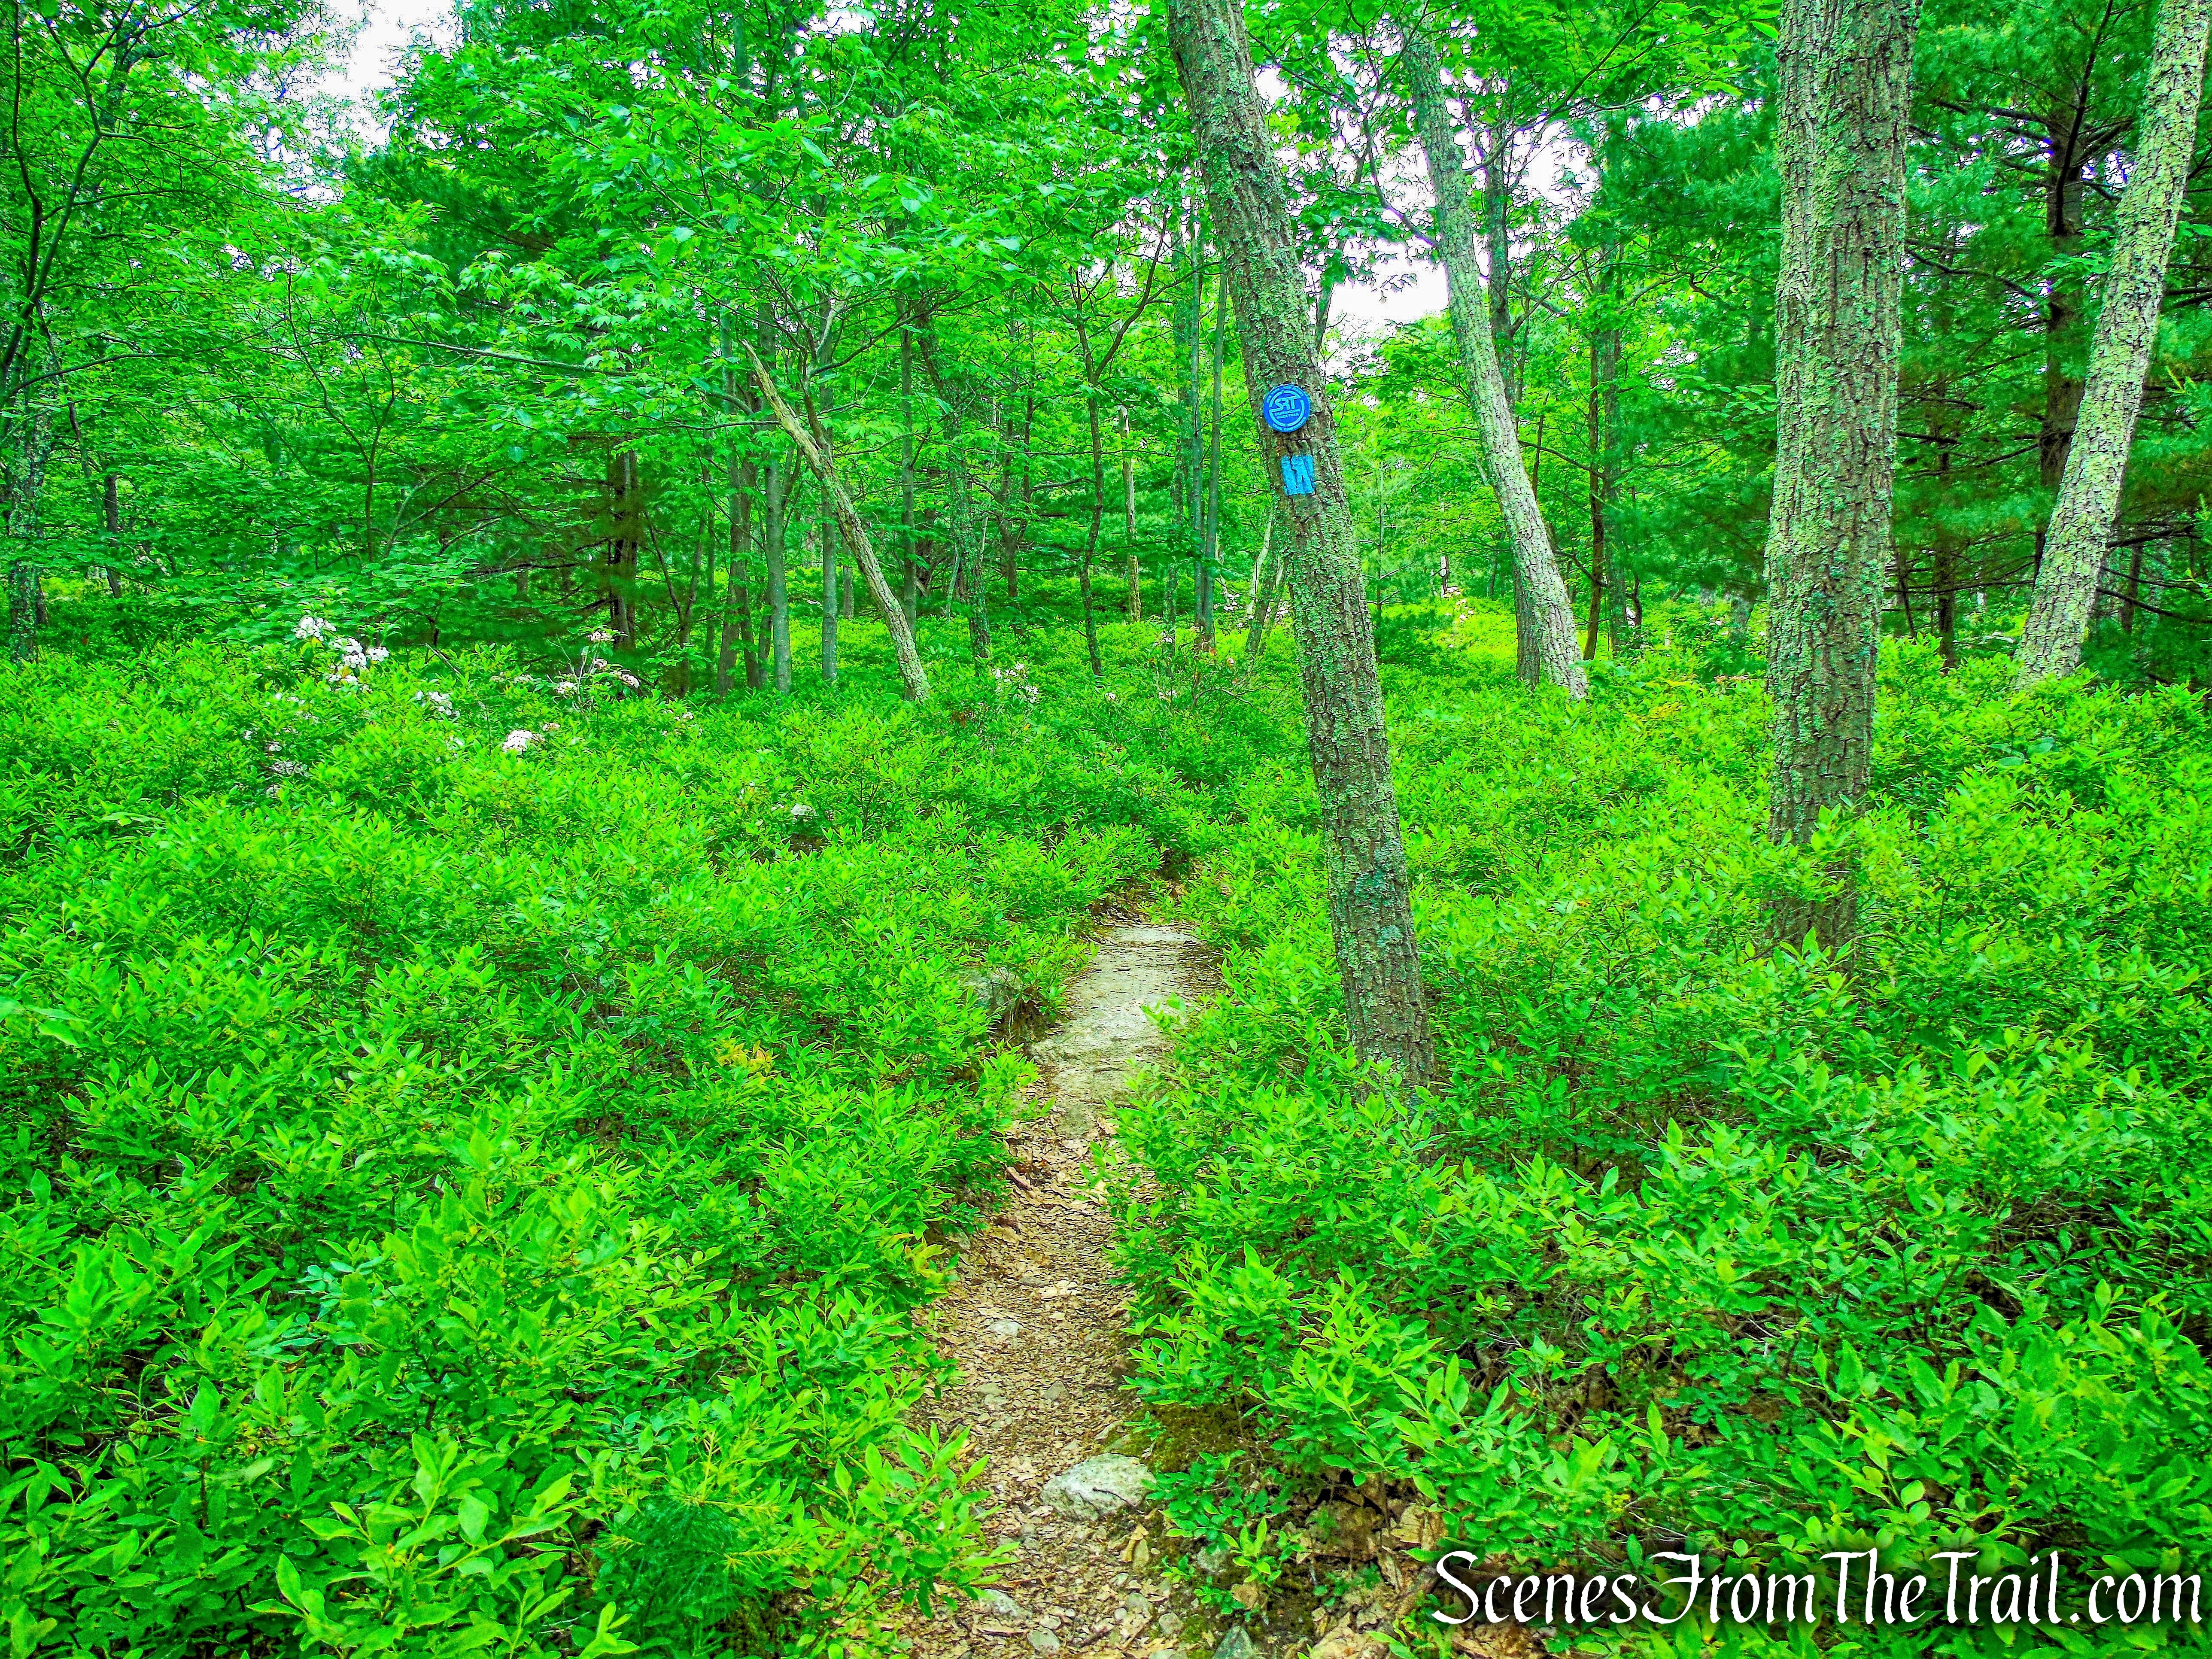
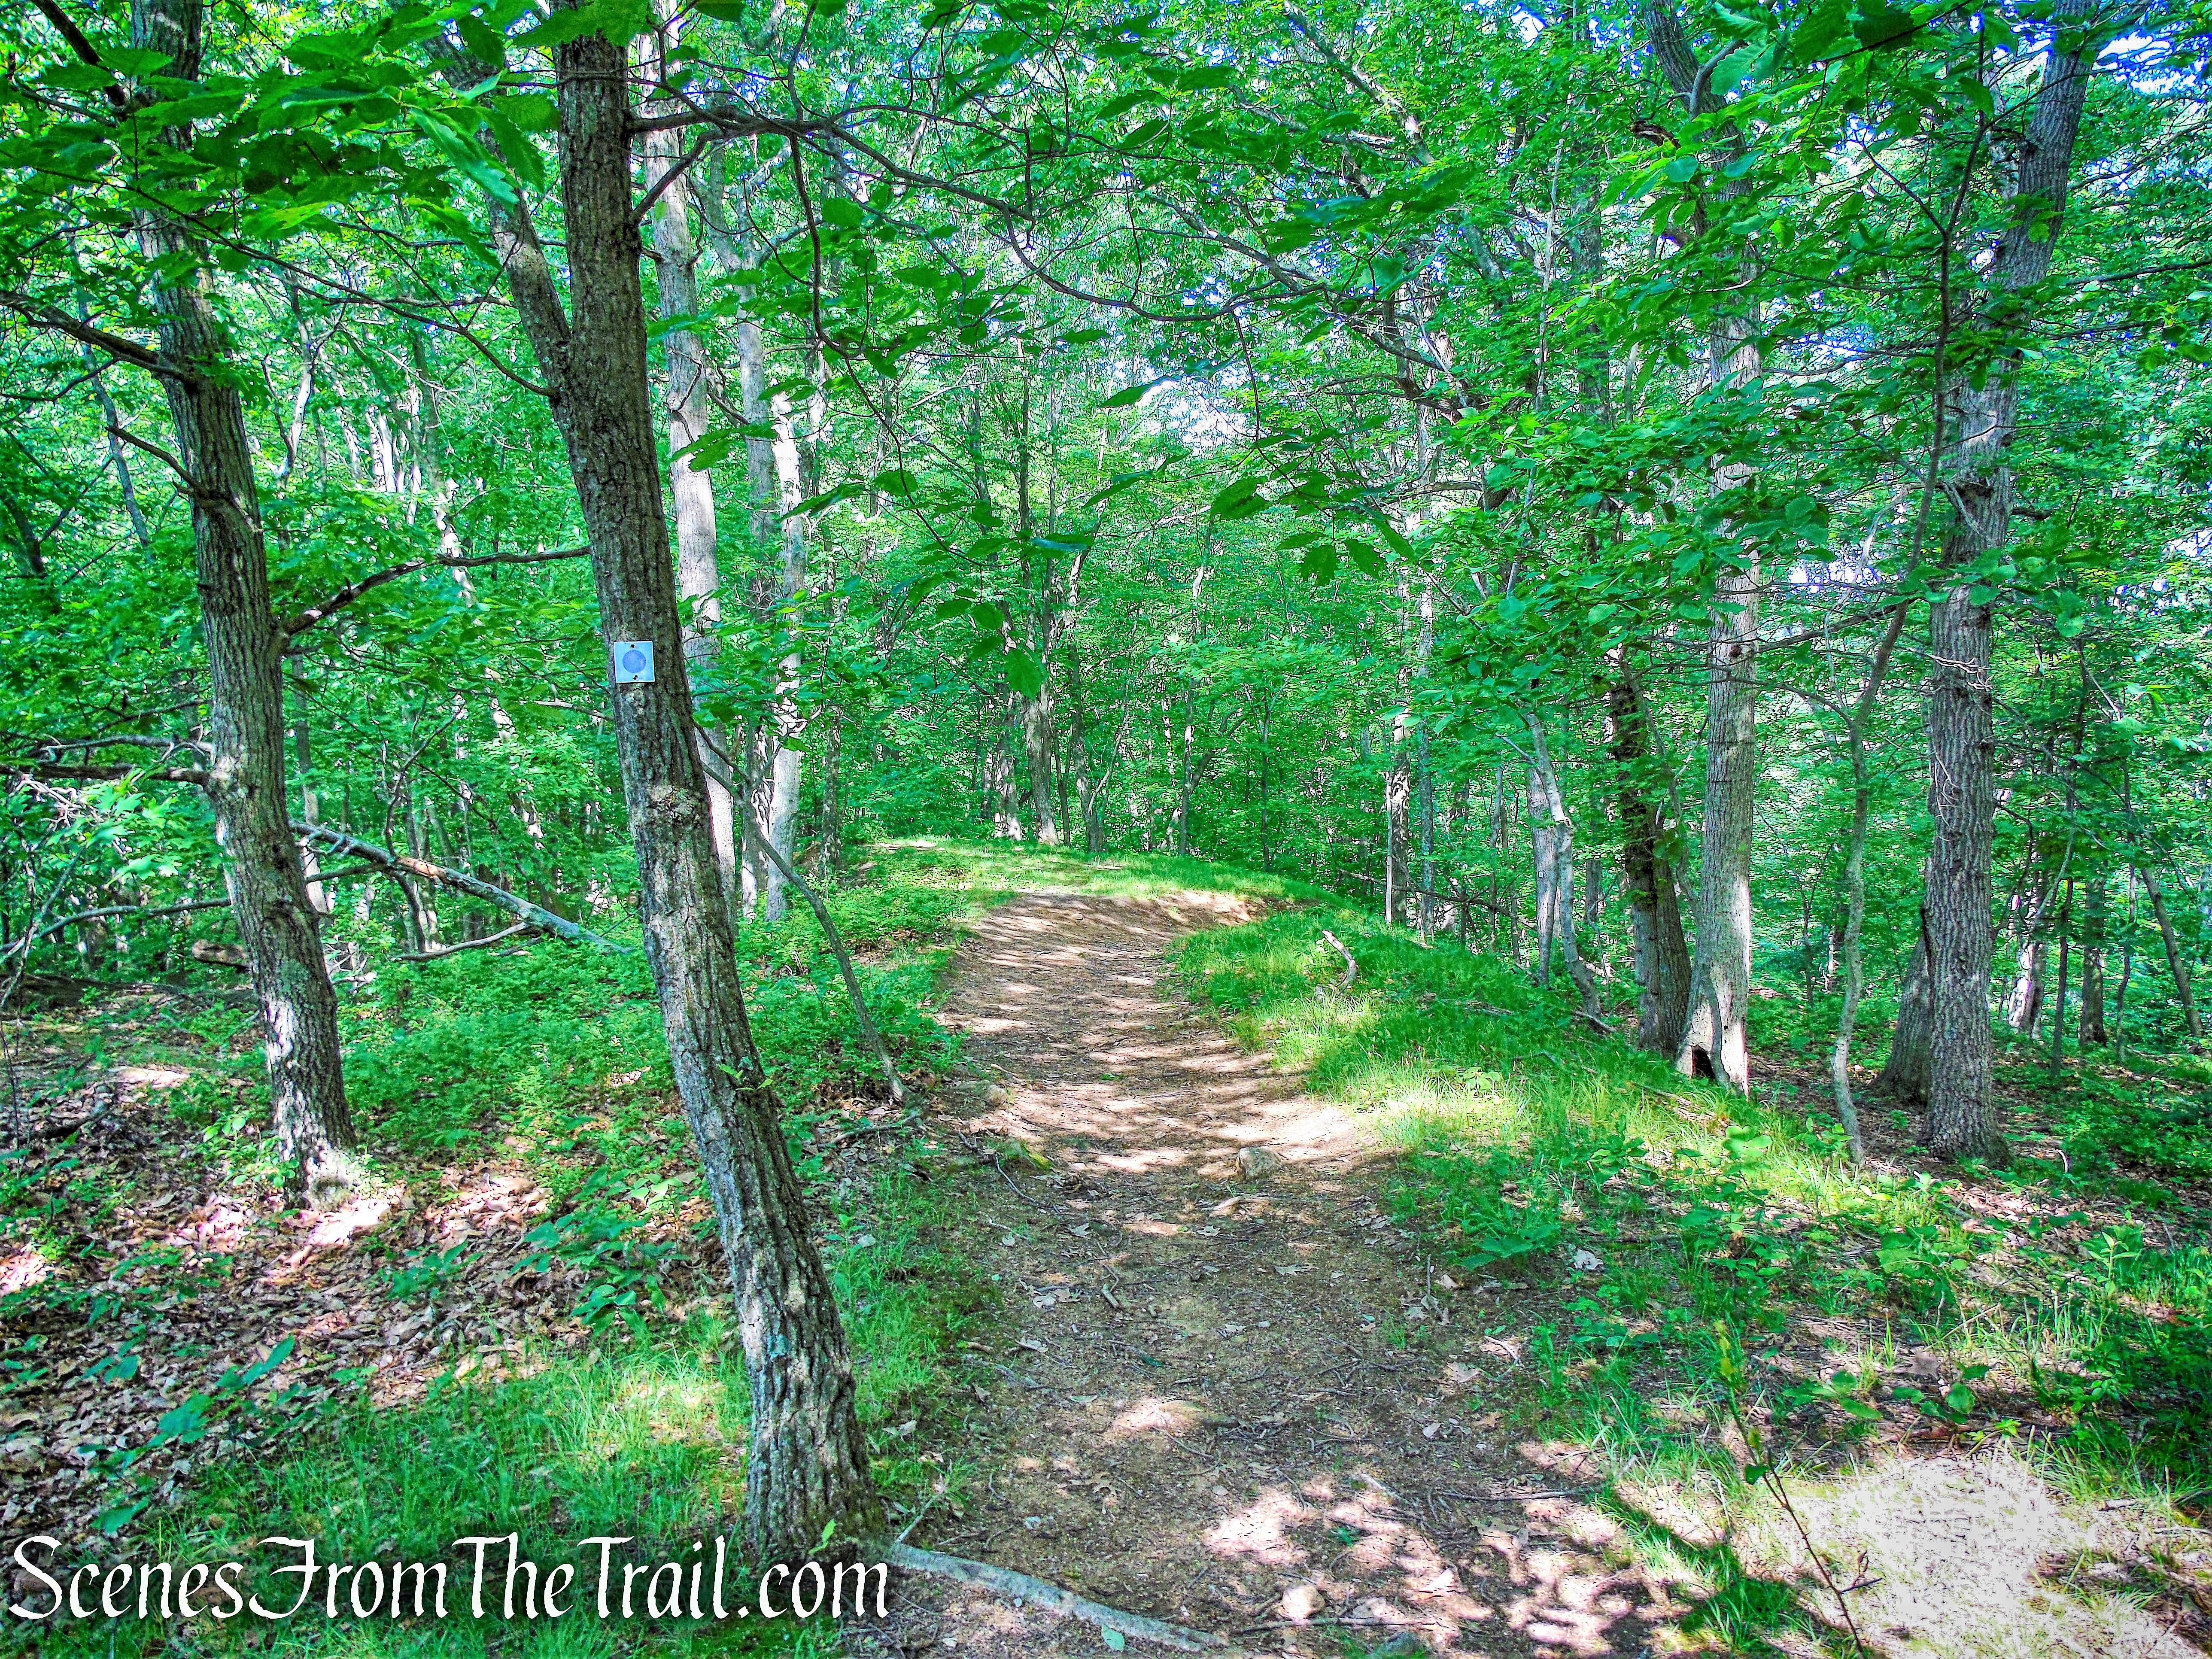
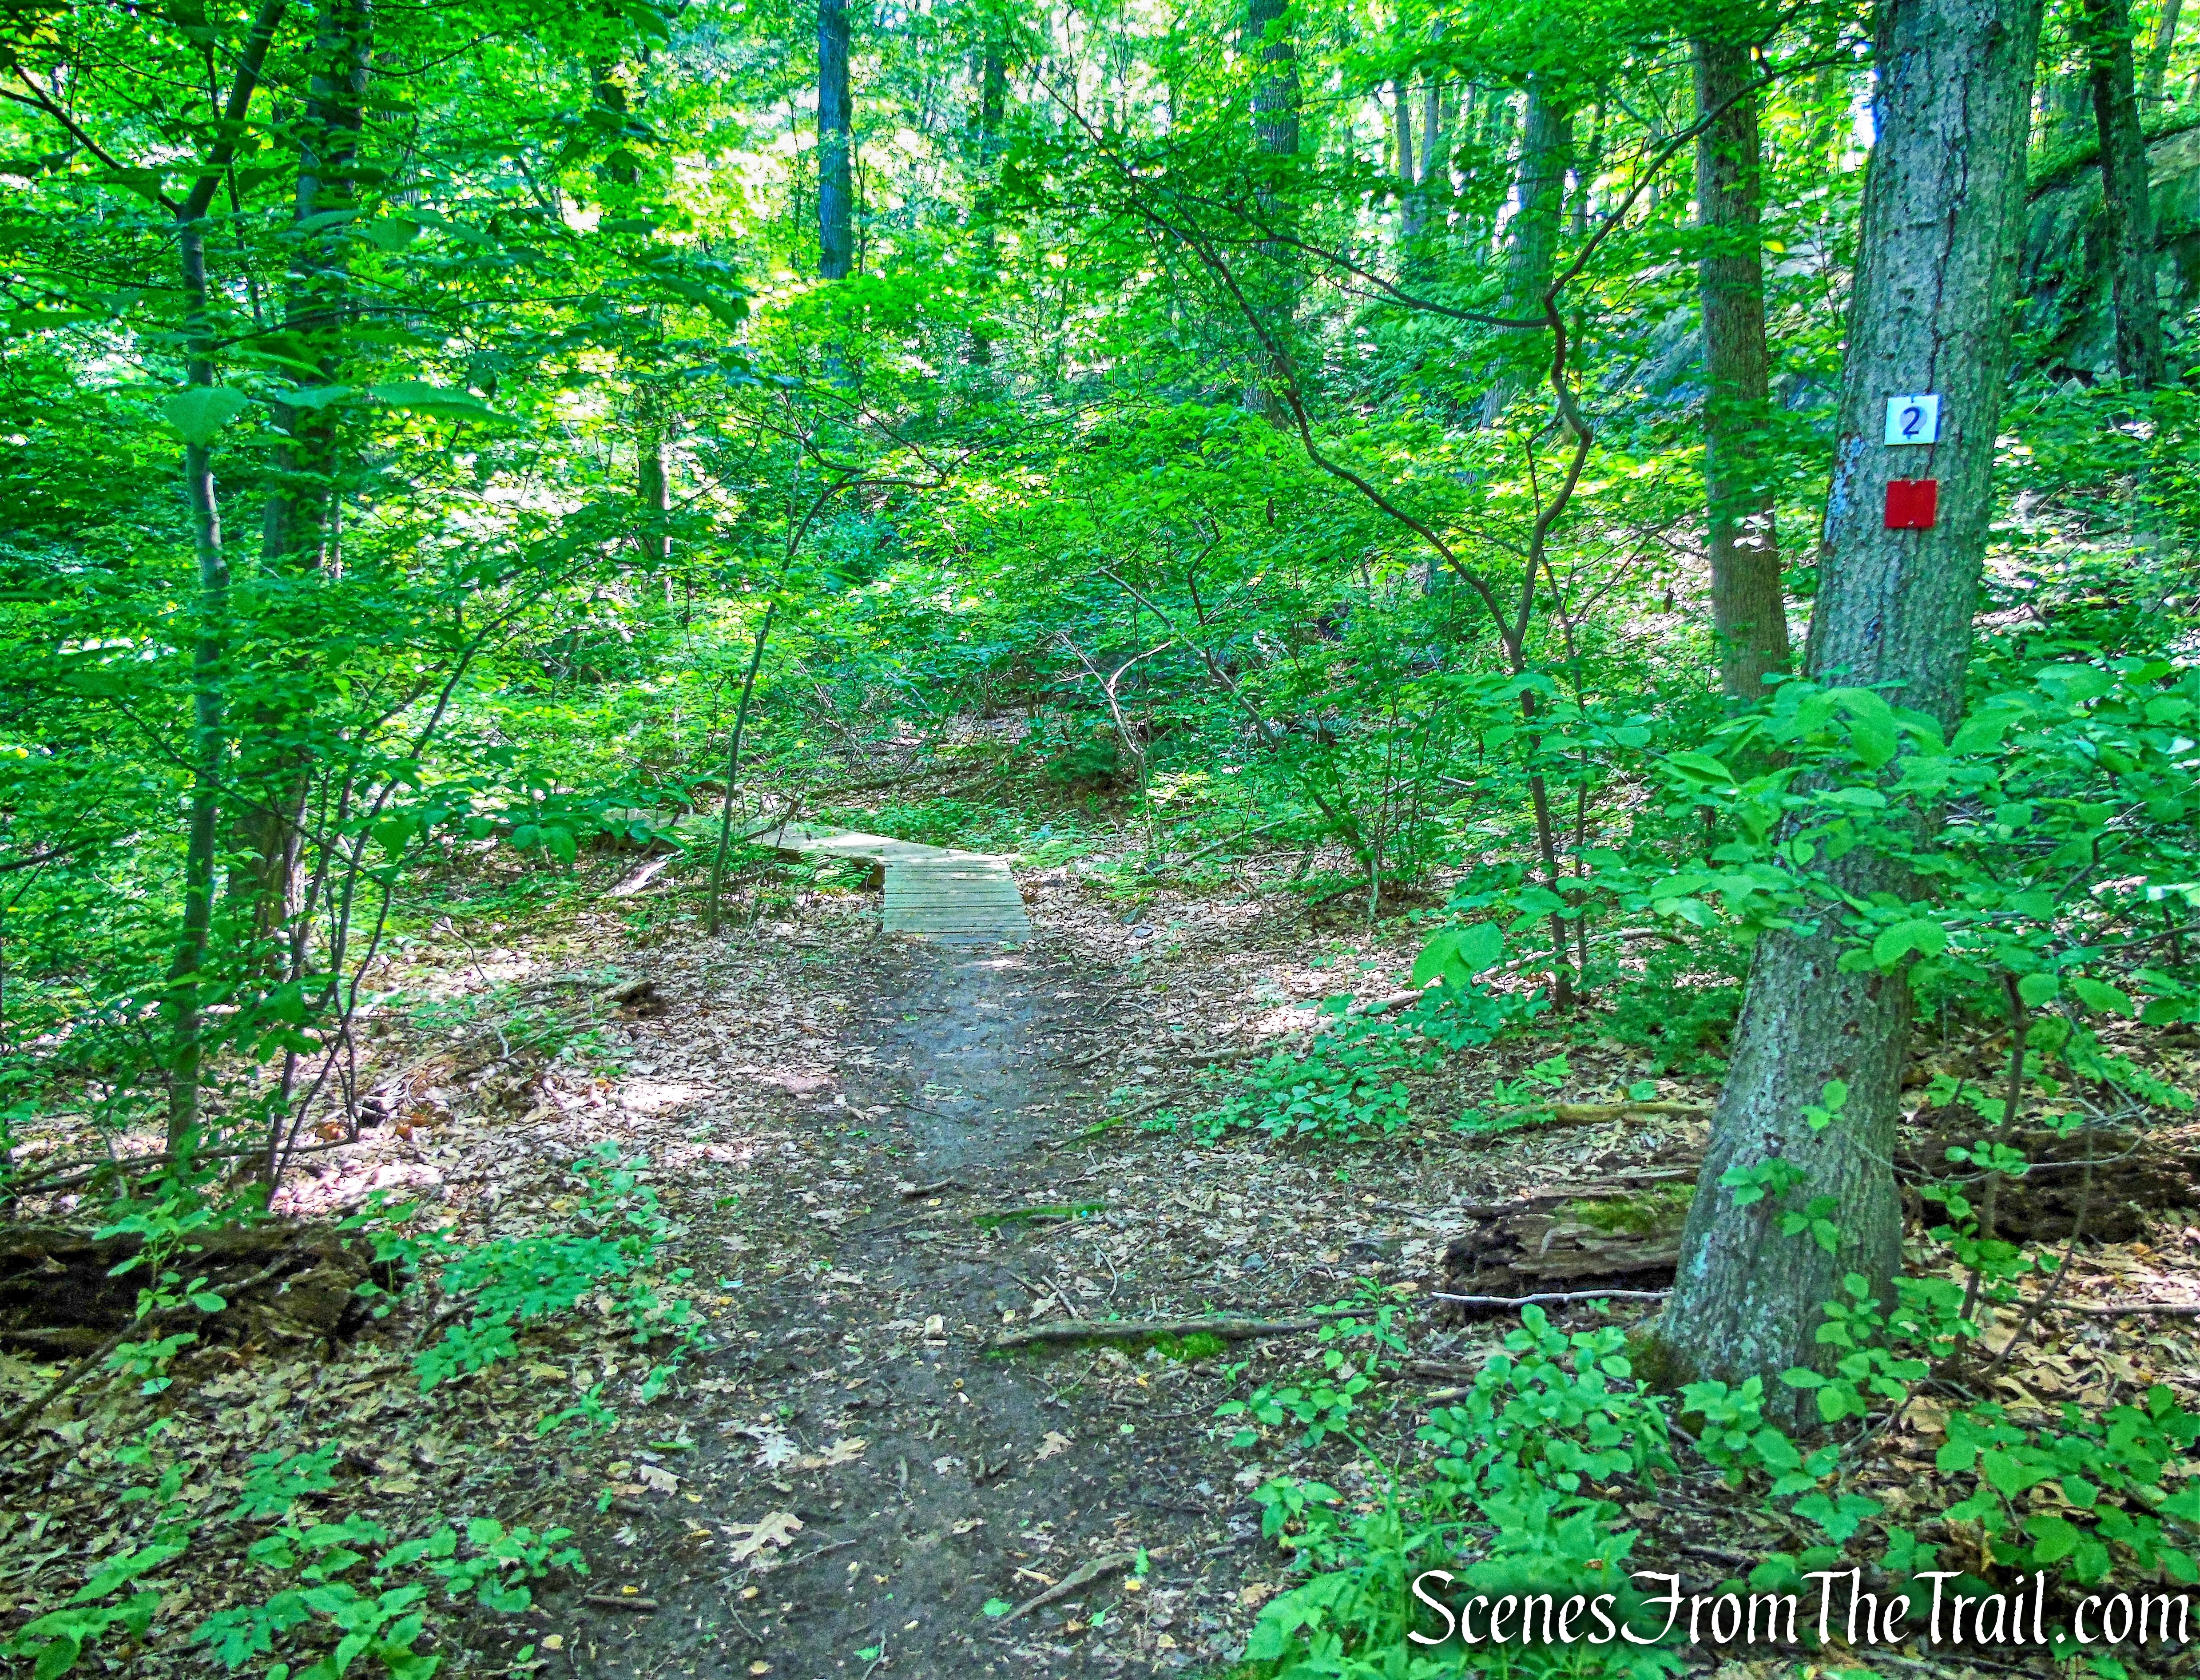
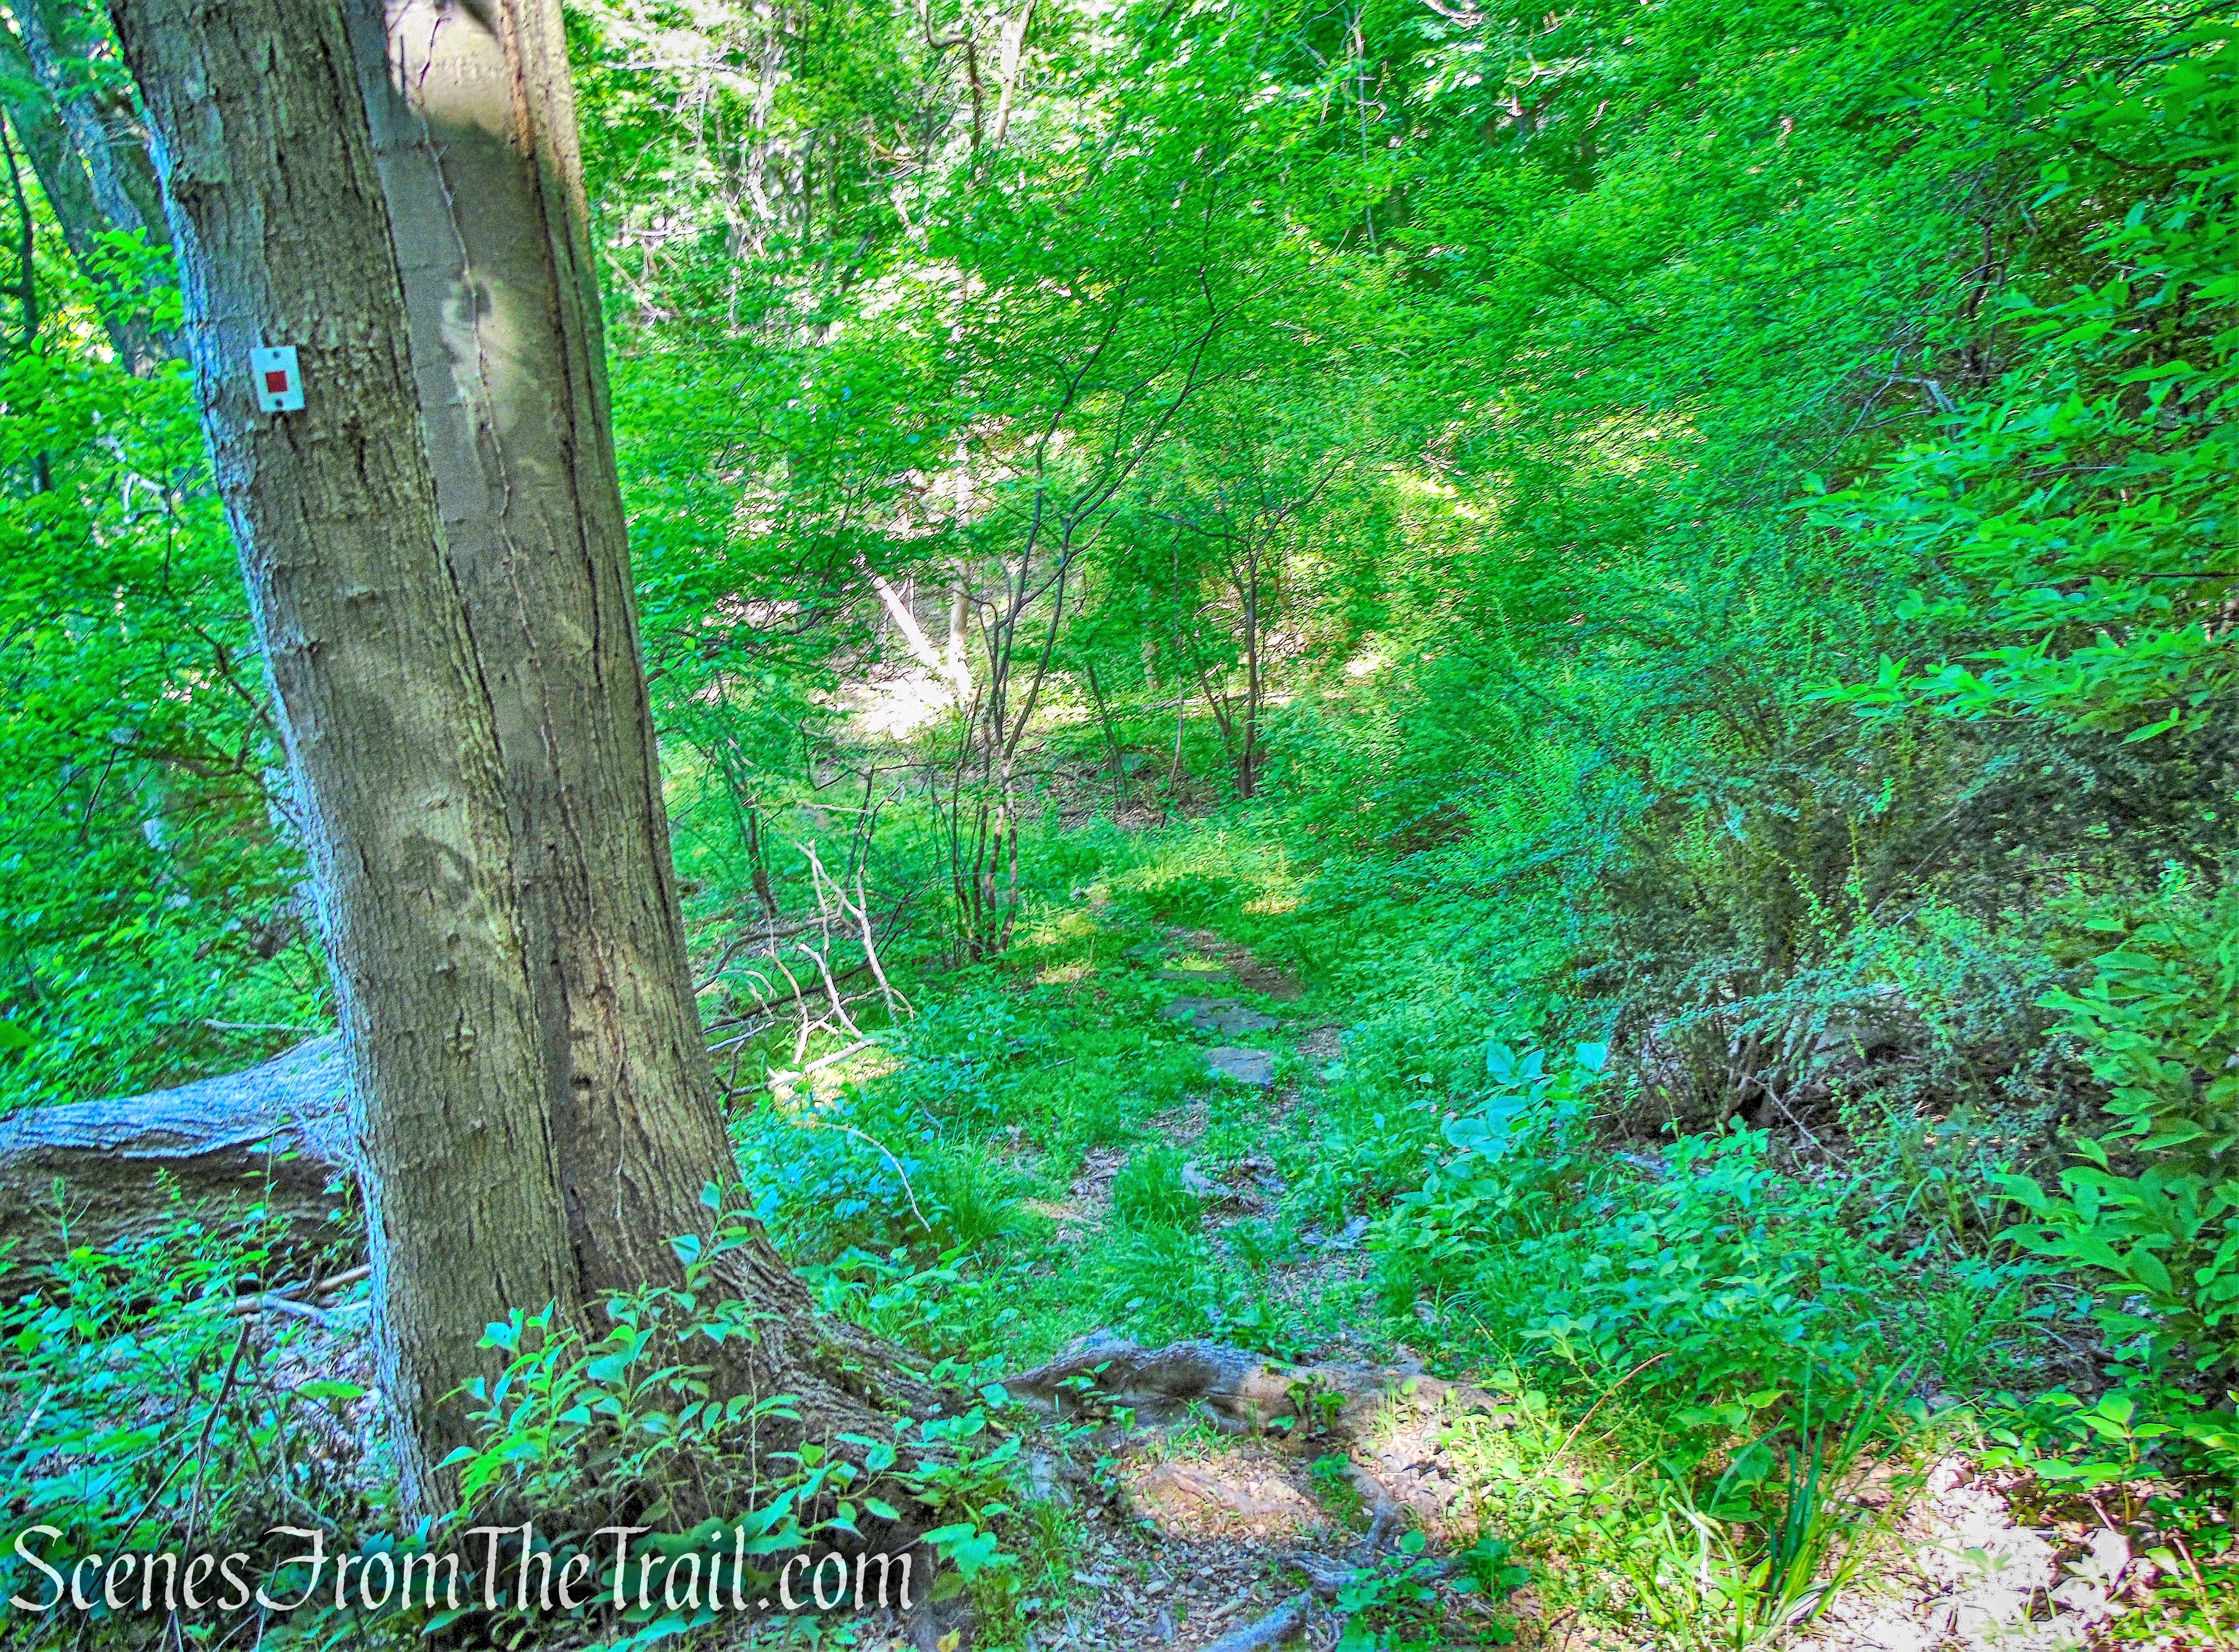
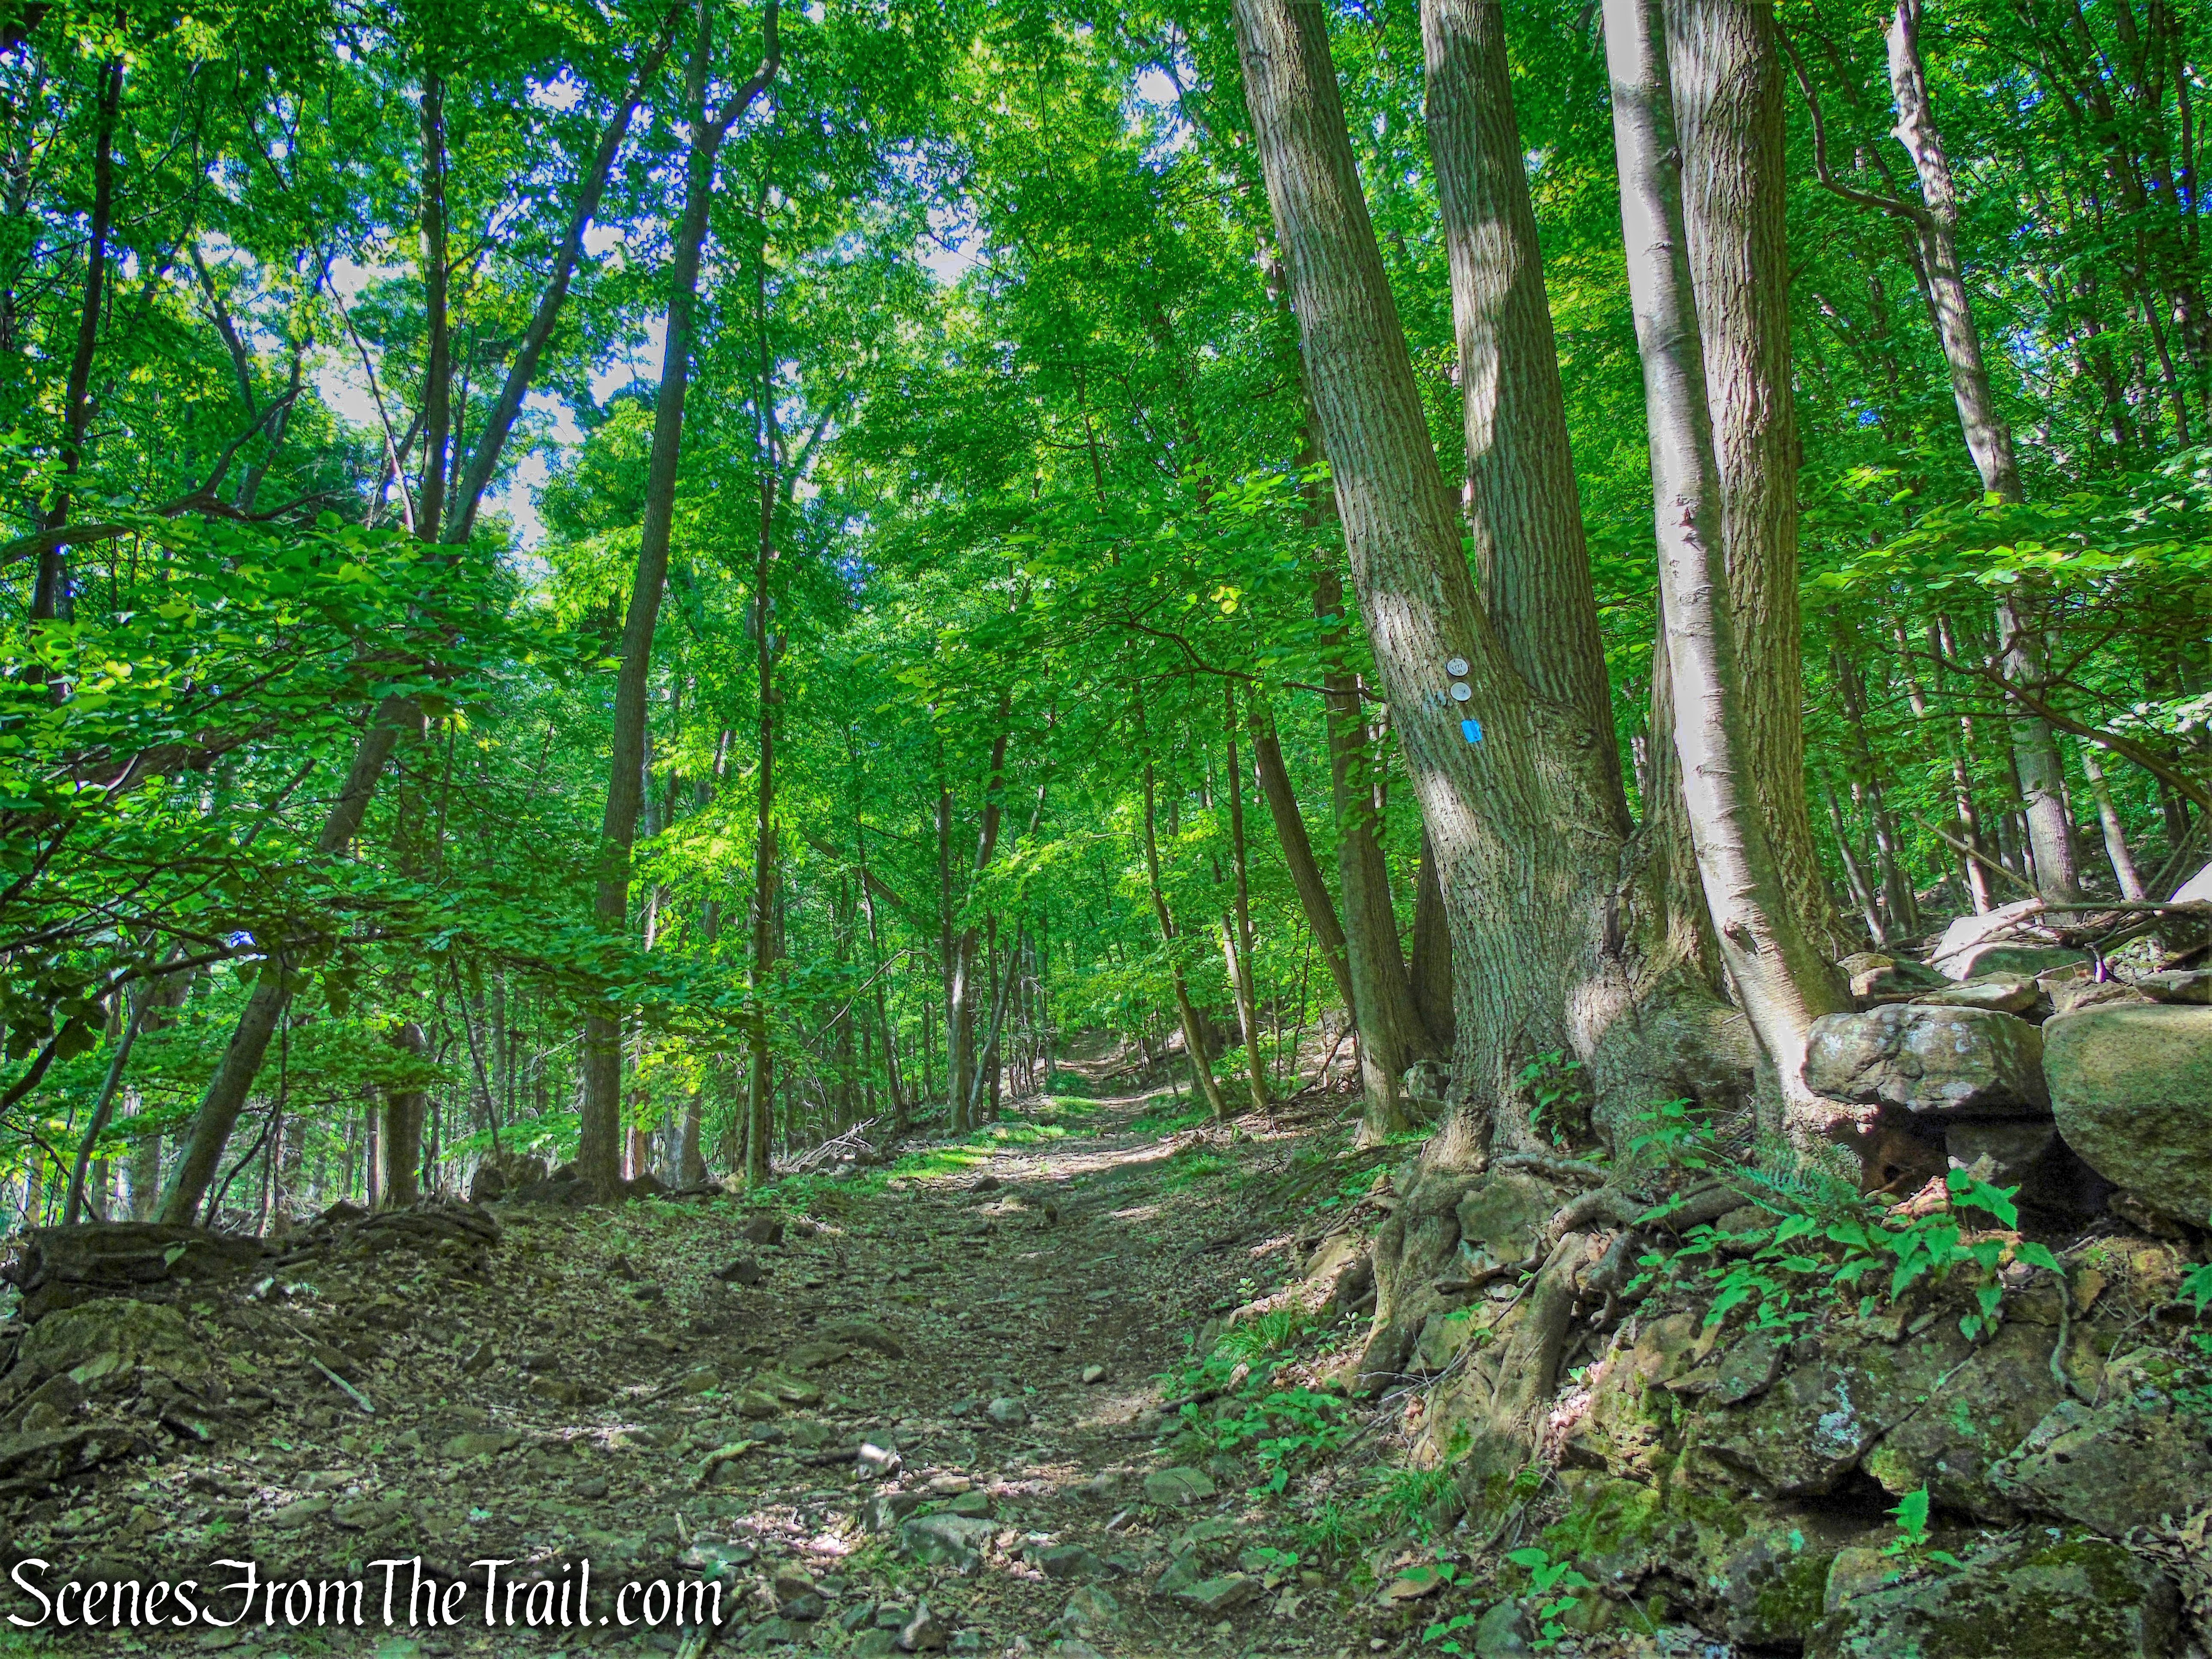
The hike begins on the green-blazed Nelsonville Footpath indicated by the three green blazes on a tree.
Nelsonville Footpath
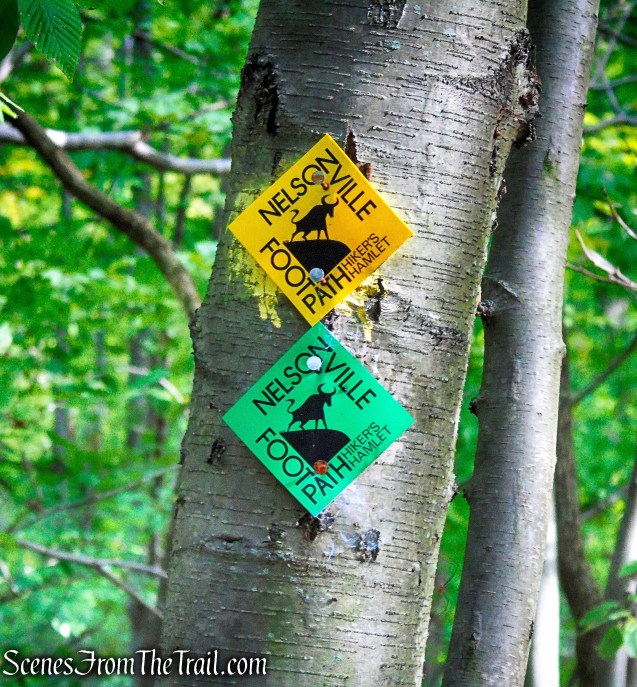
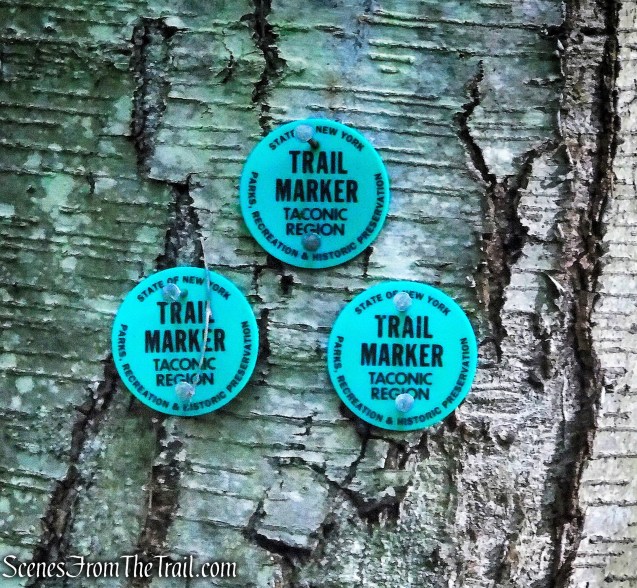
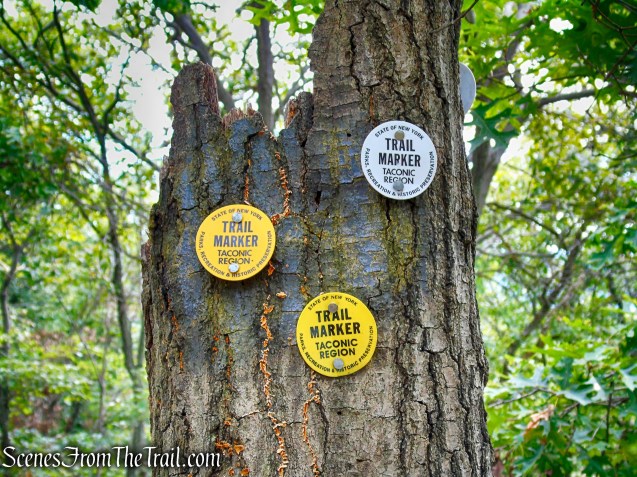
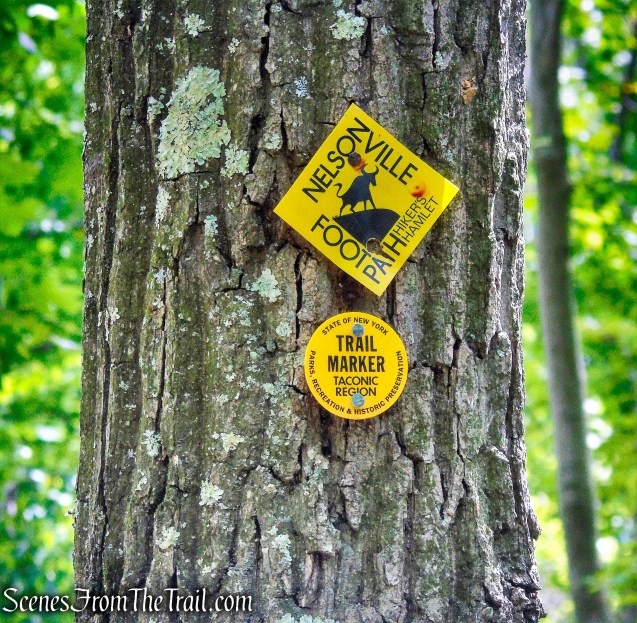
This green-blazed trail is marked with plastic markers which feature the logo of a bull (the blazing may be sparse in places).
Nelsonville Footpath
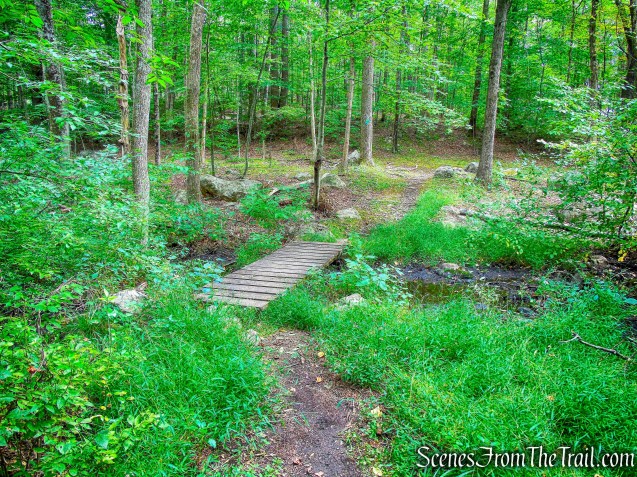
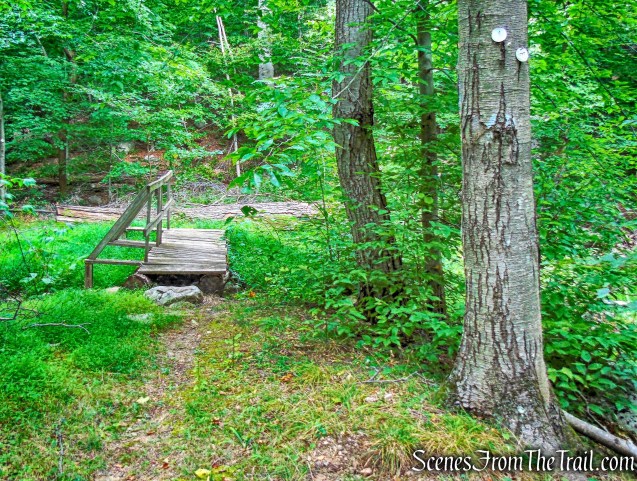
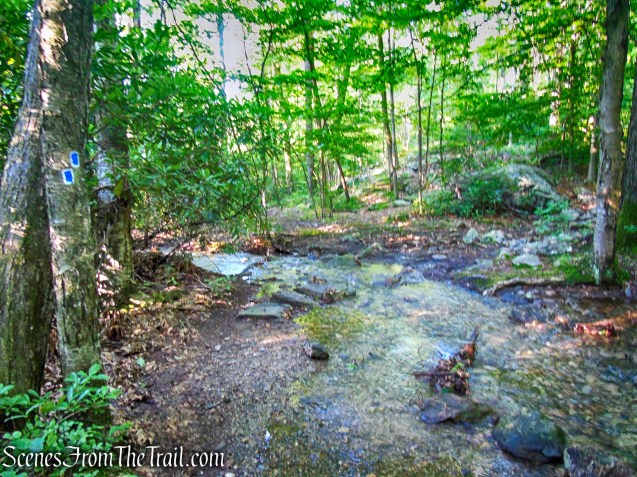
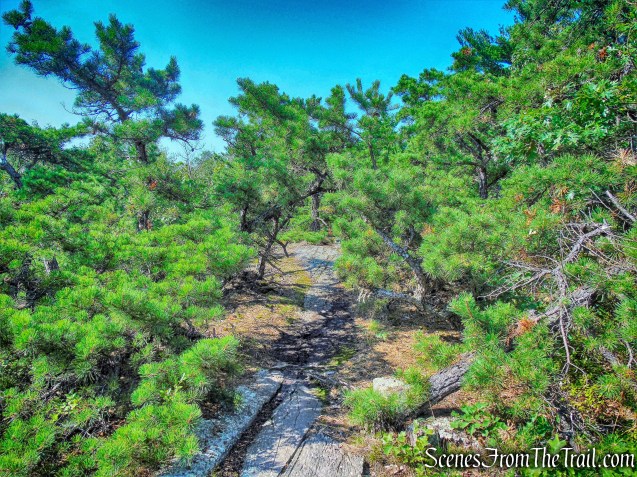
Almost immediately, the trail crosses a stream on a small wooden bridge. After crossing the stream, the trail turns left onto an old woods road.
Nelsonville Footpath
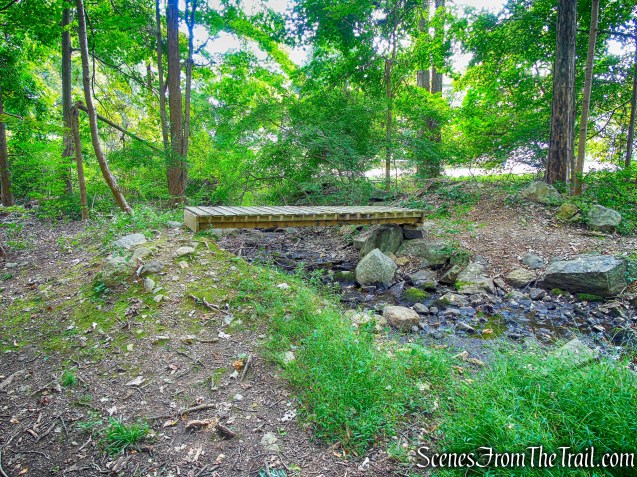
It soon bears left and crosses another stream on a wooden bridge.
wooden bridge – Nelsonville Footpath
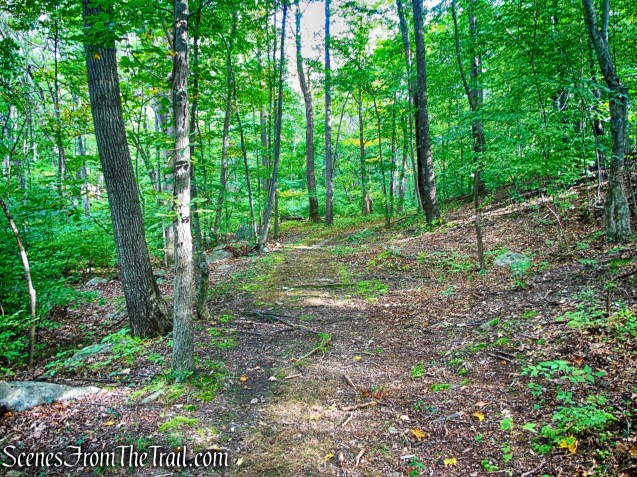
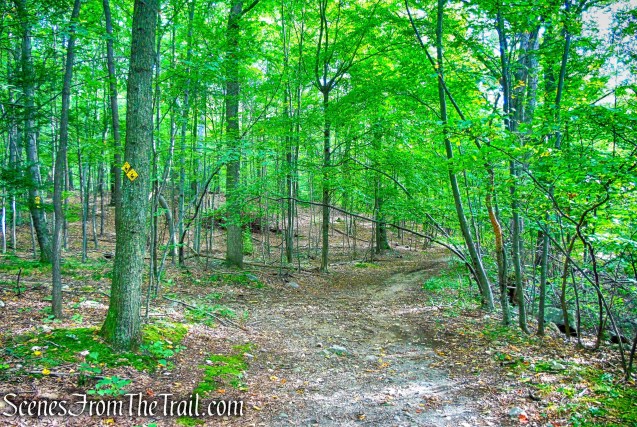
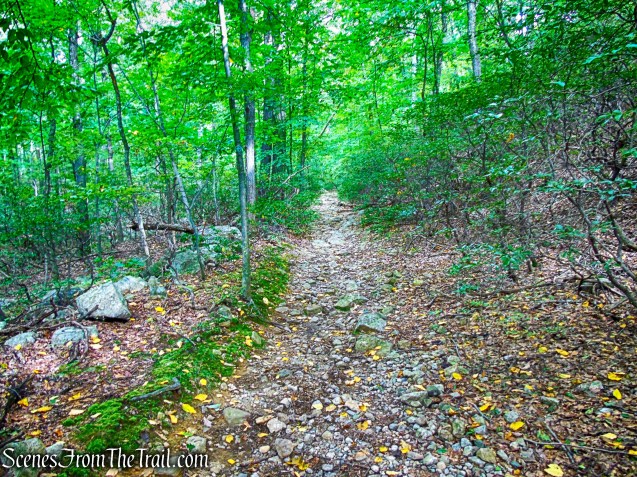
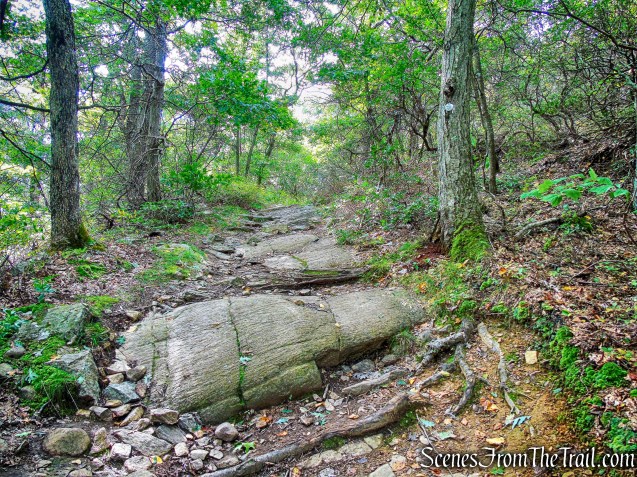
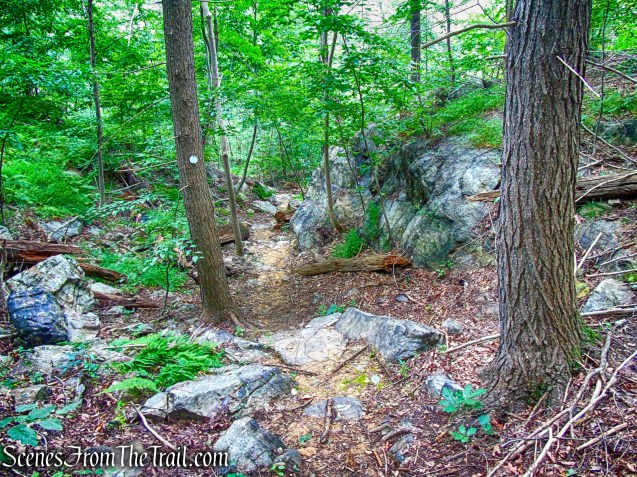
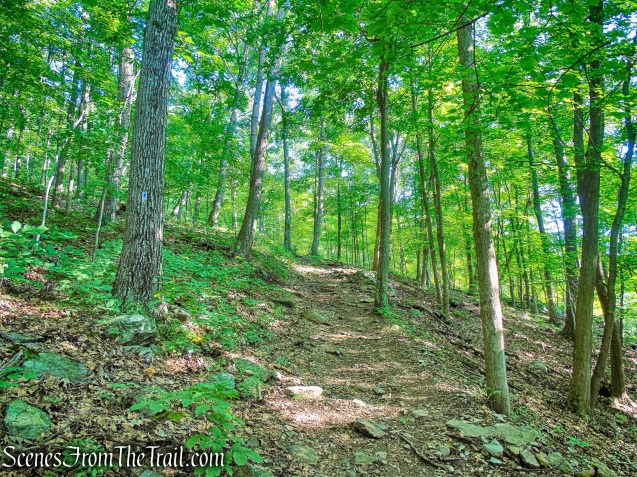
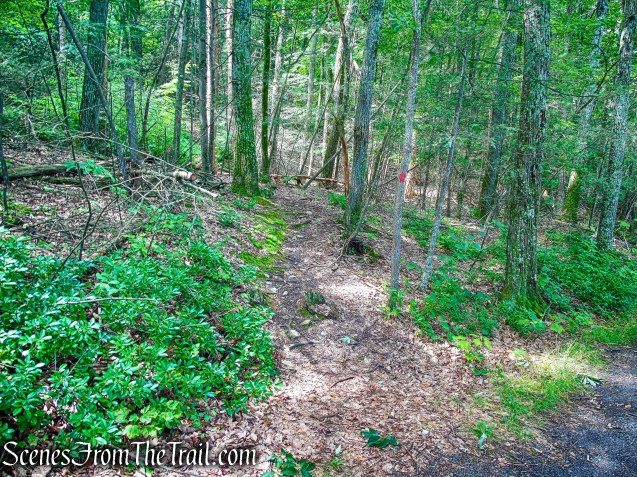
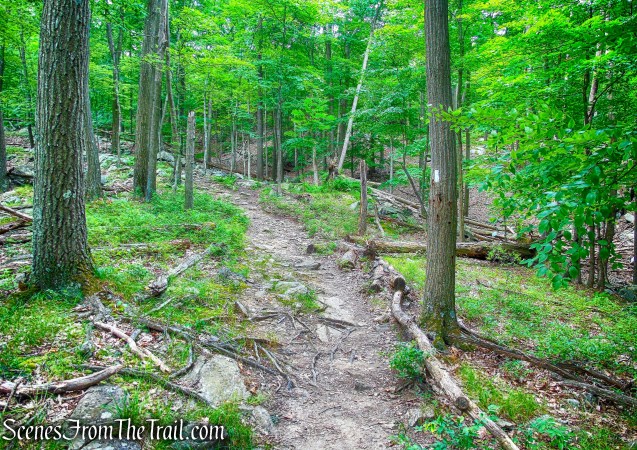
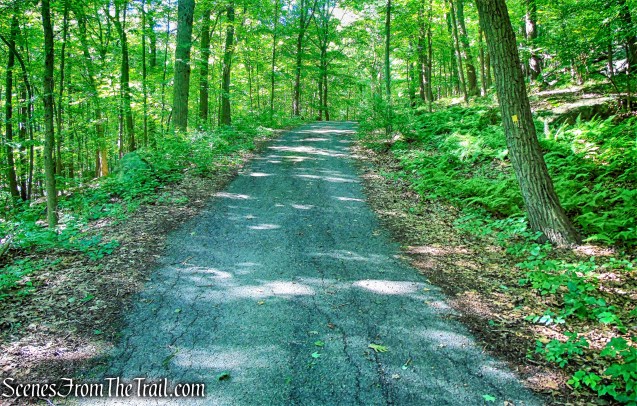
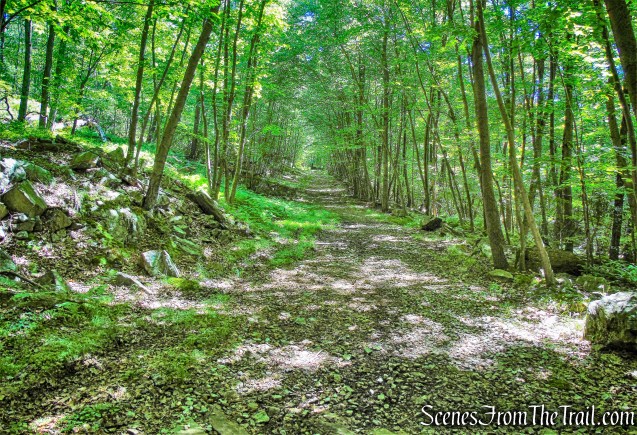
The Nelsonville Footpath climbs gradually on the woods road.
Nelsonville Footpath
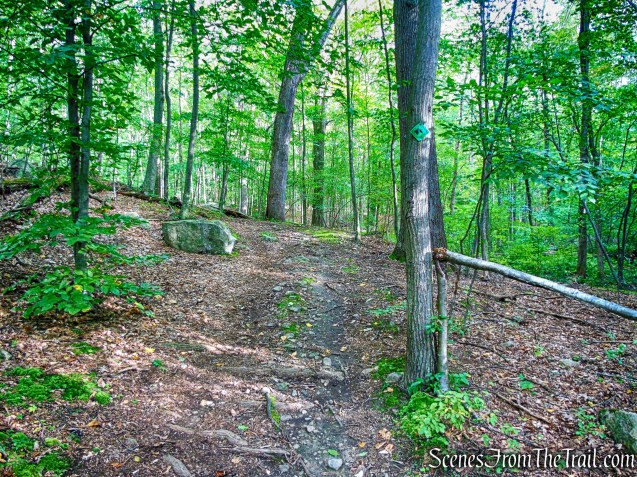
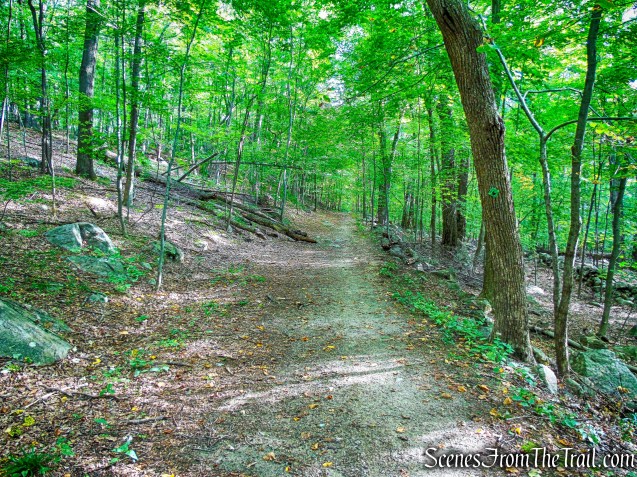
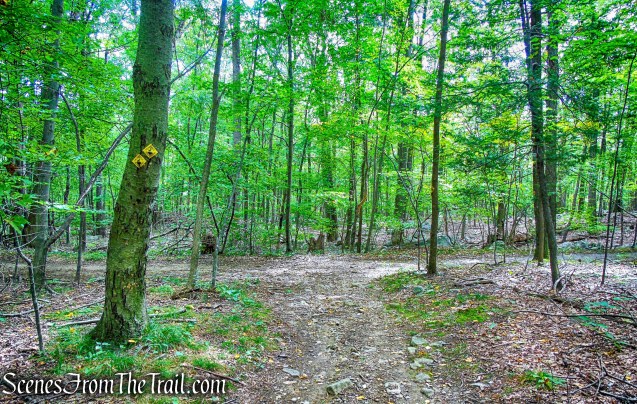
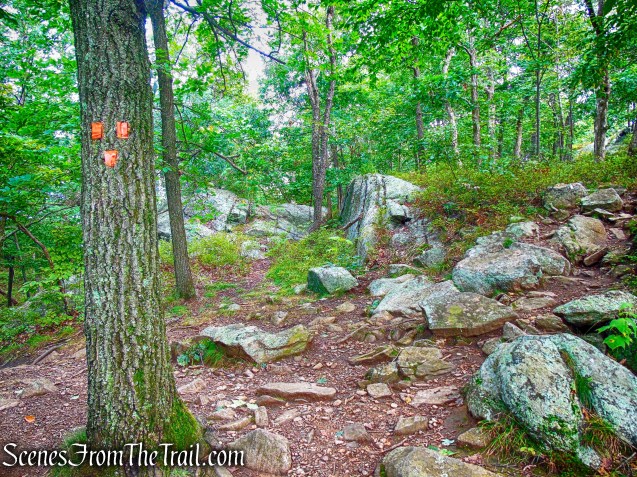
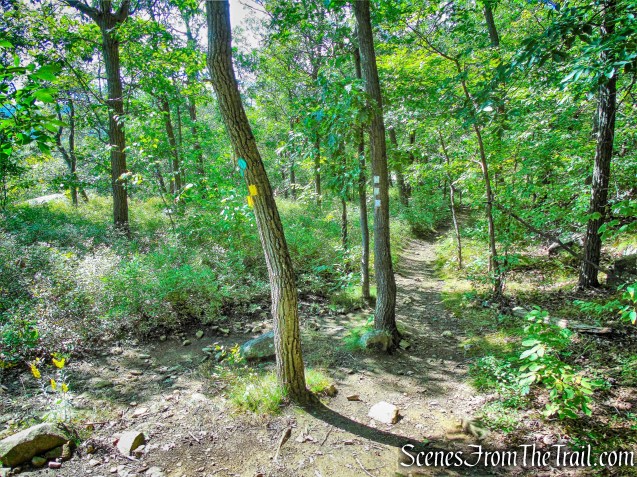
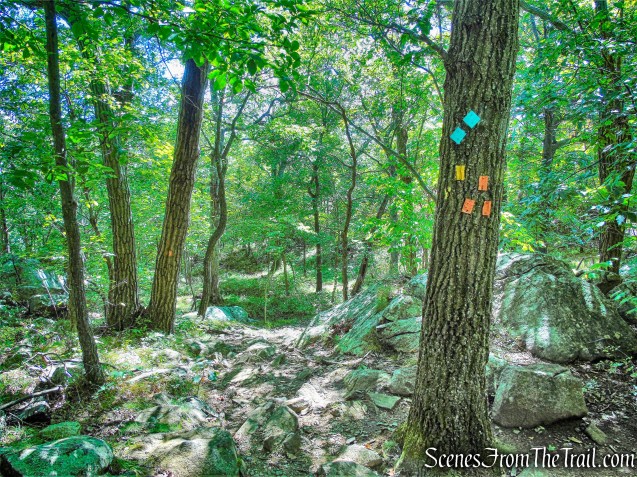
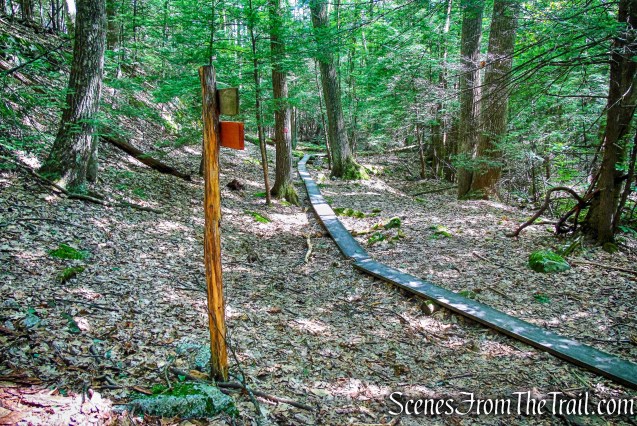
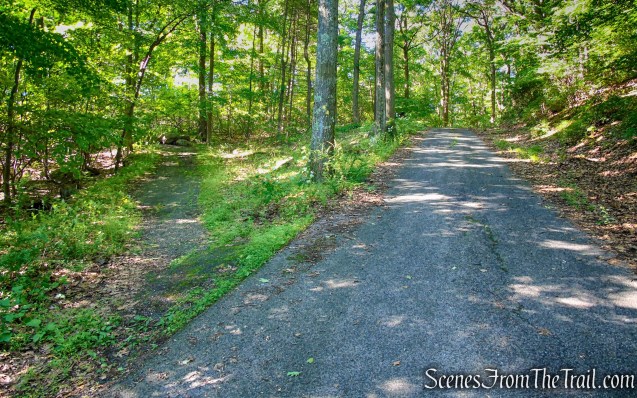
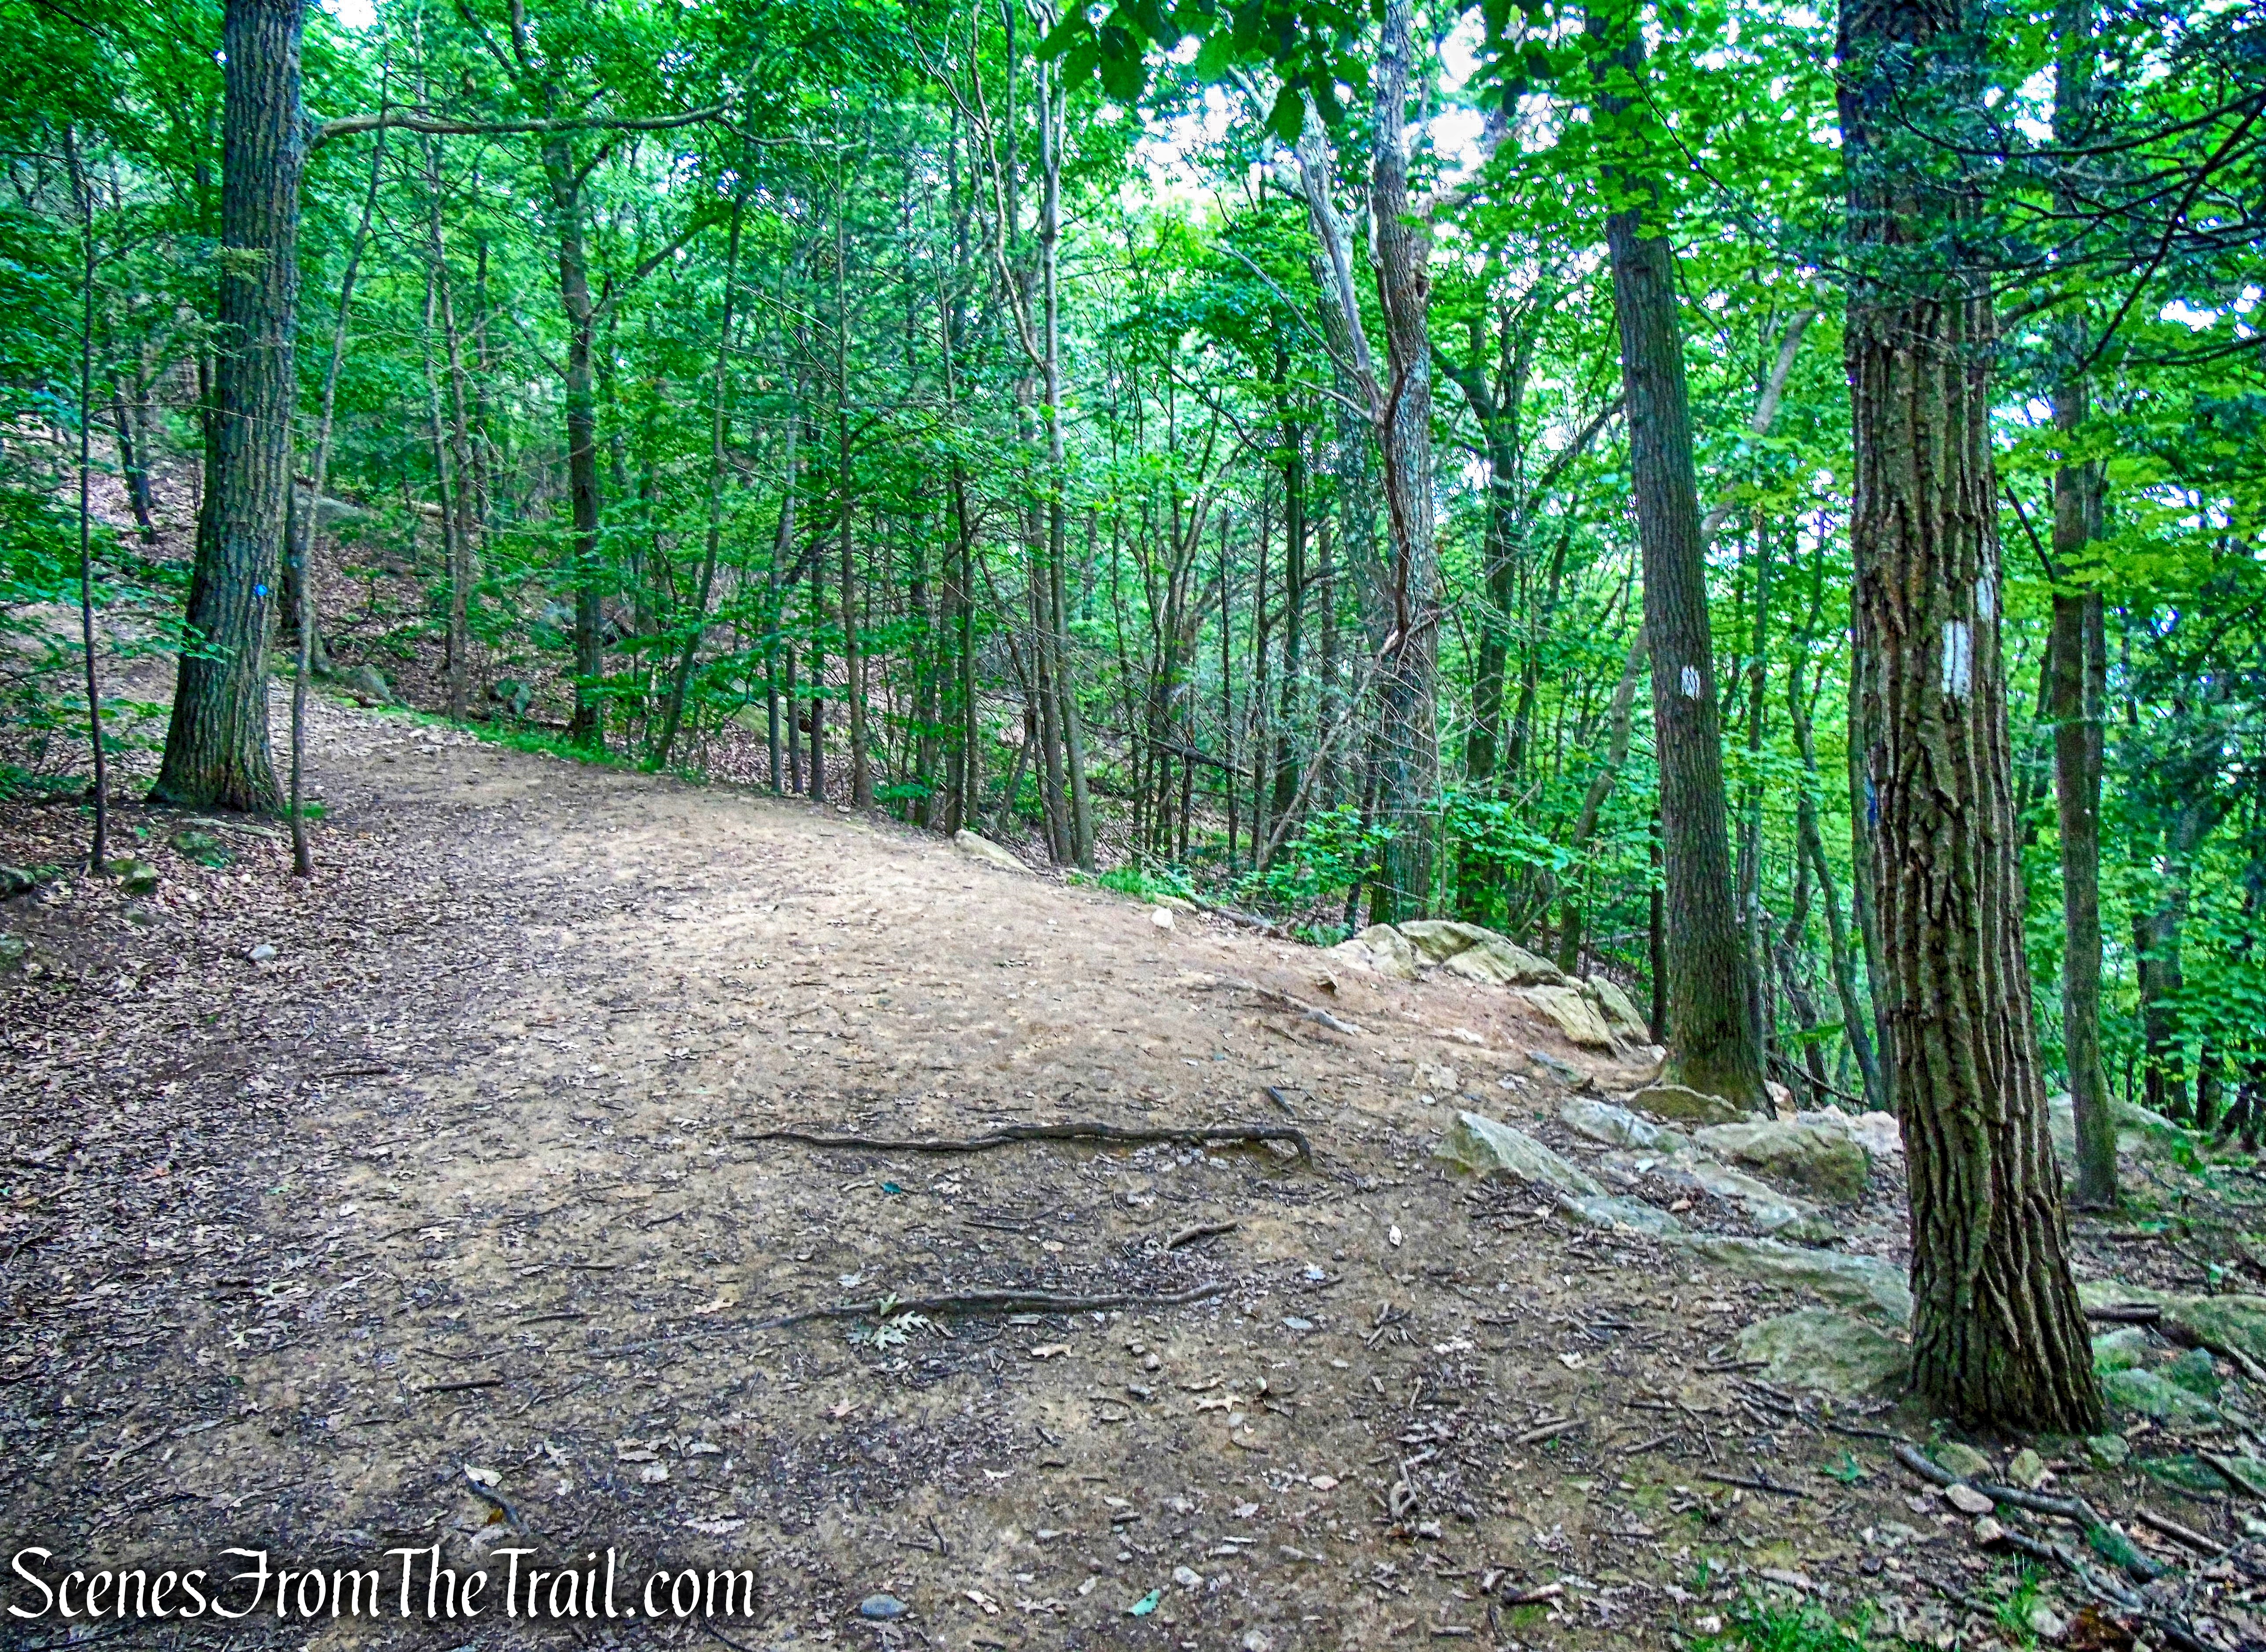
At 0.3 mile, the Nelsonville Footpath turns right onto a wide, eroded woods road.
Nelsonville Footpath
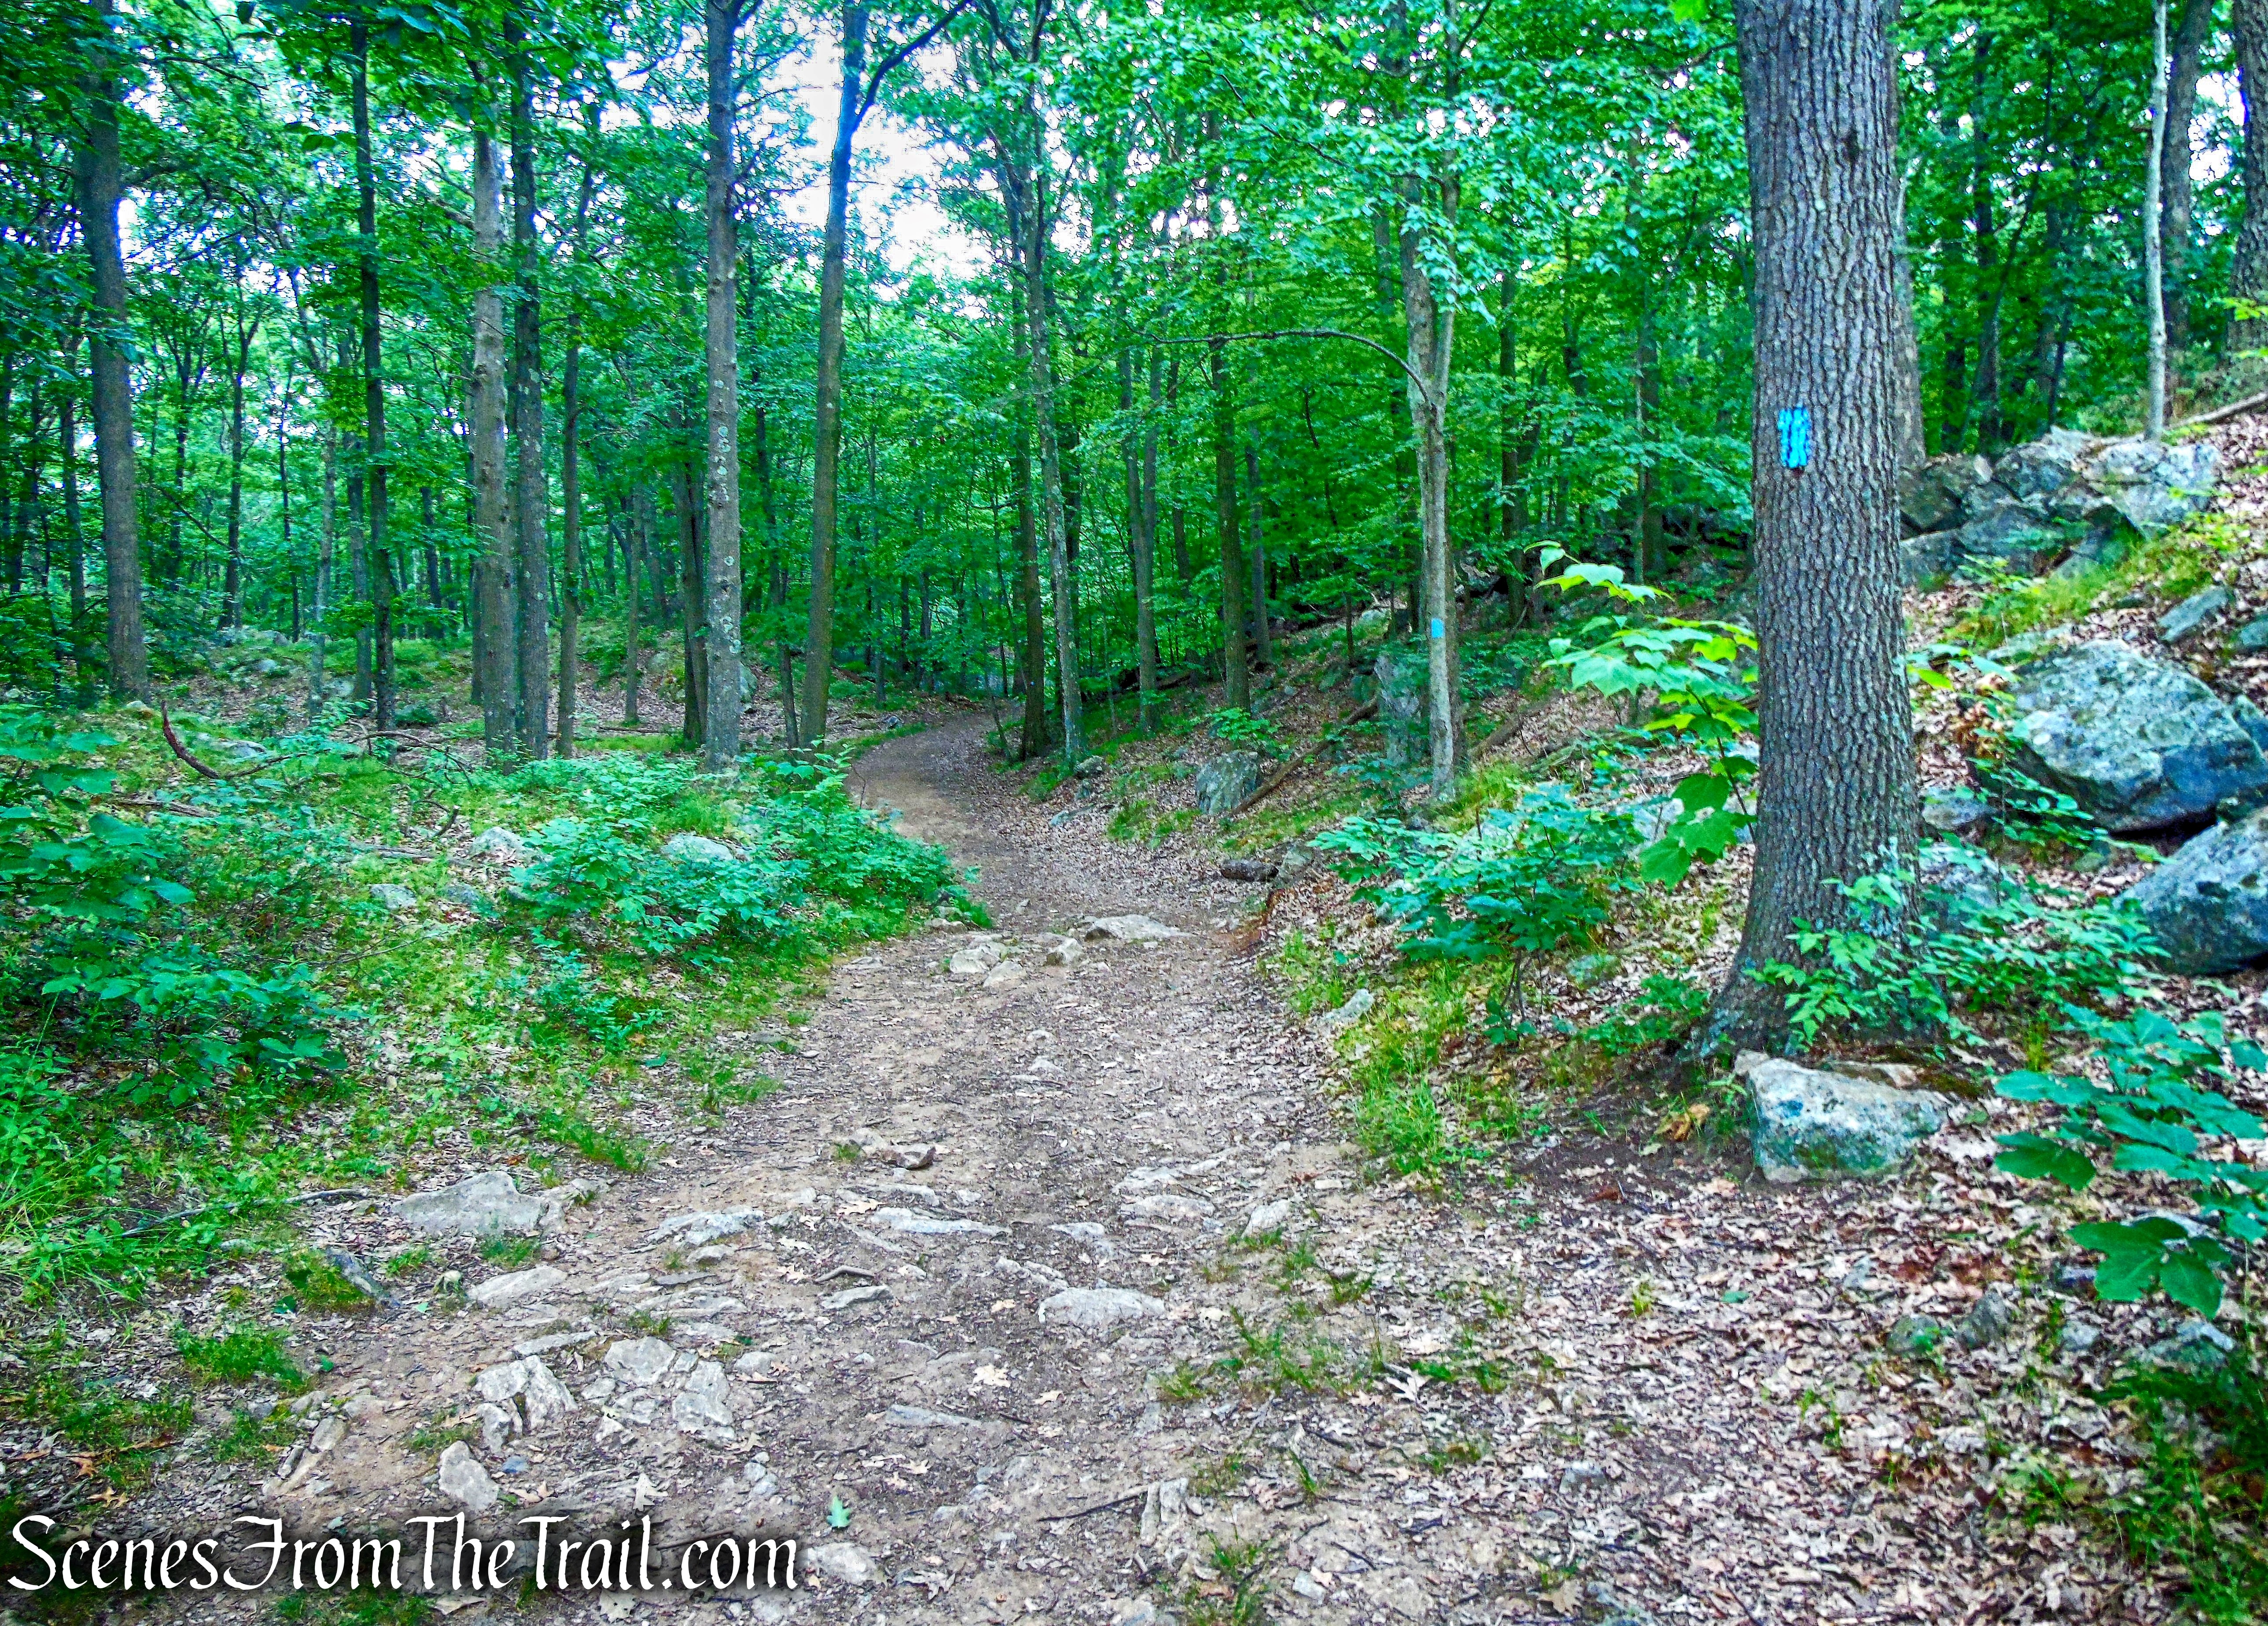
This is also the route of the yellow-blazed Undercliff Trail.
joint Nelsonville Footpath/Undercliff Trail
joint Nelsonville Footpath/Undercliff Trail
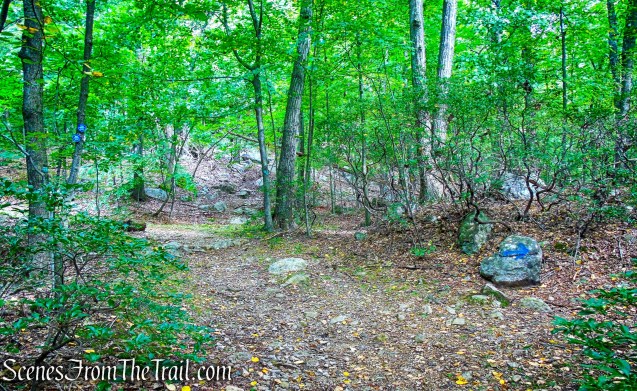
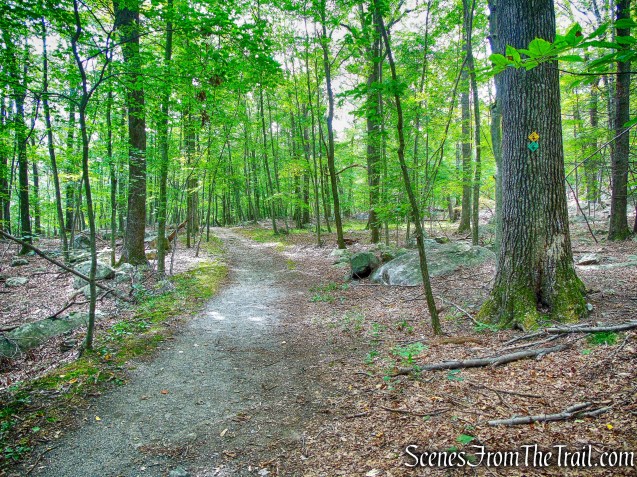
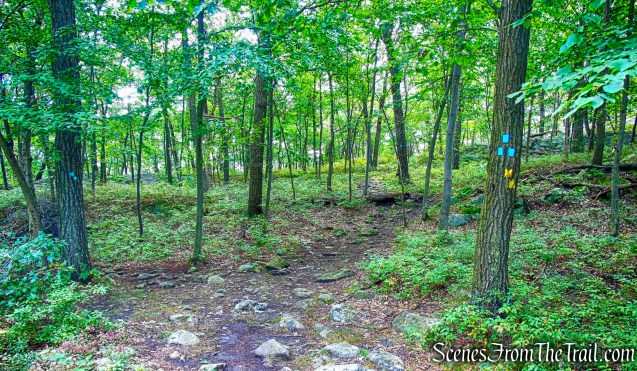
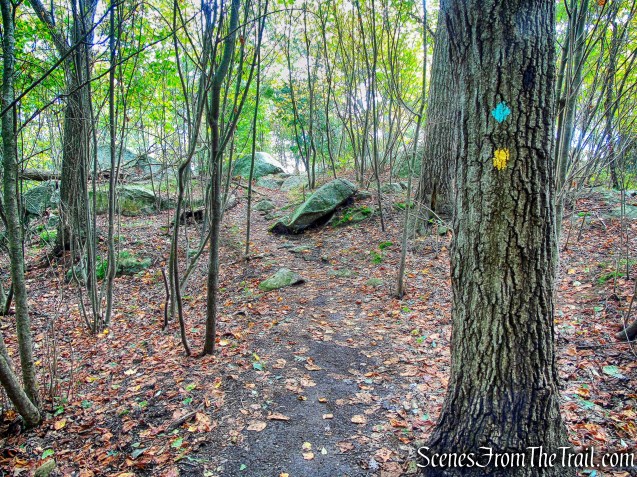
A short distance ahead, the Undercliff Trail leaves to the left, which would be our return route,
Undercliff Trail leaves to the left
but we continued ahead on the woods road, following the green blazes.
continue ahead on Nelsonville Footpath
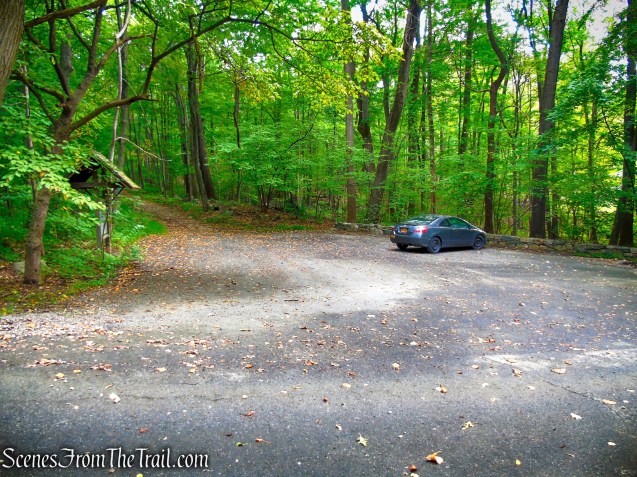
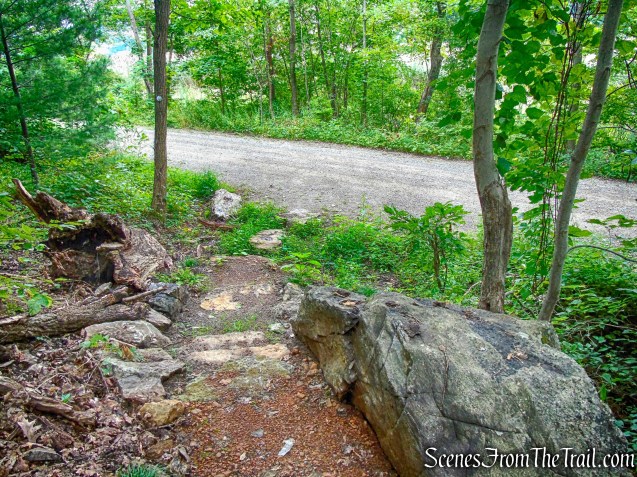
The Nelsonville Footpath crosses paved Gatehouse Road at 0.6 mile.
Nelsonville Footpath
There is a nice size parking area here. If I would have known about it, I may have started the hike here.
Nelsonville Footpath trailhead
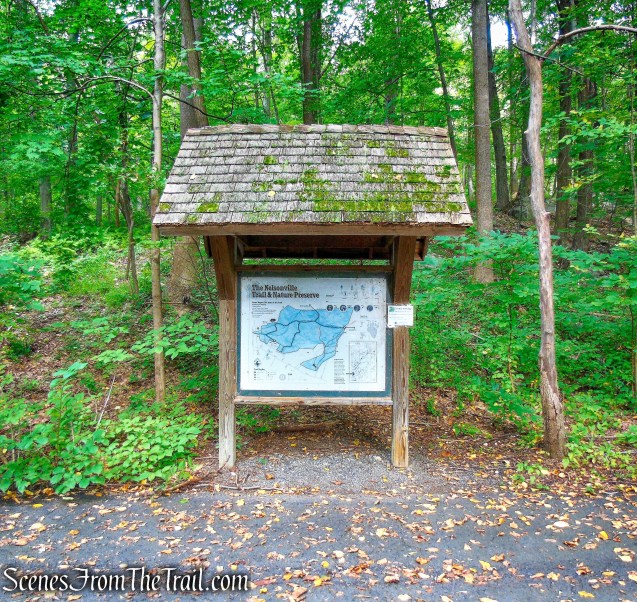
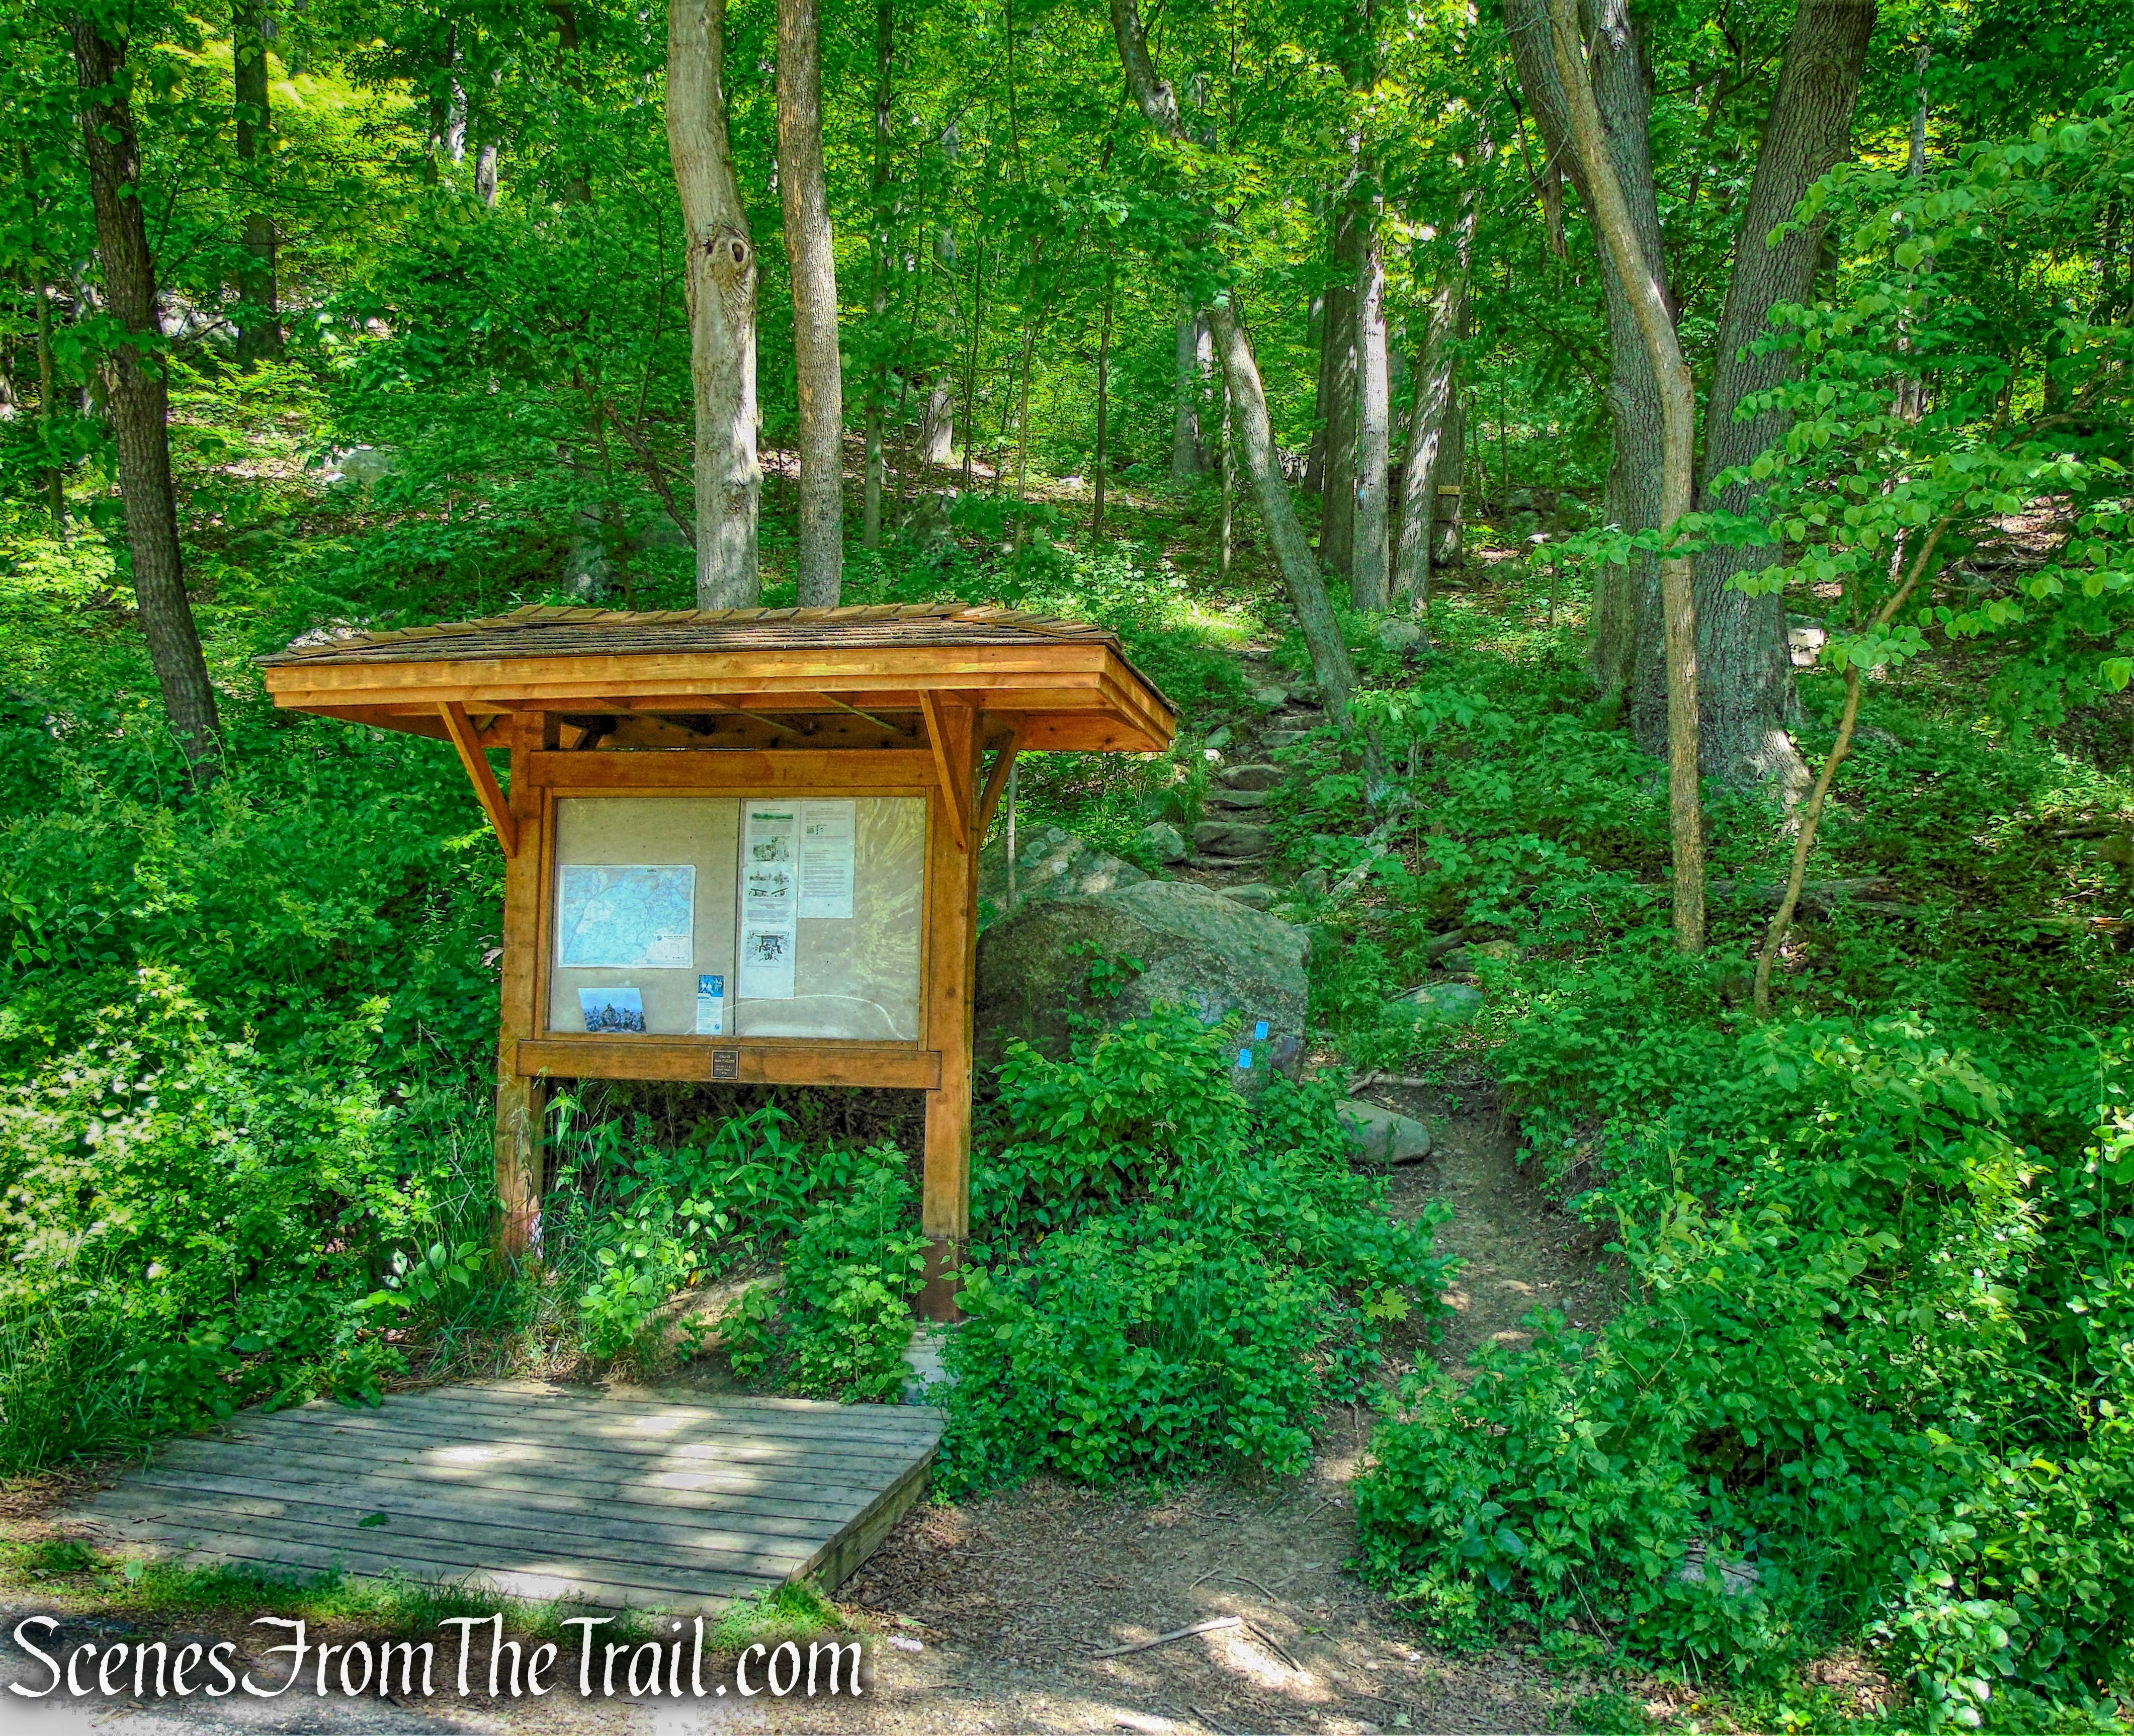
There is also a kiosk with a map here.
Nelsonville Footpath trailhead
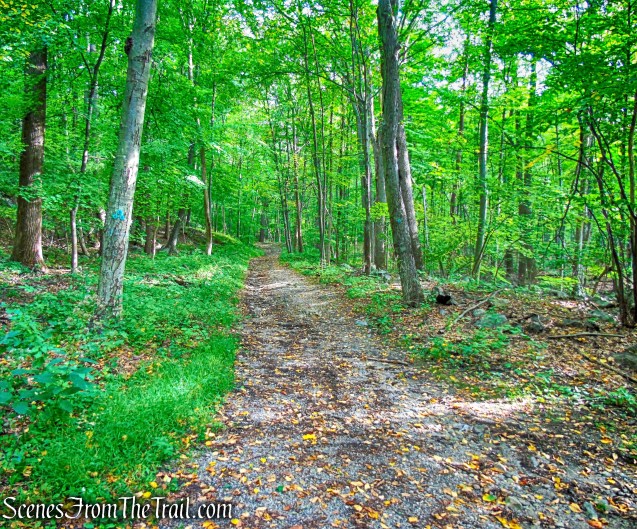
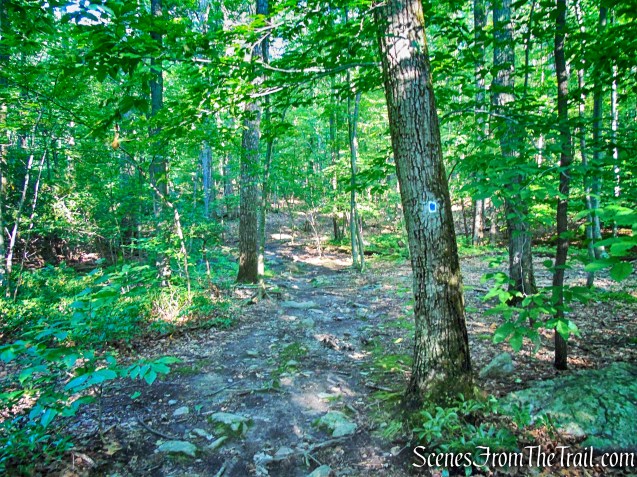
The Nelsonville Footpath continues past the kiosk on the woods road.
Nelsonville Footpath
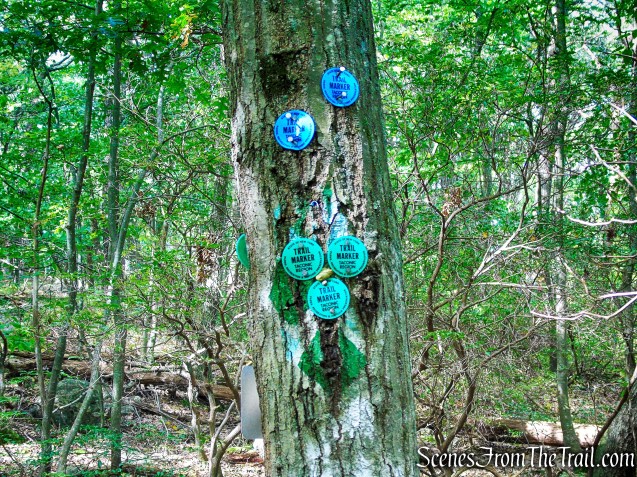
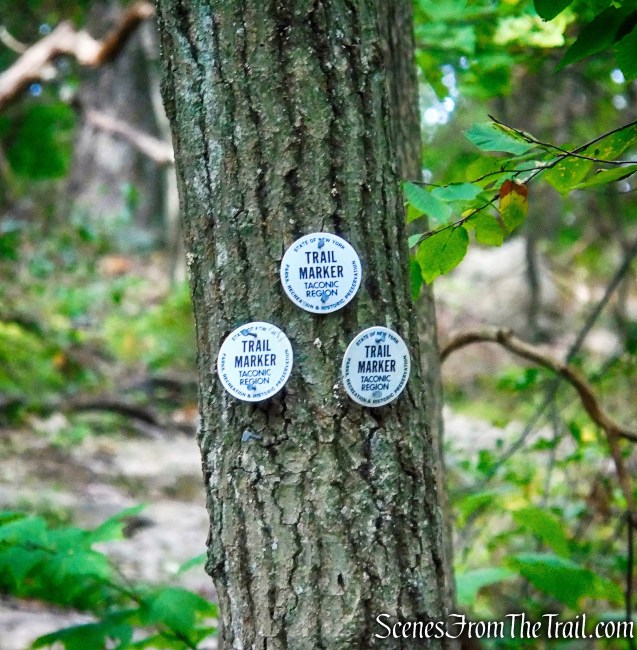
The plastic blazes with the bull logos are now replaced by round NYS markers. Although three blazes normally indicates the start of a trail, this is the continuation of the Nelsonville Footpath.
Nelsonville Footpath
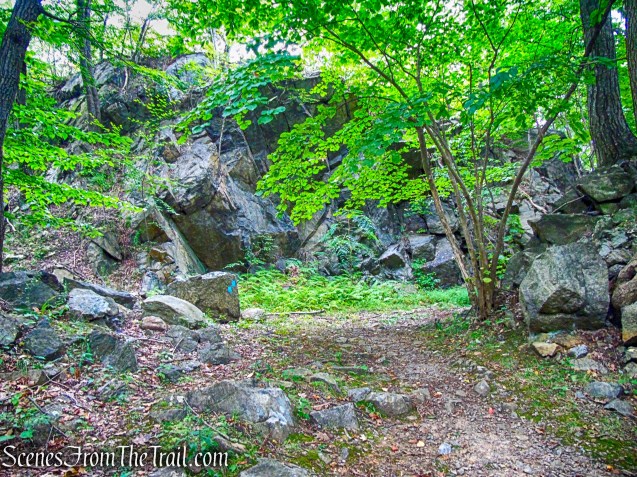
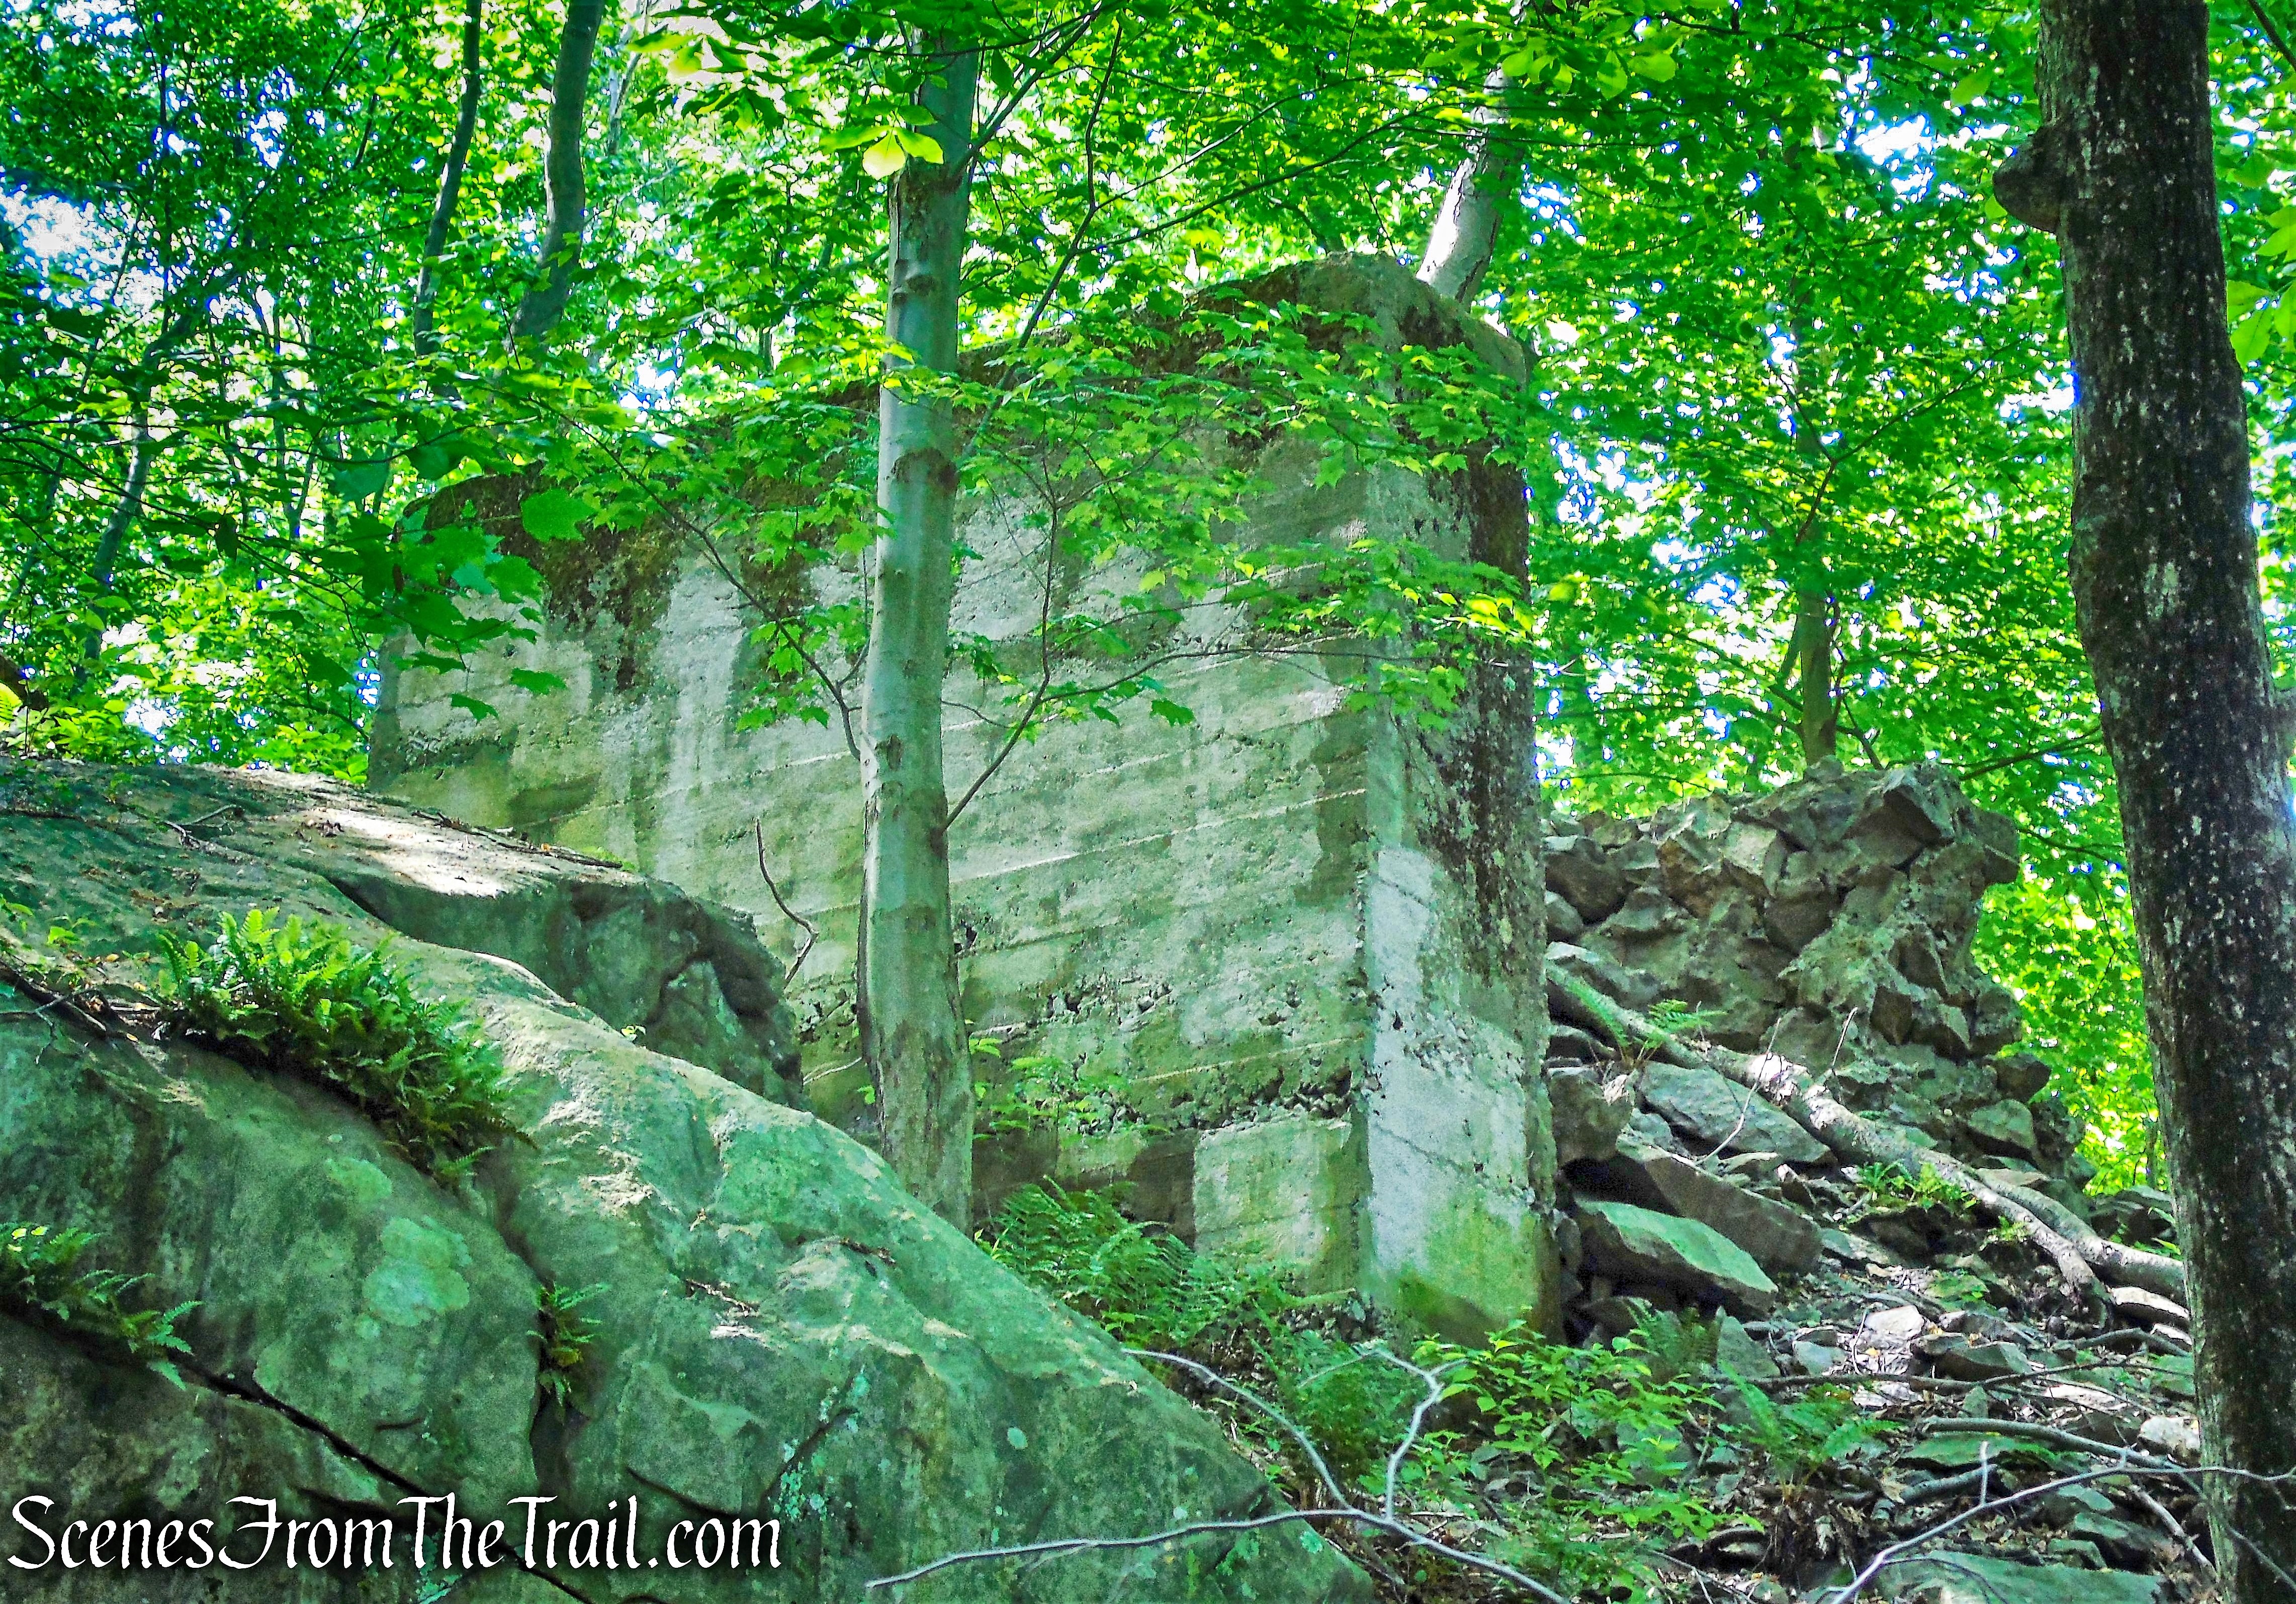
In a short distance, the Nelsonville Footpath reaches a cleared strip of land that intersects the trail. This is the route of the Catskill Aqueduct.
Catskill Aqueduct
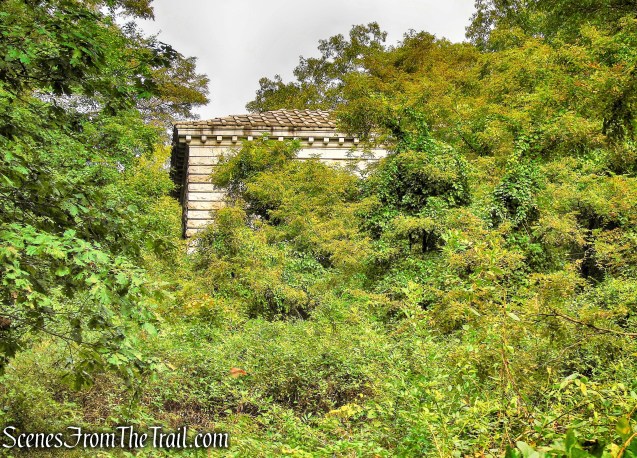
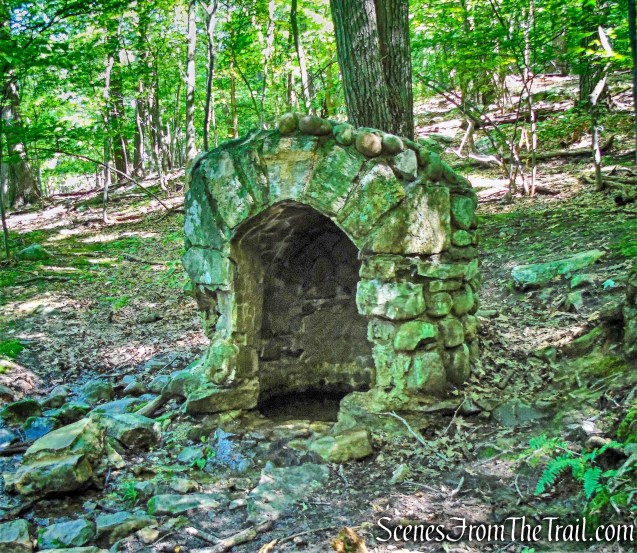
The large stone building uphill on the left is not a pumping station. It houses one end of an inverted syphon that carries the water down to and under Route 301 and then up to the next ridge.
Catskill Aqueduct
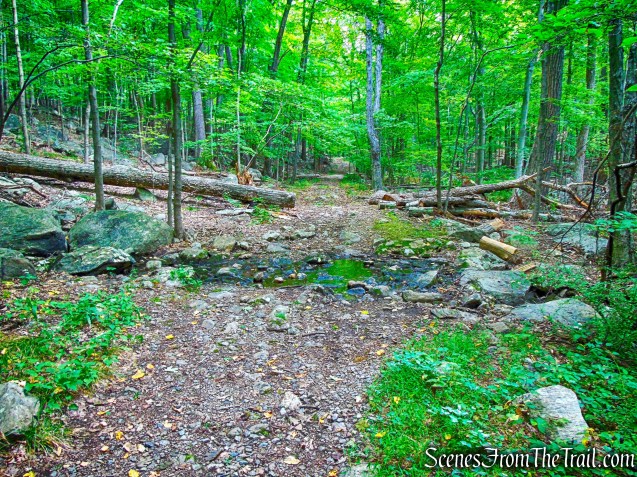
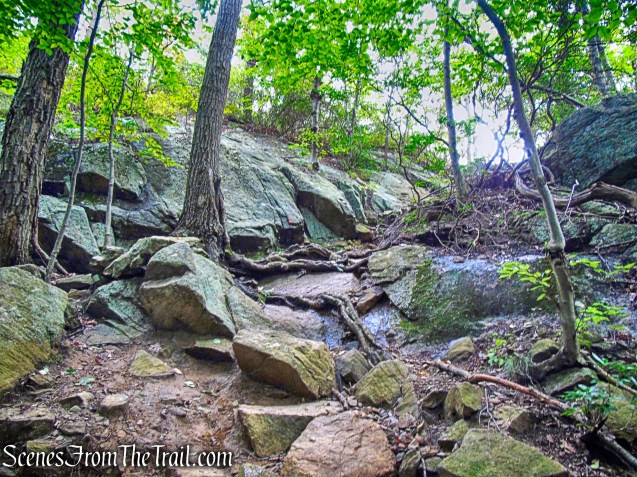
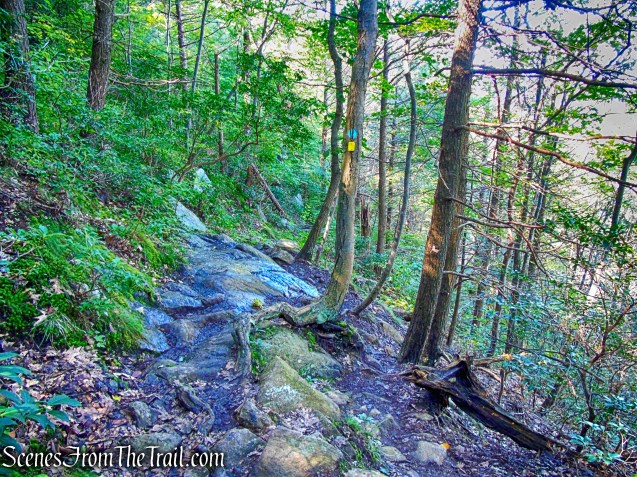
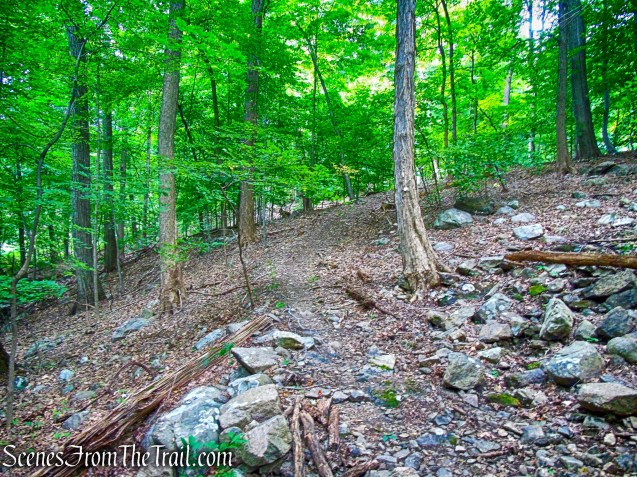
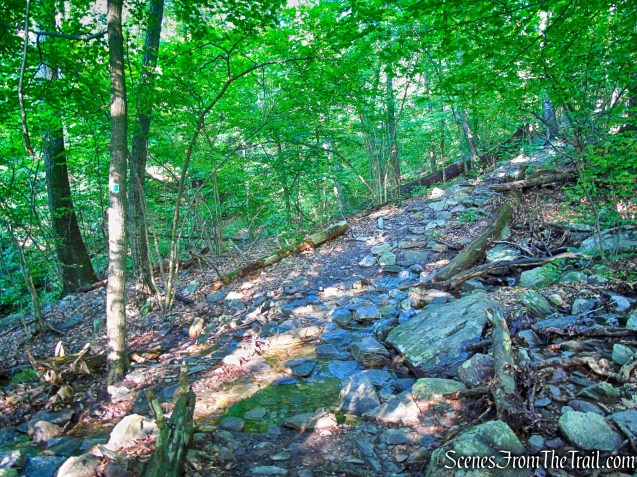
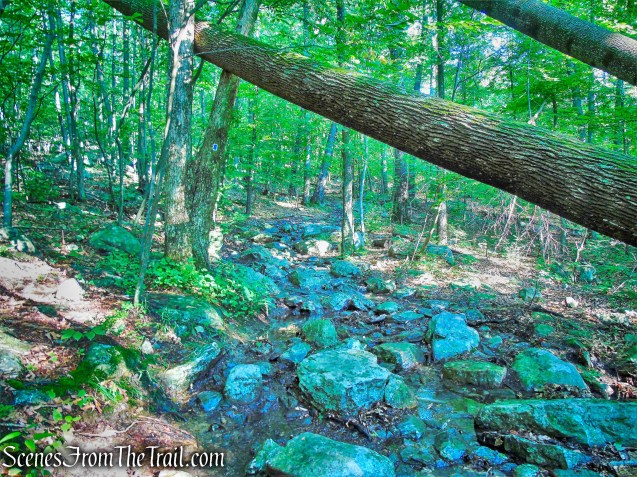
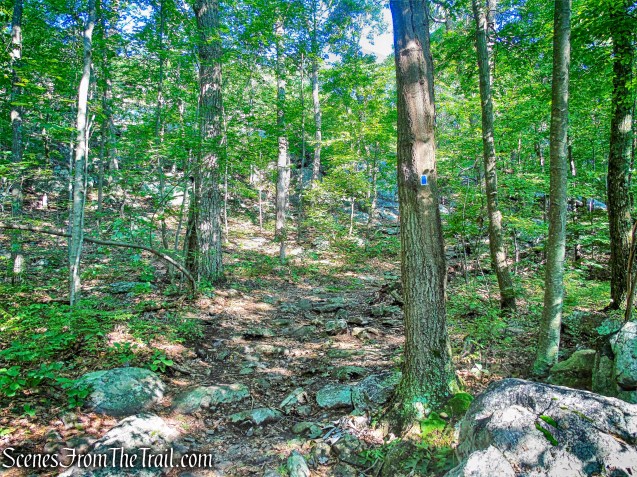
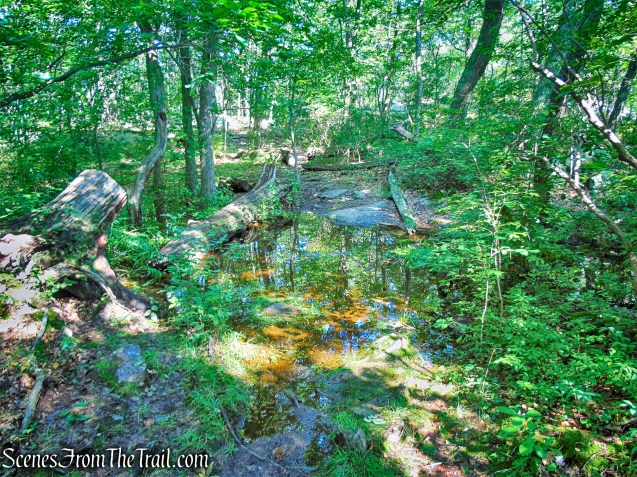
The Nelsonville Footpath now crosses a stream, bears right, and begins a steady ascent.
stream crossing – Nelsonville Footpath
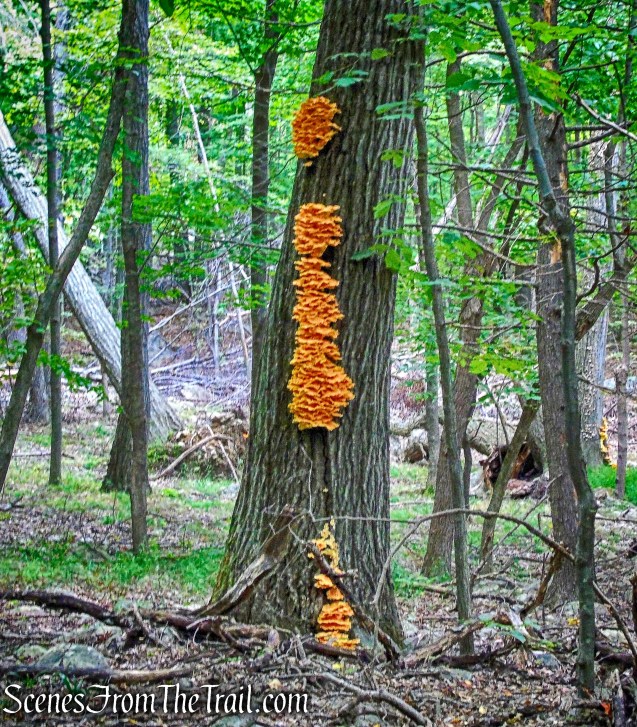
To the right of the trail, some interesting looking mushrooms growing on a tree. They are commonly referred to as “chicken of the woods.” This edible mushroom can be prepared in most ways that one can prepare chicken meat. I have never tried it and I probably never will.
chicken of the woods
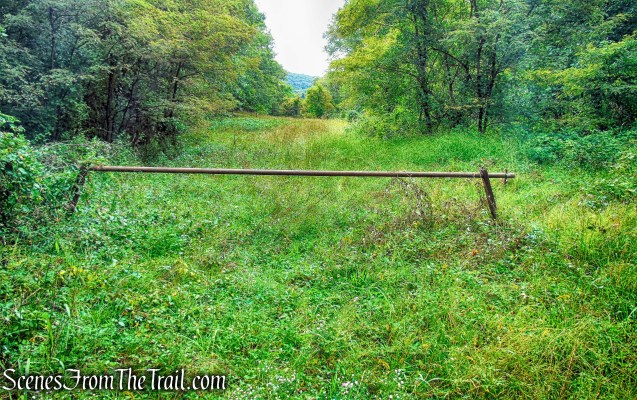
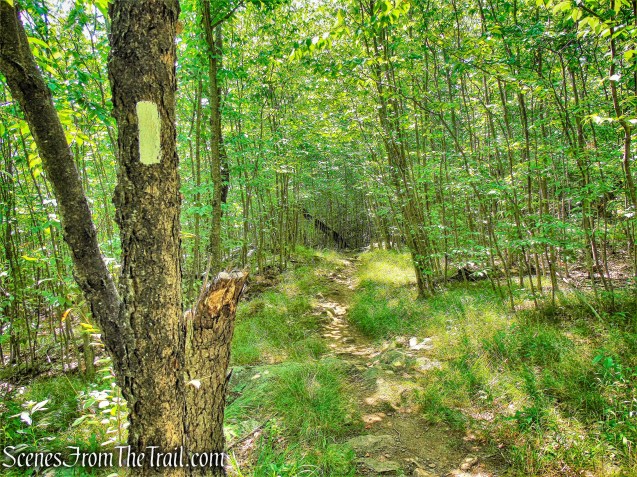
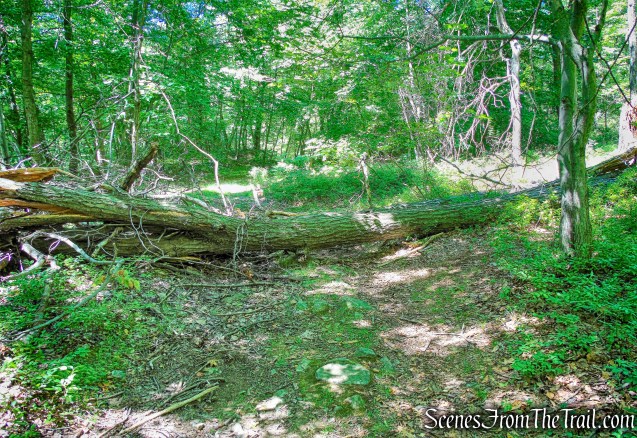
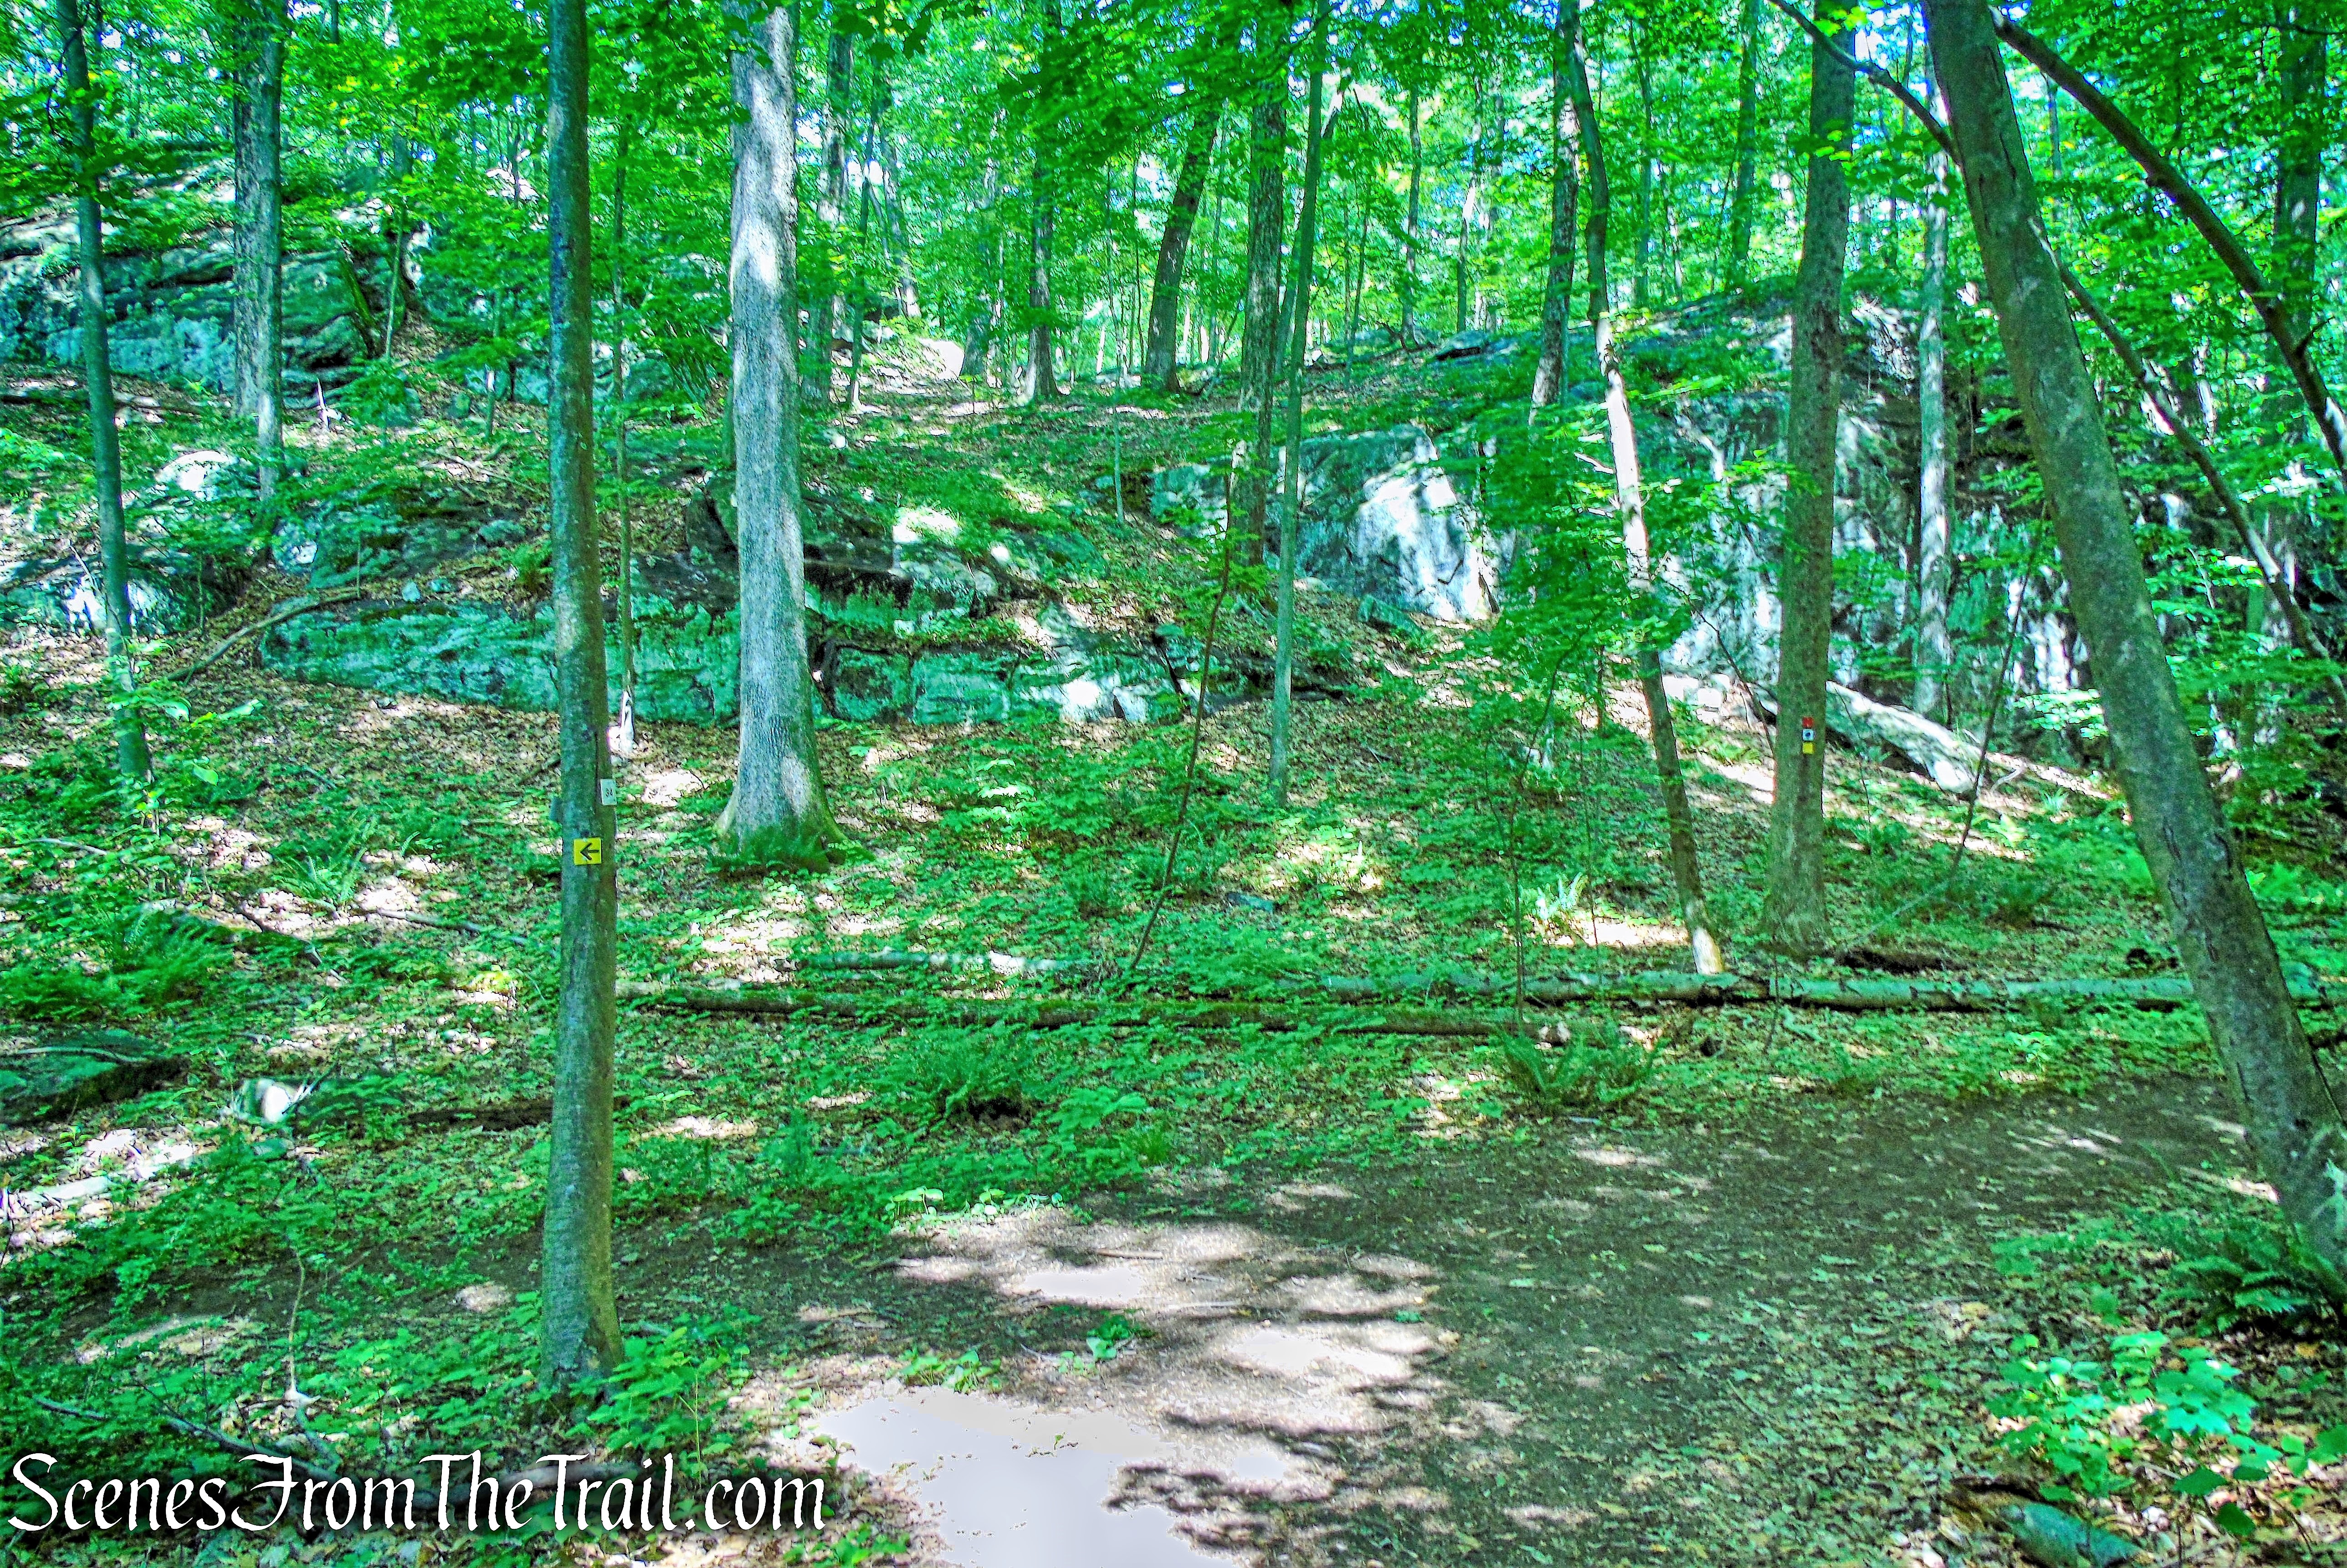
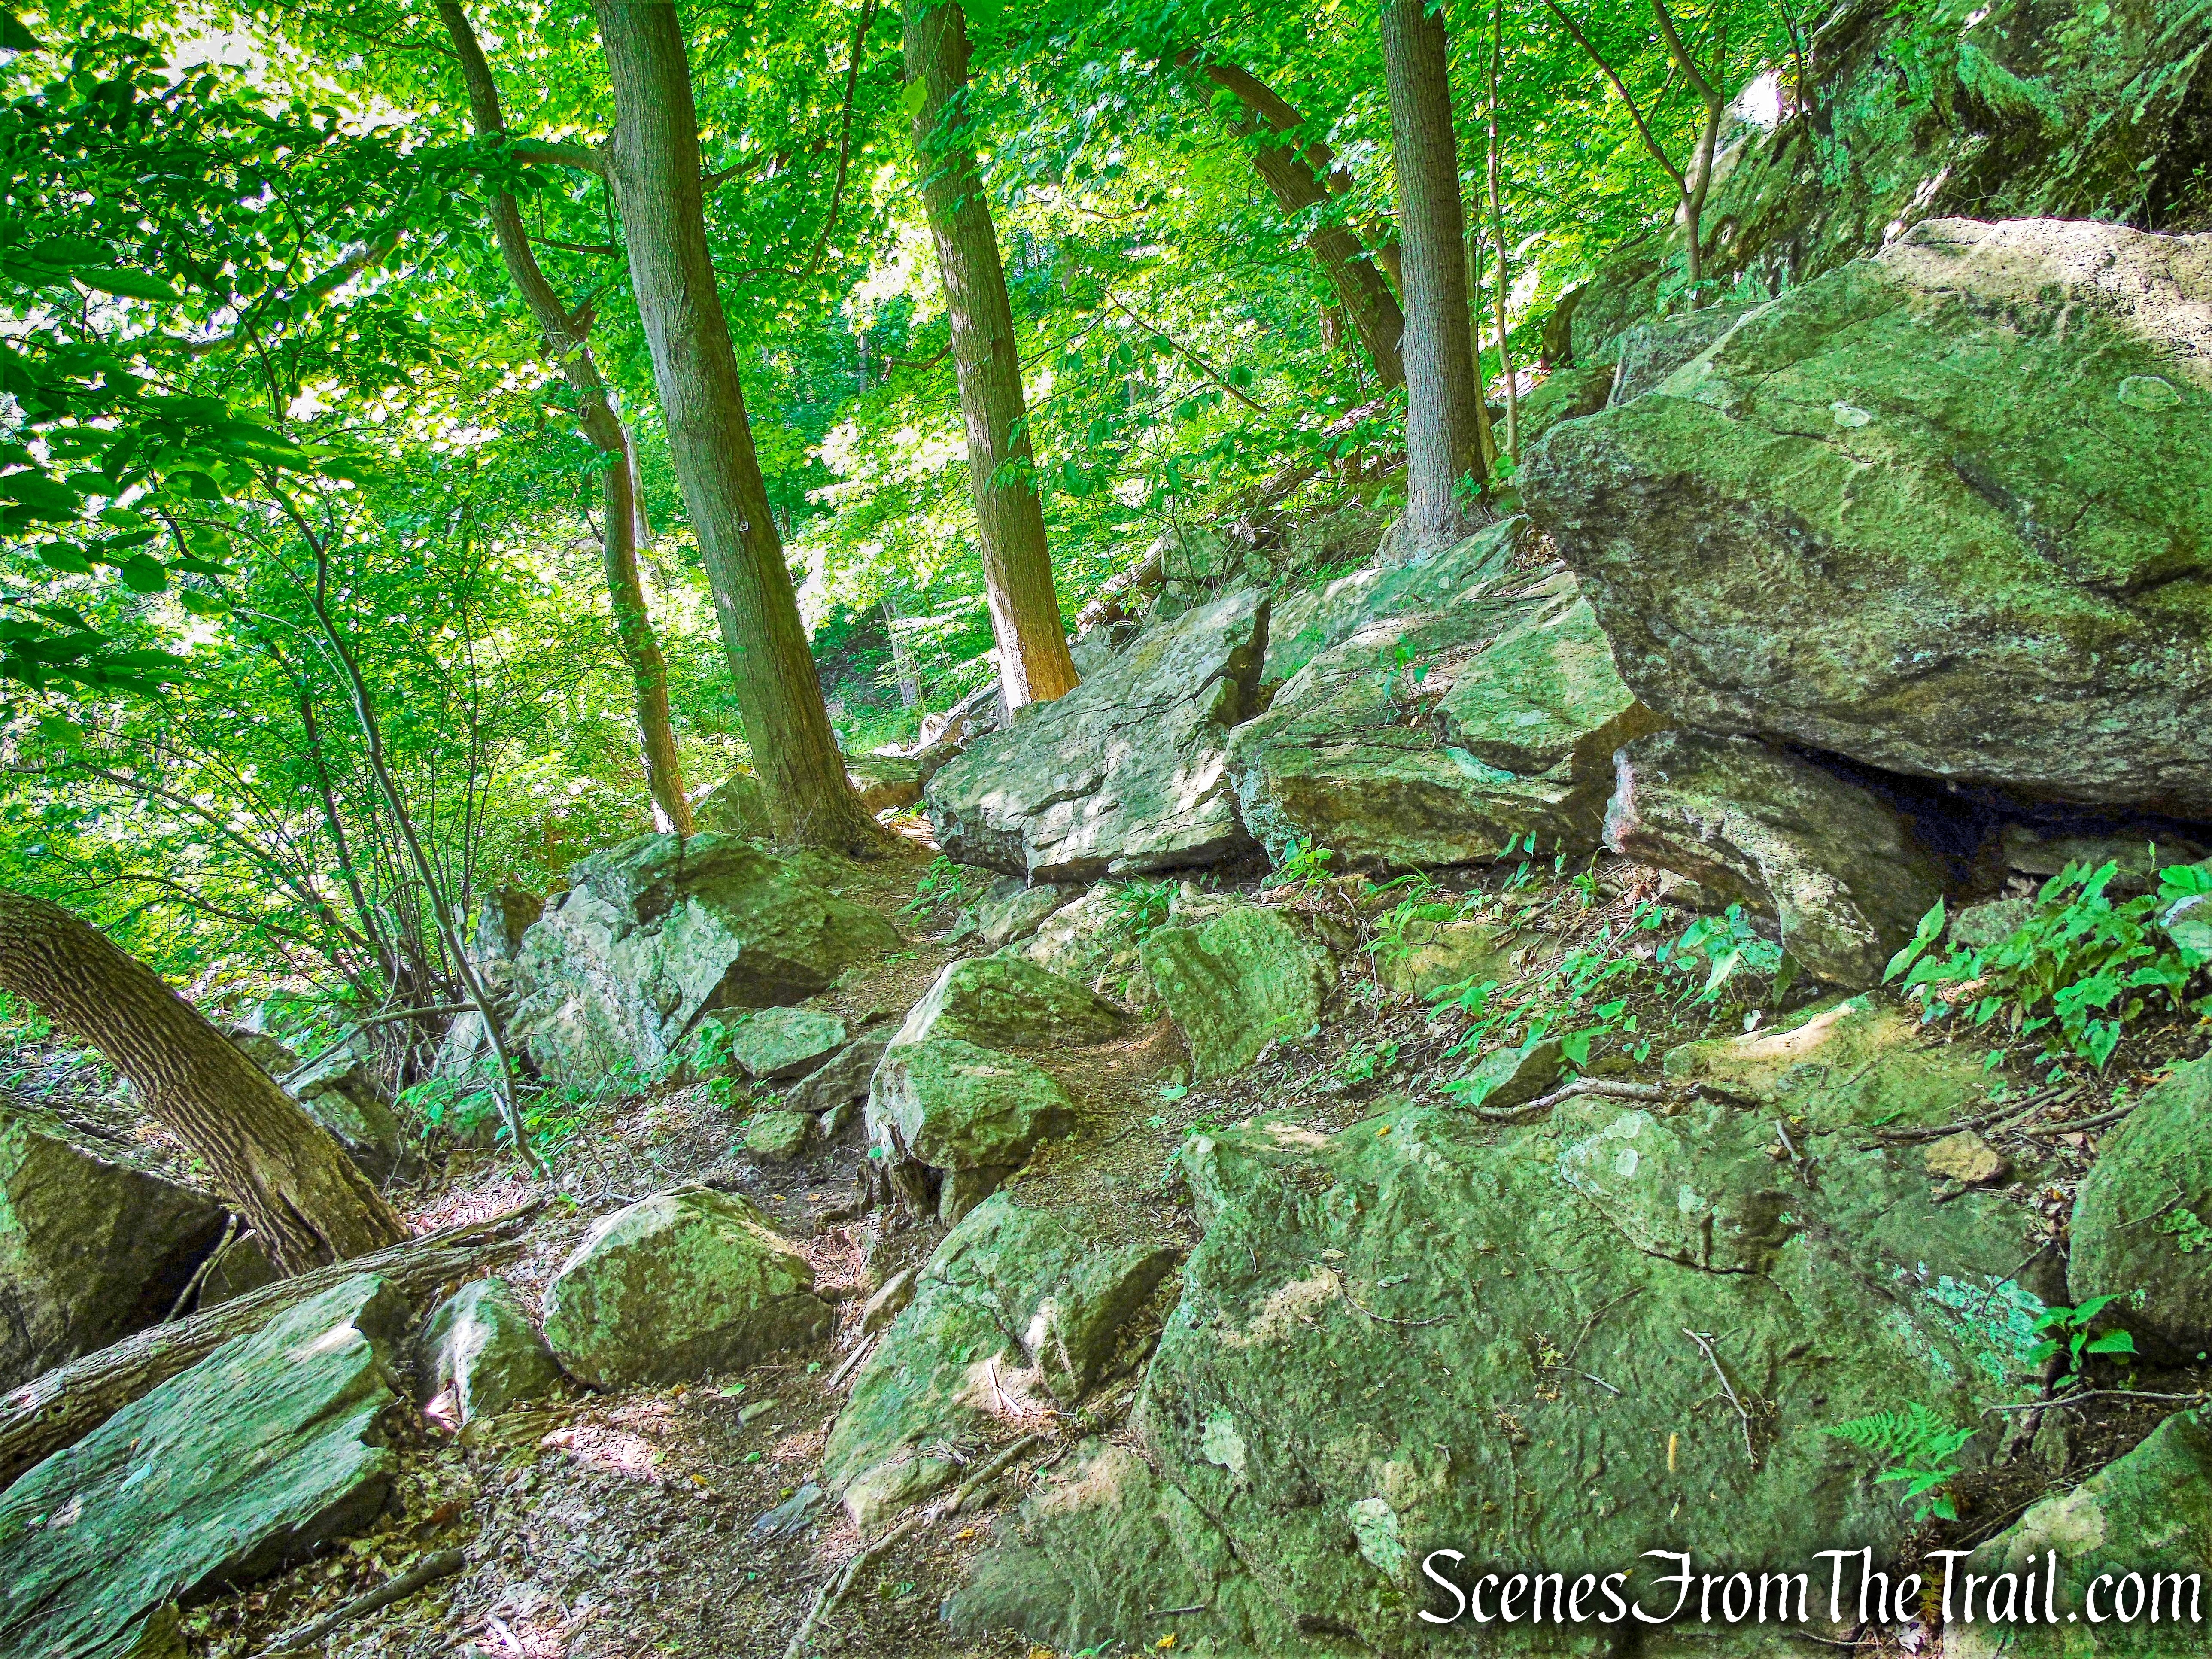
At 1.2 miles, it passes gate posts (and a broken gate) which mark the boundary of Hudson Highlands State Park. Just beyond, the Split Rock Trail (red) leaves to the right.
boundary of Hudson Highlands State Park
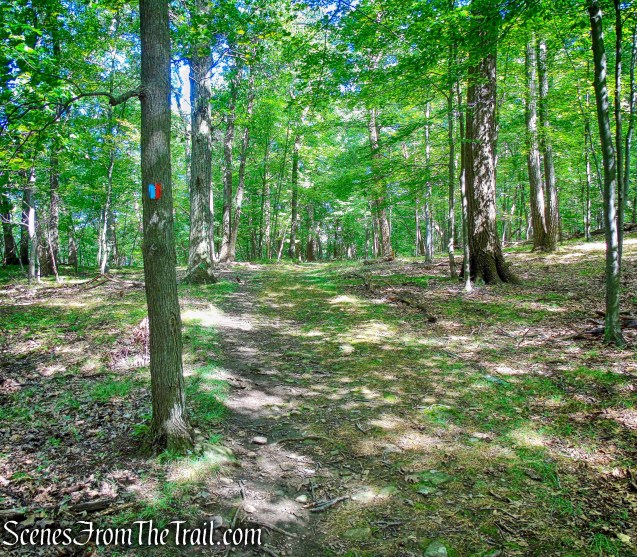
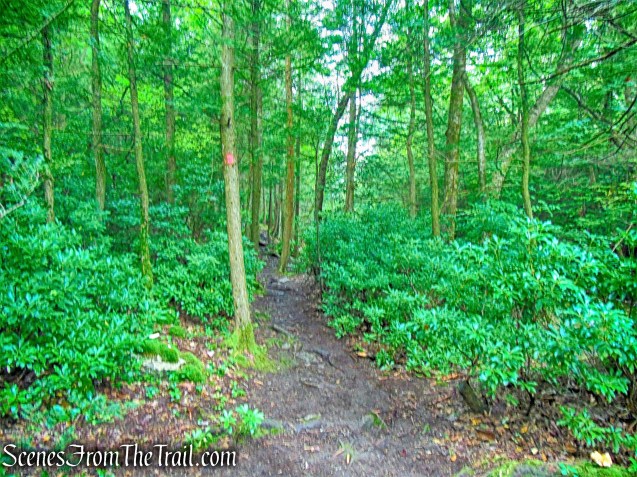
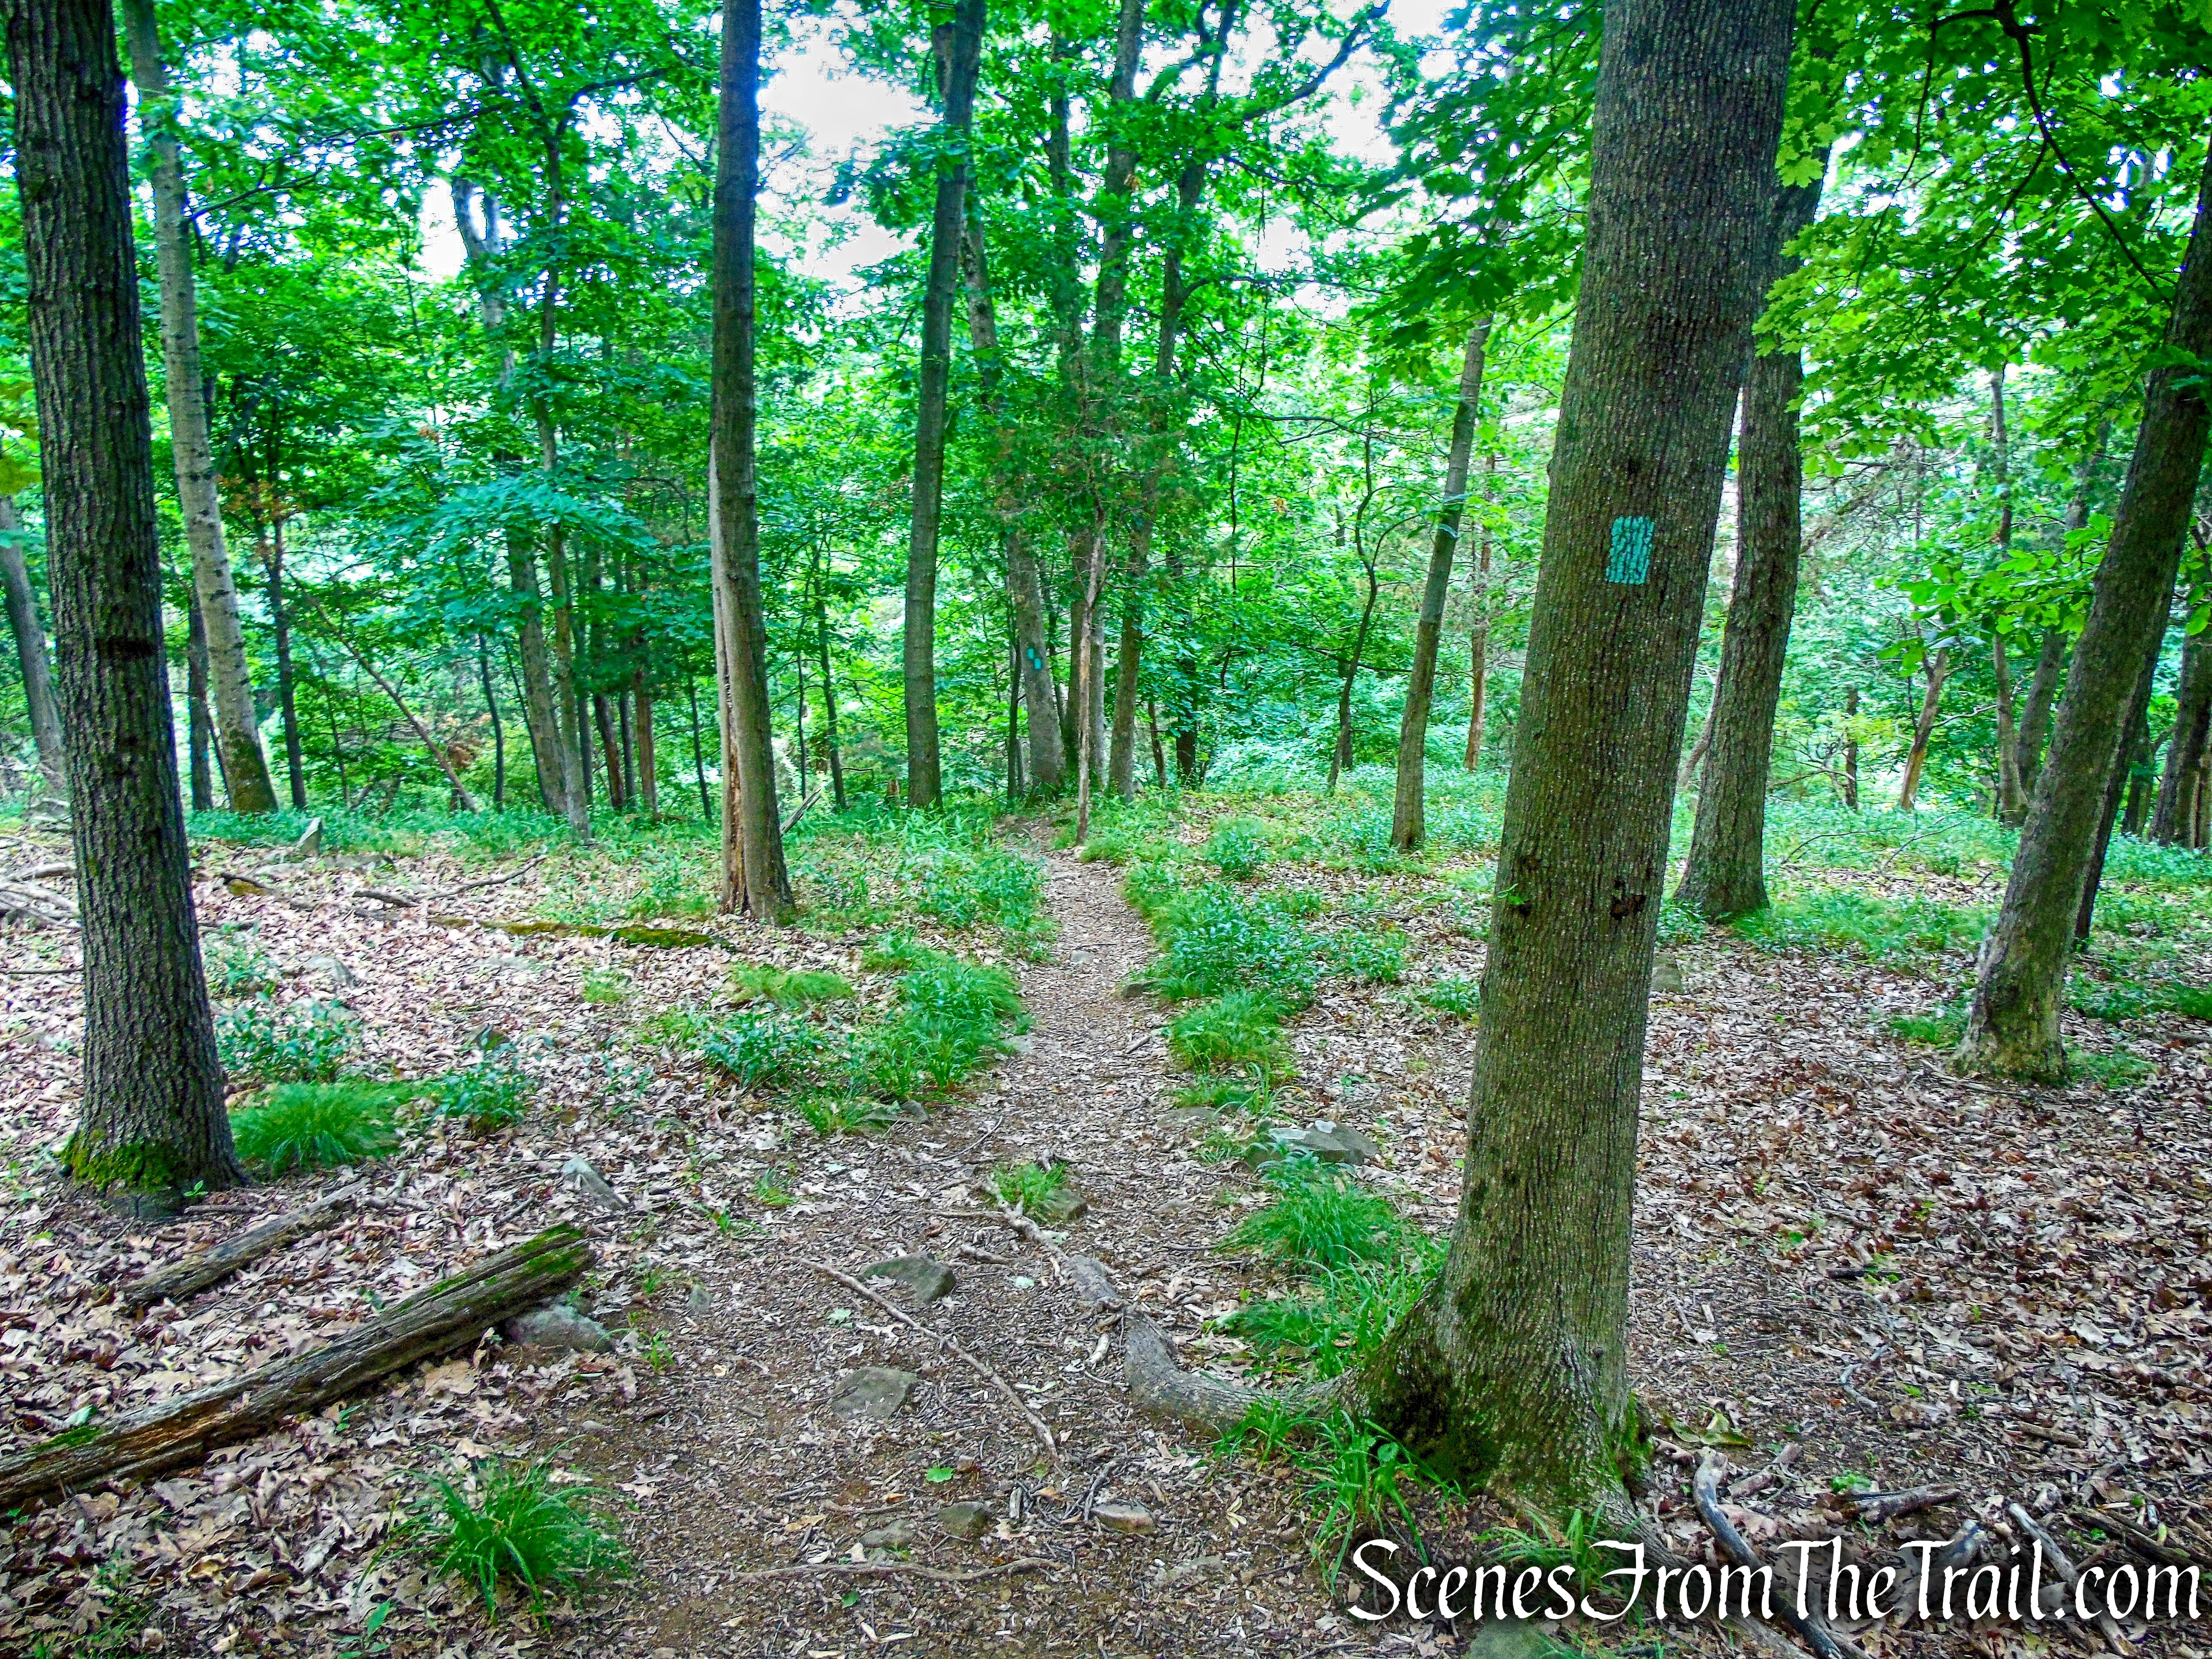
The trail begins to pass through attractive mountain laurel thickets.
Nelsonville Footpath
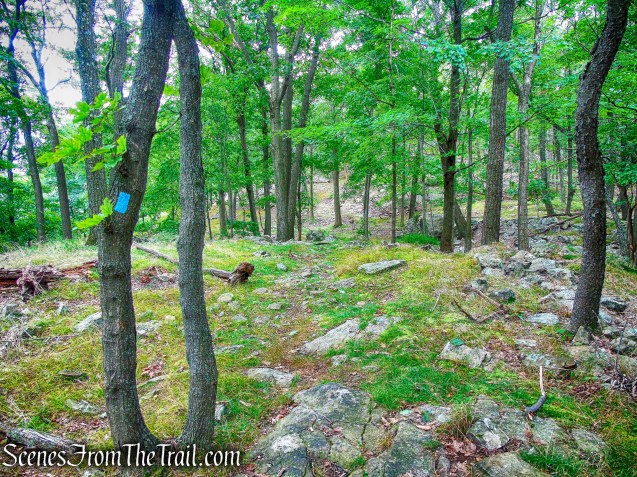
After several more turns, the Lone Star Trail (blue) begins to the right.
junction with Lone Star Trail
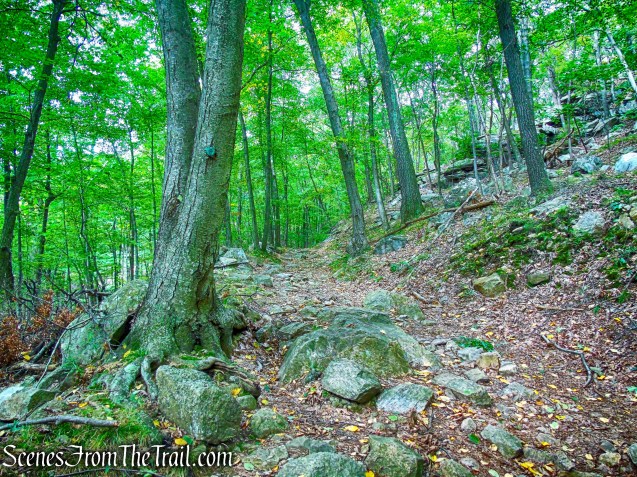
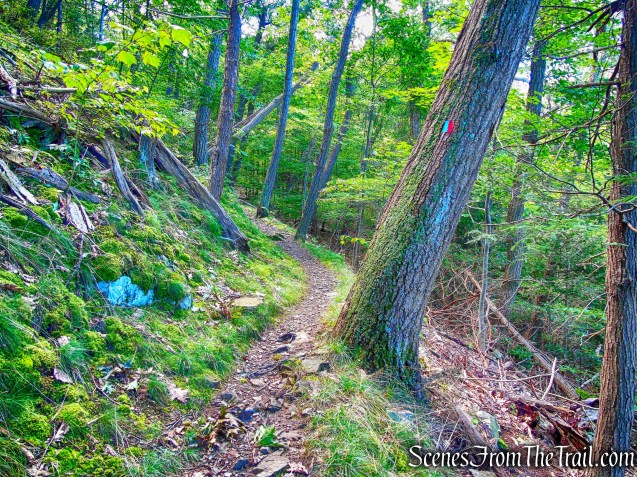
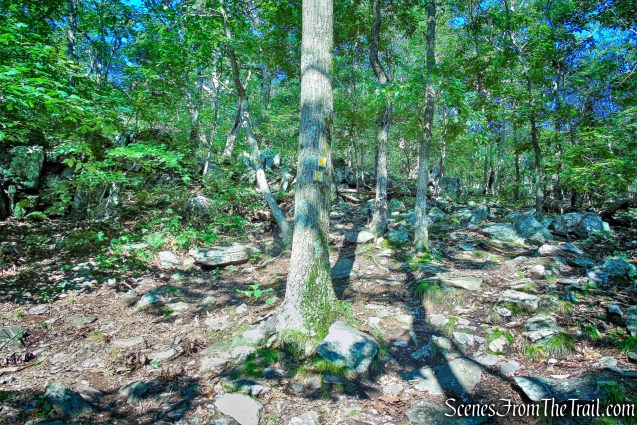
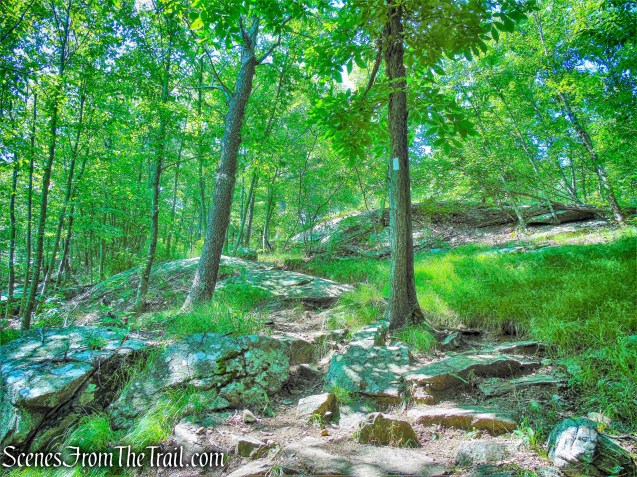
The Nelsonville Footpath turns left and continues to climb steadily along the woods road, quite eroded in places.
Nelsonville Footpath
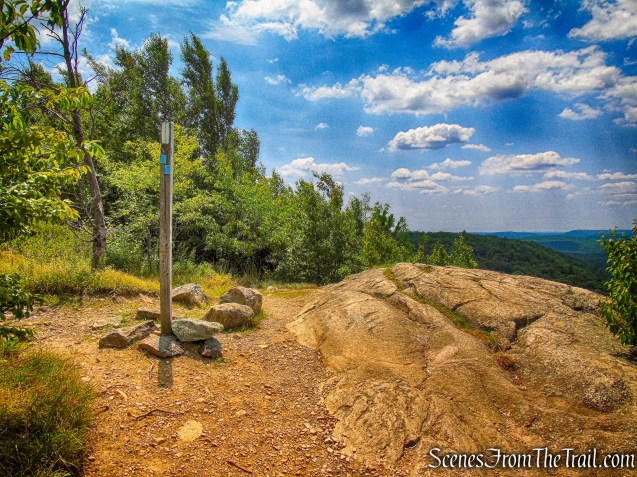
The Nelsonville Footpath ends at a three-way junction, with the blue-blazed Notch Trail, which begins on the right and the white-blazed Washburn Trail which continues ahead.
terminus of Nelsonville Footpath
terminus of Nelsonville Footpath
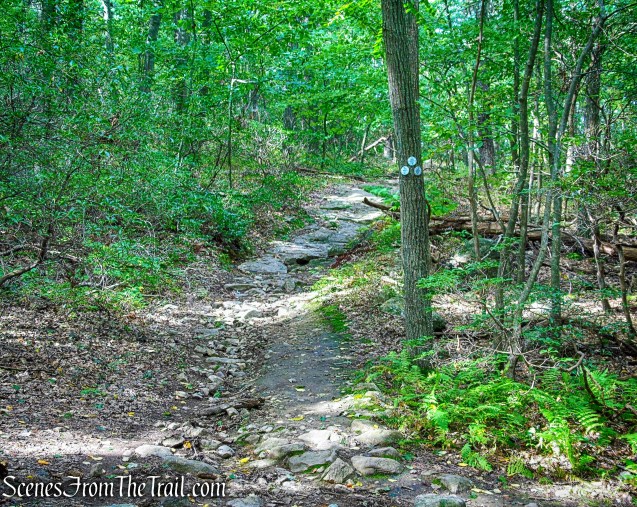
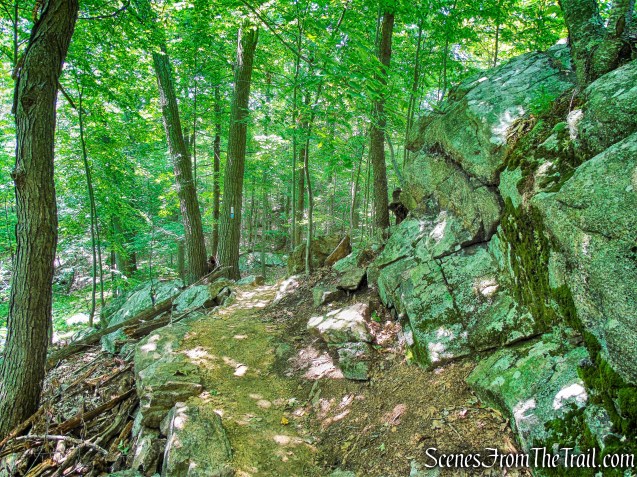
We continued ahead on the woods road, now blazed white as the Washburn Trail.
Washburn Trail
Washburn Trail
The Washburn Trail climbs Bull Hill (Mt. Taurus) on broad switchbacks.
Washburn Trail
We passed several groups of hikers going in the opposite direction in this area.
Washburn Trail
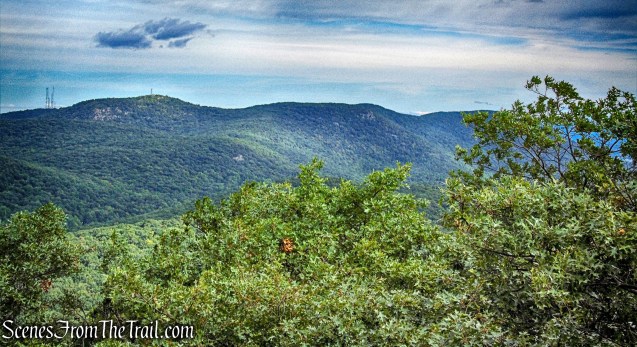
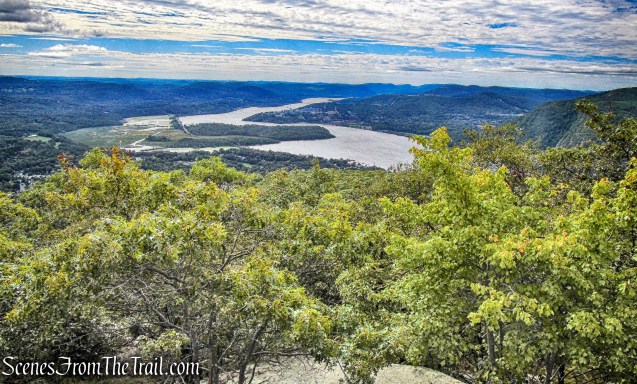
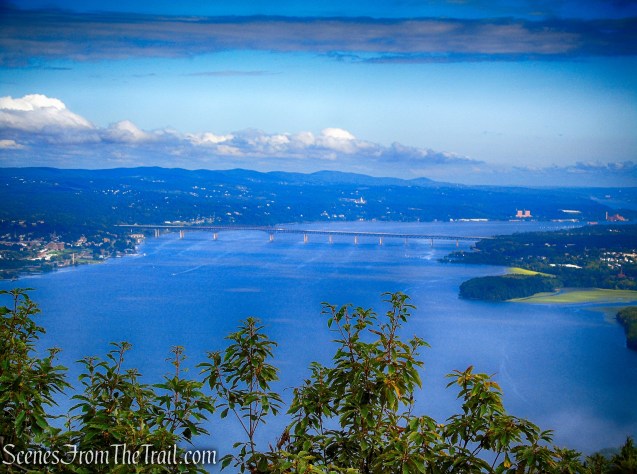
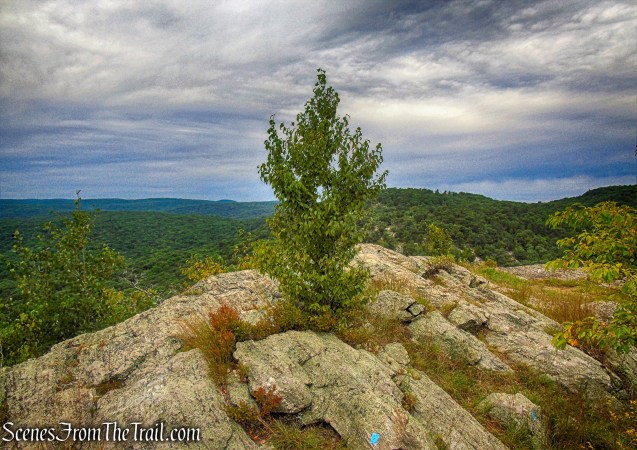
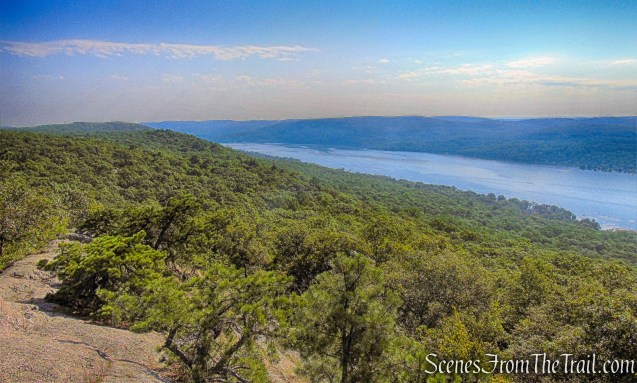
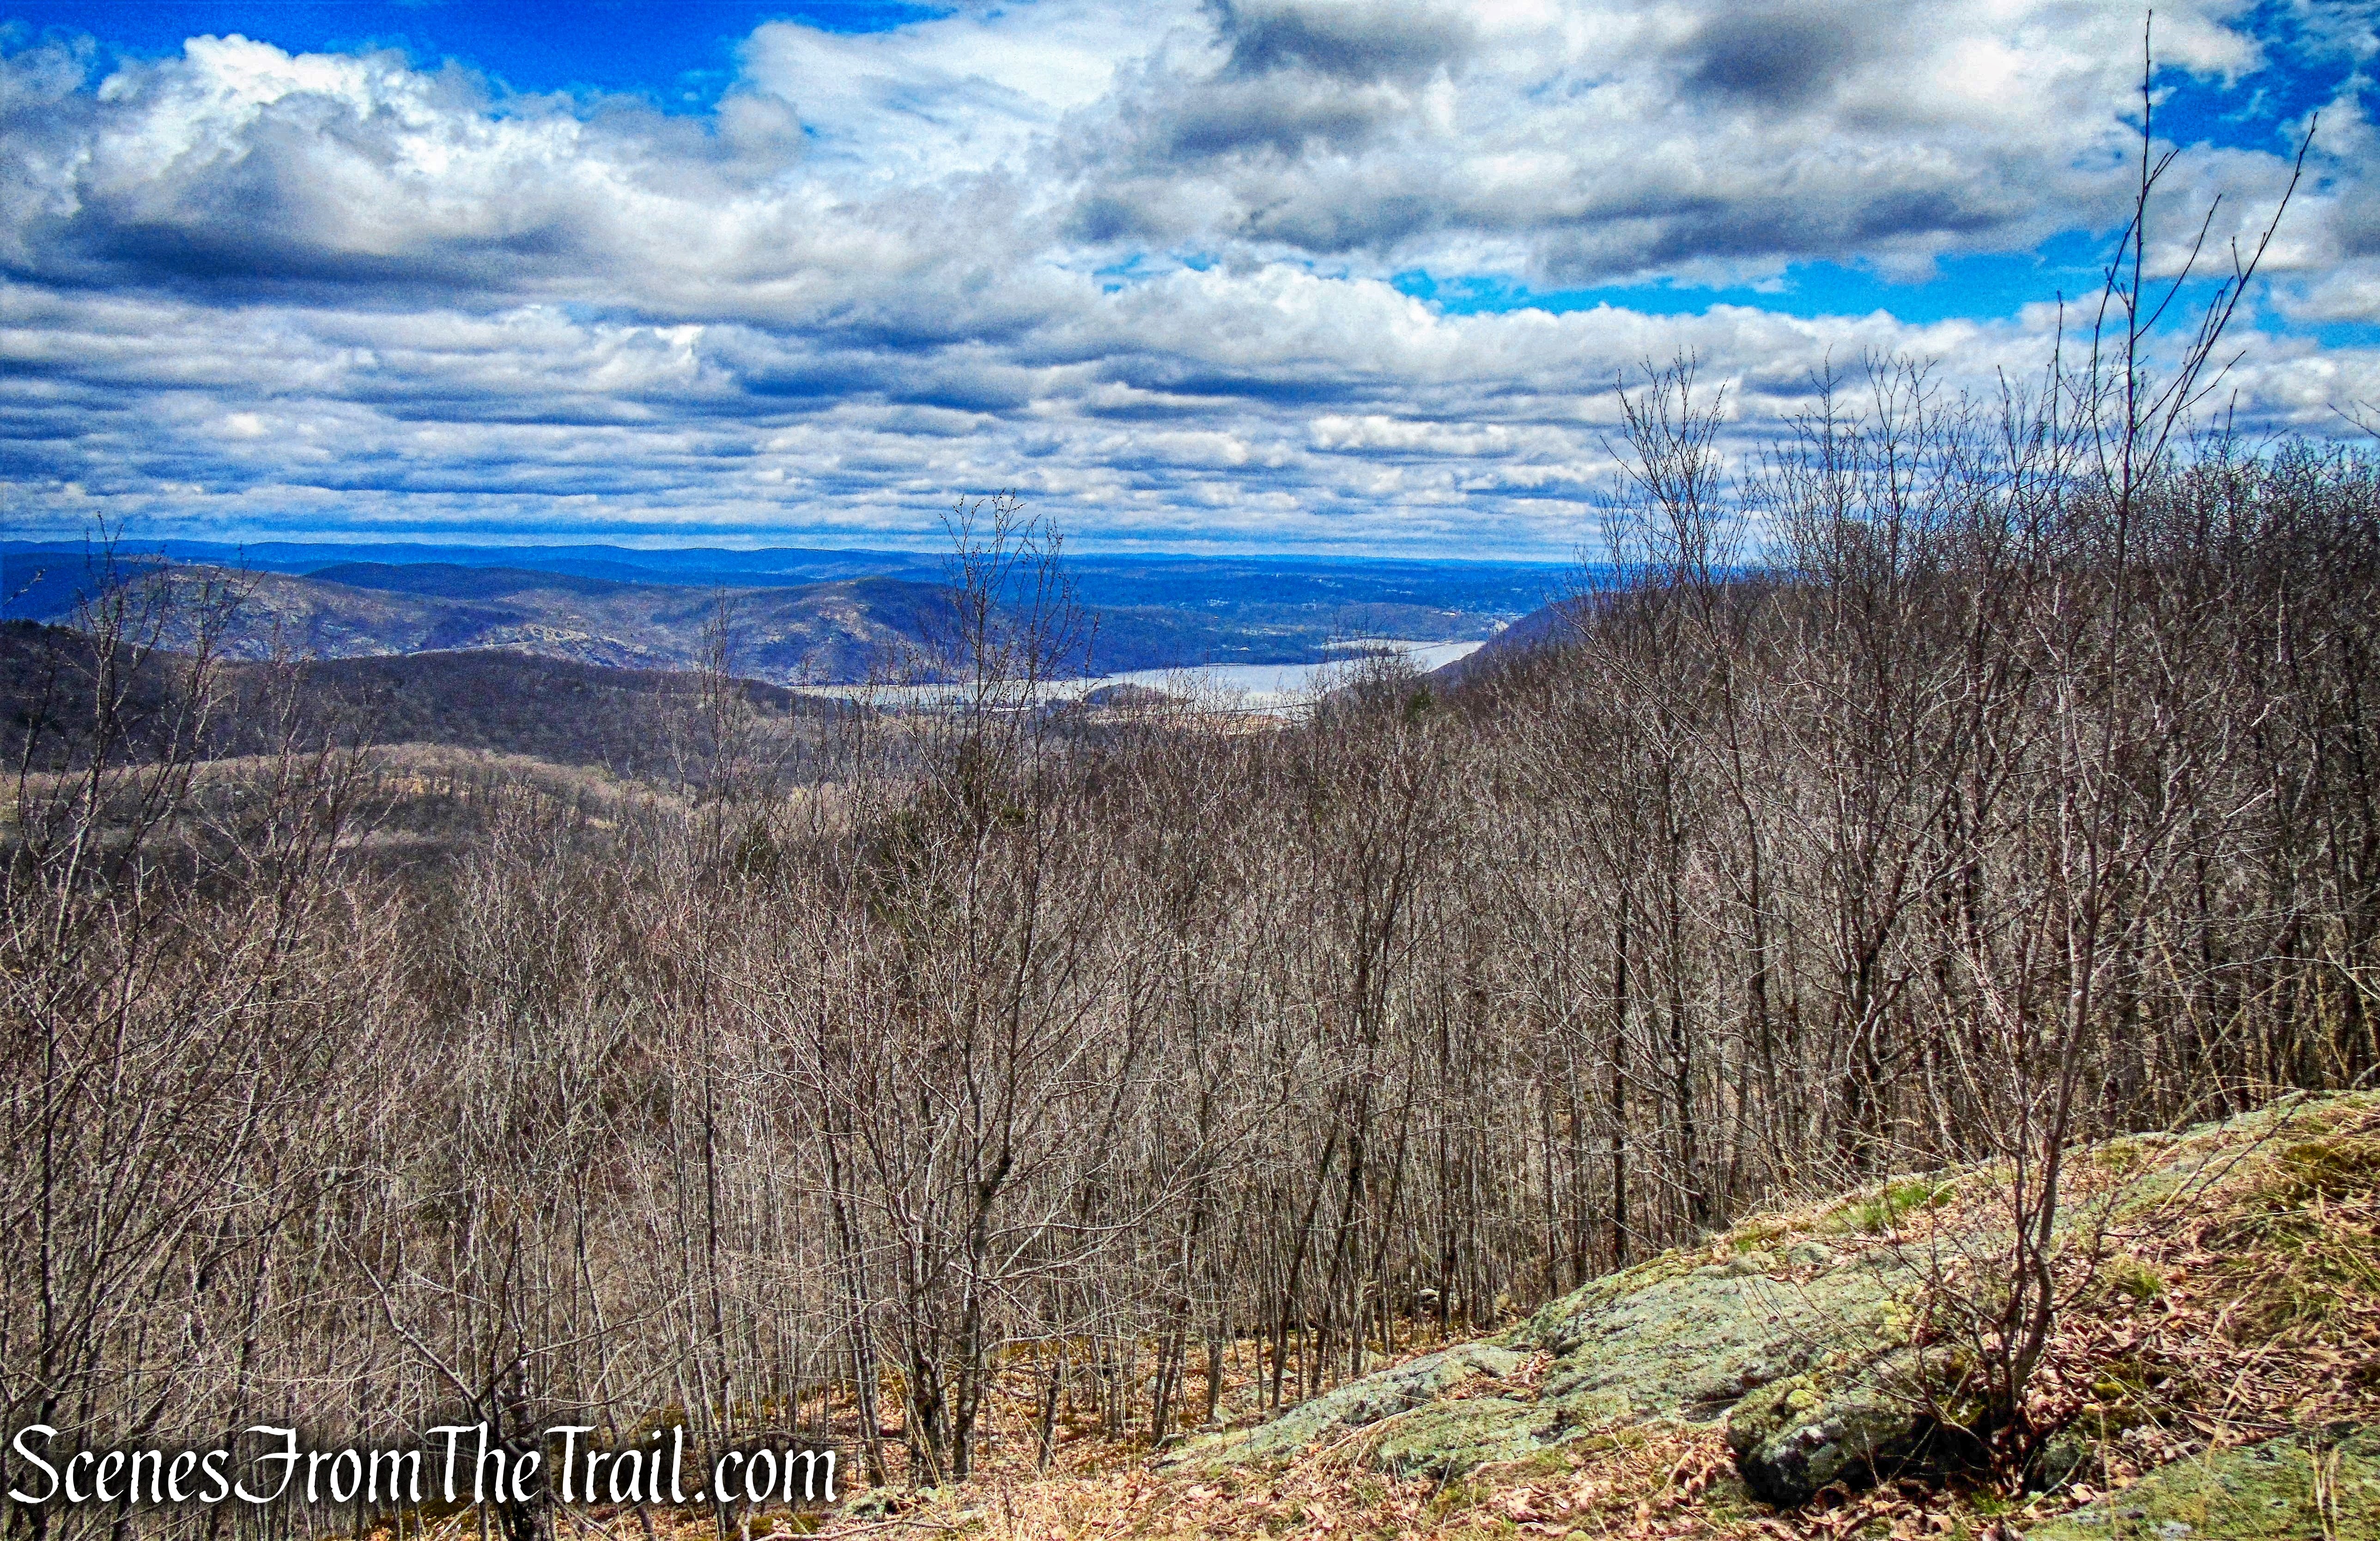
As the trail approaches the summit, there is a north-facing view from rock ledges just to the right of the trail. To the left, one can see the Hudson River. The imposing ridge extending northeast from the river is Breakneck Ridge.
north-facing view – Washburn Trail
The Newburgh-Beacon Bridge is visible through a low point in the ridge.
north-facing view – Washburn Trail
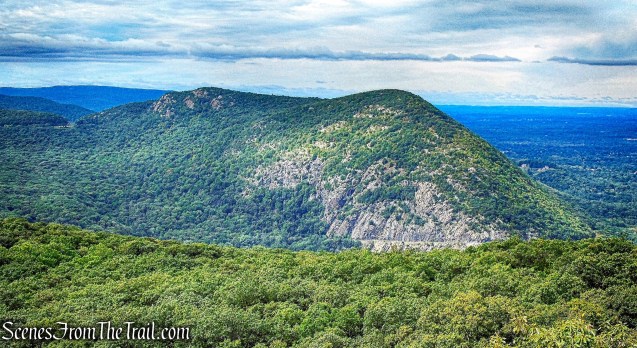
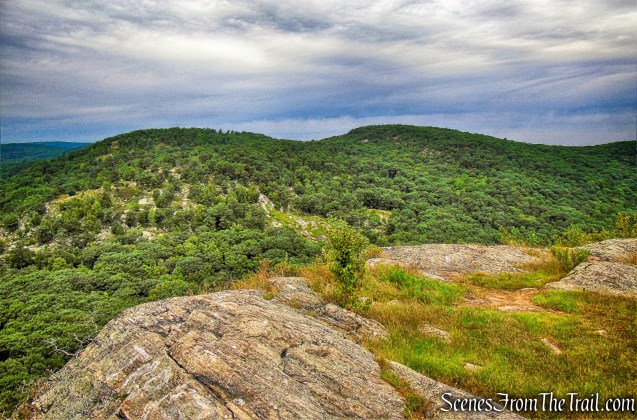
In the image below, from left to right: North Beacon Mountain with the communications towers at its summit, the fire tower on South Beacon Mountain, the highest point in the East Hudson Highlands and Scofield Ridge visible in the center and Fishkill Ridge on the right, partially obscured..
north-facing view – Washburn Trail
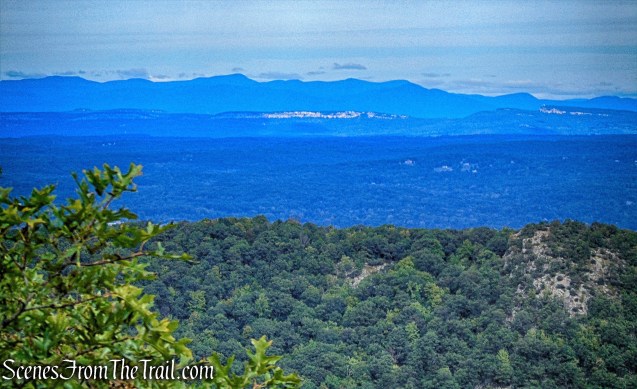
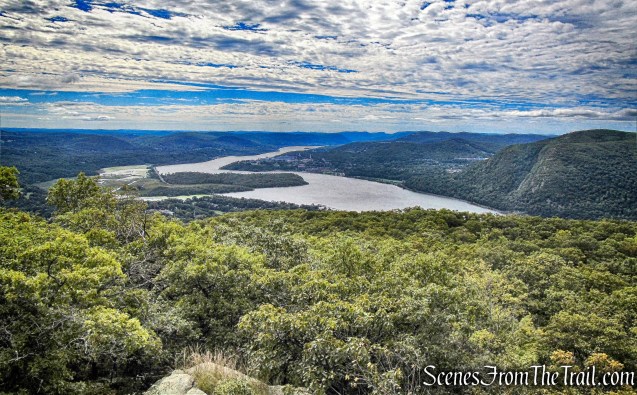
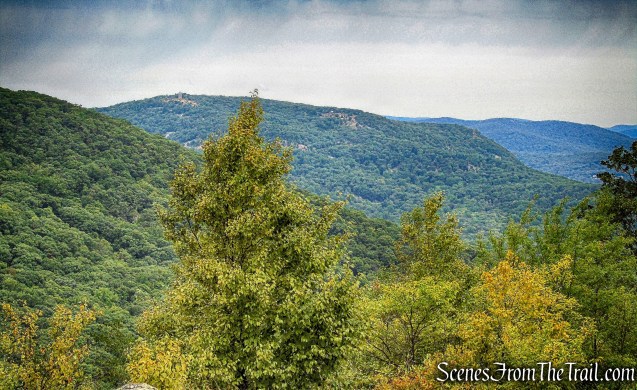
In the distance, the white cliffs of the Shawangunk Mountains and the Catskills just beyond, may be seen on a clear day. This is was good spot to take a well-deserved rest. We had just climbed about 1,150 vertical feet to reach this point.
north-facing view – Washburn Trail
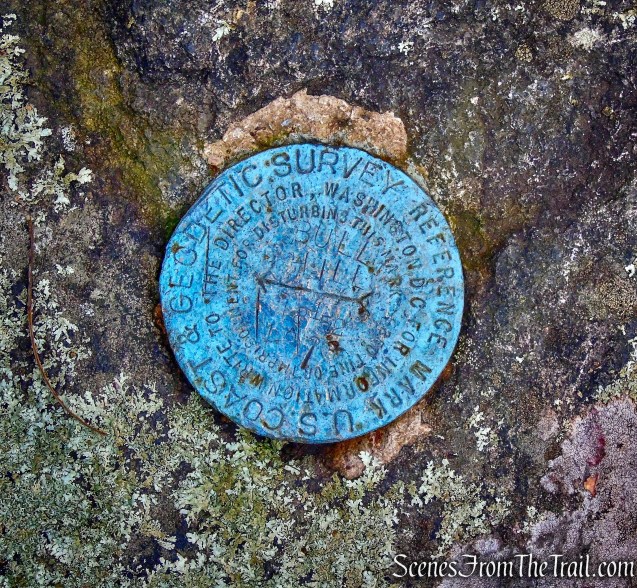
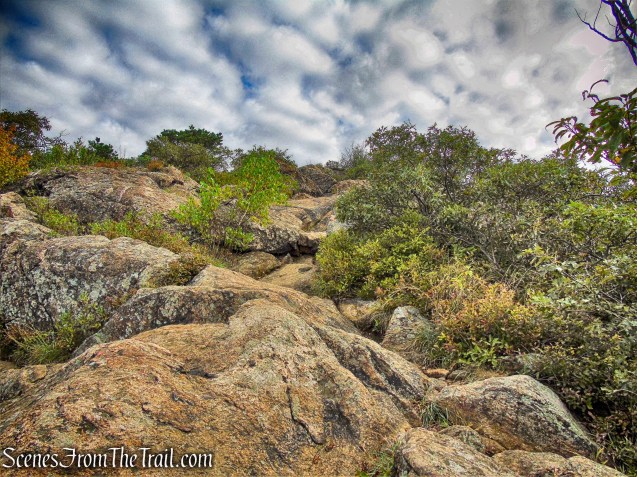
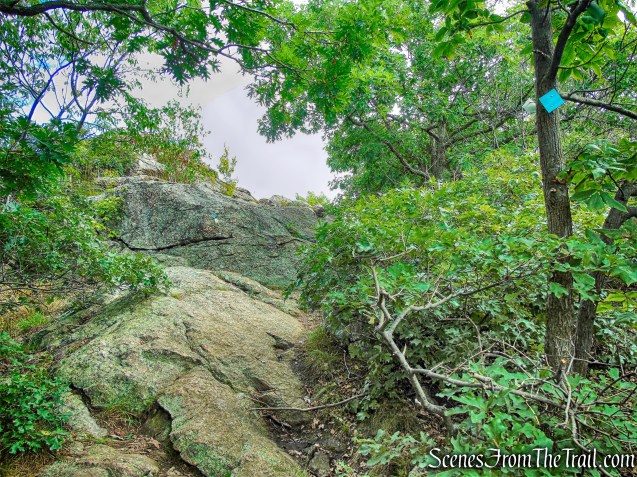
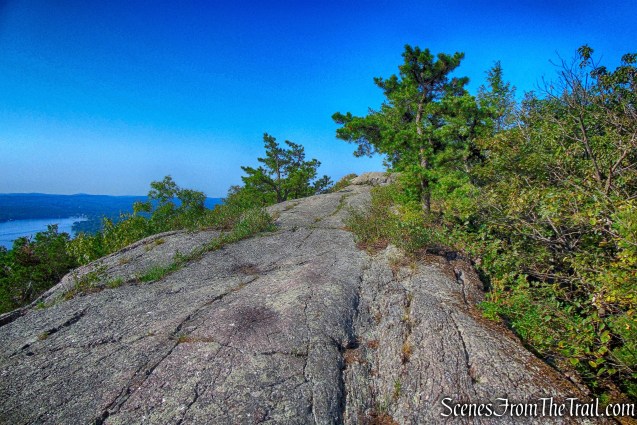
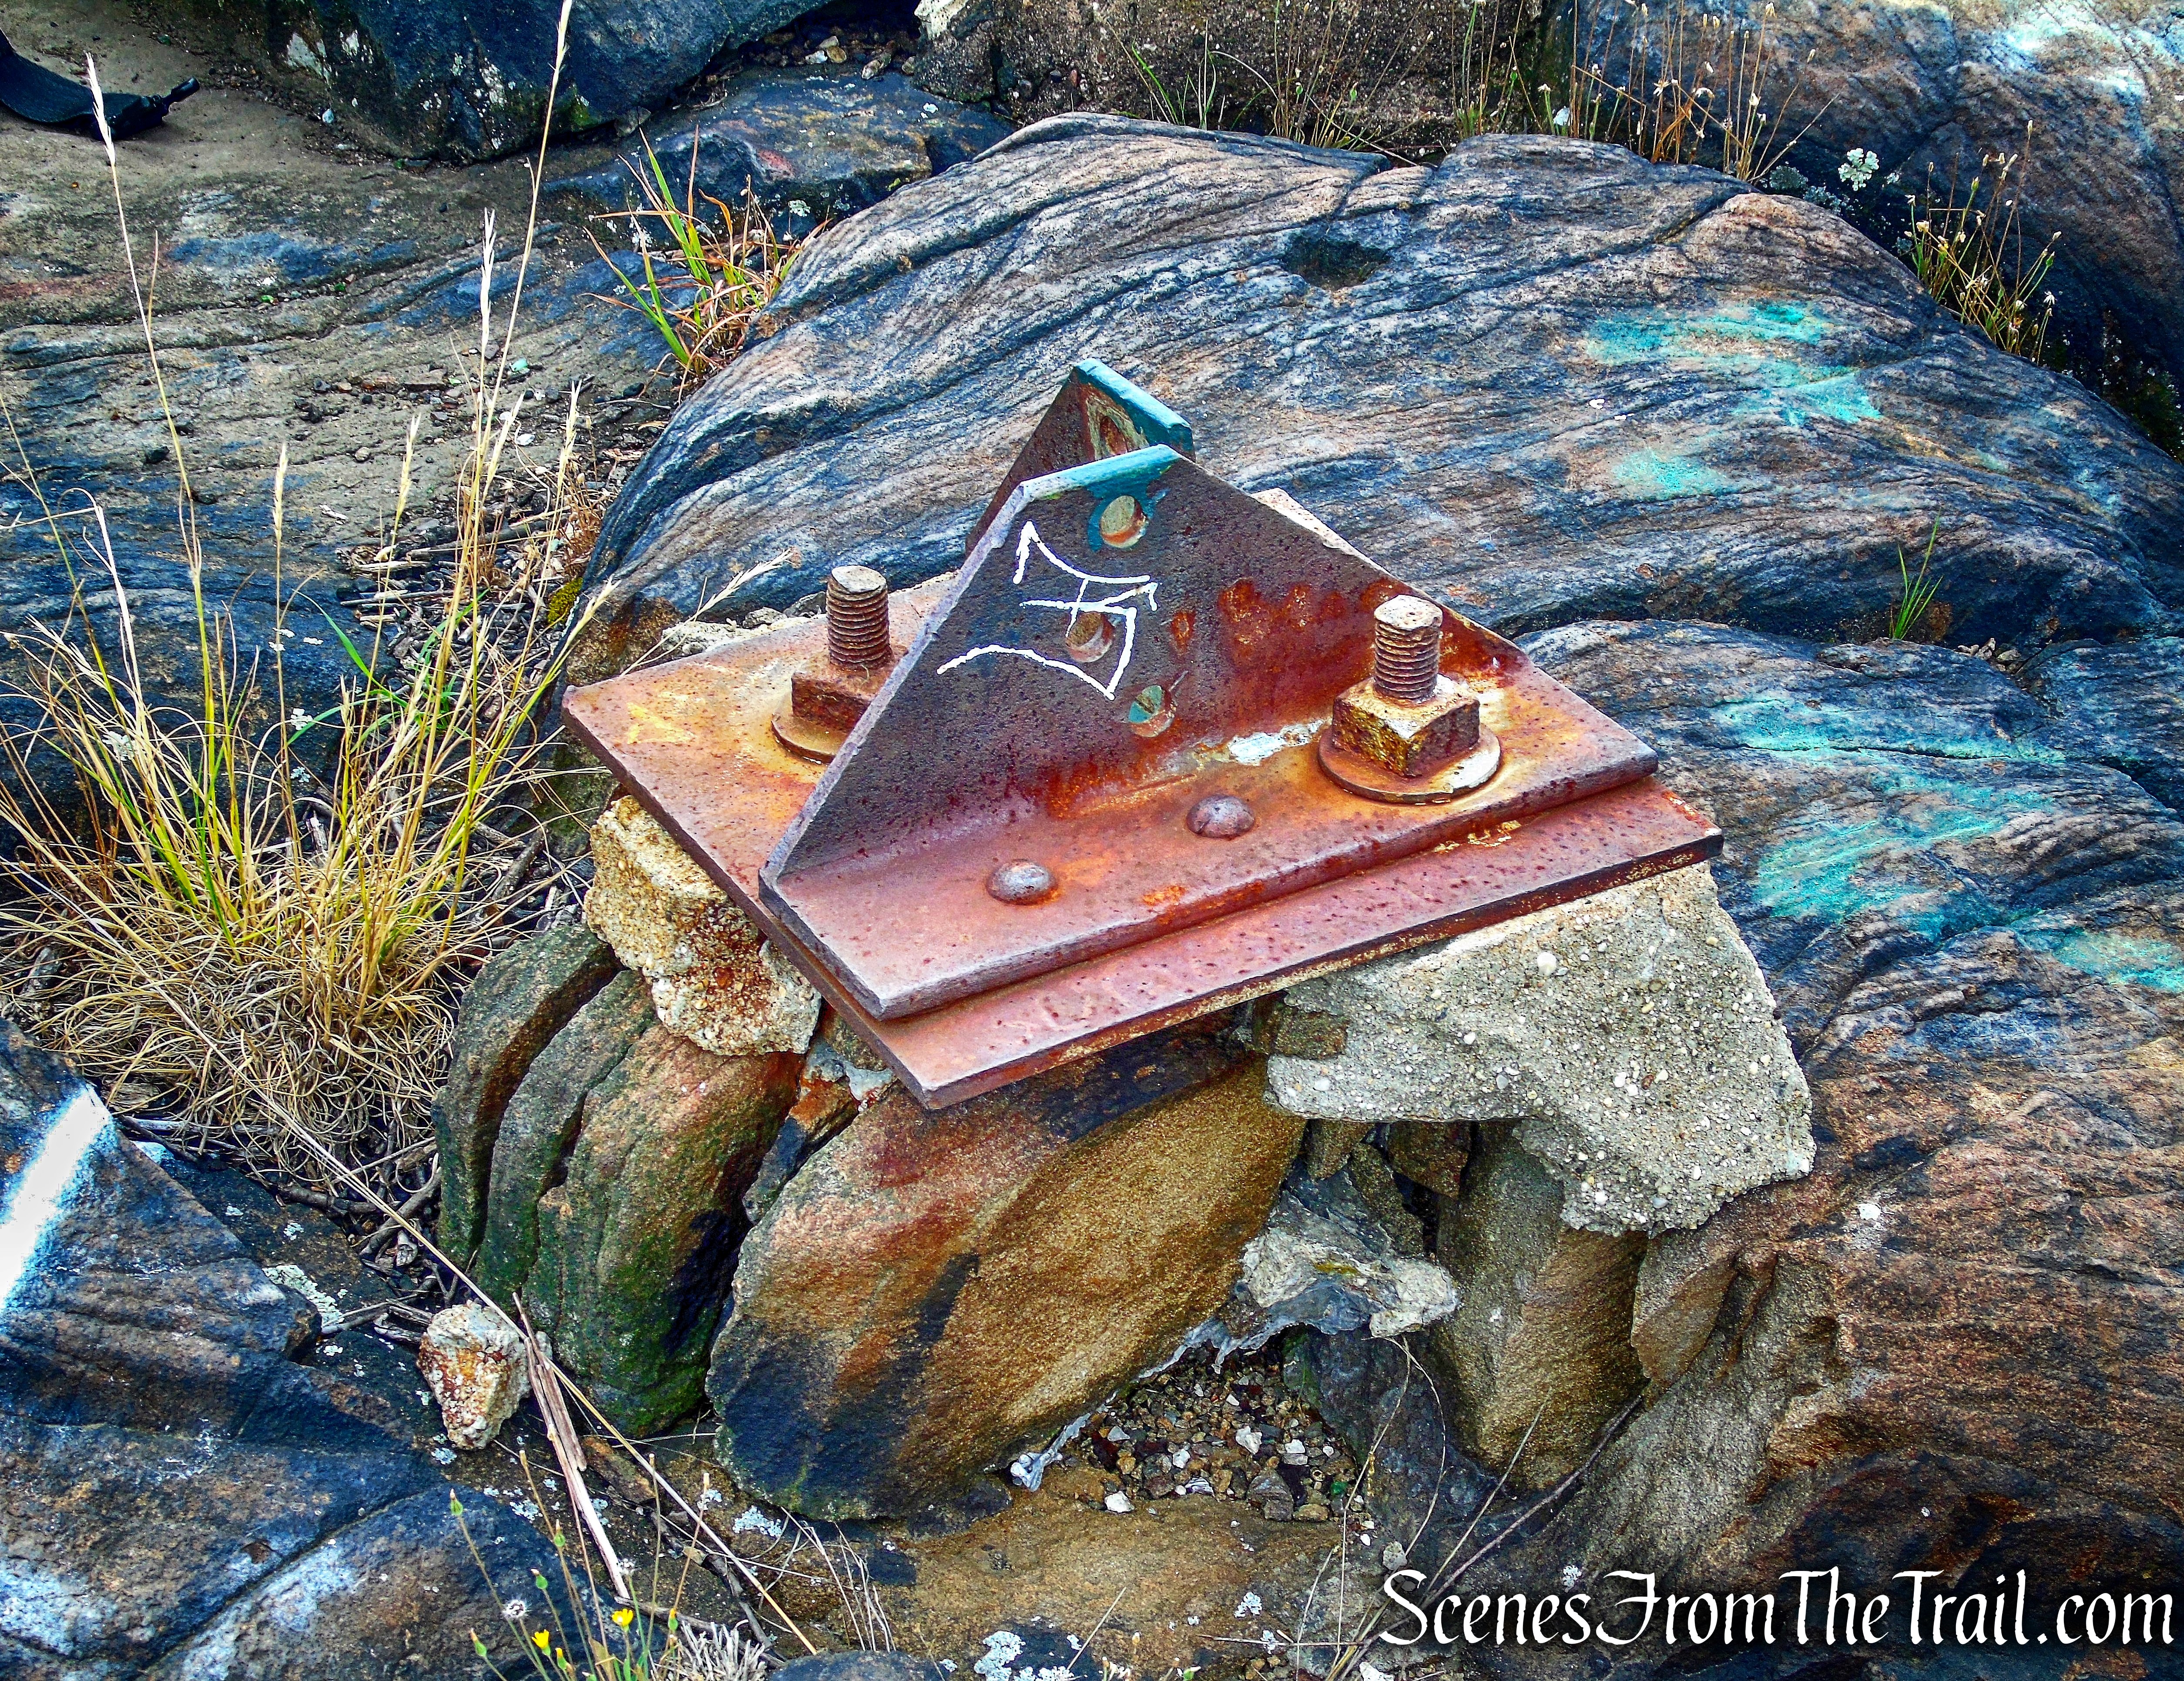
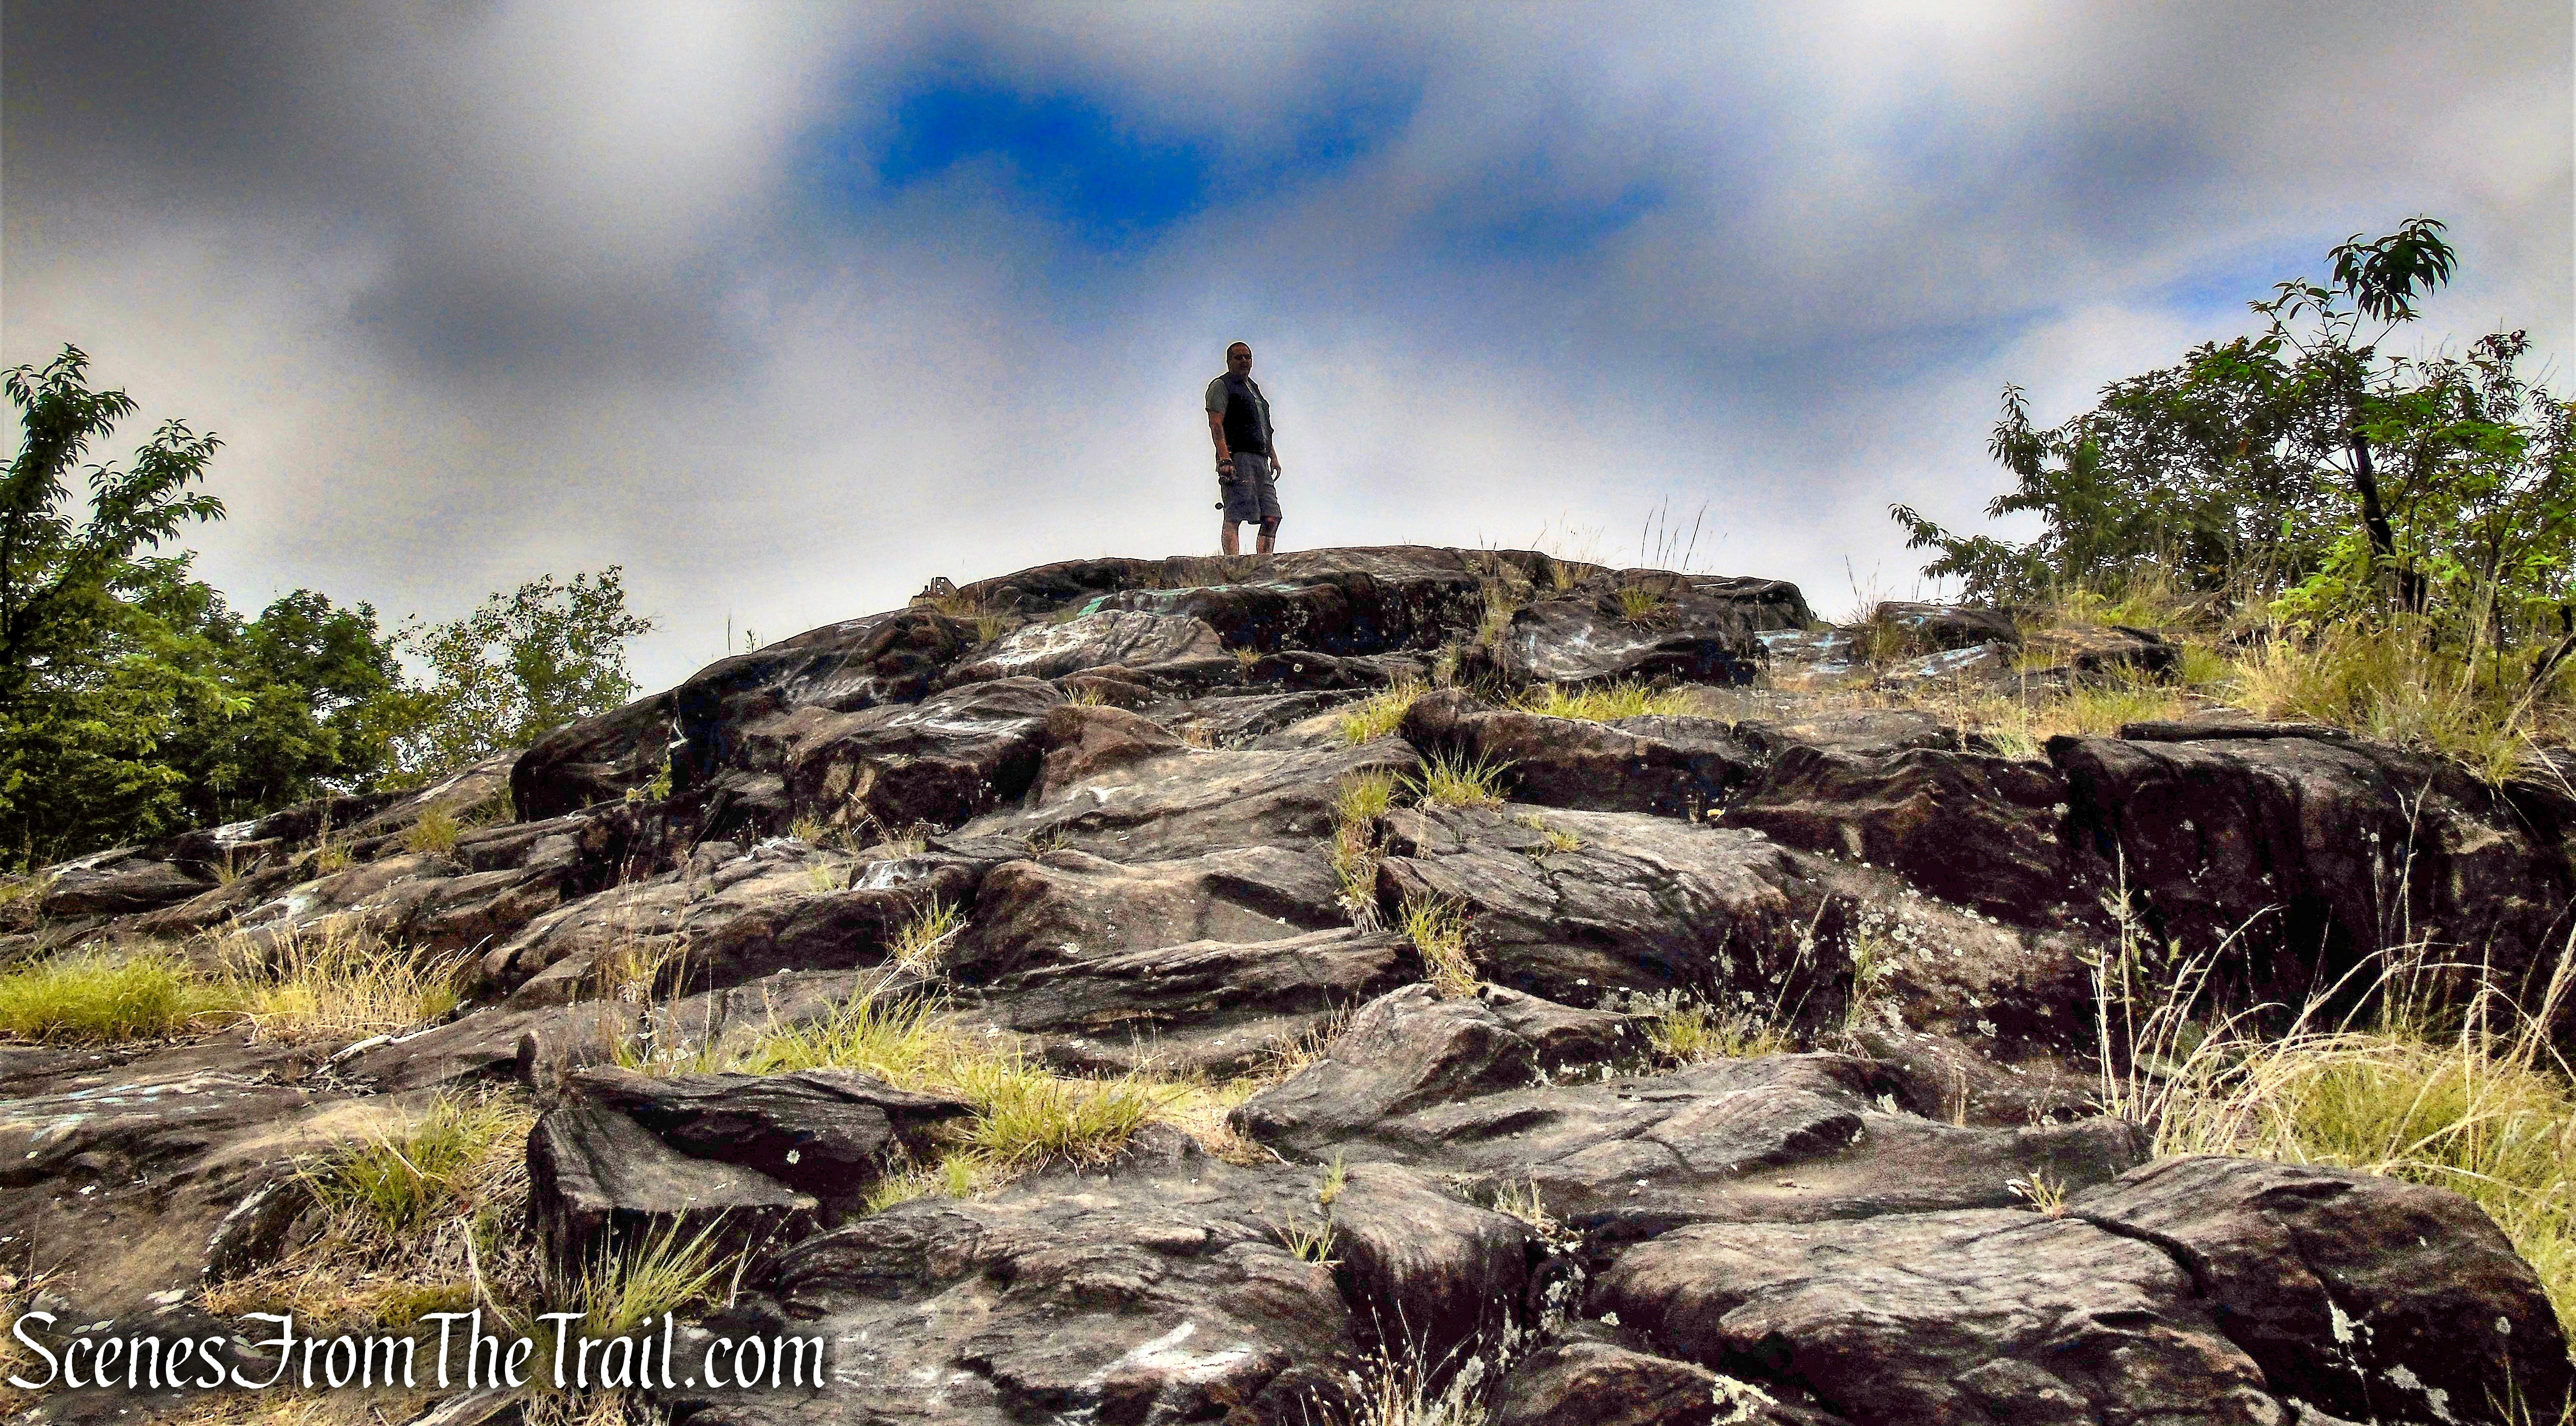
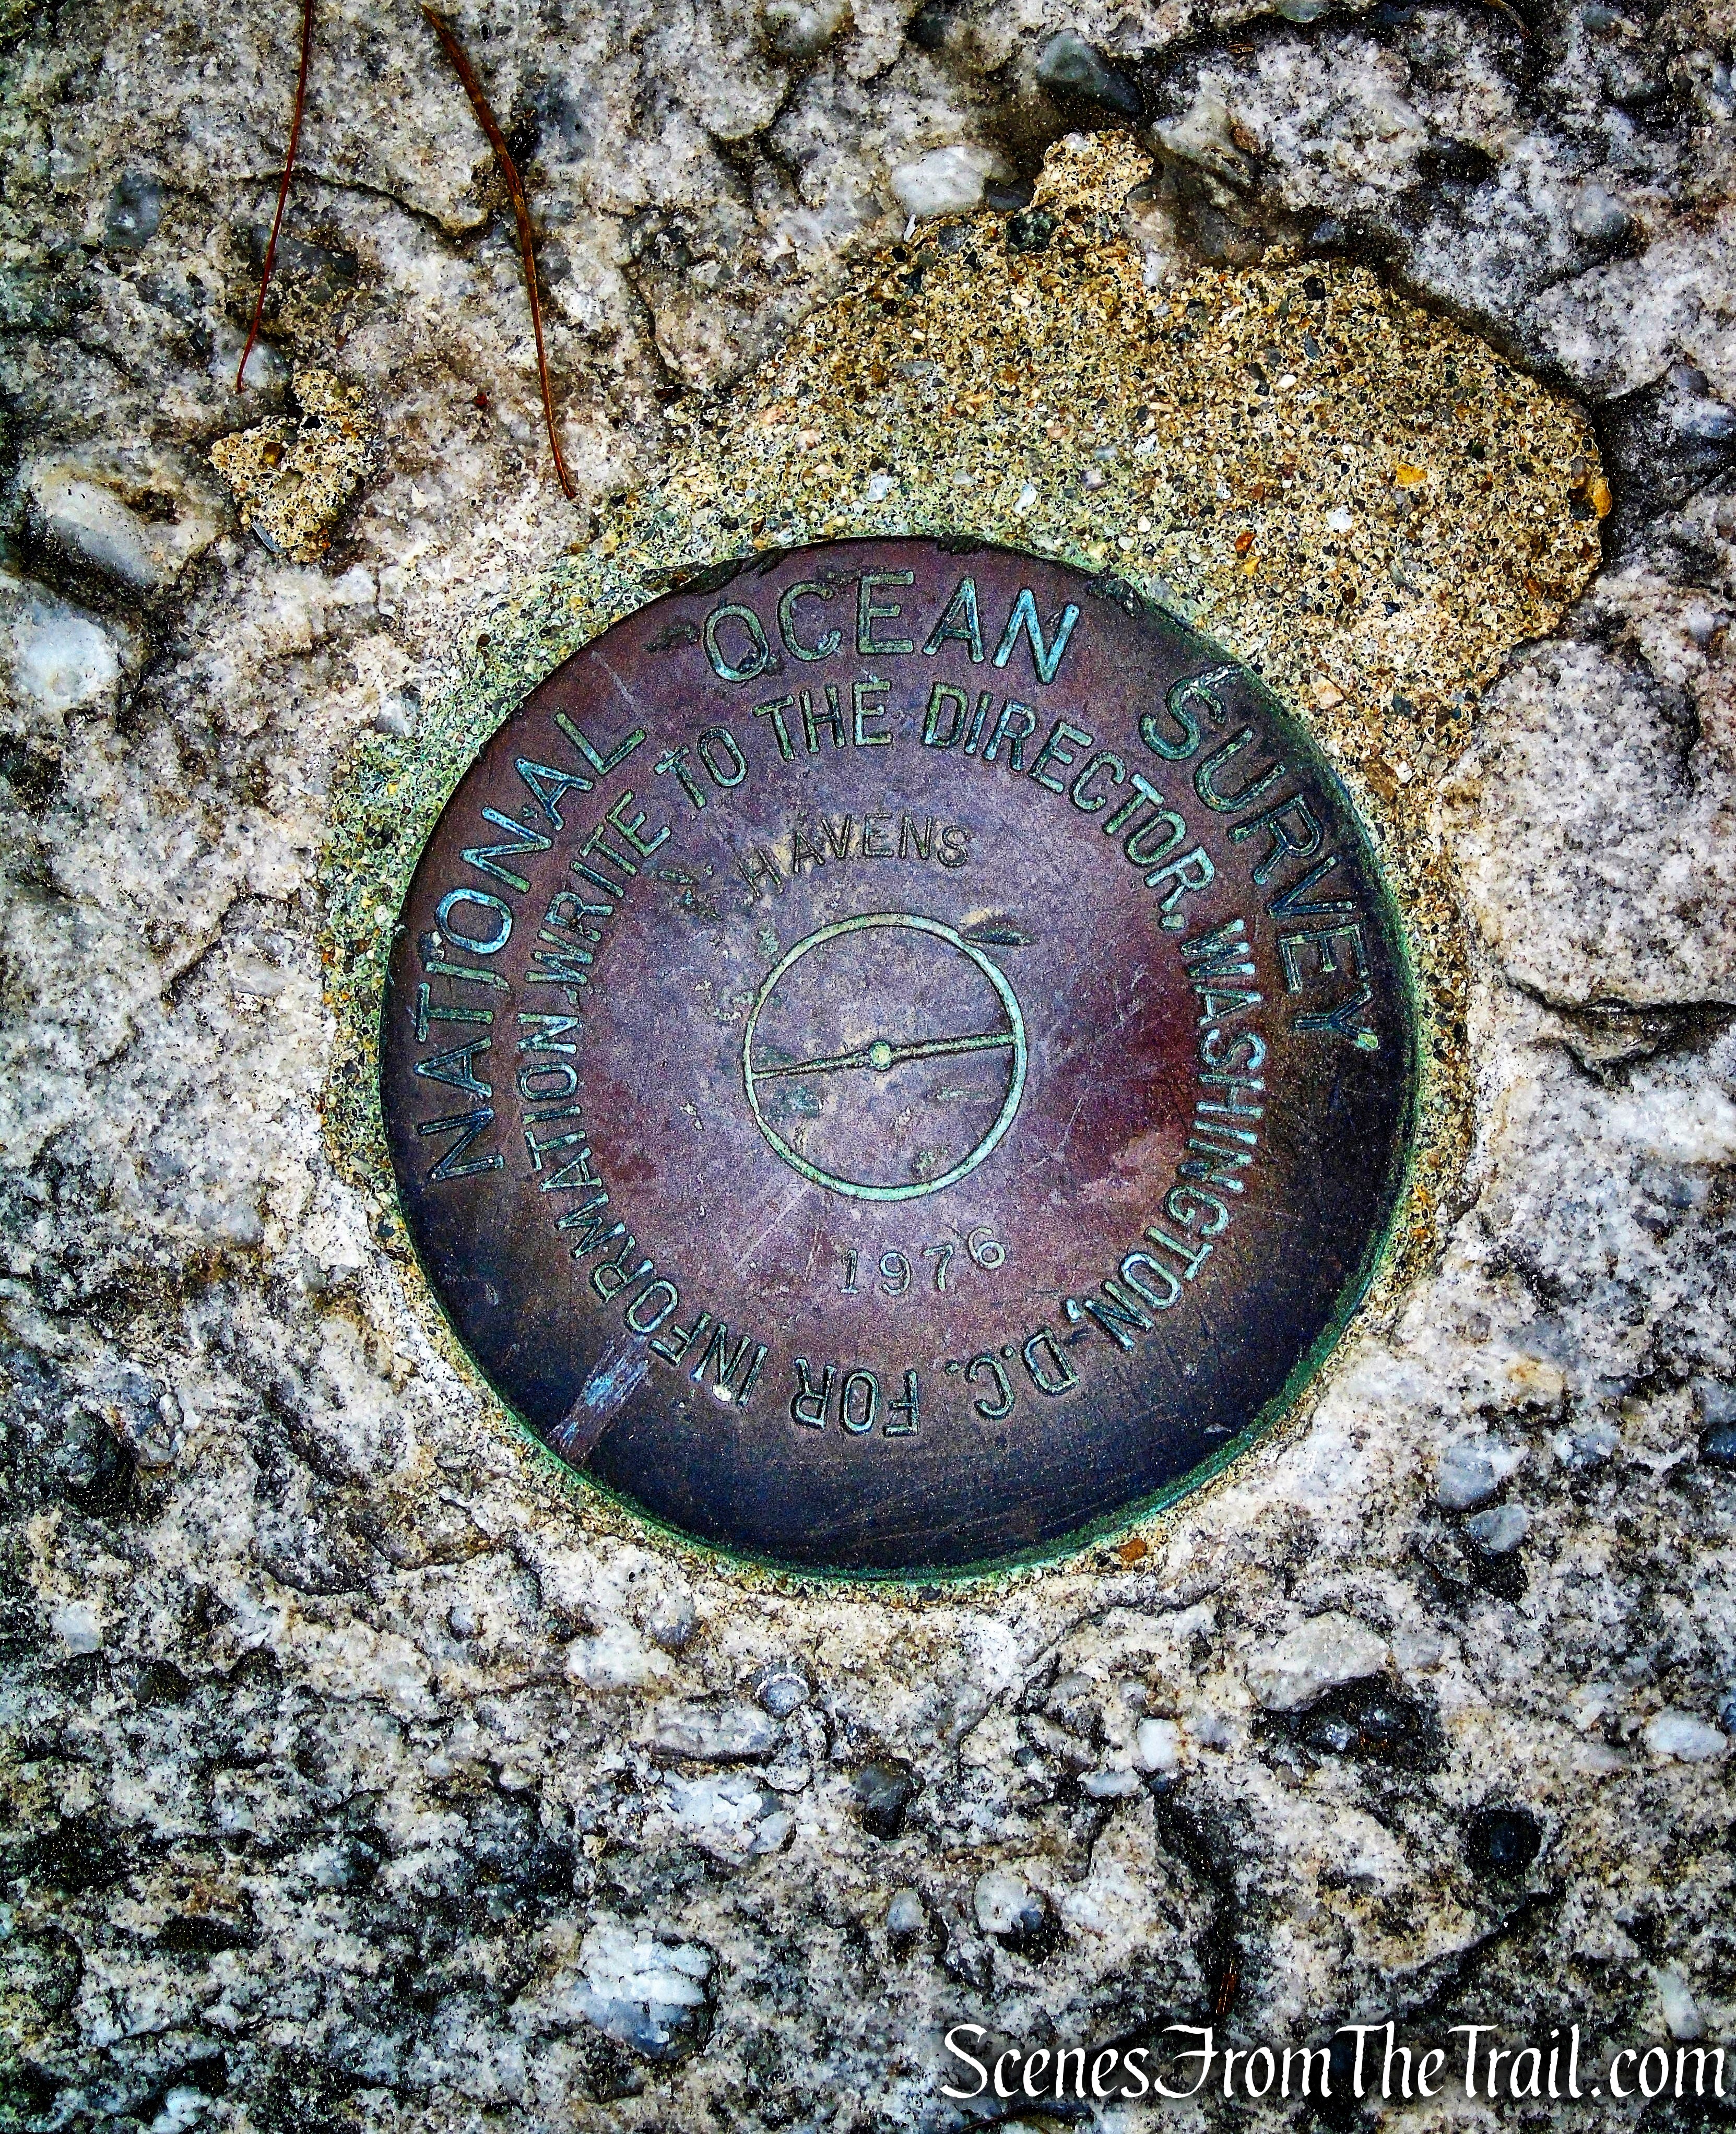
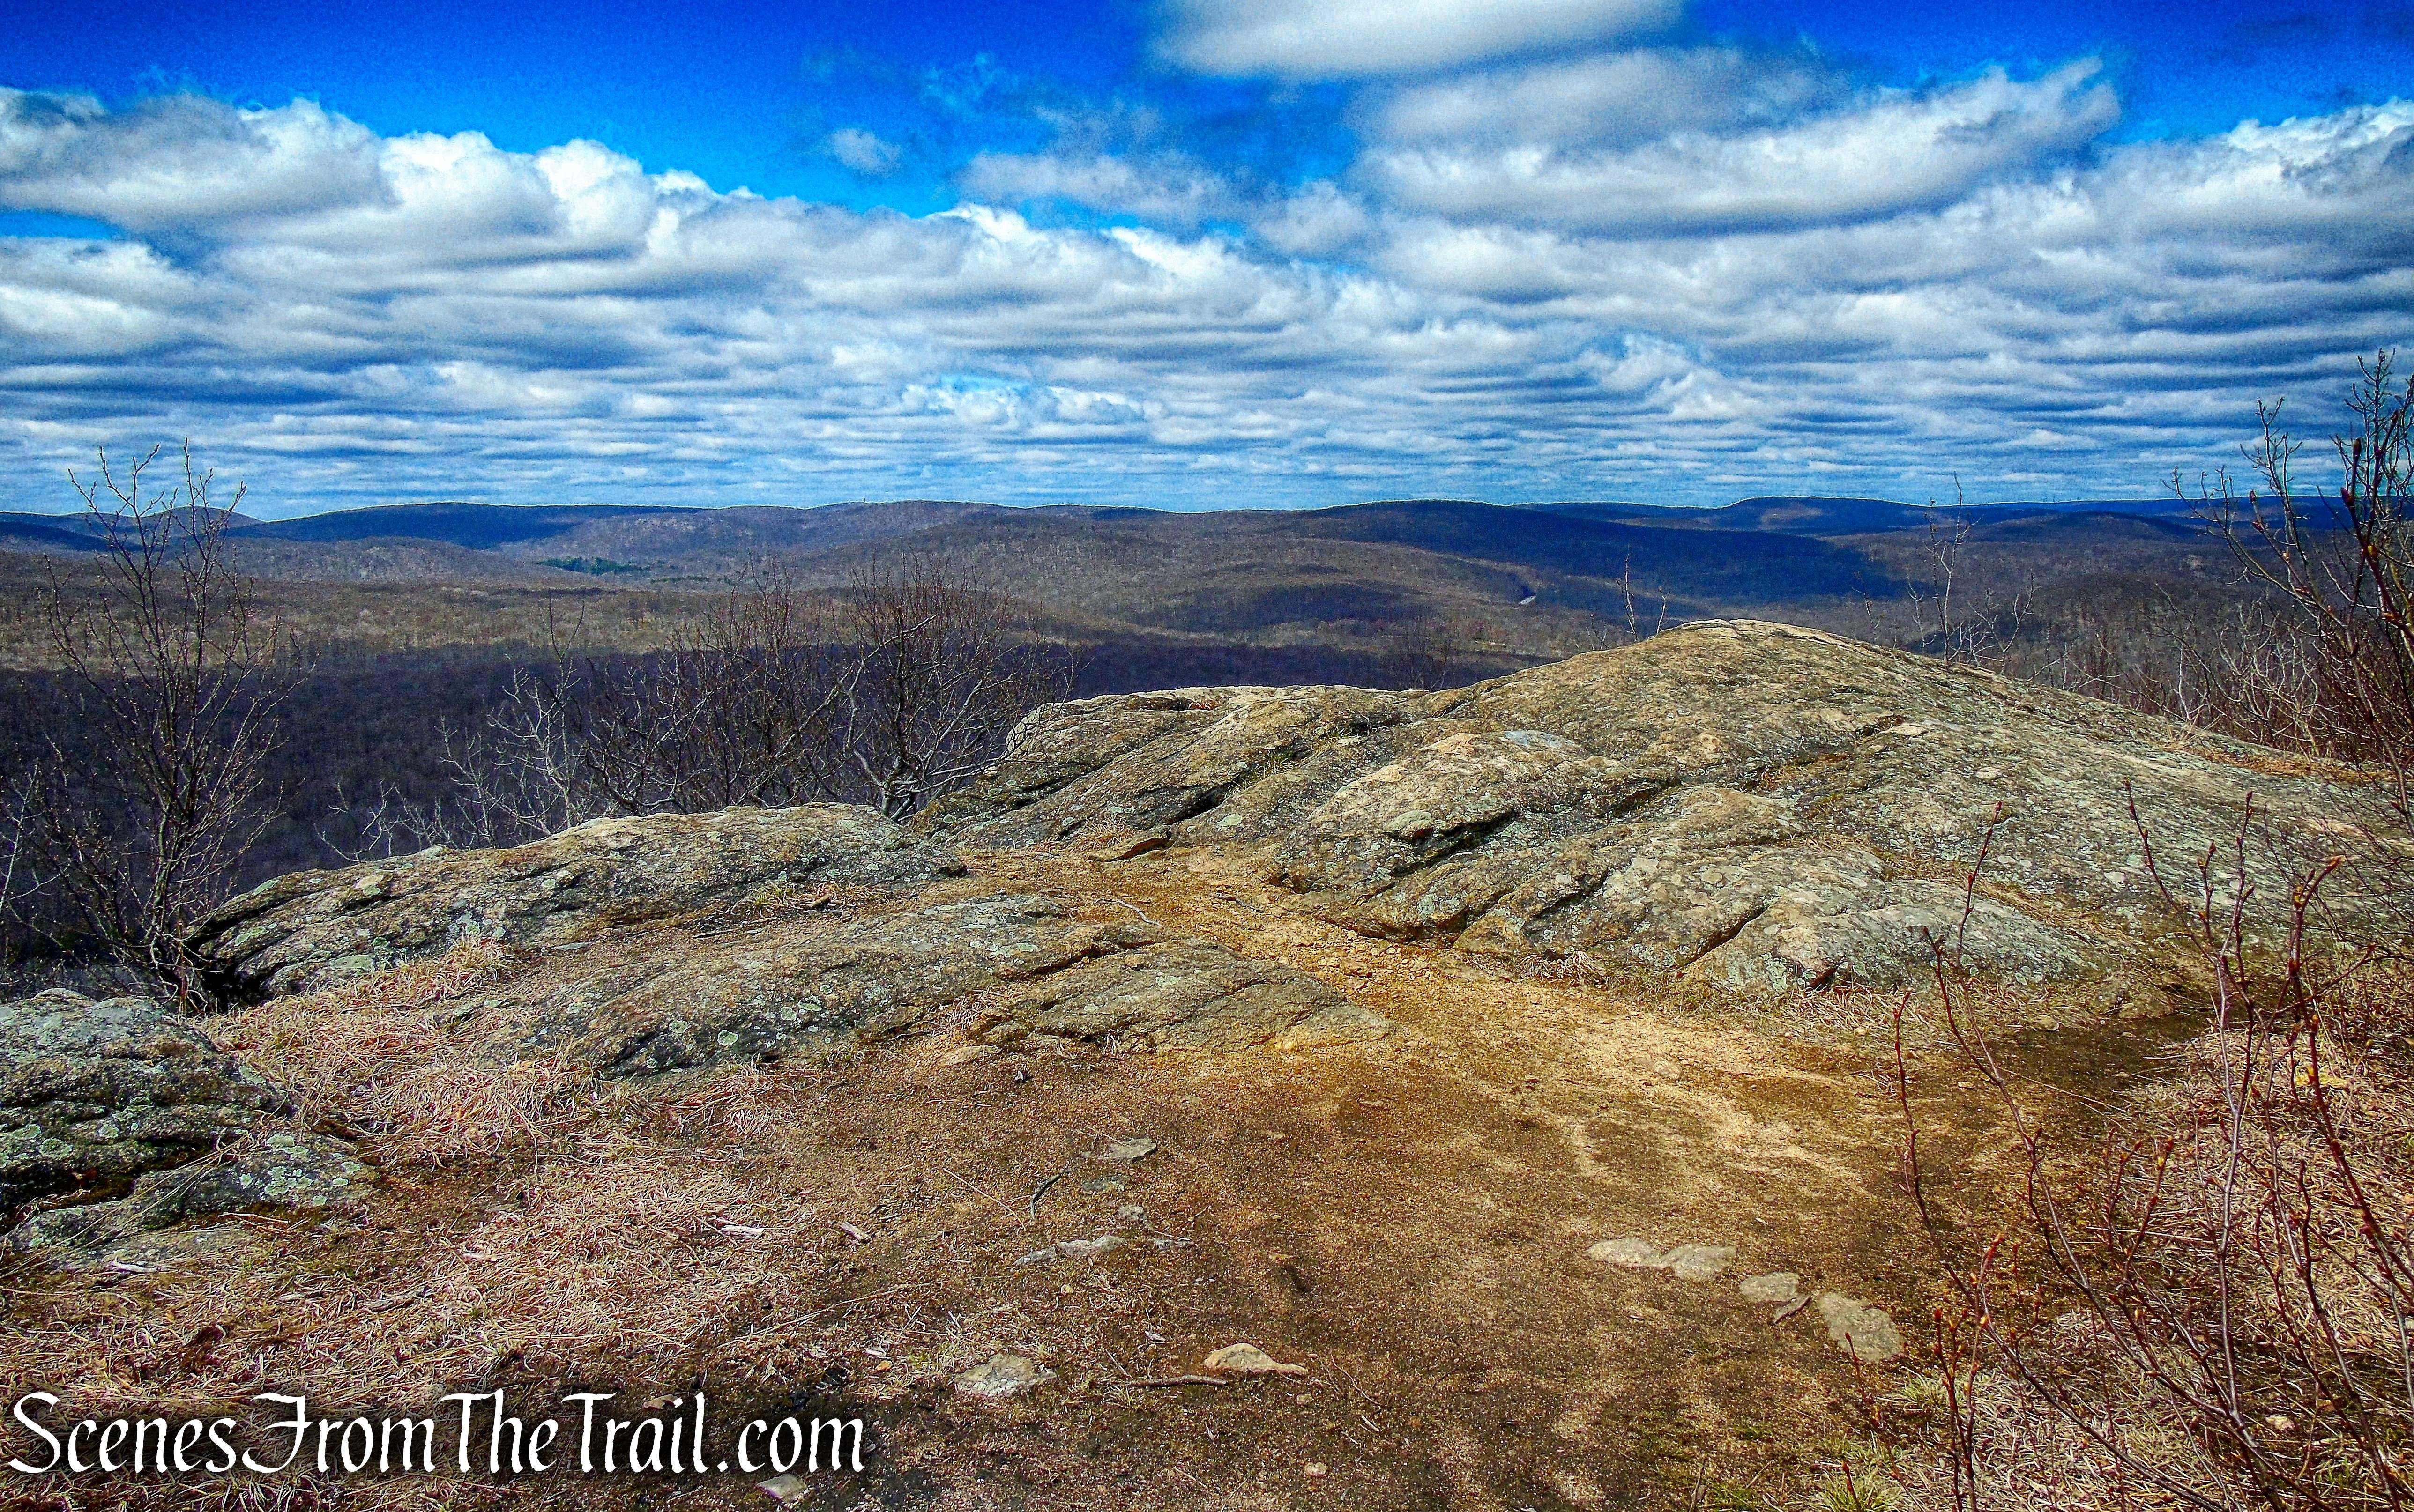
Just ahead along the Washburn Trail, there is supposed to be an unmarked side trail on the left that leads to a viewpoint from rock ledges to the south and east. I walked down a few side trails, but did not see any viewpoints. We continued to follow the white-blazed Washburn Trail along the summit ridge. The viewless summit is marked by a split rock on the right and a USGS survey marker along the trail.
USGS survey marker – summit of Bull Hill
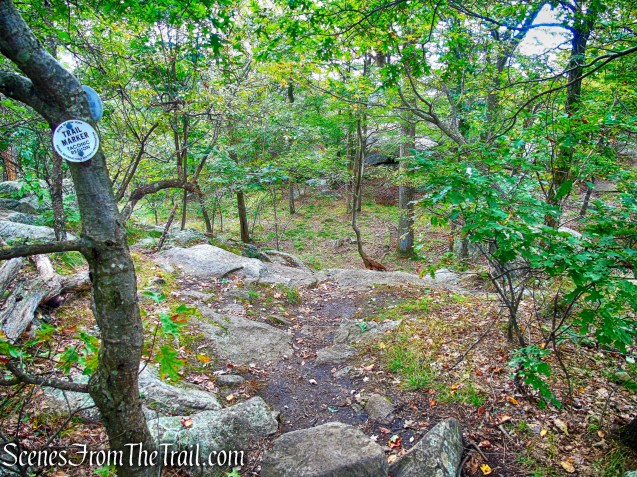
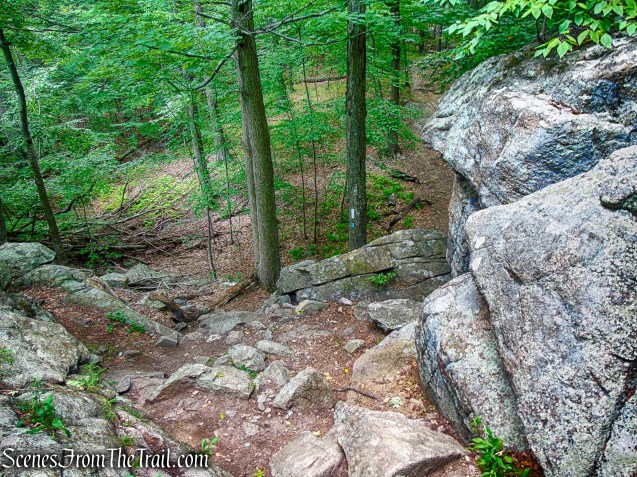
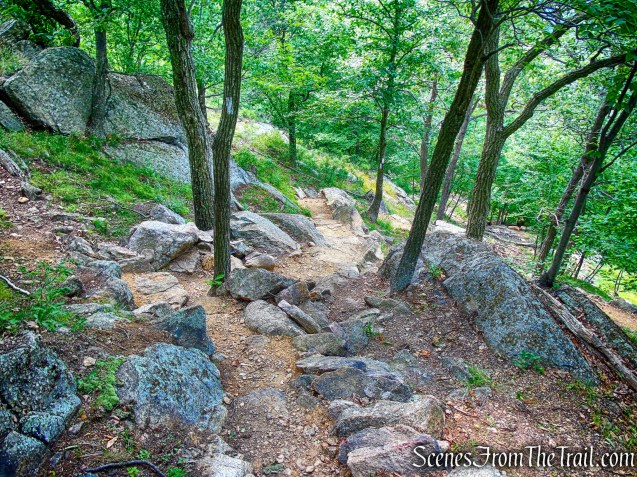
The trail then makes a short, rather steep descent.
Washburn Trail
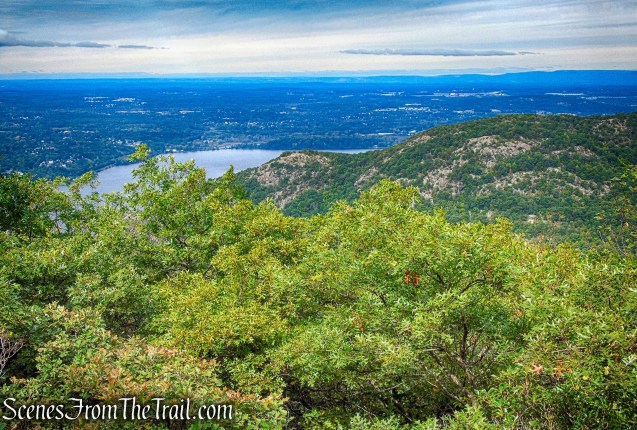
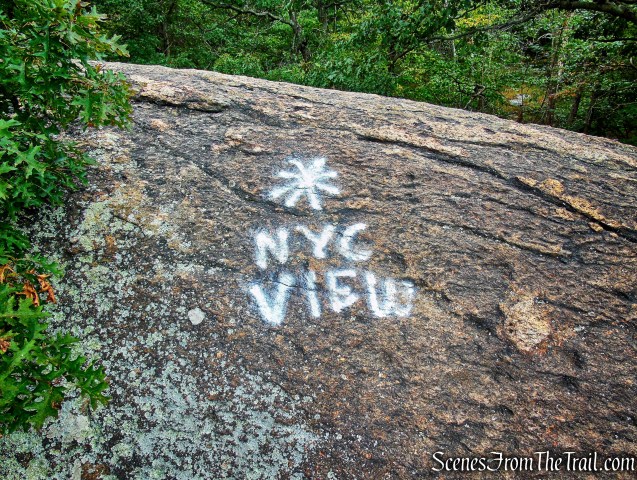
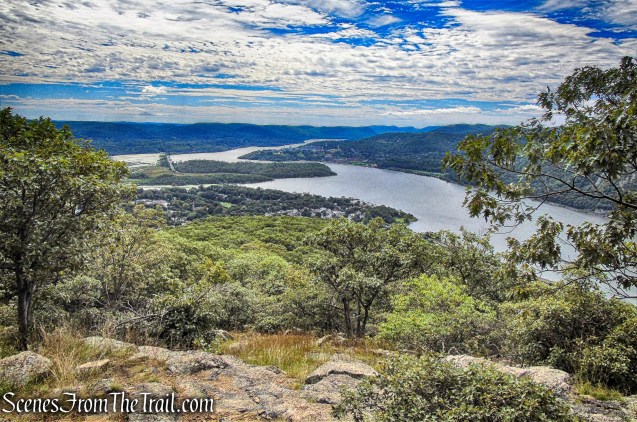
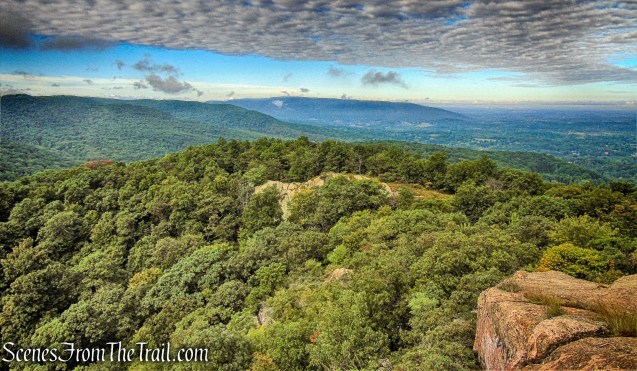
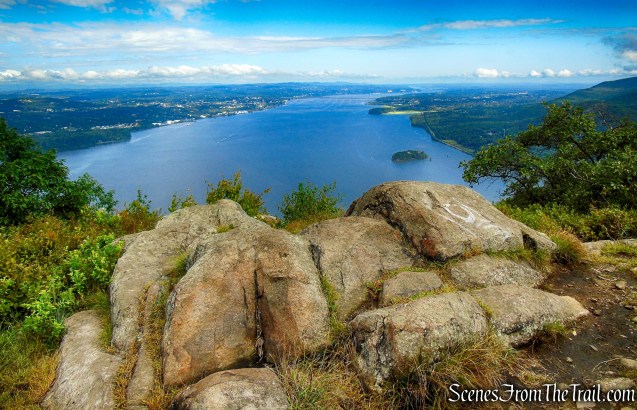
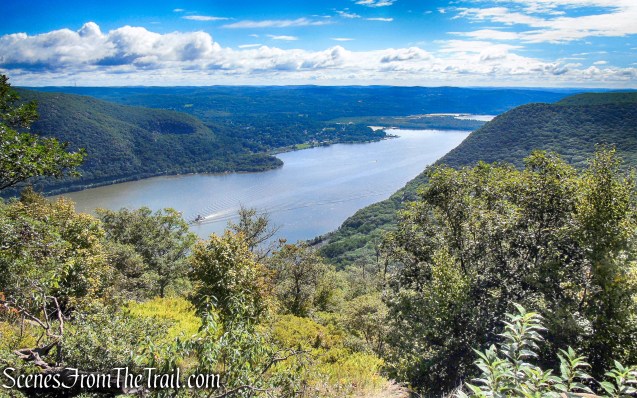
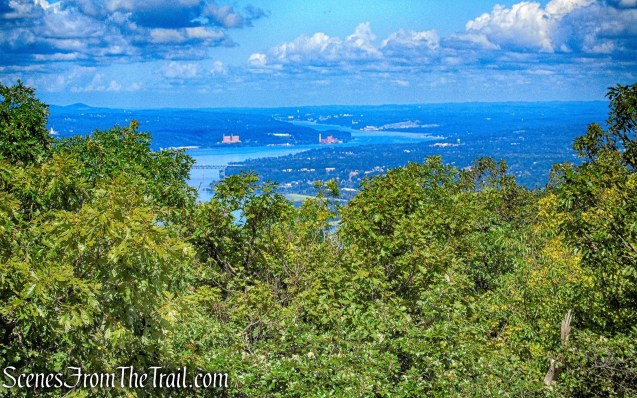
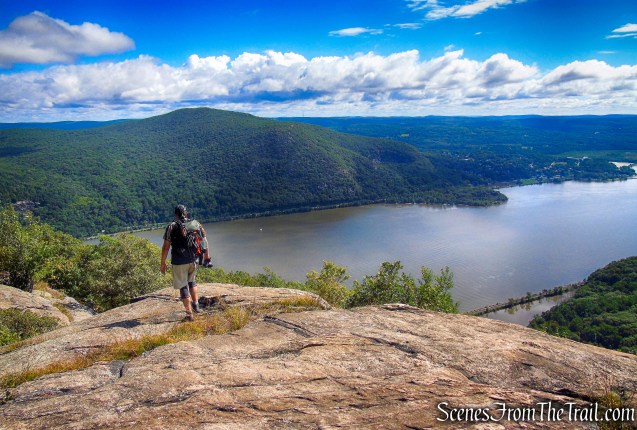
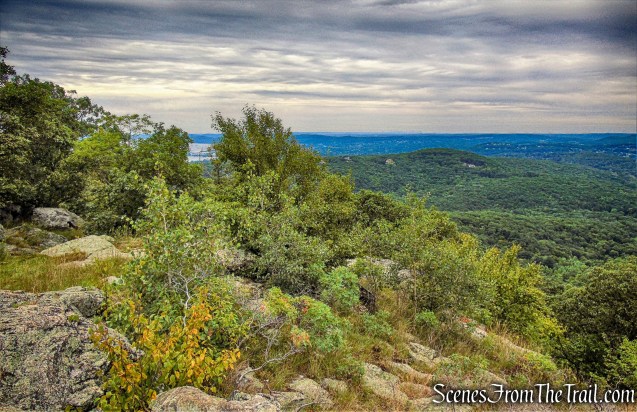
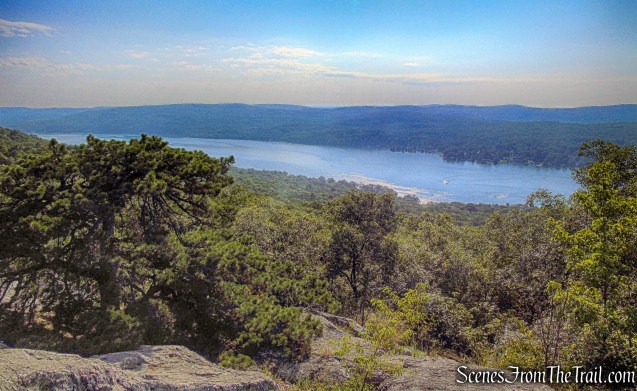
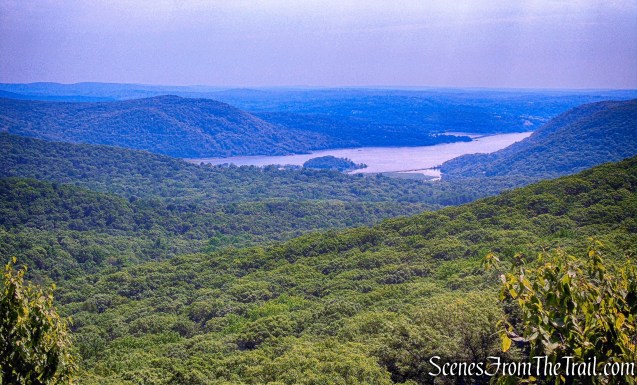
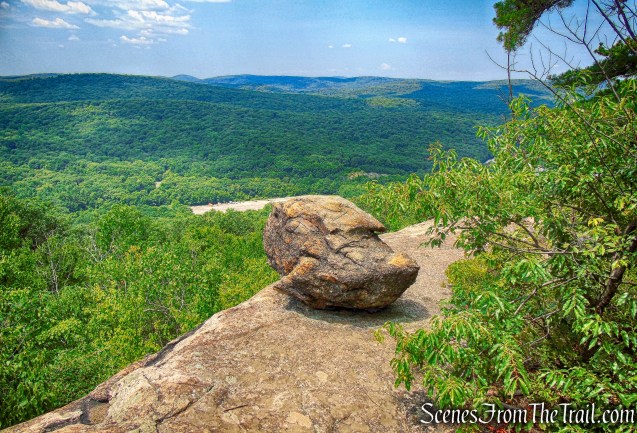
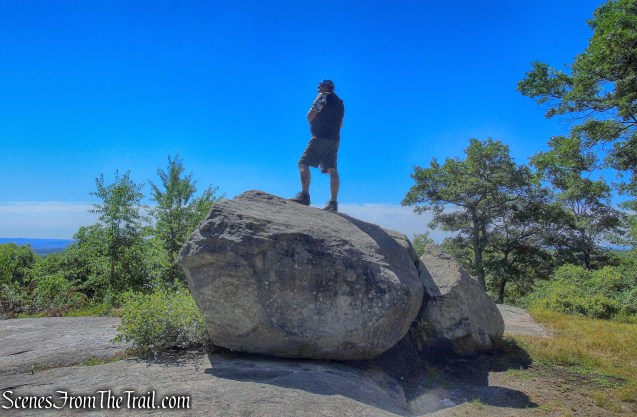
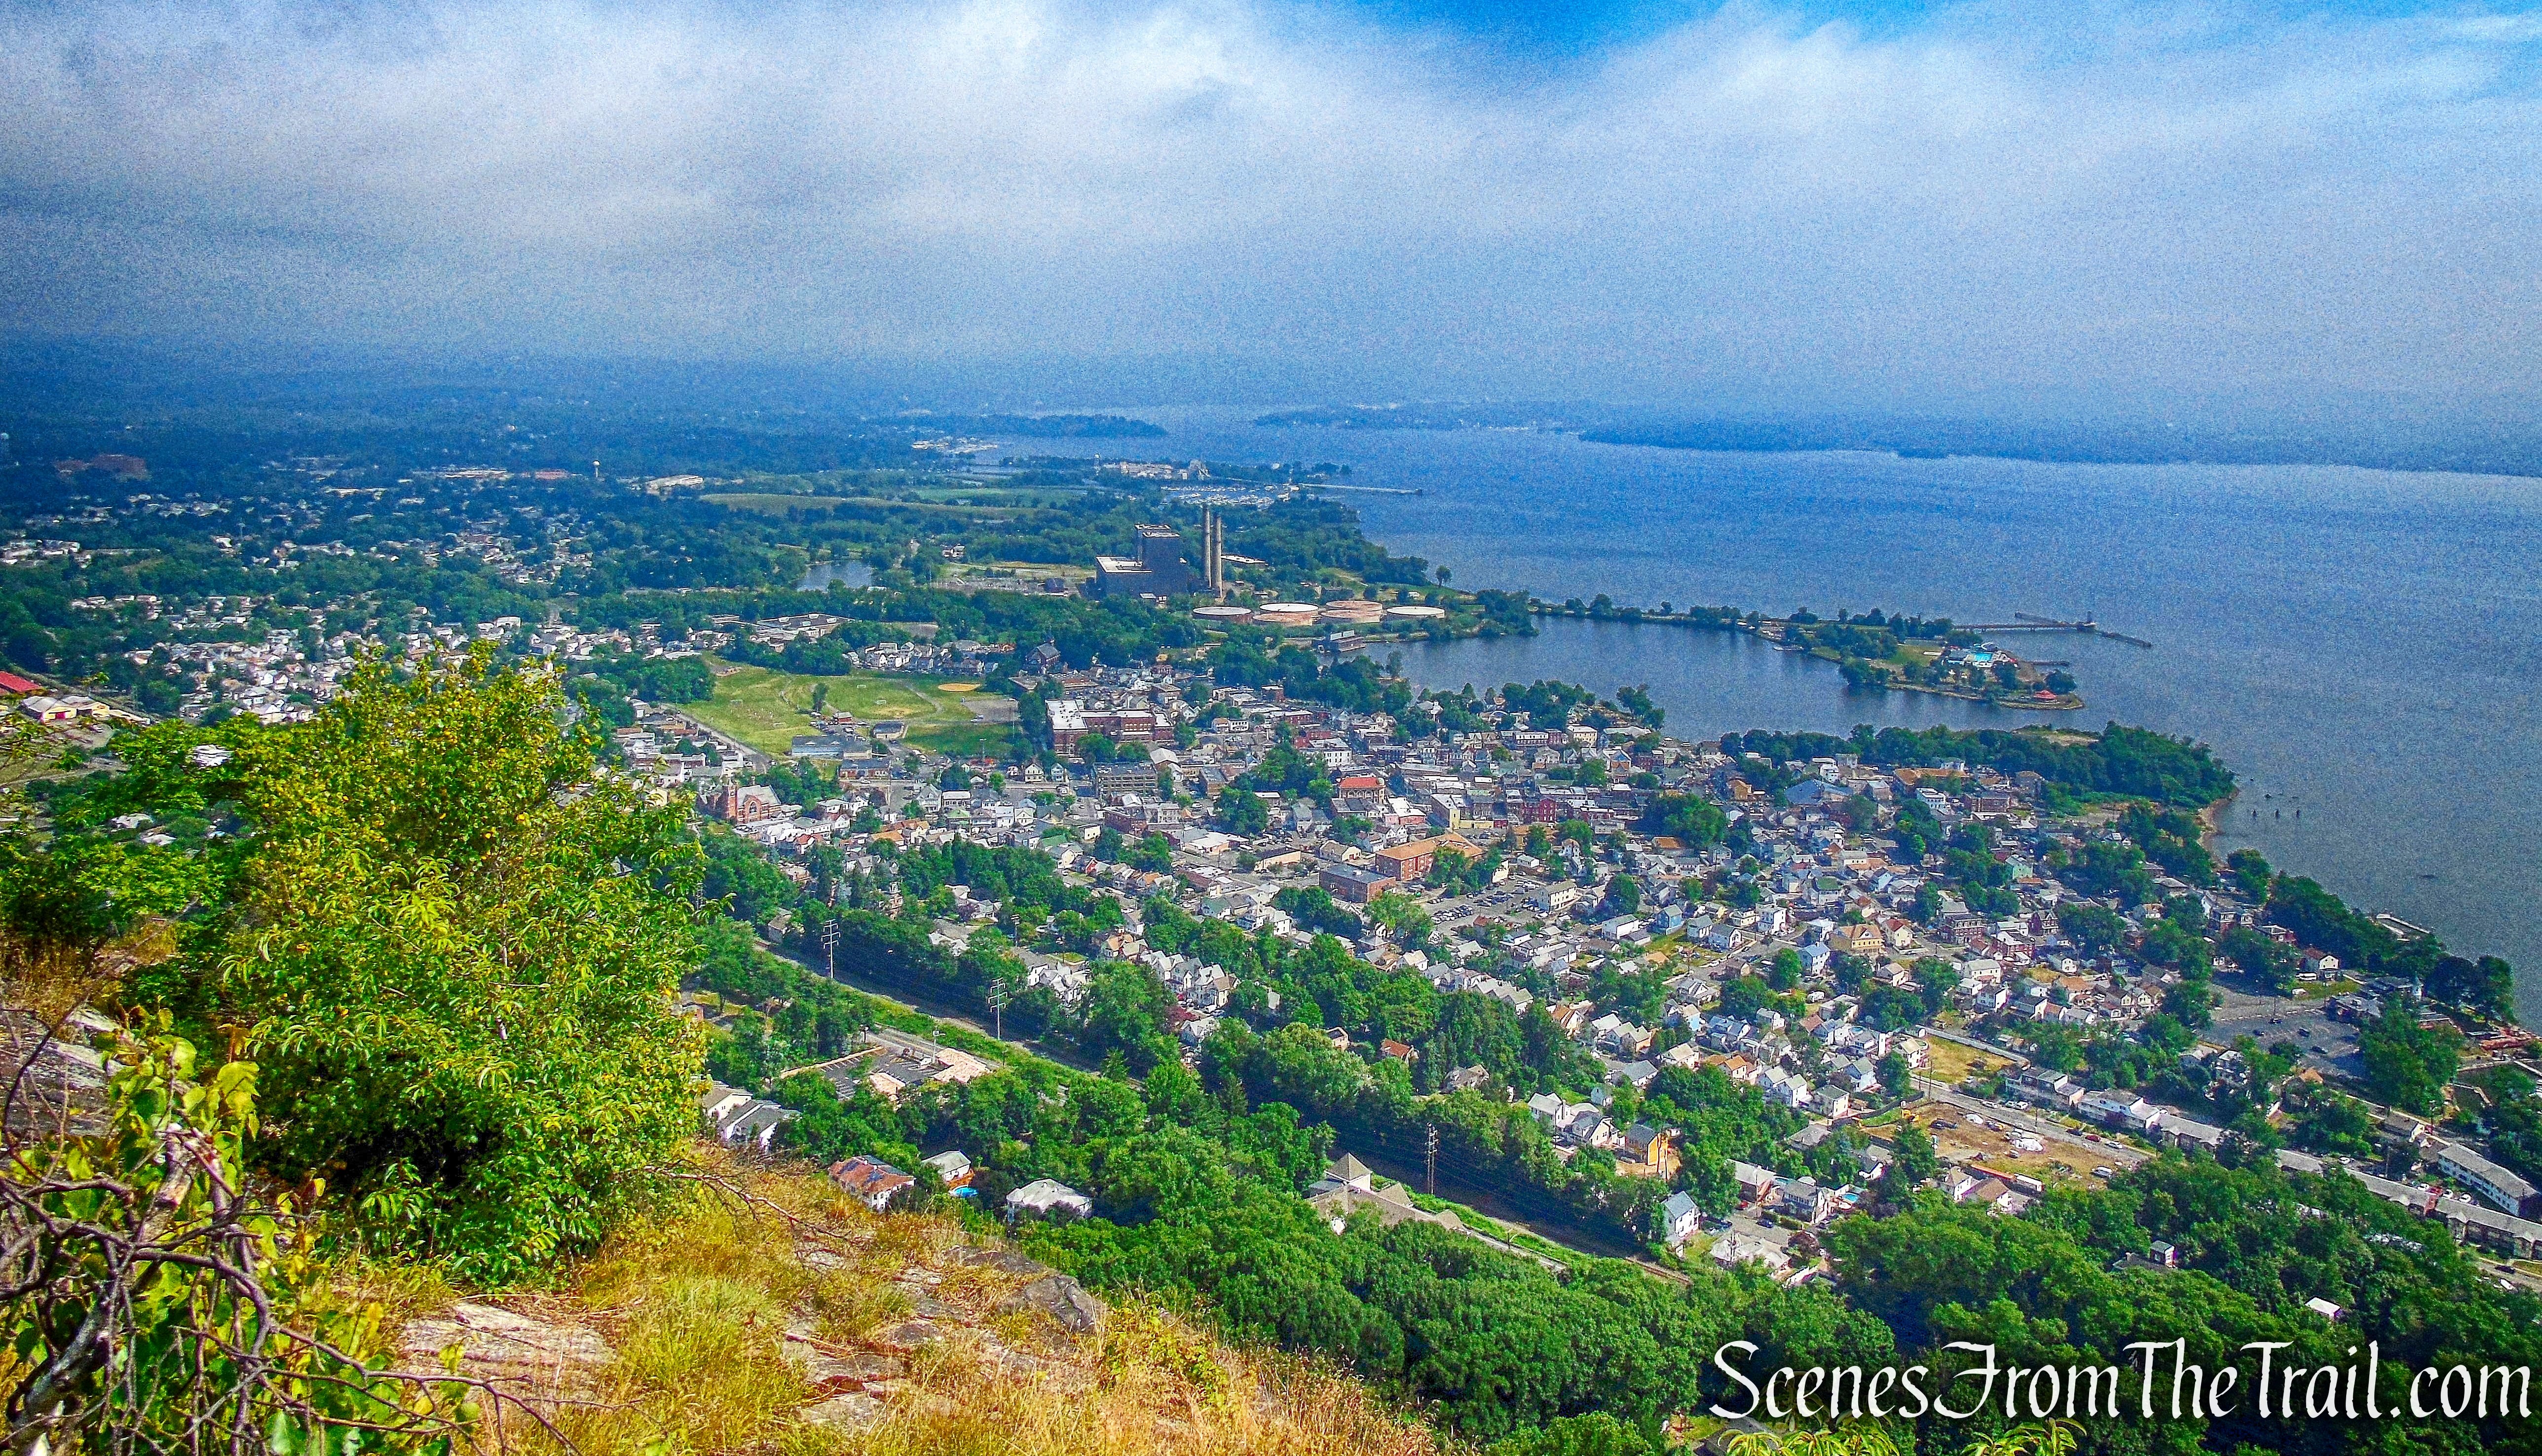
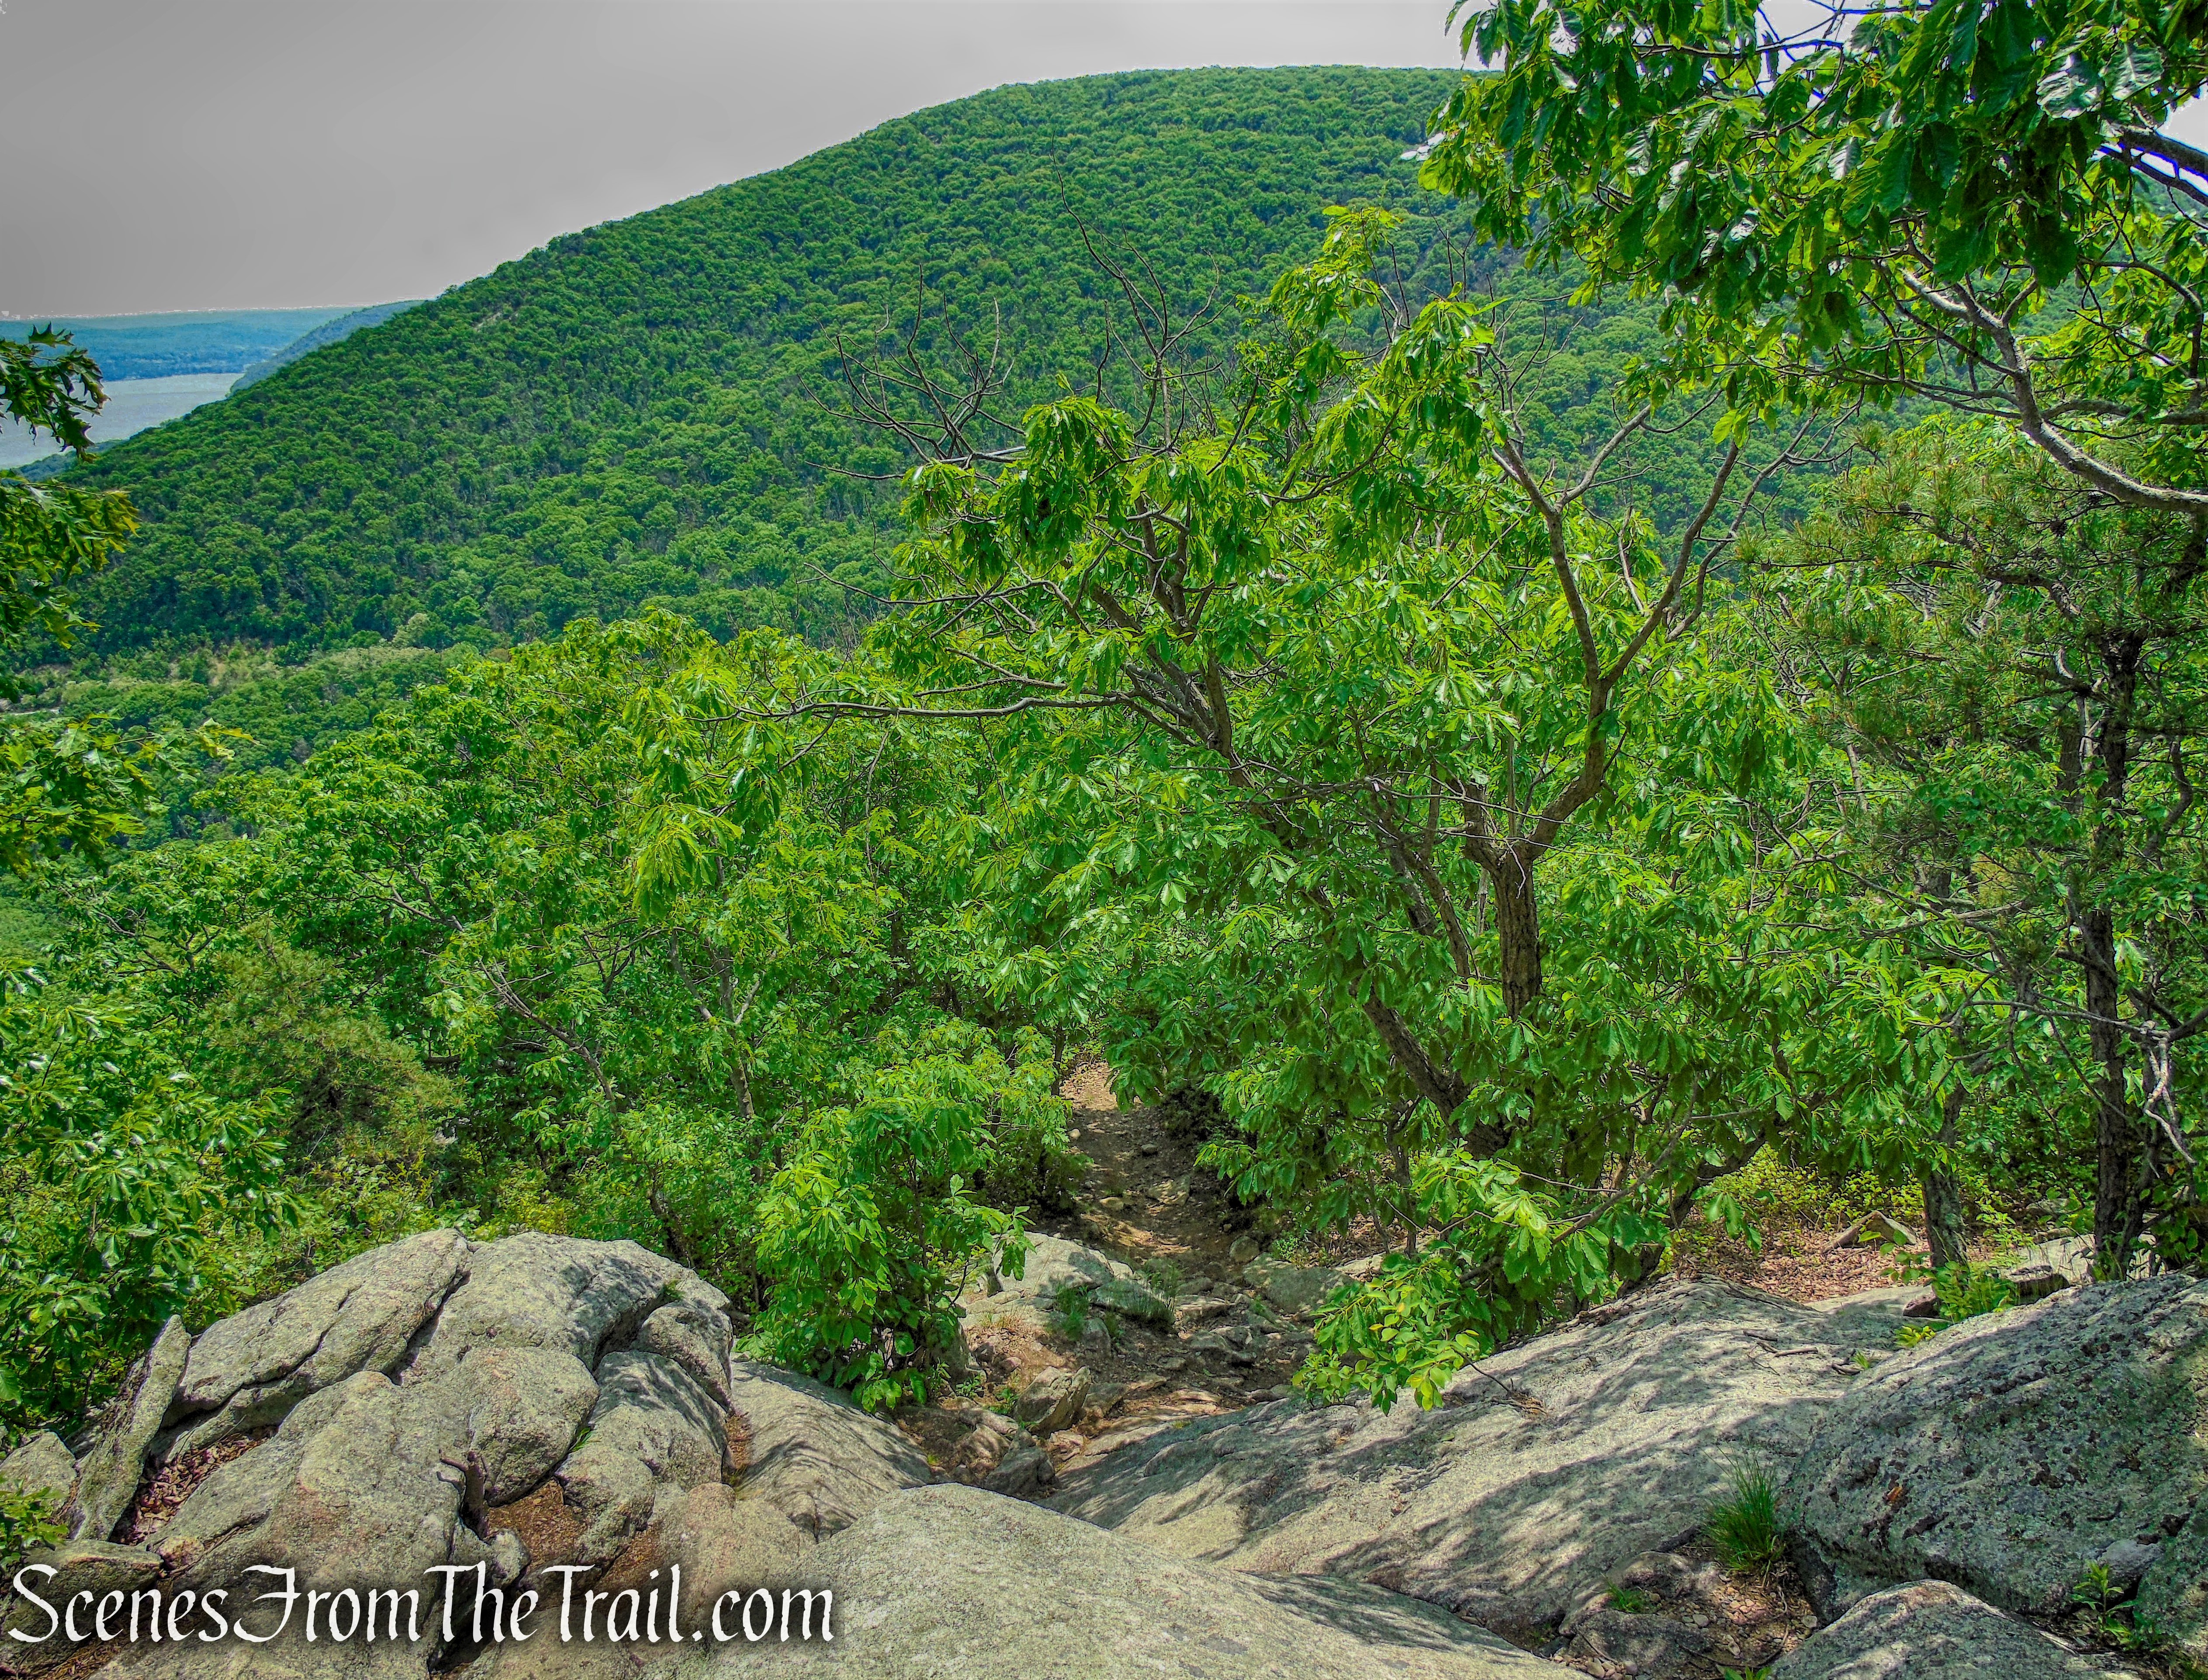
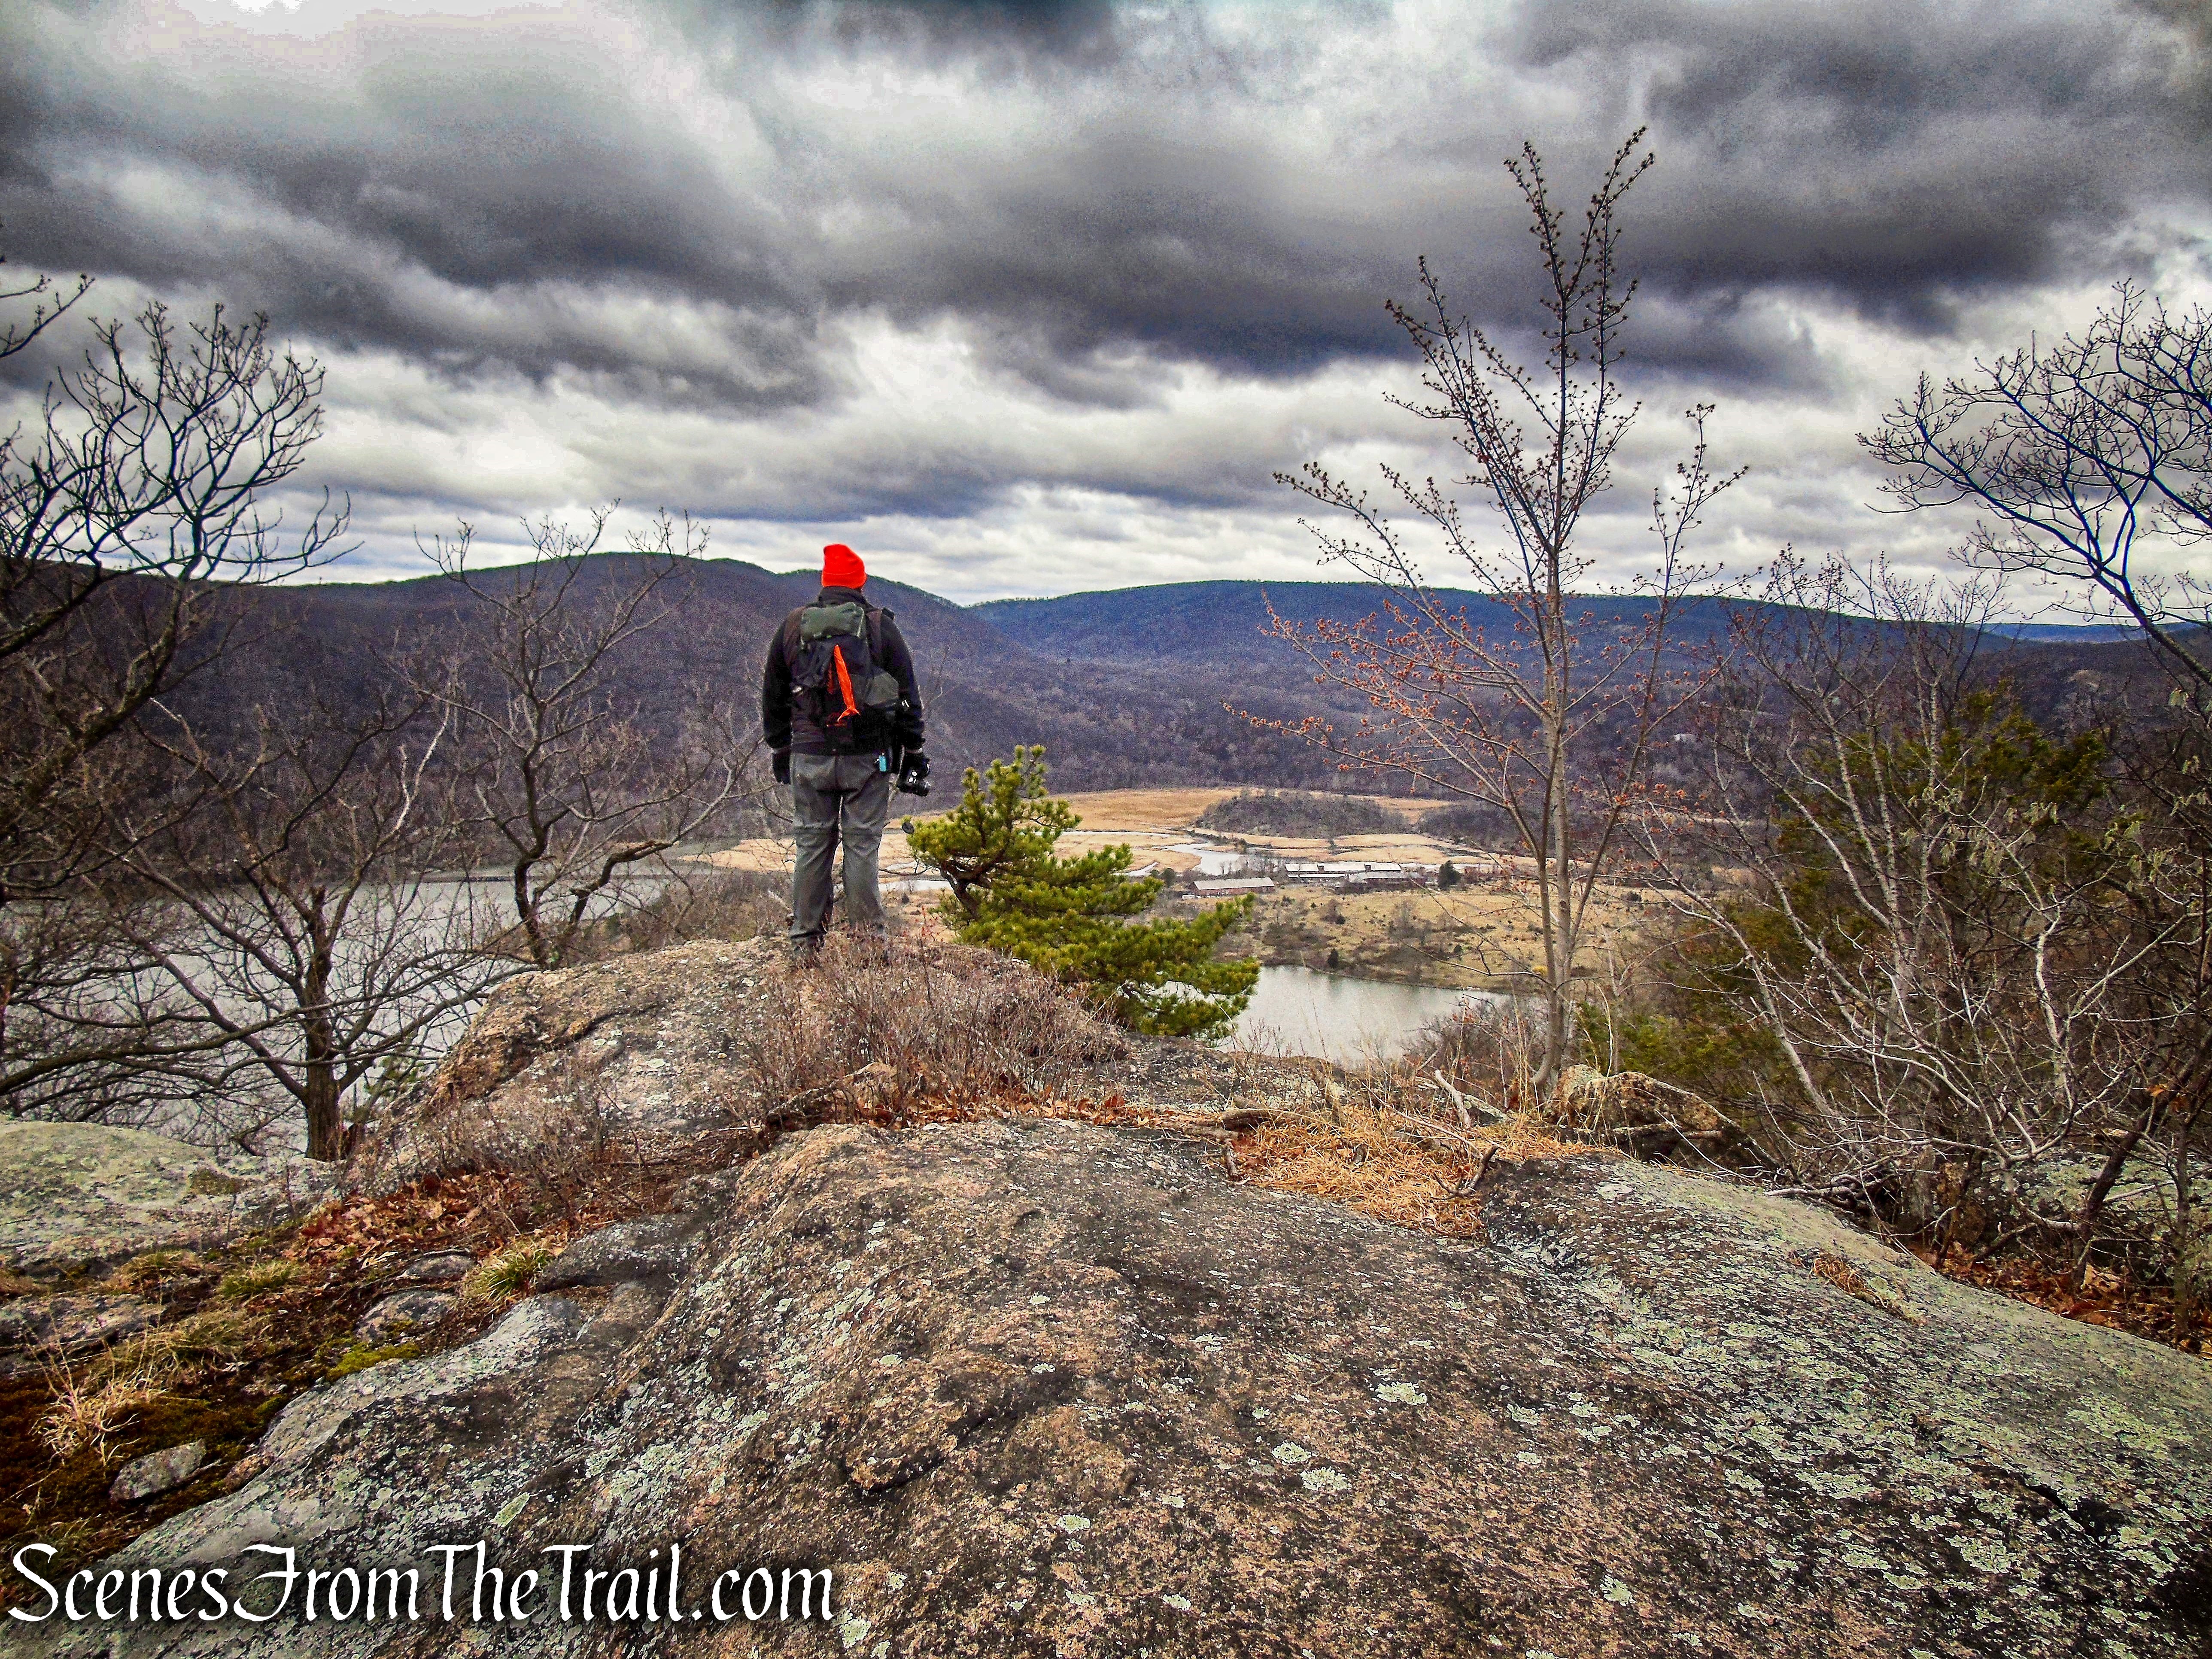
Just beyond, an open rock ledge on the left affords a panoramic south-facing view over the Hudson River. You have to climb up slightly, above the writing for the view. I saw several people walk by and not even bother.
south-facing view – Washburn Trail
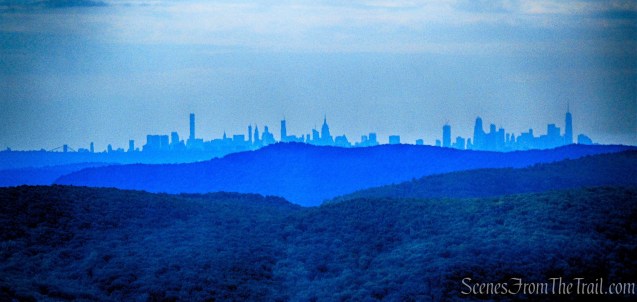
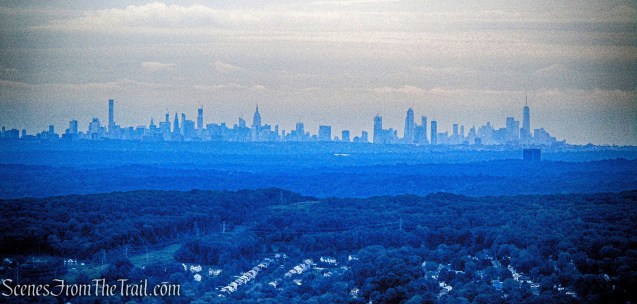
The Manhattan skyline from about 50 miles away.
south-facing view – Washburn Trail
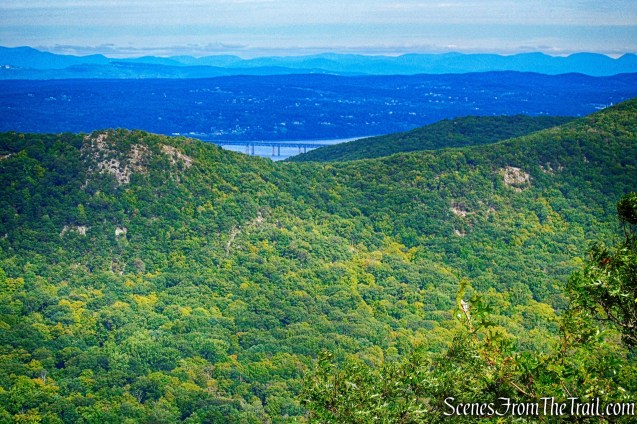
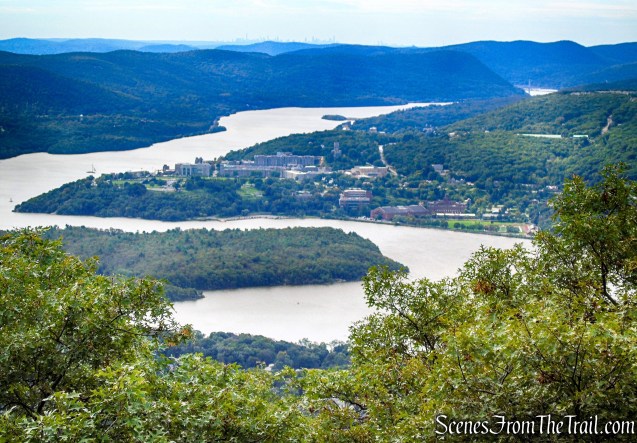
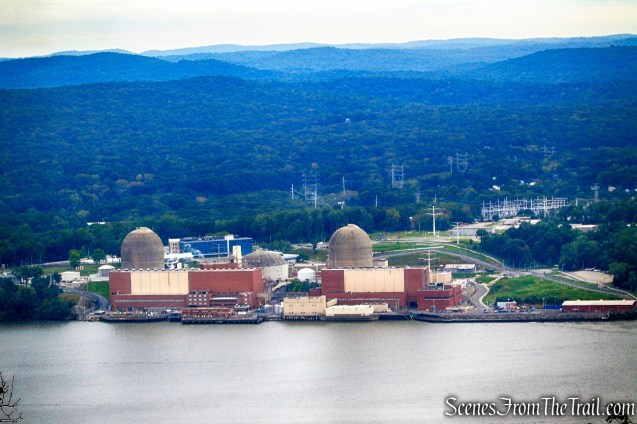
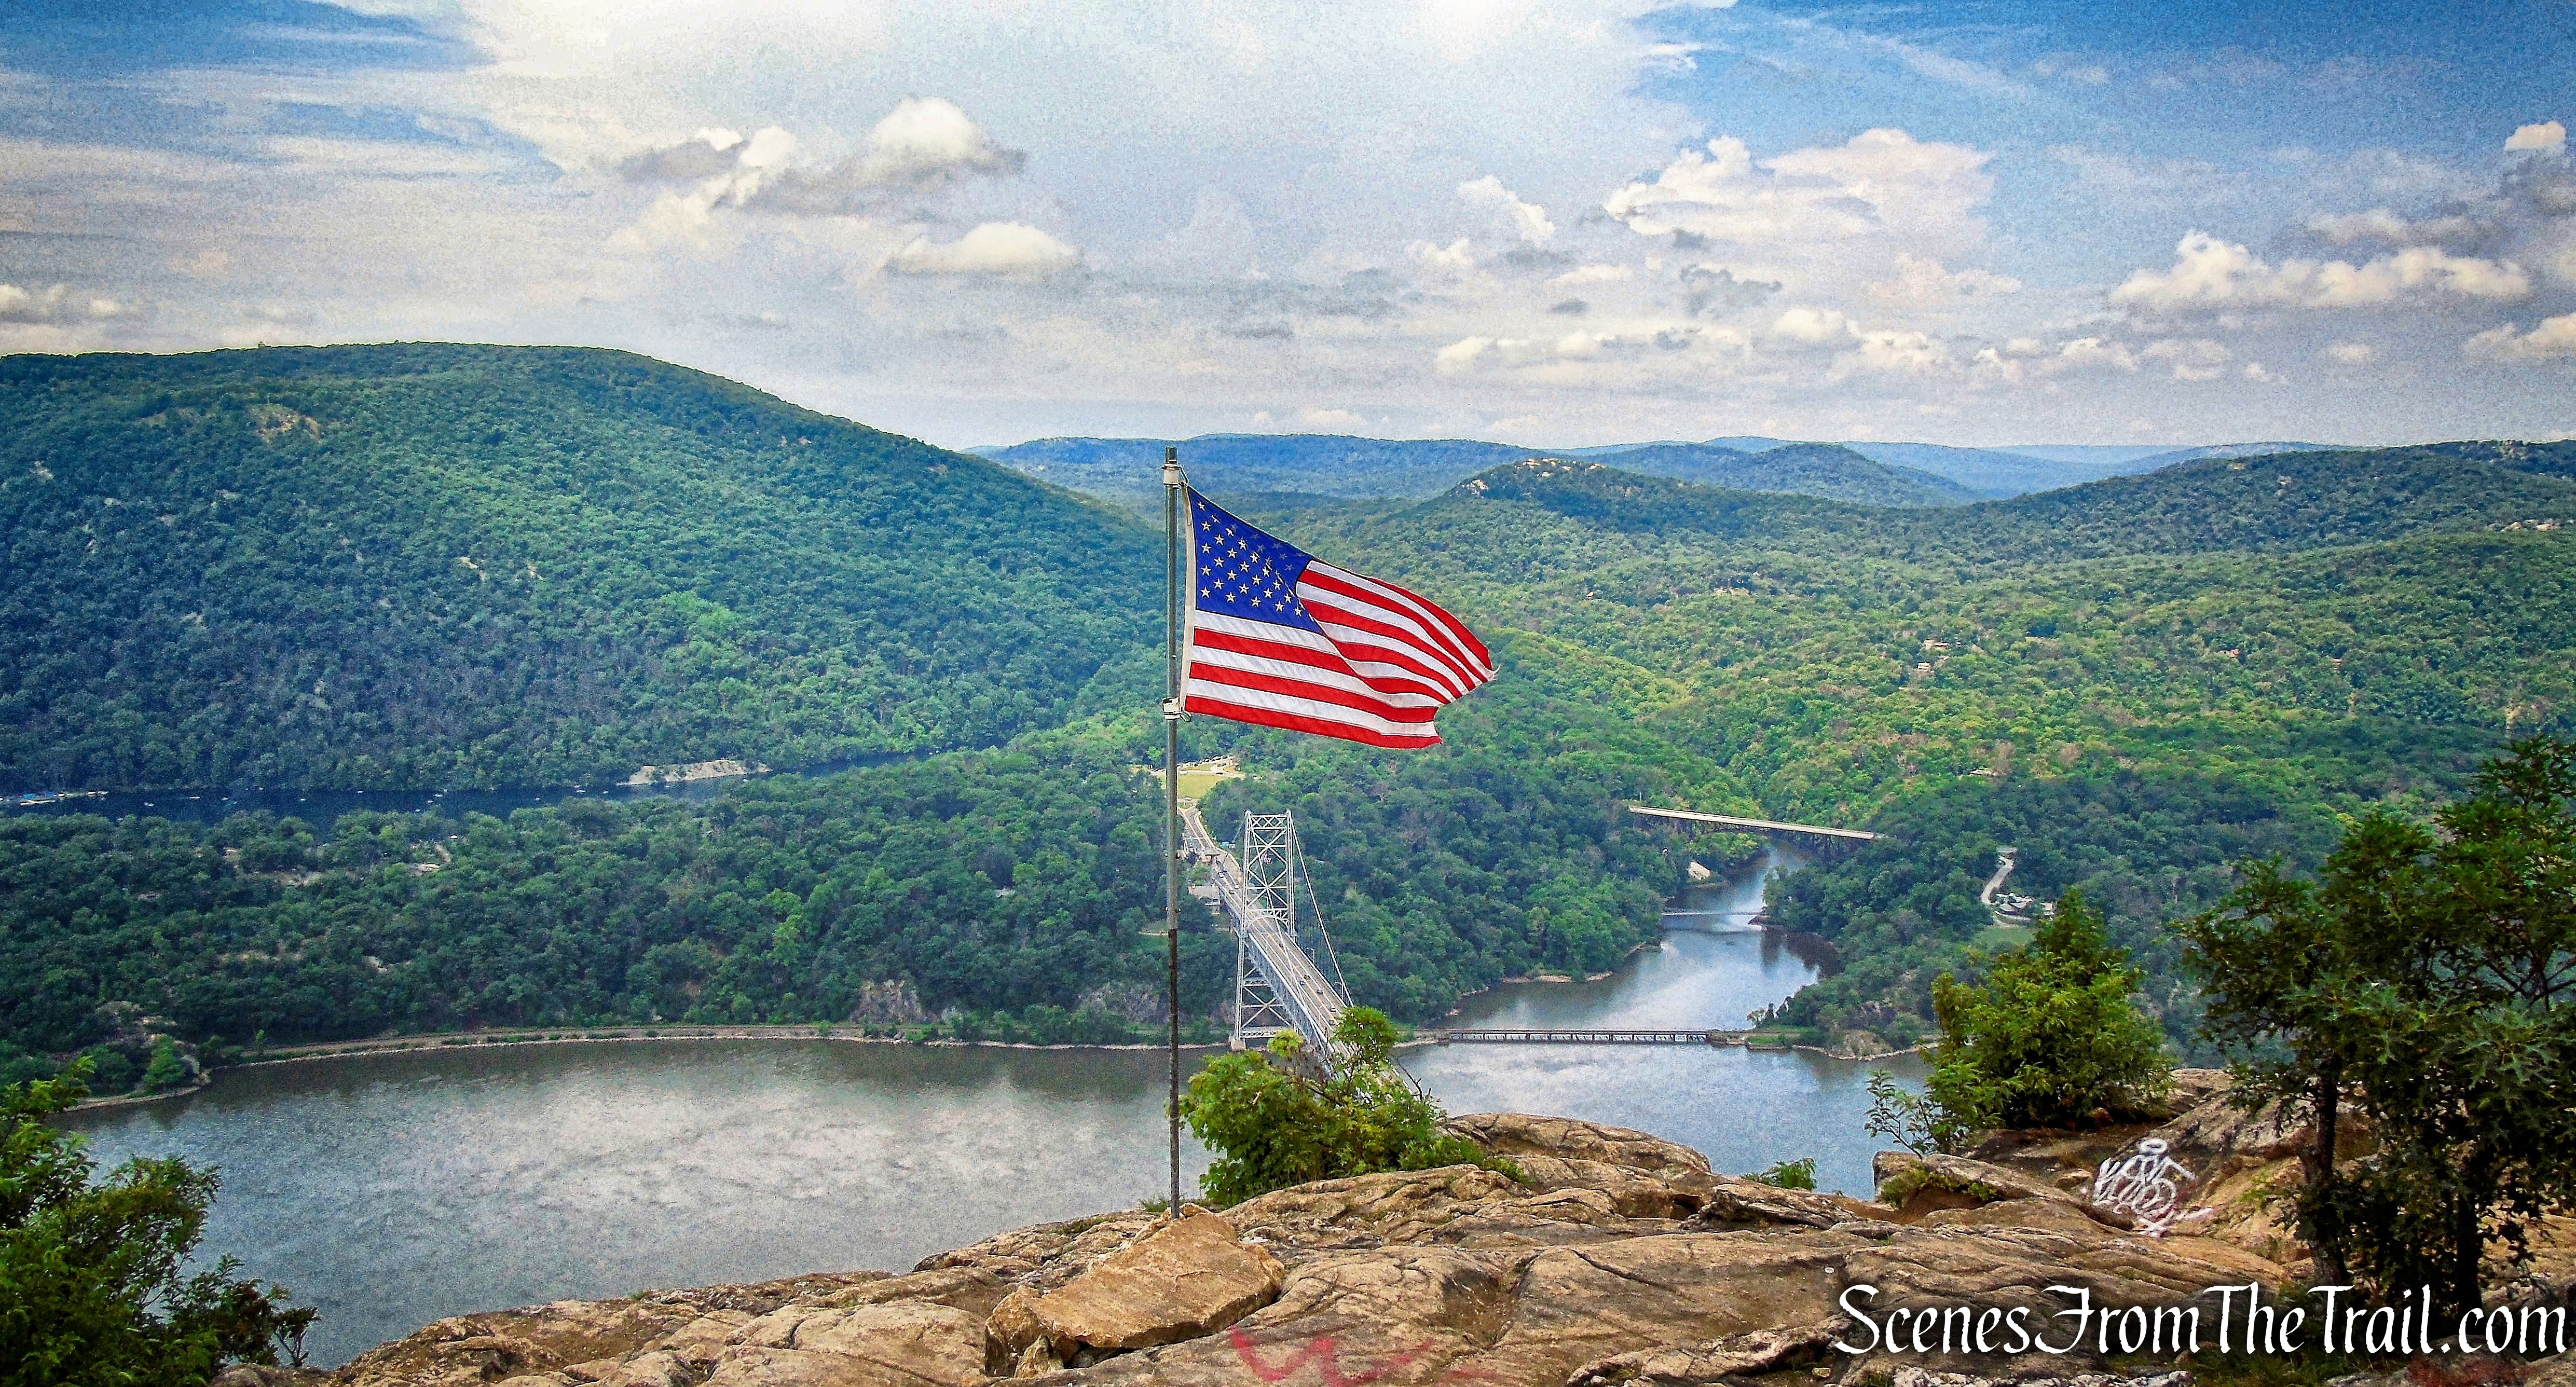
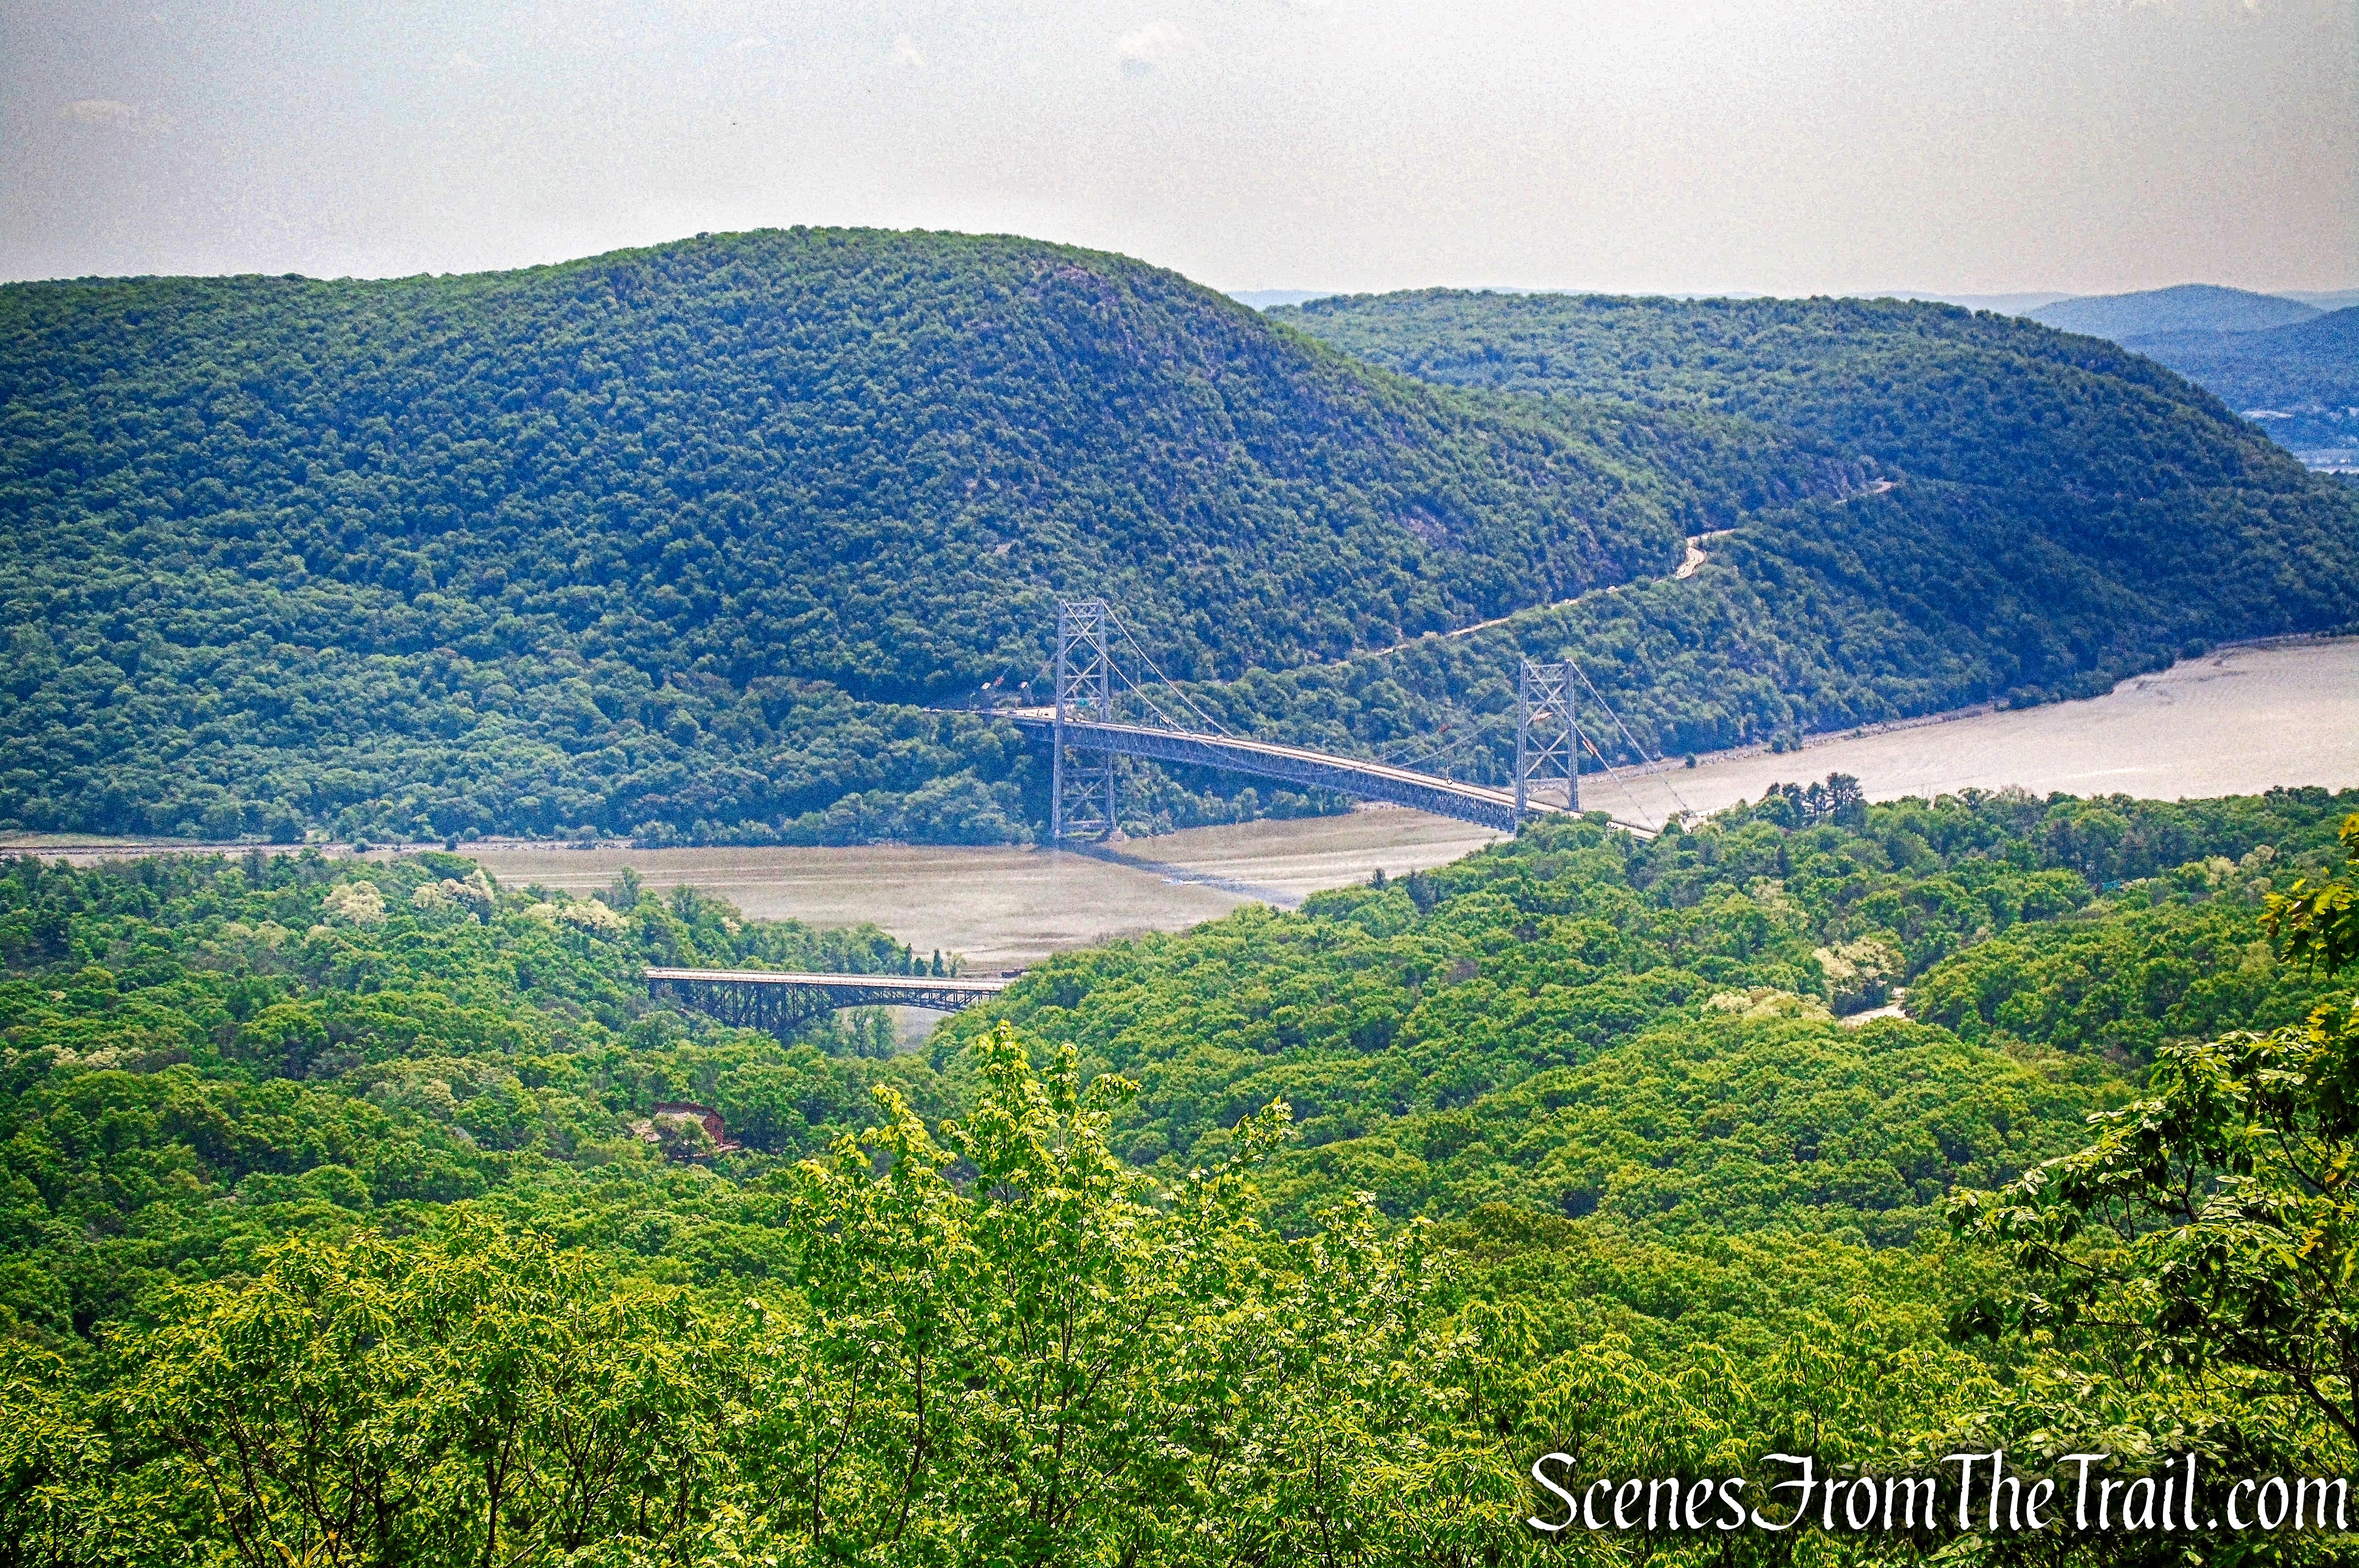
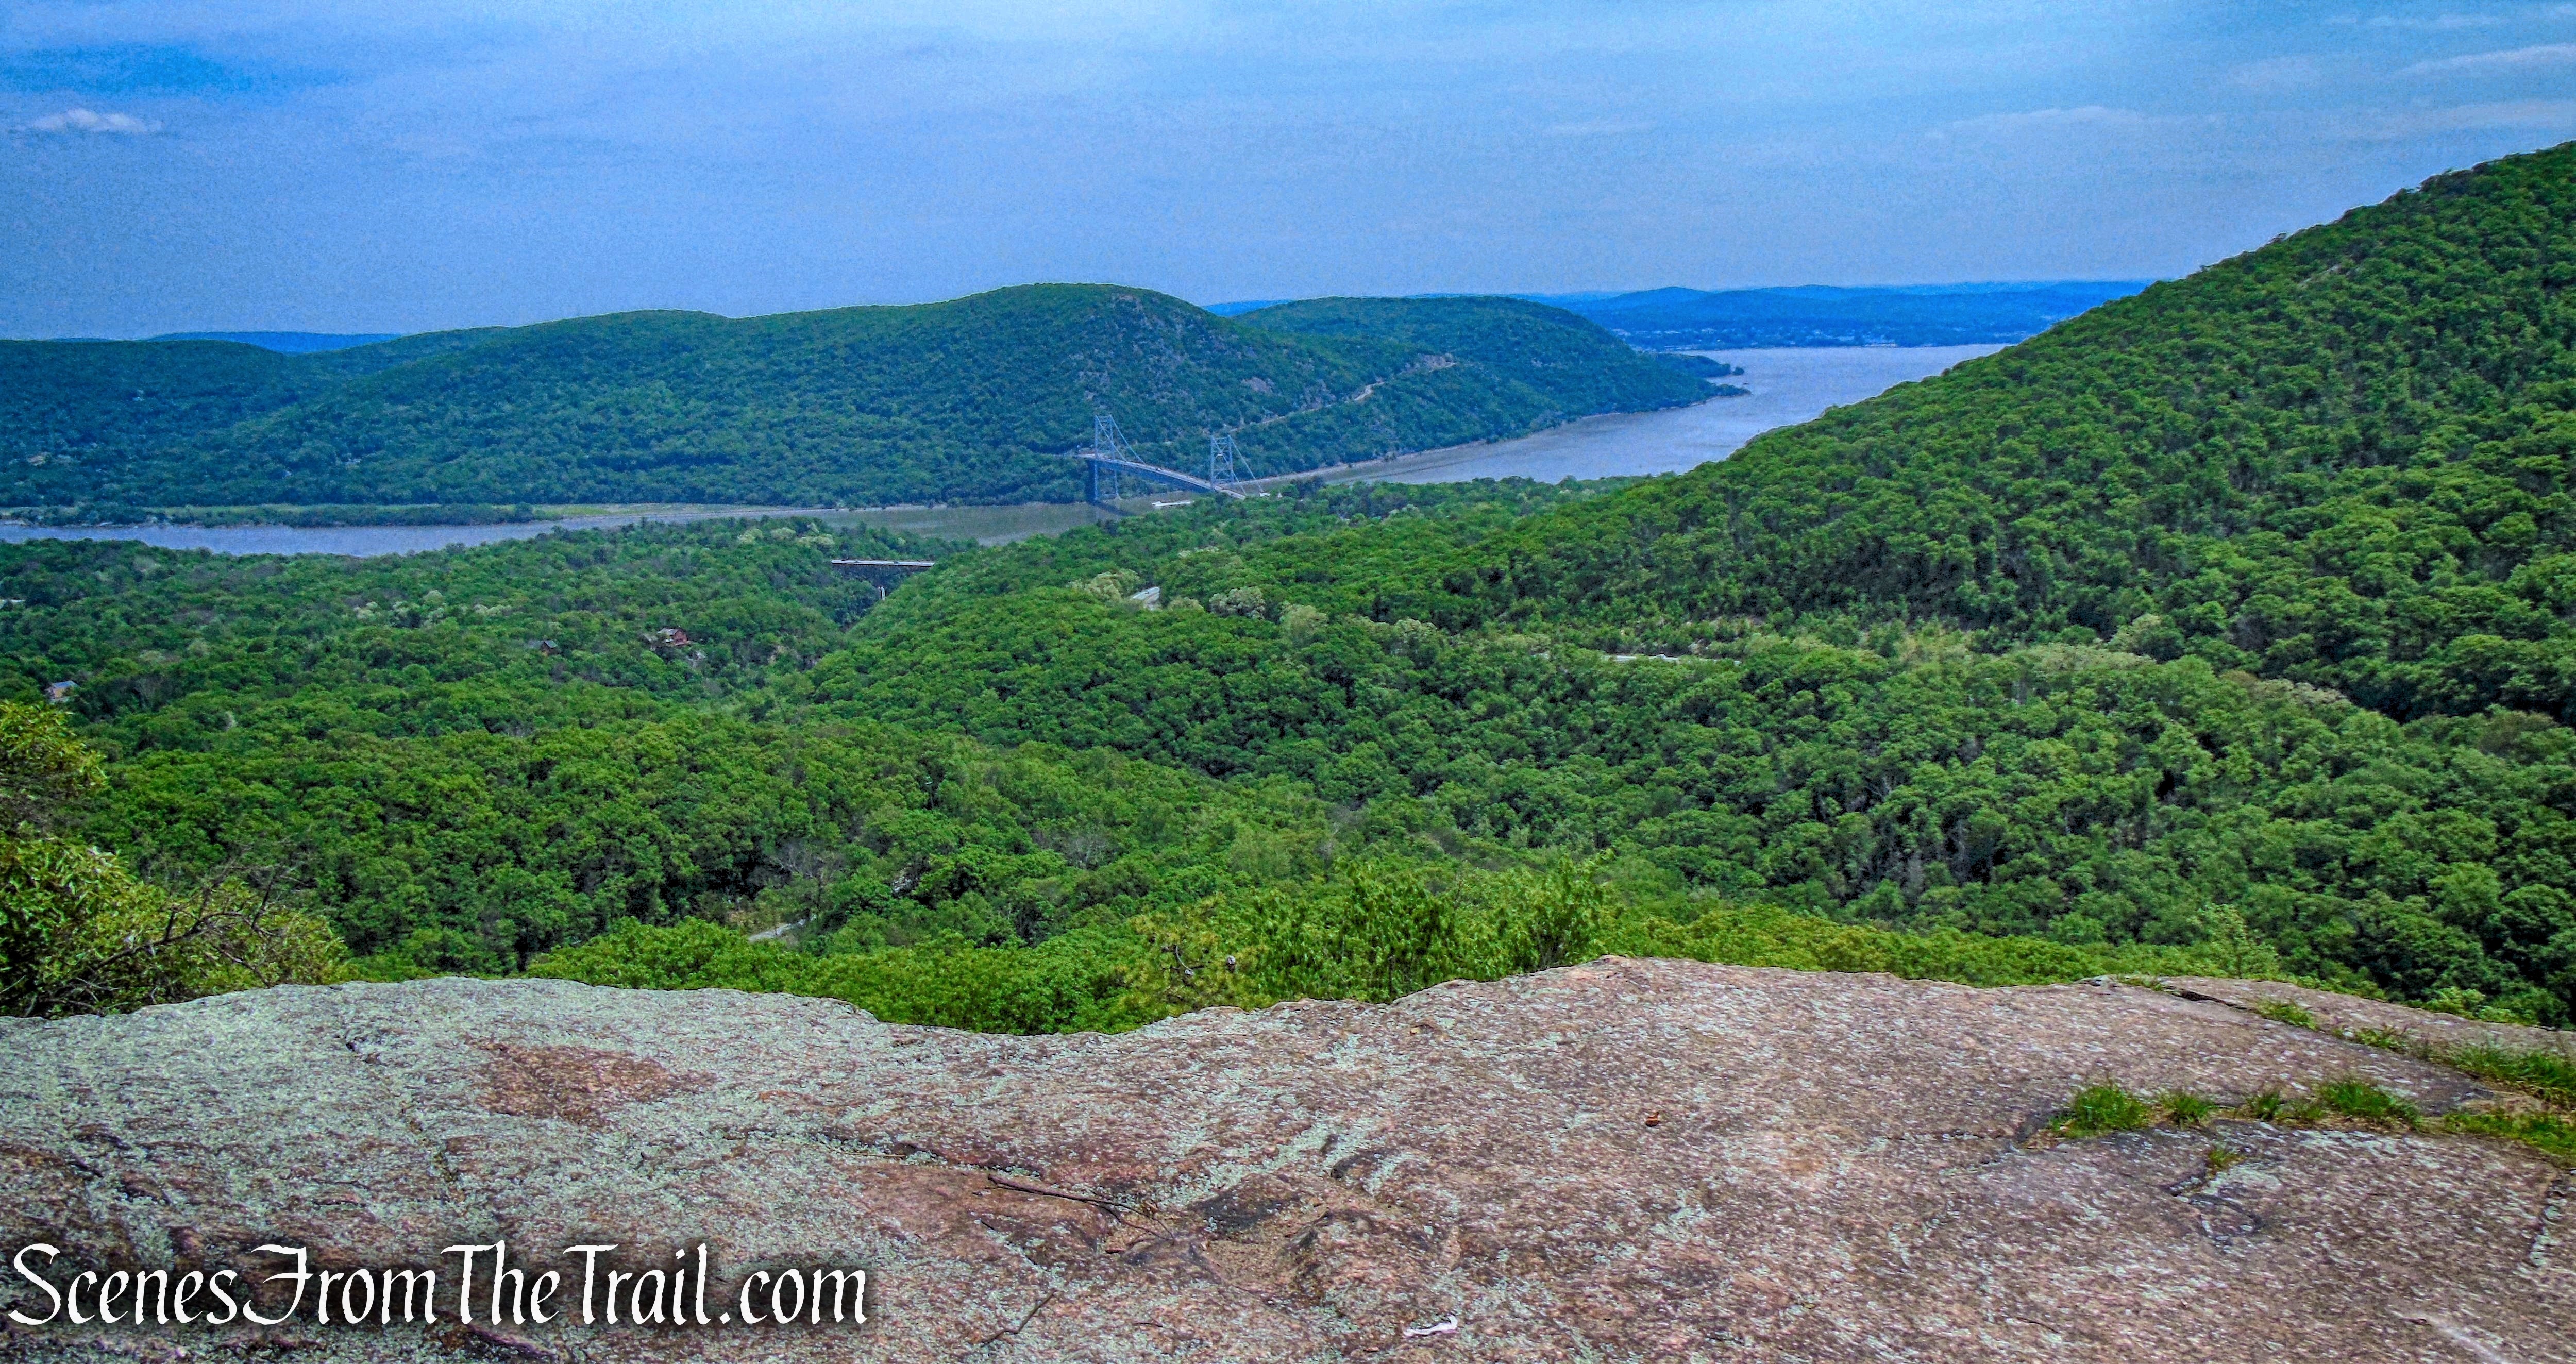
Just north of the sharp bend in the river, of great strategic importance during the Revolutionary War, is Constitution Island, and beyond the bend is the United States Military Academy at West Point. To the right, on the west side of the river, is Crows Nest Mountain. On a clear day, you can see the Bear Mountain Bridge down the river in the distance.
south-facing view – Washburn Trail
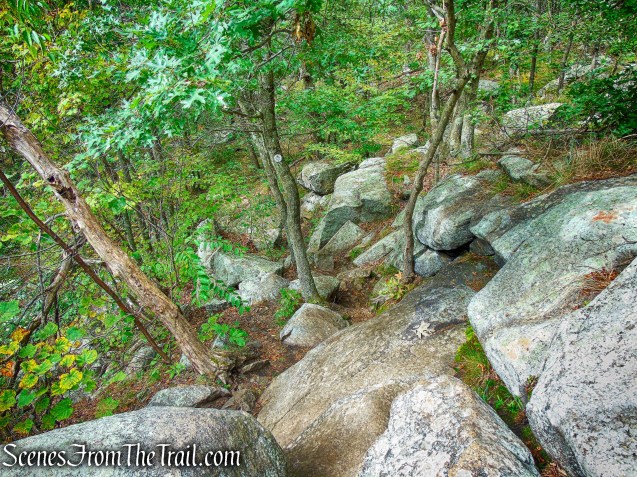
The trail continues to descend, steeply in places.
Washburn Trail
The trail levels off briefly and along the way, I was on the lookout for any side trails that lead to a view.
Washburn Trail
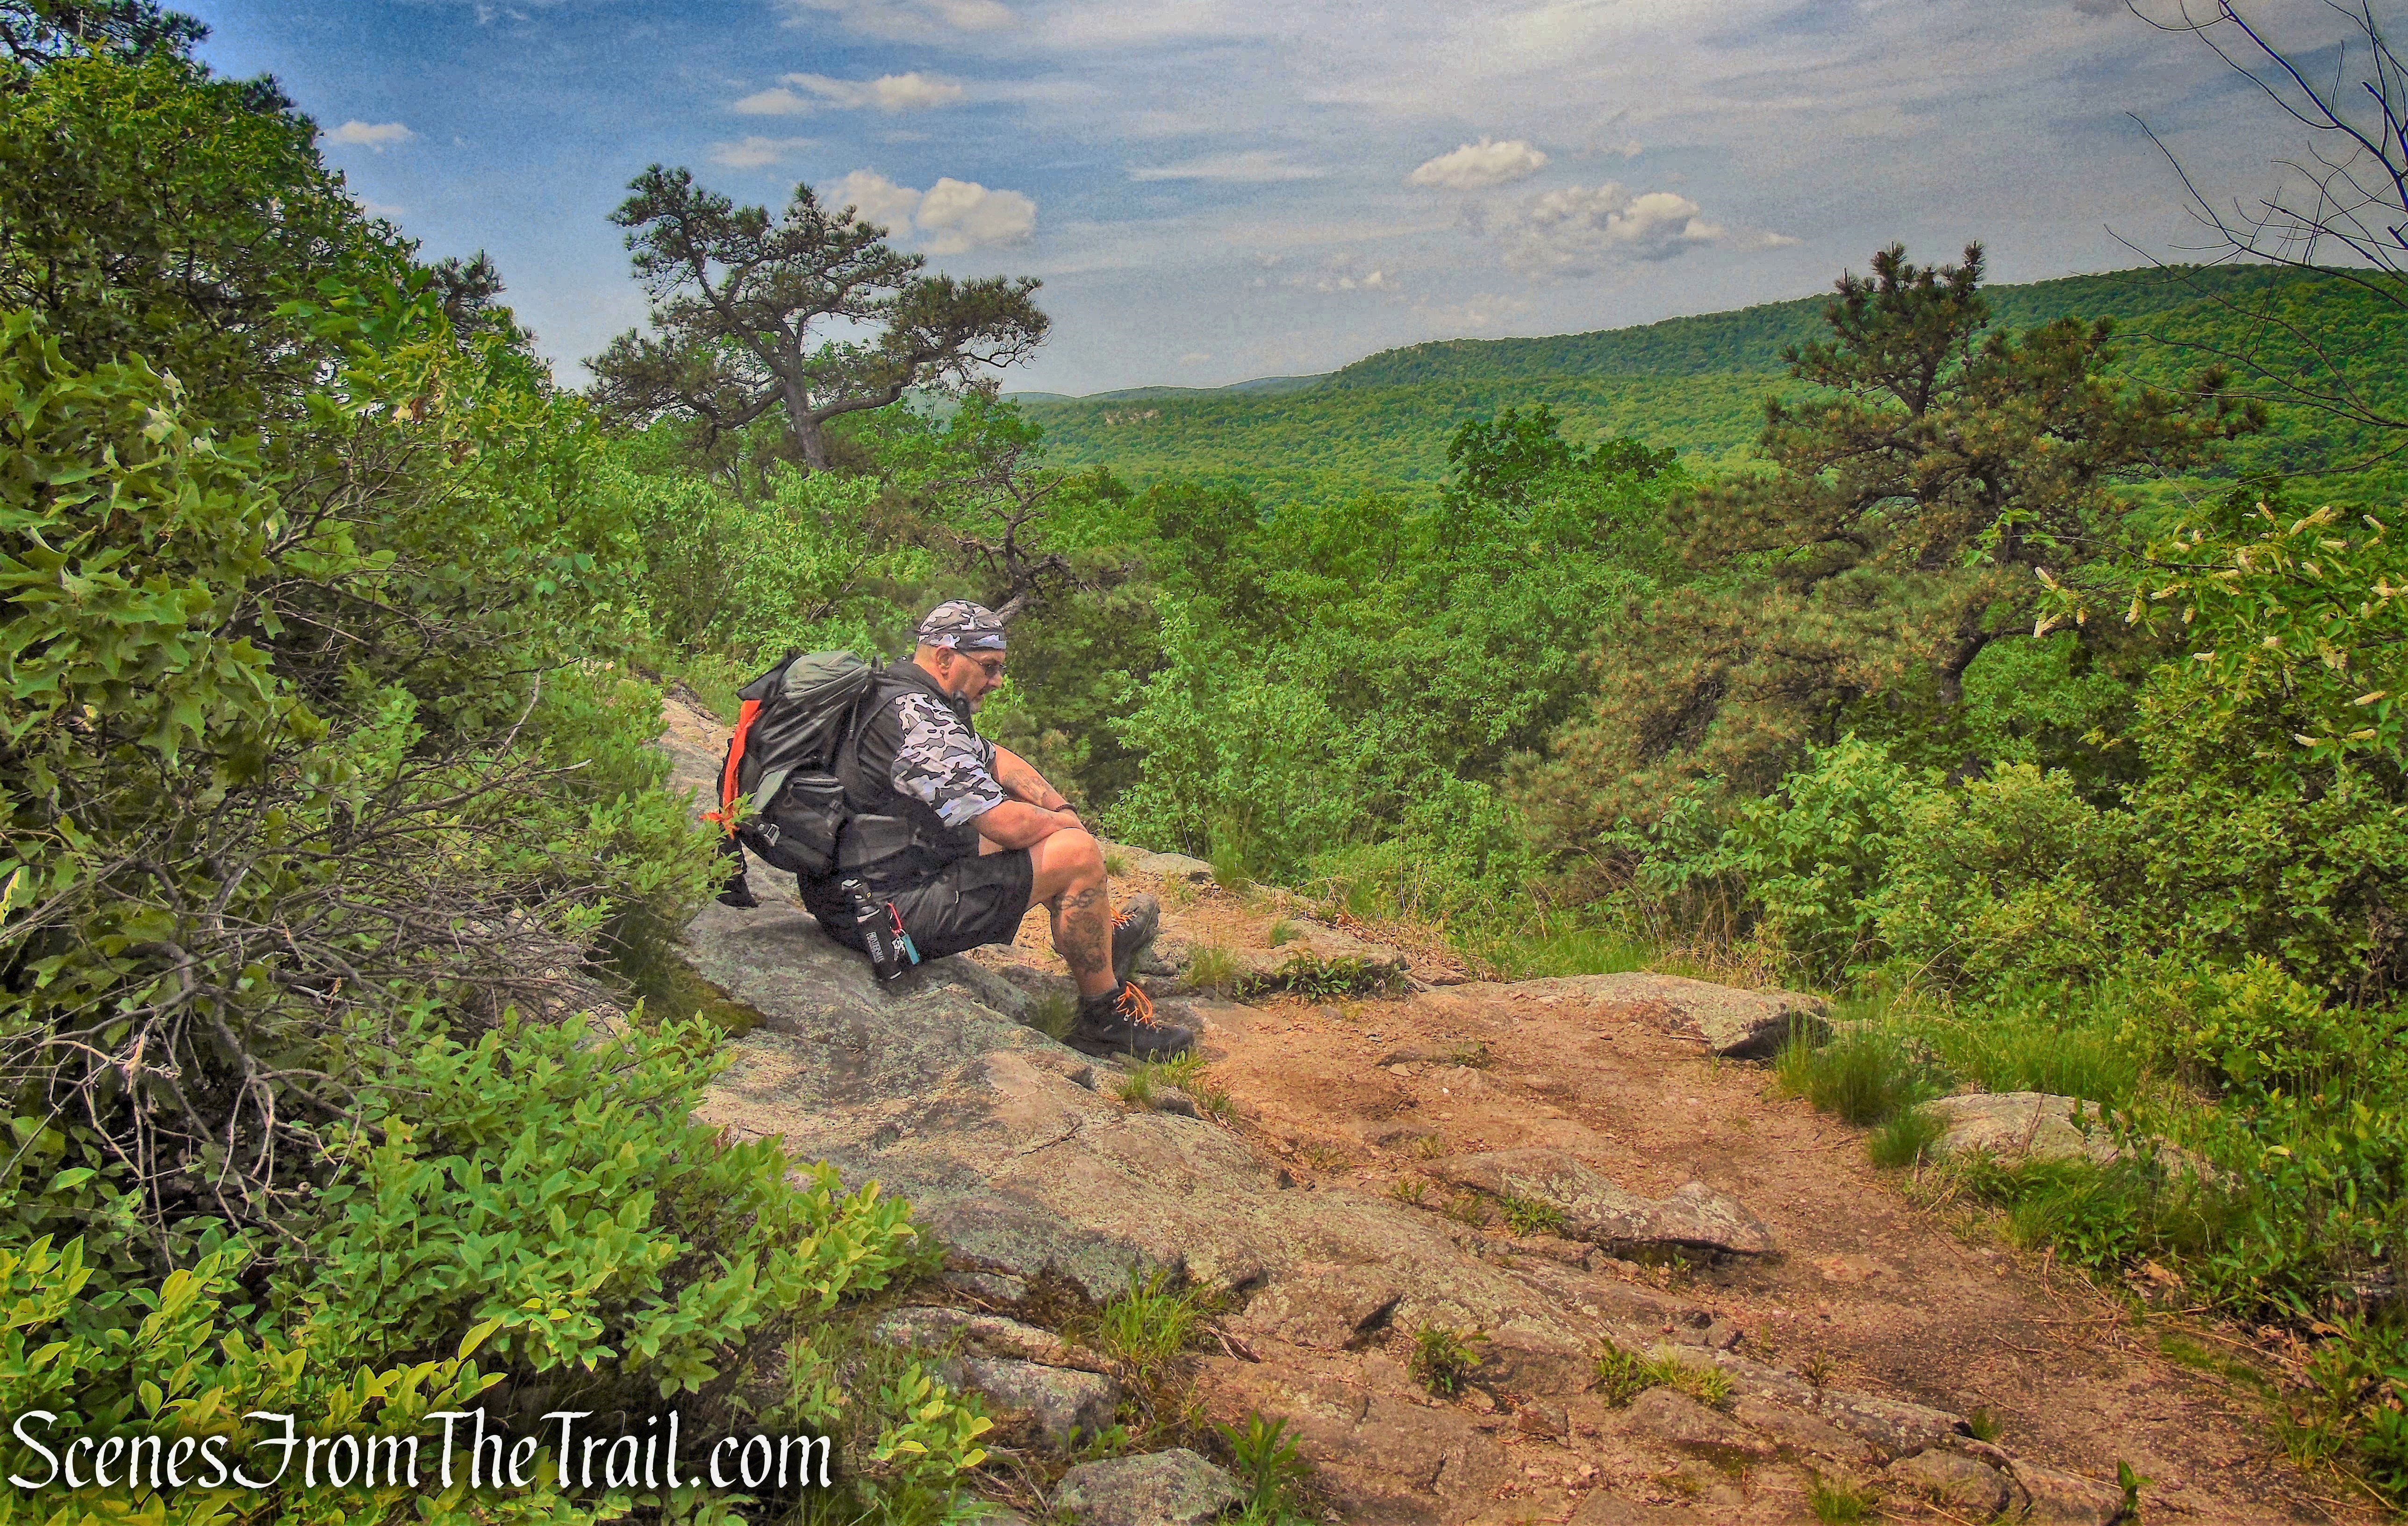
I wandered off trail several times to see if I could find any viewpoints that aren’t listed on the map. I came across this one from a large rock outcrop that was quite nice.
south-facing view – just off the Washburn Trail
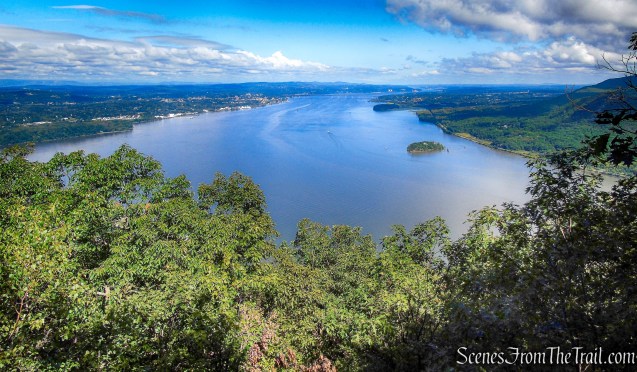
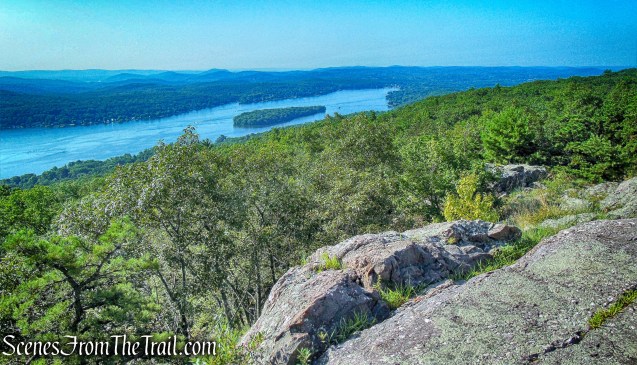
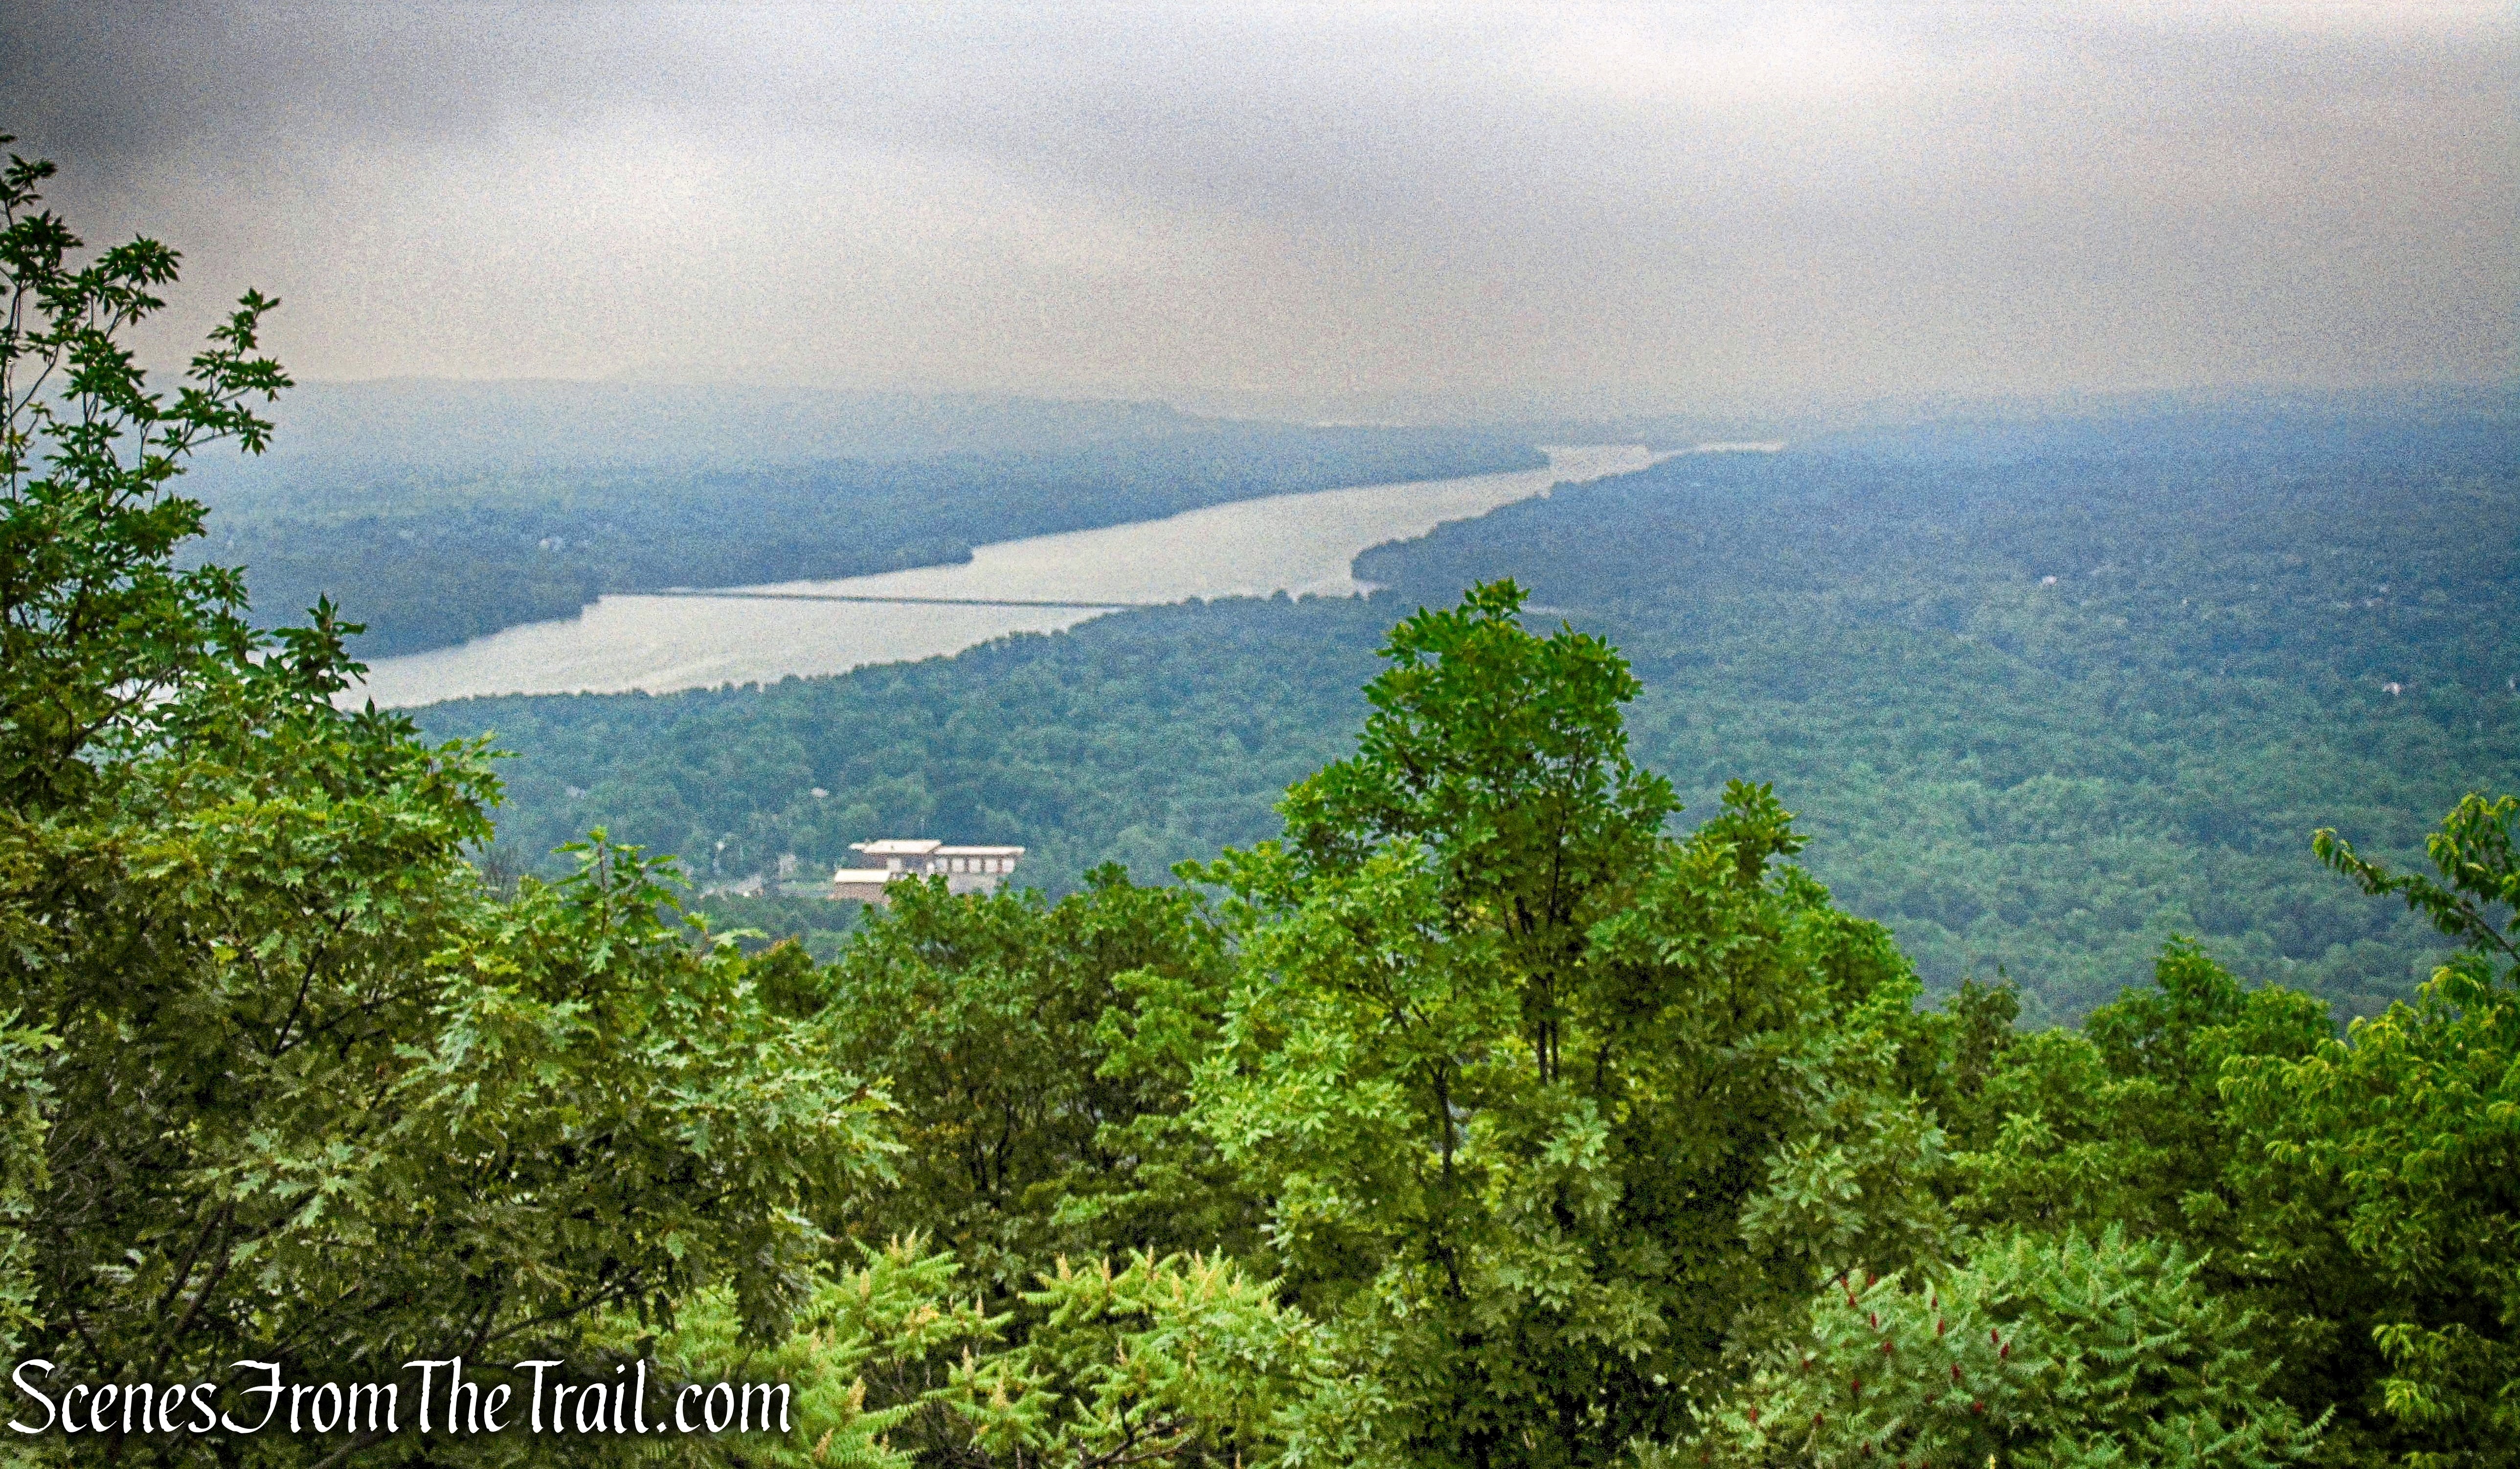
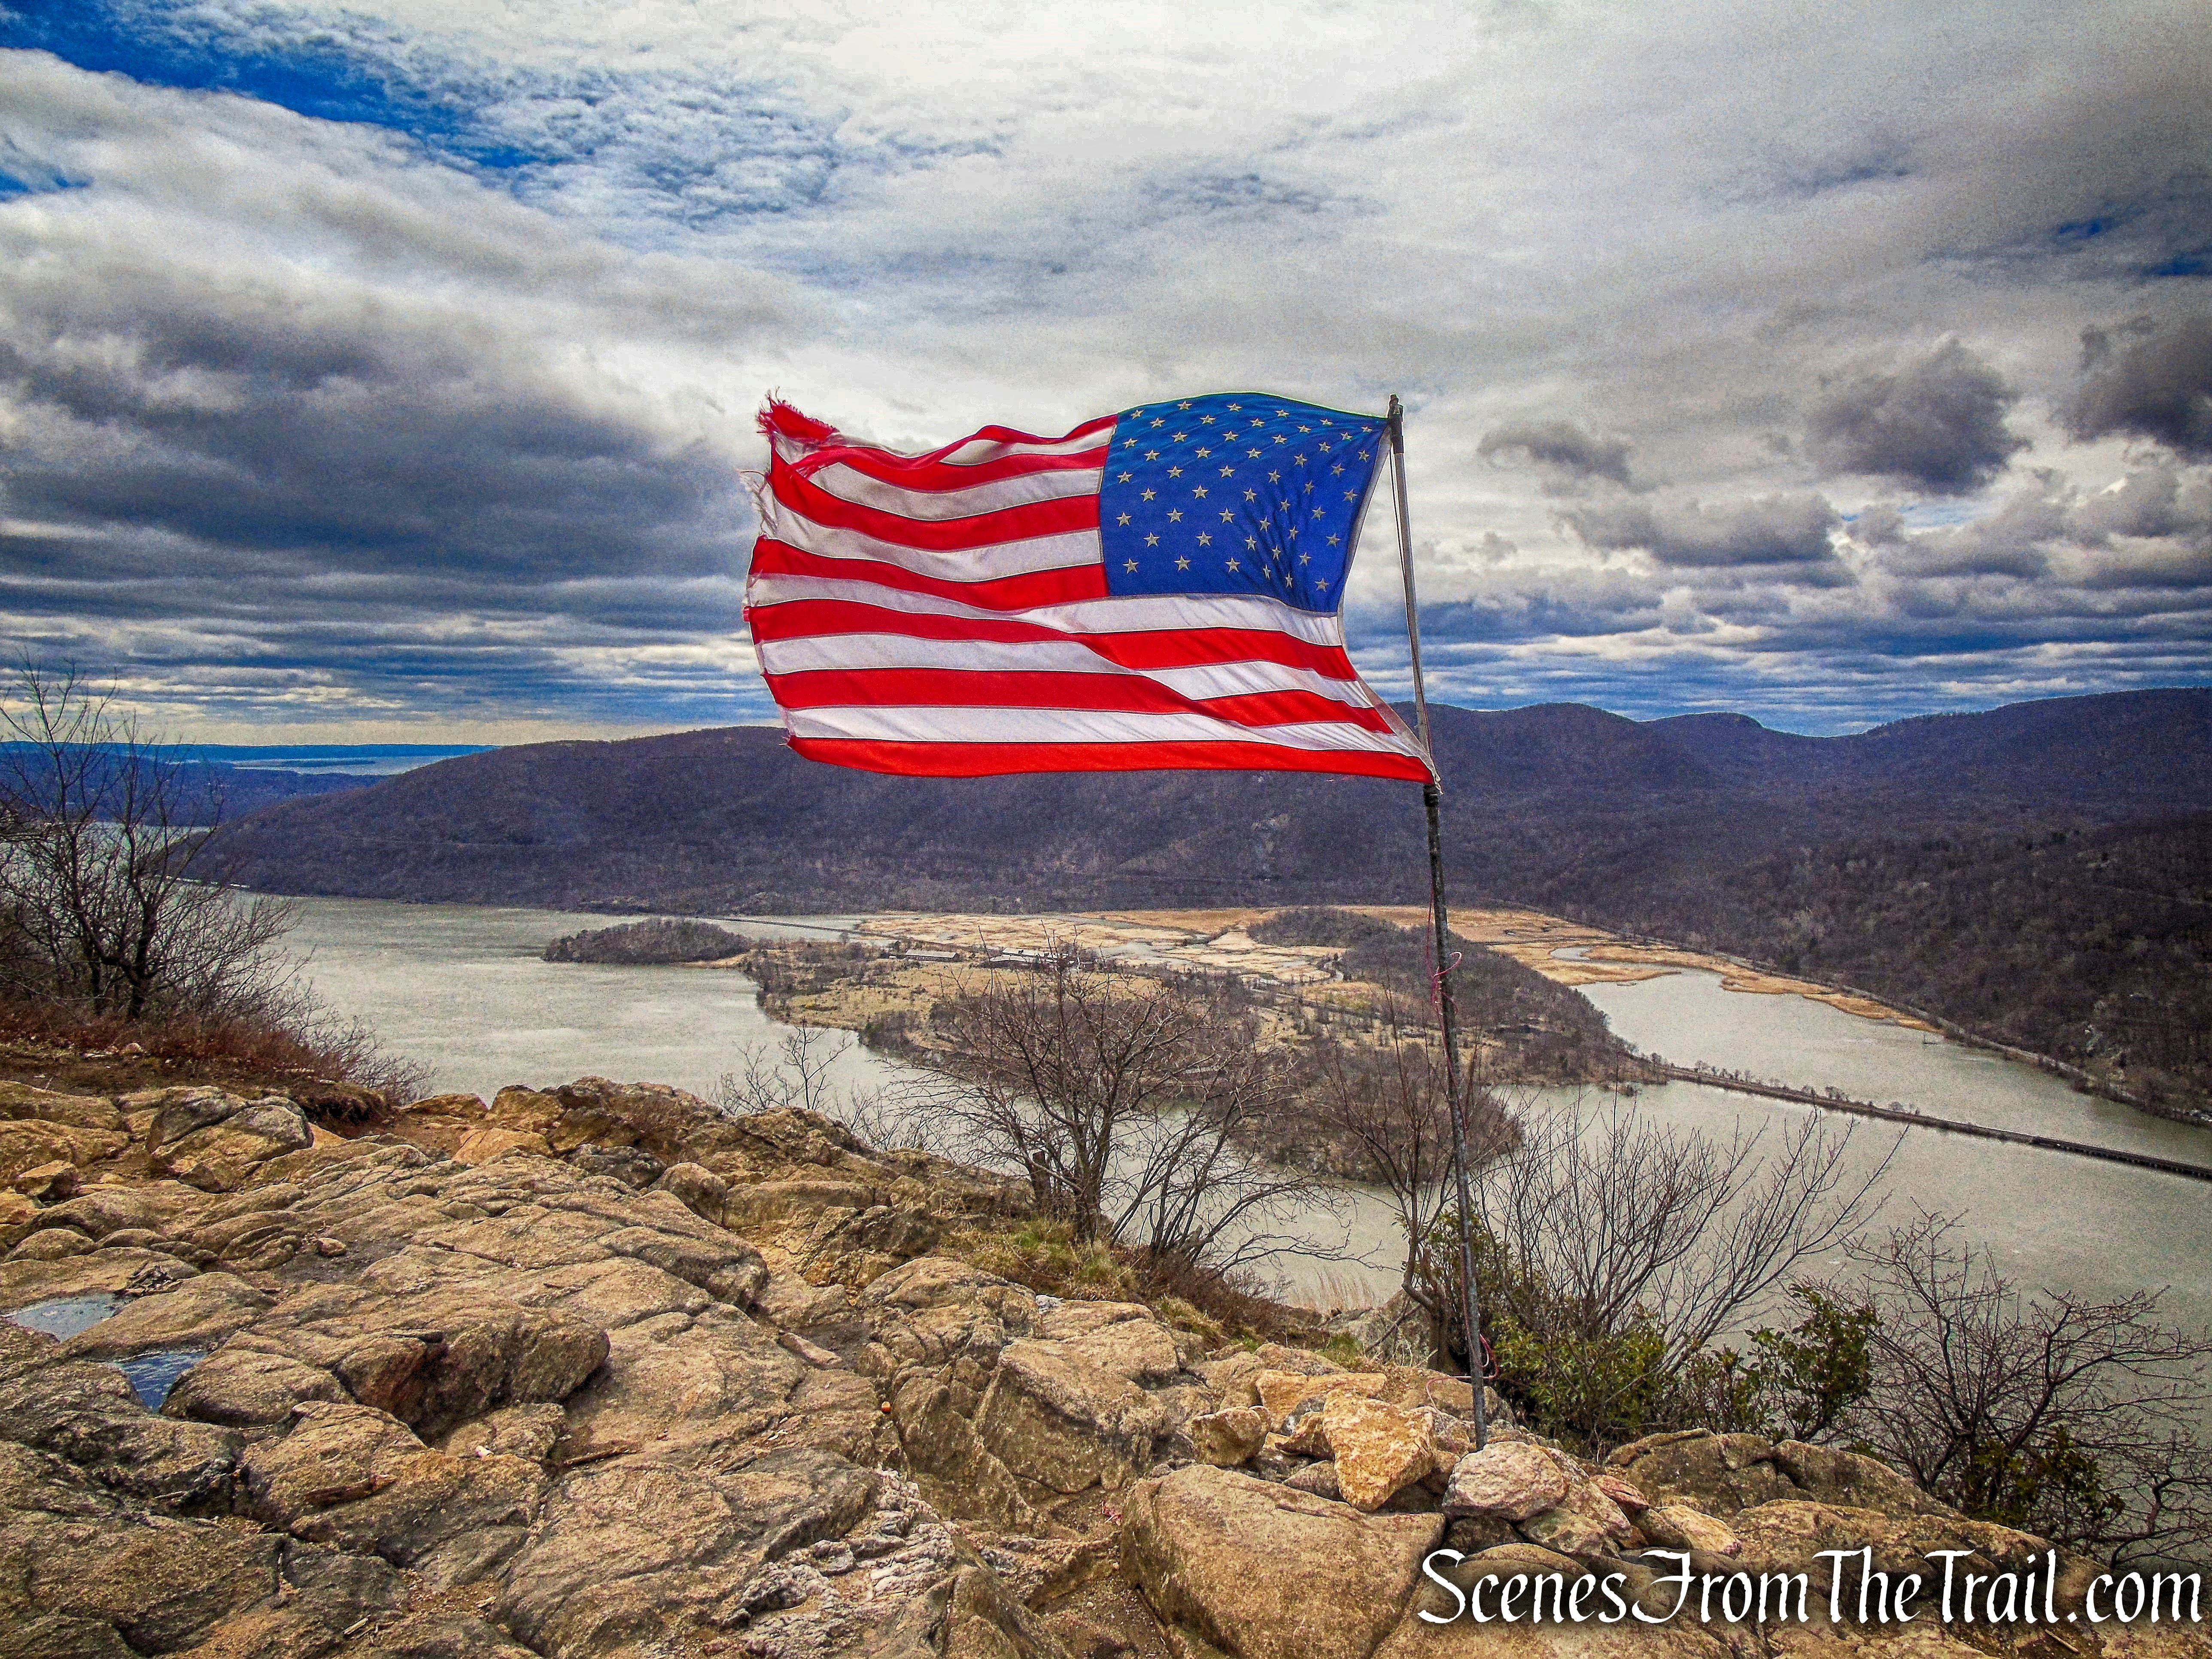
After descending some more, We reached a great viewpoint over the Hudson River from a rock outcrop to the right of the trail. The view was the broadest of the entire hike and extends from West Point up the river to Storm King Mountain (identified by the gash carved into the mountain by the construction of the Storm King Highway in 1922).
Butter Hill and Storm King Mountain as viewed from Bull Hill
This rock outcrop was crowded so we didn’t stay long.
south-facing view – Washburn Trail
The Washburn Trail continues to descend rather steeply, then ascends a little. Just beyond, the trail reaches a junction with the yellow-blazed Undercliff Trail.
turn left on the Undercliff Trail
To be honest, I was glad to leave the Washburn Trail. It was much too crowded for me.
turn left on the Undercliff Trail
The Undercliff Trail soon reaches another viewpoint over Cold Spring and West Point, with Crows Nest Mountain visible to the right, across the river.
south-facing view – Undercliff Trail
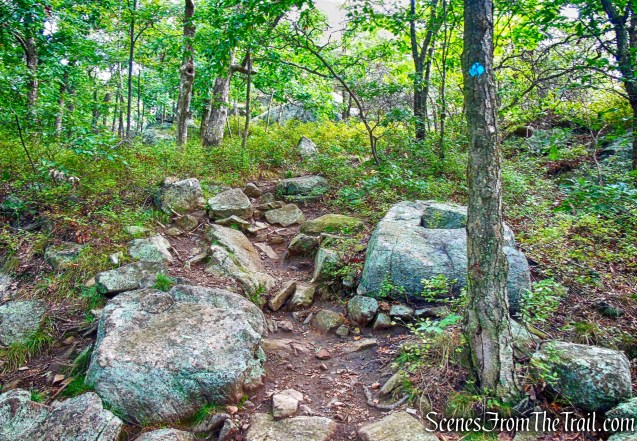
We followed the Undercliff Trail as it continues to descend. After a relatively level section, the trail turns right and continues to descend on a woods road. We passed several unmarked footpaths in this area and we stayed alert, as the yellow trail soon turns sharp left, leaving the woods road.
Undercliff Trail
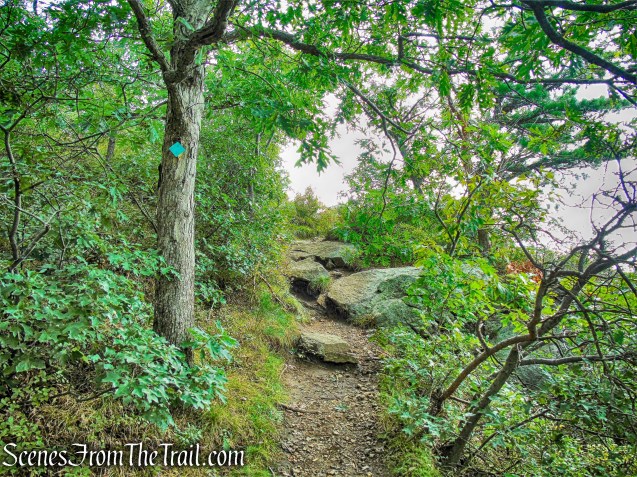
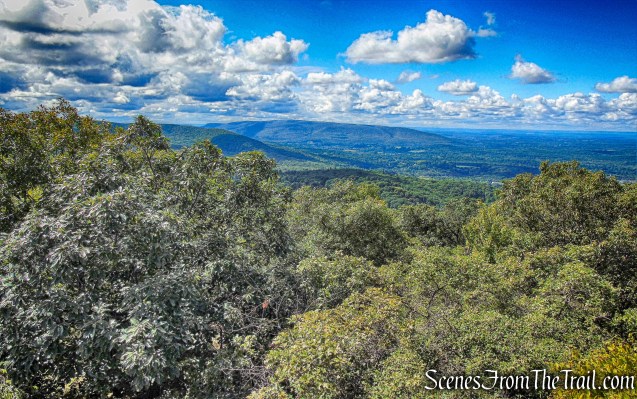
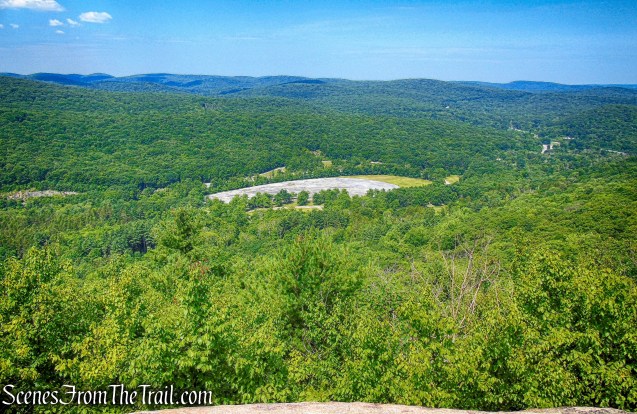
The Undercliff Trail continues descending along the shoulder of Bull Hill and soon reaches an east-facing viewpoint over the hills of Fahnestock State Park.
east-facing viewpoint – Undercliff Trail
The cleared strip of land and stone building visible in the distance, is the Catskill Aqueduct.
Catskill Aqueduct
Here, the trail turns right as your facing the view. There are unmarked trails that lead north and I walked briefly in that direction, but stopped when I didn’t see any yellow blazes. It took a few minutes to spot the next blaze. The Undercliff Trail continues to descend, entering the Nelsonville Nature Preserve.
Undercliff Trail
The Undercliff Trail, once in the preserve, is marked by yellow “Nelsonville Footpath” blazes.
Undercliff Trail
As we were descending along the trail, I saw a very large bear print in the dirt, right on the trail. At the base of the descent, the Undercliff Trail reaches a T-junction with a wide woods road, the route of the green-blazed Nelsonville Trail from earlier in the hike.
turn right onto joint Undercliff/Nelsonville Trail
We turned right and were now retracing our steps from the beginning of the hike. We followed the joint Undercliff/Nelsonville Trail a short distance.
joint Undercliff/Nelsonville Trail
Just up ahead, the Undercliff Trail continues straight as the Nelsonville Footpath turns left onto another woods road. We turned left, following the green blazes.
Nelsonville Footpath
We crossed the small wooden footbridge and turned right.
Nelsonville Footpath
A short distance later we crossed the second footbridge,
Nelsonville Footpath
and walked a short distance back to the trailhead on Secor Street, where the hike began.
terminus of Nelsonville Footpath
This was a tough hike, but truly rewarding. Once up near the summit, the views were seemingly endless. I could have done without the crowds, but with a train stop just across 9D, perfect weather, it being a Saturday and the first day of Autumn, there was bound to be plenty of foot traffic. The only crowds we encountered were on the Washburn Trail. The rest of the hike we only passed a few people. If you haven’t hiked Bull Hill, give it a try, it’s worth it.
Pros: Sweeping Hudson River views, challenging hike, a good weekday hike (avoid the crowds), well marked trails.
Cons: A lot of foot traffic on the Washburn Trail, parking can be an issue.
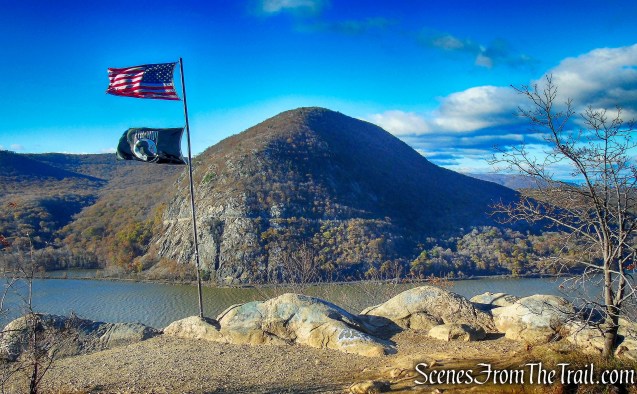
Storm King Mountain is a mountain on the west bank of the Hudson River just south of Cornwall-on-Hudson, New York. Together with Breakneck Ridge on the opposite bank of the river, it forms “Wey-Gat” or Wind Gate, the picturesque northern narrows of the Hudson Highlands.
Storm King Mountain as viewed from Breakneck Ridge – November 17, 2017
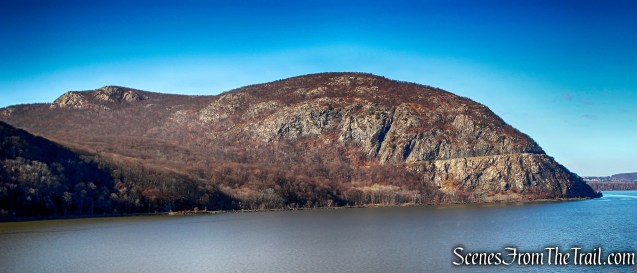
Its distinctive curved ridge is the most prominent aspect of Storm King.
Butter Hill (left) and Storm King Mountain (right) as viewed from Bull Hill – December 3, 2016
The mountain is a major part of Storm King State Park. With wide views of the Hudson River and the surrounding area, both Storm King and Butter Hill summits are popular with hikers.
Butter Hill (left) and Storm King Mountain (right) as viewed from Little Stony Point – December 4, 2016
While Storm King Mountain is thought of as the highest point in the area, its summit reaching approximately 1,340 feet above sea level, the eastern summit known officially as Butter Hill is actually higher, with an elevation of 1,380 feet.
Butter Hill as viewed from the 9W trailhead
There is nothing easy about the trails in Storm King State Park. However, views of the Hudson Highlands and the Hudson River reward hikers far beyond the effort required to arrive at a viewpoint. The park contains a small network of seven trails across a 10-mile span, allowing hikers to minimize retracing their steps, and various loop hikes are possible.
I hiked Storm King Mountain in 2016, shortly after starting this blog. Since then I have hiked most of the East Hudson Highlands that sit just just across the Hudson River. From viewpoints on most of those hikes, Storm King dominates the landscape. It was time to stop admiring it from afar and pay it a return visit. Knowing that the trails are somewhat rugged, I kept the hike on the short side. This hike was done in a counterclockwise fashion from the 9W trailhead.
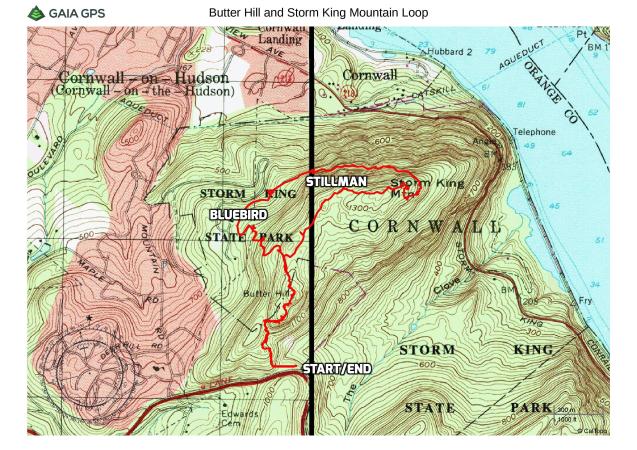
Butter Hill and Storm King Mountain Loop
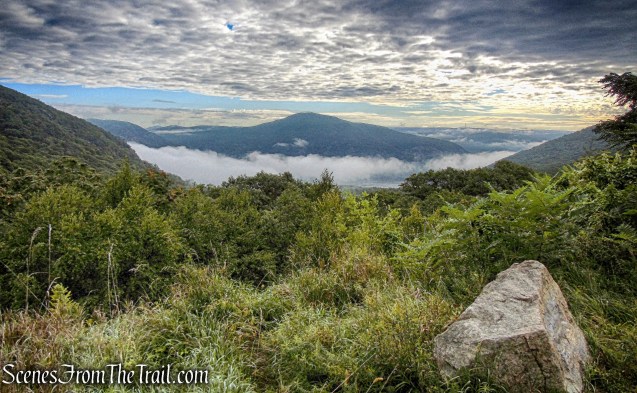
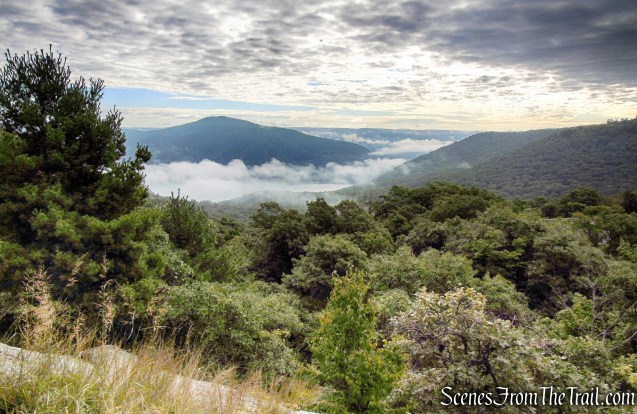
Knowing that this is a popular hiking spot, we got an early start and arrived at the parking area by 8:30 am. There were only four cars in the lot when we arrived, but when we returned in the afternoon, it was near capacity. There was a lot of fog on the Hudson River when we arrived. There is a picnic area at the trailhead with several tables that offers a nice view of Bull Hill across the river.
Bull Hill as viewed from Route 9W trailhead
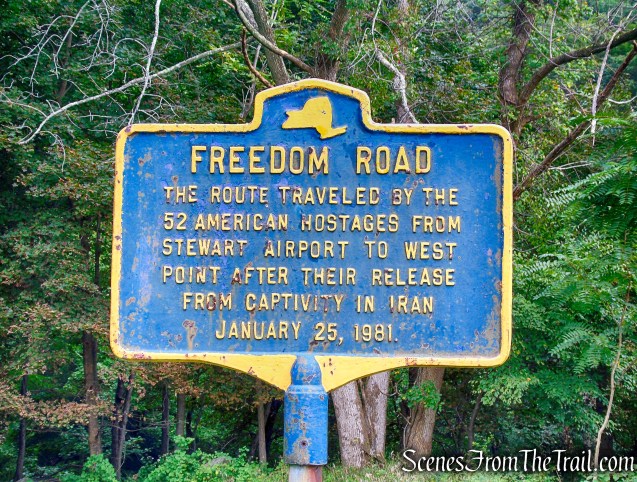
The parking area is at times referred to as the Freedom Road Parking Area. “Freedom Road” took the returning American Hostages through the historic Hudson Valley on January 25, 1981. “Freedom Road” was actually a series of roads traveled by a caravan of buses that brought the hostages from Stewart Airport to West Point, their first trip after landing back on American soil.
Freedom Road Parking Area
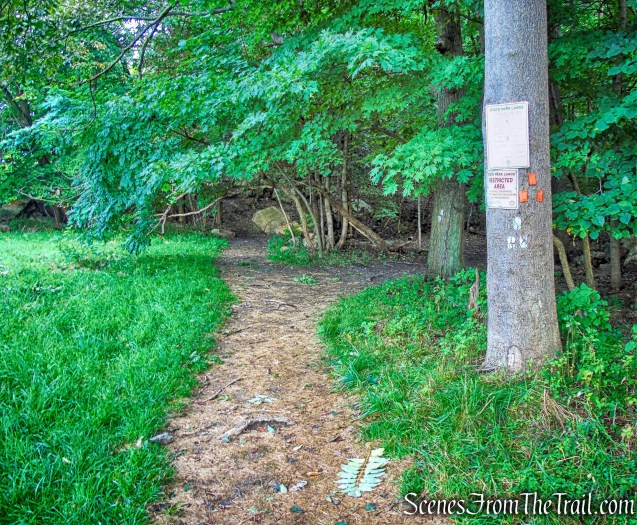
At the north end of the parking area, on the grassy shoulder of the road, there is a tree with a triple-orange blaze, which marks the start of the Butter Hill Trail.
Butter Hill Trail
Almost immediately, the trail begins to ascend as it briefly parallels the road.
Butter Hill Trail
In a short distance, the Butter Hill Trail bears right, away from the road and begins to ascend steeply.
Butter Hill Trail
Butter Hill Trail
Soon, views over the Hudson River begin to appear to the right. The mountain across the river is Bull Hill (Mt. Taurus), and the point of land jutting into the river is Little Stony Point (obscured by fog).
view from Butter Hill
Looking up, the summit of Butter Hill is visible in the distance.
Butter Hill Trail
The majority of the orange blazes on the way up are painted on rock.
Butter Hill Trail
The steepness of the trail would make this a real difficult hike in the snow.
Butter Hill Trail
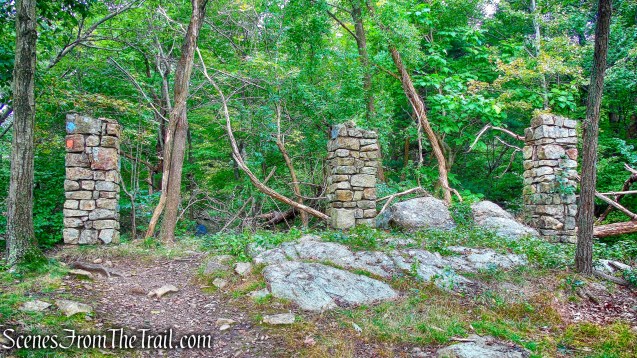
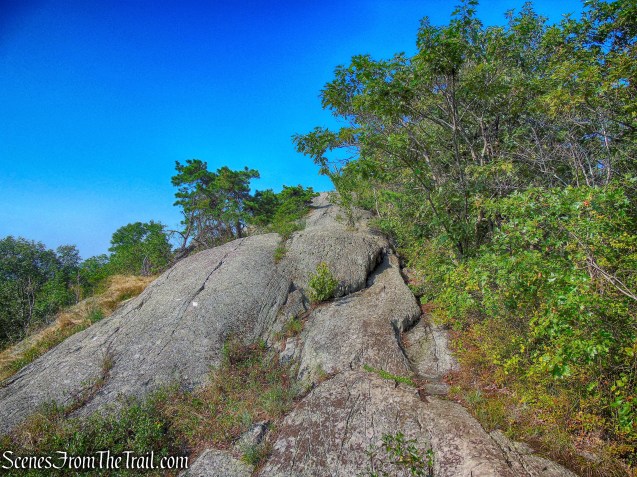
In 0.2 mile, the trail reaches three stone pillars, with a stone foundation behind the pillars.
stone pillars – Butter Hill Trail
These are the remains of Spy Rock House, the summer cottage of Dr. Edward L. Partridge, who served on the Palisades Interstate Park Commission from 1913 to 1930.
Spy Rock House ruins – Butter Hill Trail
The trail now descends slightly…..
Butter Hill Trail
Butter Hill Trail
then continues to climb Butter Hill, gradually at first.
Butter Hill Trail
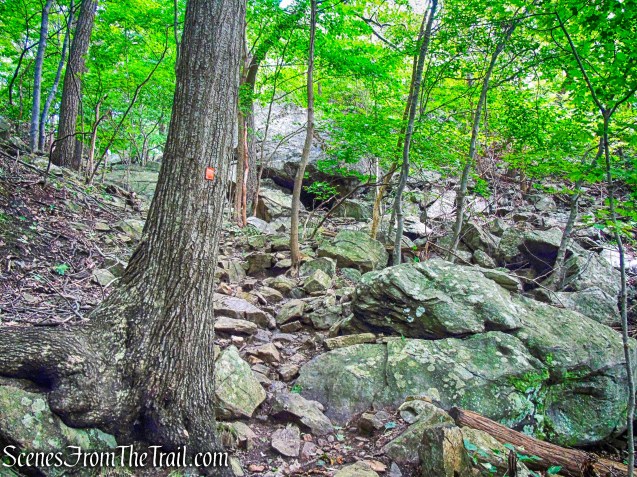
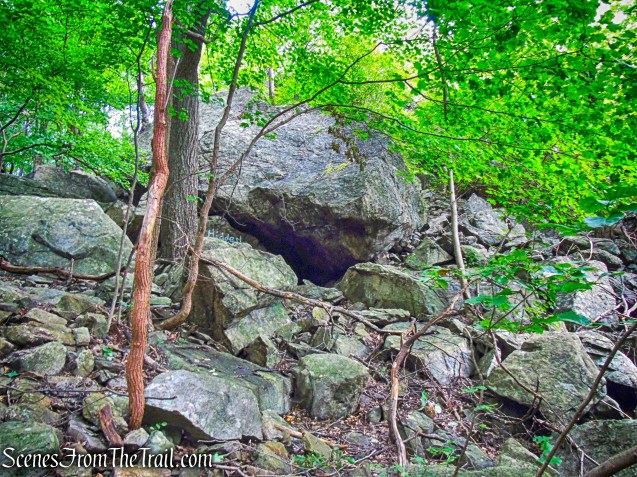
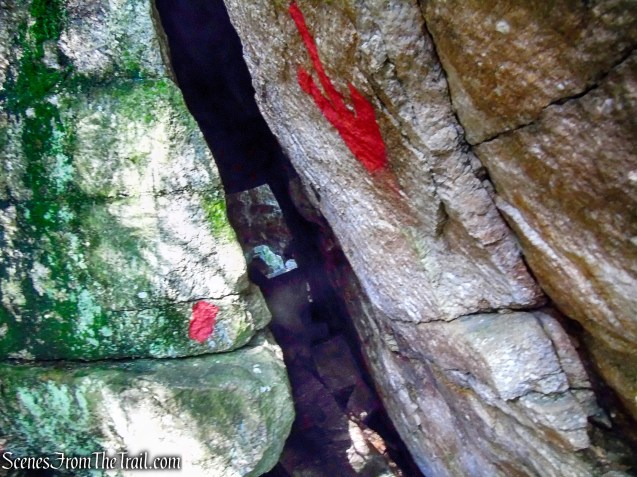
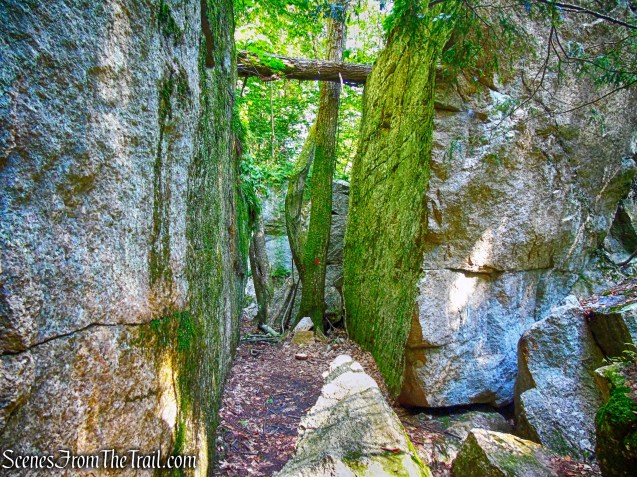
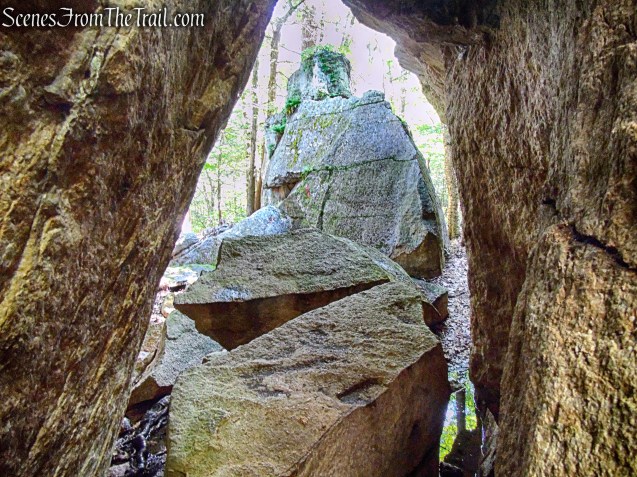
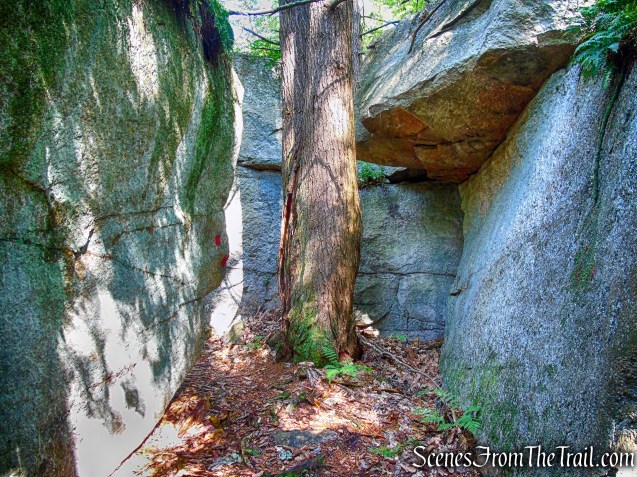
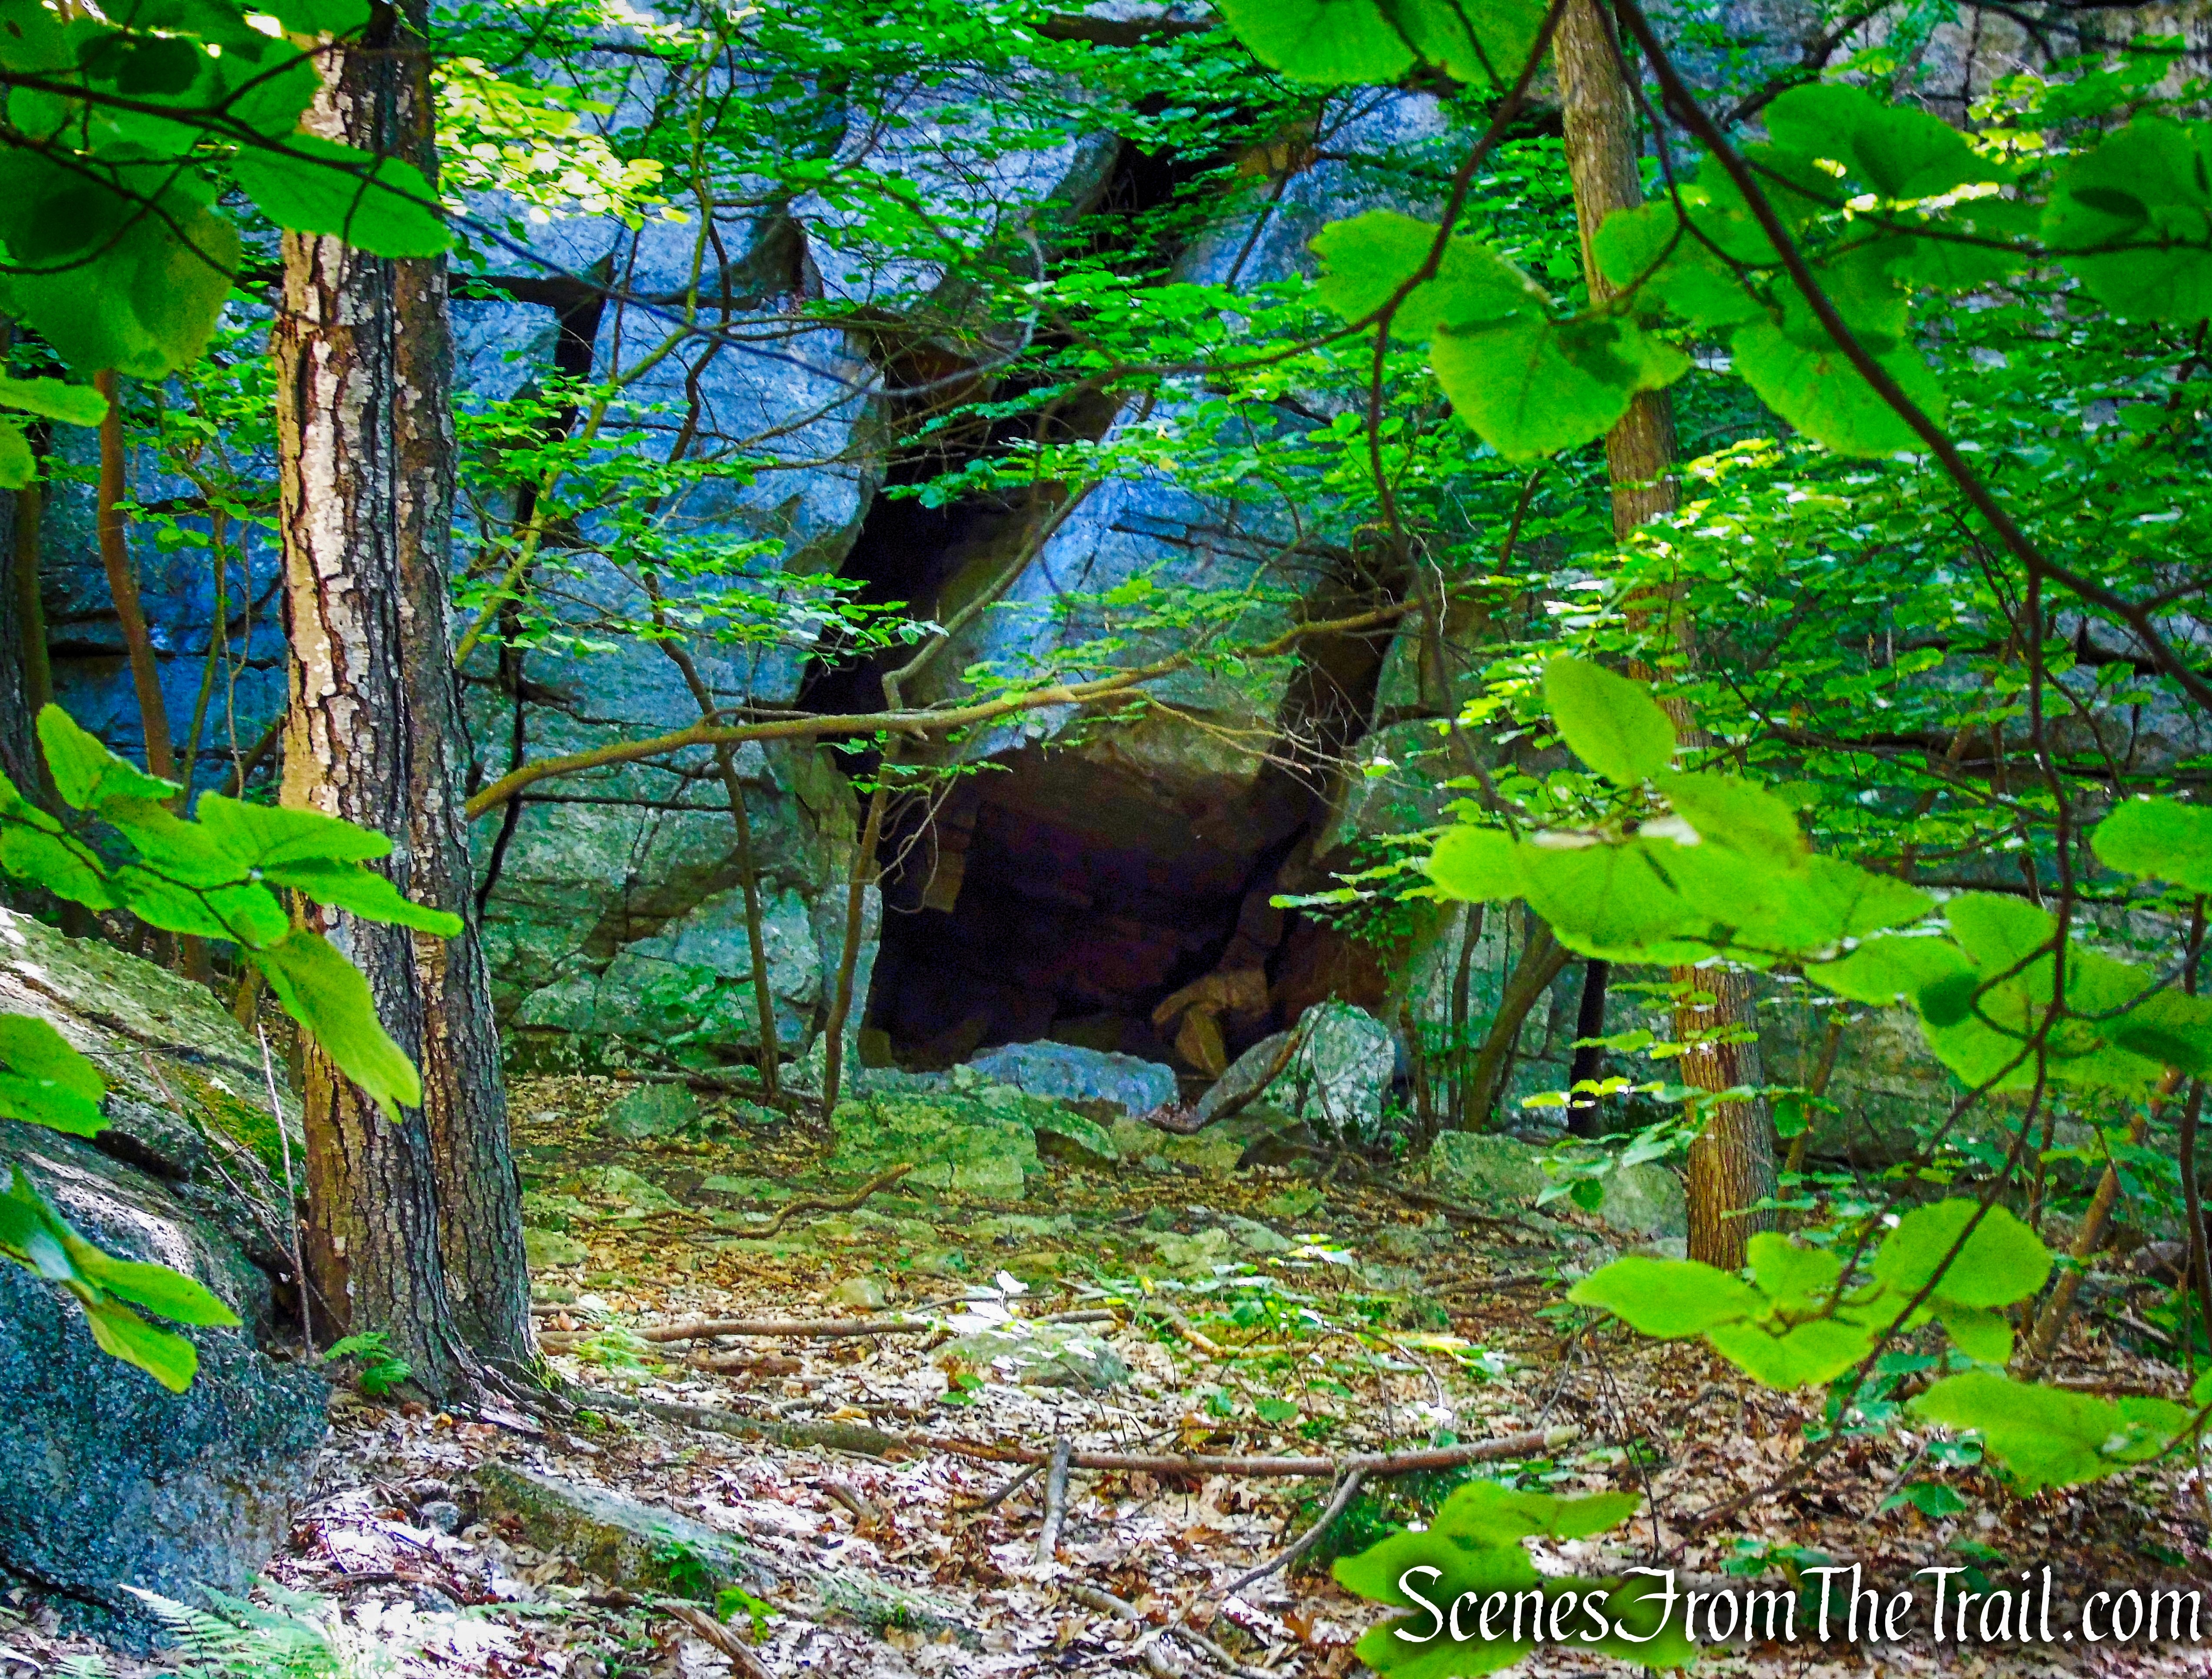
A large rock cave sits just off the trail.
rock cave – Butter Hill Trail
rock cave – Butter Hill Trail
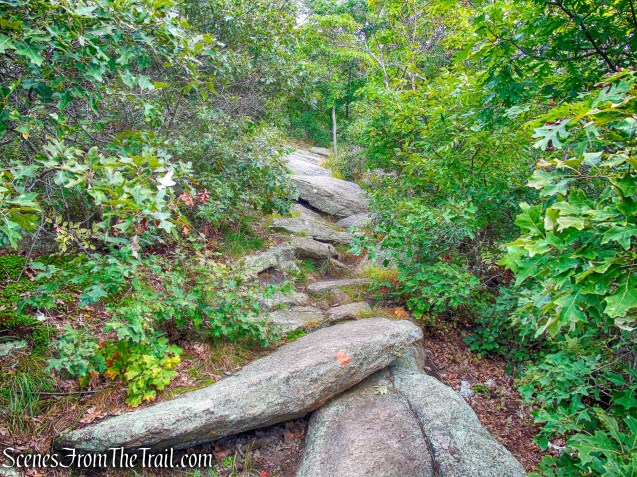
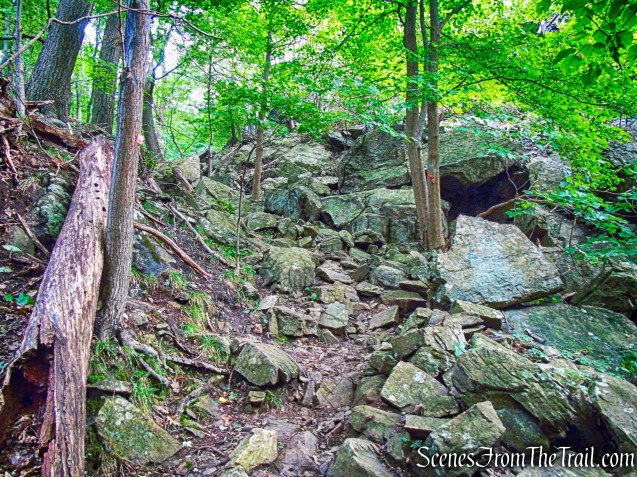
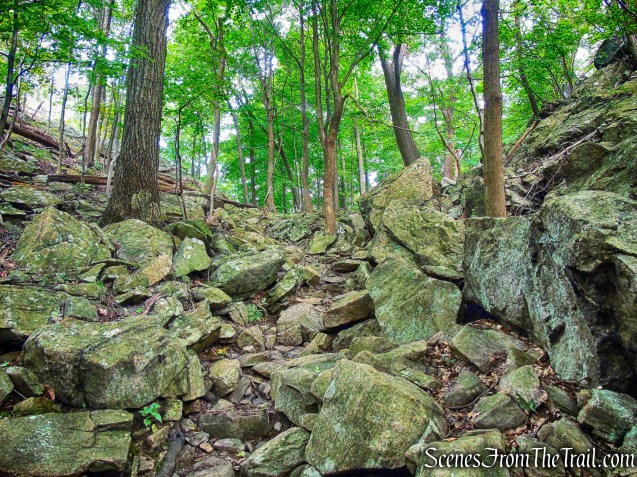
The Butter Hill Trail then steepens as it continues to climb over rocky terrain.
Butter Hill Trail
Butter Hill Trail
The trail levels off briefly and turns right.
Butter Hill Trail
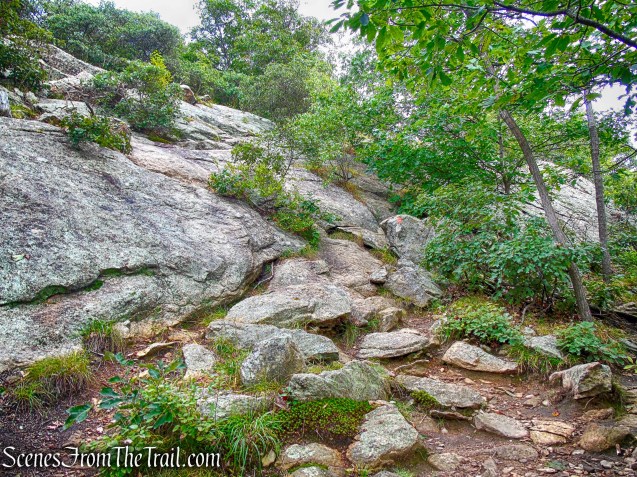
After turning right, the trail resumes its steep ascent of Butter Hill.
Butter Hill Trail
Butter Hill Trail
At the top of the steep climb, there are open rock ledges that afford a wide panorama to the east, south and west. Route 9W is visible straight ahead to the south, with the North Ridge of Crows Nest Mountain to its left.
Butter Hill Trail
Schunemunk Mountain may be seen to the west. We stopped here for a little while to enjoy this expansive view and catch our breath.
Butter Hill Trail
The trail climbs steeply and at some points we needed to use our hands to ascend.
Butter Hill Trail
After a short level stretch,
Butter Hill Trail
the Butter Hill Trail ends at a junction with the yellow-blazed Stillman Trail, also the route of the teal diamond-blazed Highlands Trail.
terminus of Butter Hill Trail
We turned right and followed the yellow-blazed Stillman Trail up towards the summit of Butter Hill.
co-aligned Stillman/Highlands Trail
Standing at the junction, the only blaze visible is teal (Highlands Trail), but once we turned right and walked a few feet, the yellow blazes (painted on rock) become visible as well.
co-aligned Stillman/Highlands Trail
co-aligned Stillman/Highlands Trail
On the summit of Butter Hill, a rock outcrop just to the left of the trail provides a 360° view. We missed this viewpoint because I started speaking to another hiker and forgot to look for it. We would be coming back this way on our way back, so all wasn’t lost. Below another view of Schunemunk Mountain to the west.
co-aligned Stillman/Highlands Trail
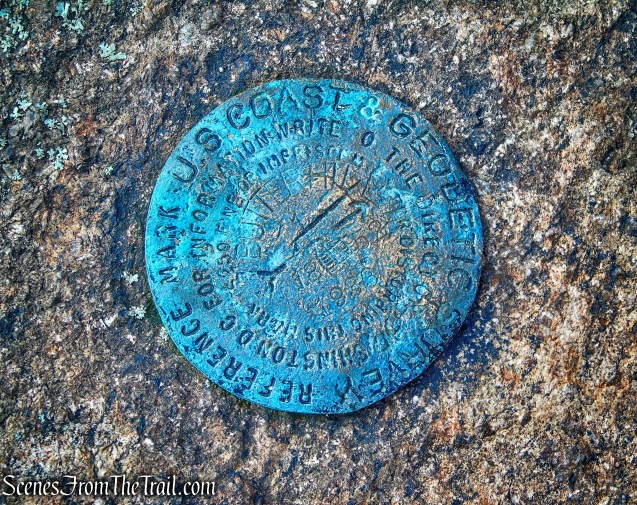
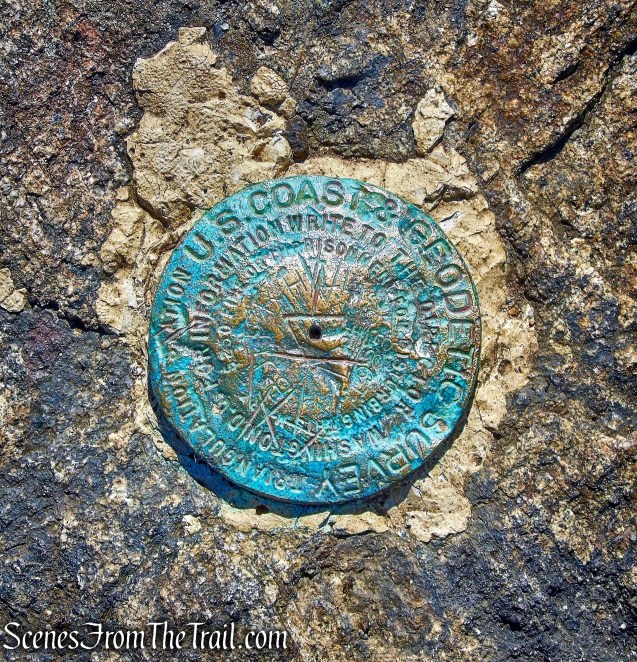
I did stumble upon a United States Coast and Geodetic Survey marker (USC&GS) that is right on the trail.
We continued ahead on the yellow-blazed Stillman Trail, which descends slightly. Soon, we reached a junction with the blue-and-red-blazed Bluebird Trail, marked by a large cairn. We turned right uphill, and remained on the Stillman Trail.
co-aligned Stillman/Highlands Trail
A short distance ahead, we reached the northern end of the blue-blazed Howell Trail, which begins on the right. We turned left here, continuing along the yellow-blazed trail
turn left on co-aligned Stillman/Highlands Trail
The trail follows a relatively level route for the next 0.7 mile. After a short, steep climb,
co-aligned Stillman/Highlands Trail
we reached a limited view to the north.
view north
Back on the trail.
co-aligned Stillman/Highlands Trail
About five minutes ahead, we came to a much better viewpoint looking north over the Hudson River. Pollopel Island is directly below, with the ruins of Bannerman’s Castle on its high point. The rail line running along the east shore of the Hudson is Metro-North’s Hudson Line (also the route of Amtrak trains to Albany).
view north from Storm King Mountain
To the east, Breakneck Ridge (marked by the rail tunnel) is visible across the river. The stone building at the foot of Breakneck Ridge (partially obscured by the vegetation) caps a shaft of the Catskill Aqueduct, which tunnels over 1,100 feet below the river. North Beacon Mountain (with communications towers) and South Beacon Mountain (with a fire tower) are to the northeast.
East Hudson Highlands
The Stillman Trail now continues to descend and soon reaches a junction with the white-blazed By-Pass Trail. We remained on the yellow-blazed Stillman Trail, which turns sharply left.
sharp left on yellow-blazed Stillman Trail
The trail soon reaches another outstanding viewpoint from a rock ledge on the right. This viewpoint faces south, with the village of Cold Spring visible across the river to the southeast, and Constitution Island jutting into the river just beyond.
view south from Stillman Trail
There are several rock outcrops in this area that provide varying views. Below is an image of Bull Hill with Little Stony Point jutting into the river.
Bull Hill and Little Stony Point from the Stillman Trail
The Stillman Trail again turns left and descends through hemlocks and laurel, then passes a viewpoint to the north.
view north from the Stillman Trail
Pollopel Island, with the ruins of Bannerman’s Castle.
Pollopel Island, with the ruins of Bannerman’s Castle.
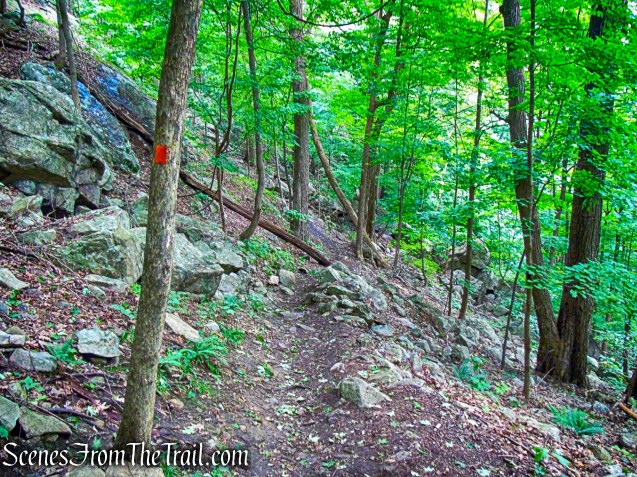
The Stillman Trail descends on an eroded stretch of sidehill trail. This is a north-facing trail section, and it is often icy in the winter.
Stillman Trail
In another half mile, it descends a second switchback, crosses a wooden bridge over a ravine, bears left, and descends more steeply. As the Stillman Trail curves to the right, it reaches a junction with the blue-and-red-blazed Bluebird Trail.
junction with the blue-and-red-blazed Bluebird Trail
Just before turning left on the Bluebird Trail, we noticed a stone structure though the trees. I bushwacked a short distance to check it out. I had been here before two years earlier. I think it may have been an old well as it had water streaming out of it. There was also a foundation of a building close by.
stone ruins
Now following the Bluebird Trail, which begins a steady ascent.
Bluebird Trail
After turning left onto a woods road, the trail continues up the mountain on switchbacks, with limited views to the right through the trees.
Bluebird Trail
In 0.6 mile, the Bluebird Trail ends at a junction with the Stillman Trail (marked by a cairn).
terminus of Bluebird Trail
Bearing right at the junction and continuing ahead on the yellow-blazed Stillman Trail, now retracing our steps. The return trip crosses Butter Hill, giving us another opportunity to take in the 360° views from its summit, which we missed earlier.
view north from the summit of Butter Hill
view west from the summit of Butter Hill
Another survey marker at the summit.
United States Coast and Geodetic Survey marker
More views on the way down.
view southeast from Butter Hill
After descending from Butter Hill, we turned left onto the orange-blazed Butter Hill Trail.
turn left onto the orange-blazed Butter Hill Trail
We followed it back to the parking area where the hike began.
terminus of Butter Hill Trail
This was a great hike, but it wasn’t easy. I have it listed as moderate – strenuous, but it is more strenuous than moderate. The ascents are steep as are the descents. The eroded section of the Stillman Trail on the north side of Storm King was no picnic either. Since the trail gets no sun it seems to stay wet and there is a lot of slanted rock with a steep drop off. I enjoyed the hike nevertheless. After all, if it ain’t rough, it ain’t right.
Pros: Views galore, well marked trails, Hudson River, fun hike.
Cons: Popular place to hike and crowds around viewpoints.
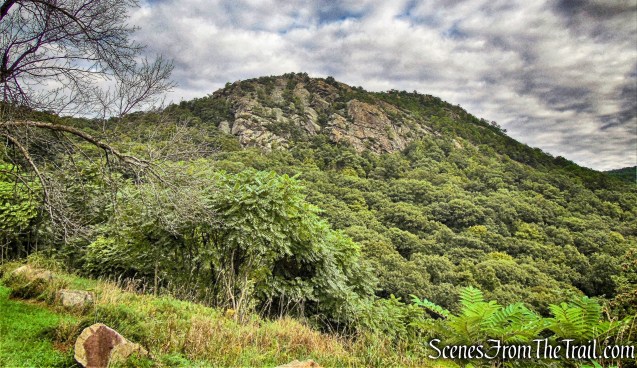
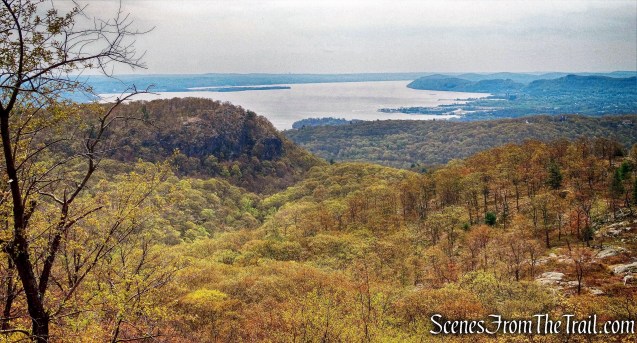
The Timp is a cliff at the west end of the Dunderberg Mountain massif. Although part of the Dunderberg Mountain formation along with Bald Mountain (Bockberg), the three summits are however, separately named by the USGS. The 1,080-foot summit of The Timp sits near the border of Bear Mountain State Park and Harriman State Park. With its sparsely wooded summit and rock ledges, it offers great views of the surrounding area.
The Timp (left of center) as viewed from West Mountain Shelter
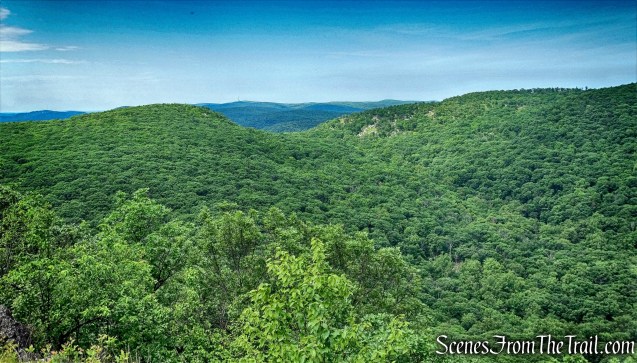
The Timp on the left and West Mountain on the right, as viewed from Bald Mountain.
The Timp on the left and West Mountain on the right, as viewed from Bald Mountain
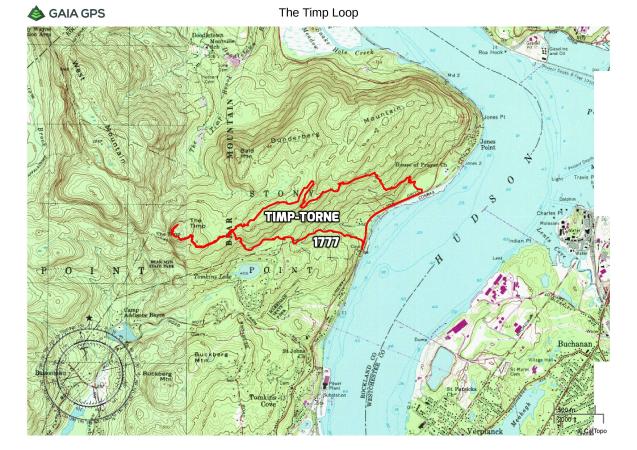
The trail system in Harriman and Bear Mountain State Parks make any number of loop hikes possible, varying in length. Since I had already been to the summit of The Timp, I wanted to include sections of trails that I had never hiked before. I mapped out several different alternatives that varied in length and elevation gain. I wanted to keep my options open and the route that would be taken would be determined by how much energy we had after reaching the summit. As it turned out, we did the longer of the three hikes I had mapped out.
The Timp Loop via 1777 Trail
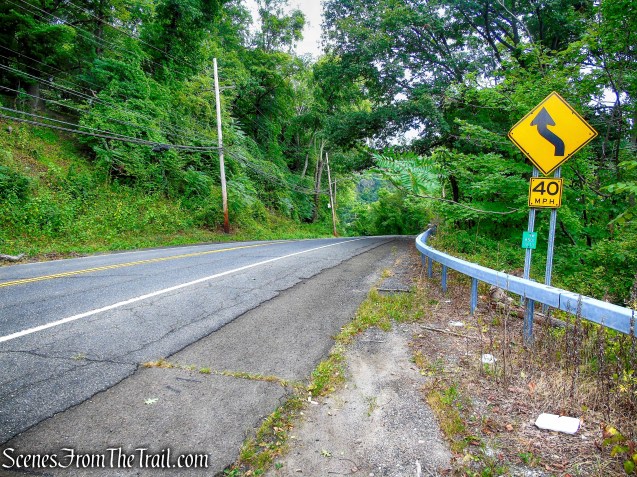
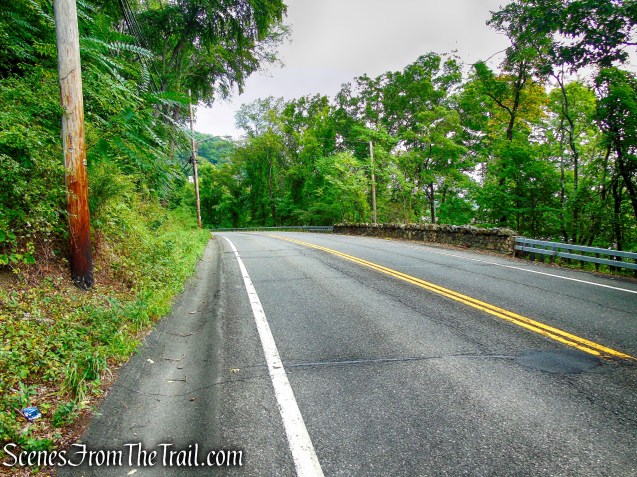
There is a small parking area along North Liberty Drive (US 9W/US 202). There were no other cars there when we arrived shortly before 9 am or when we returned in the afternoon. The parking area is about 200 feet south of the trailhead. From the parking area, we crossed the road and proceeded north along the road.
North Liberty Drive parking area
The trail is located across from the stone wall, by the telephone pole, with the white transformer box attached.
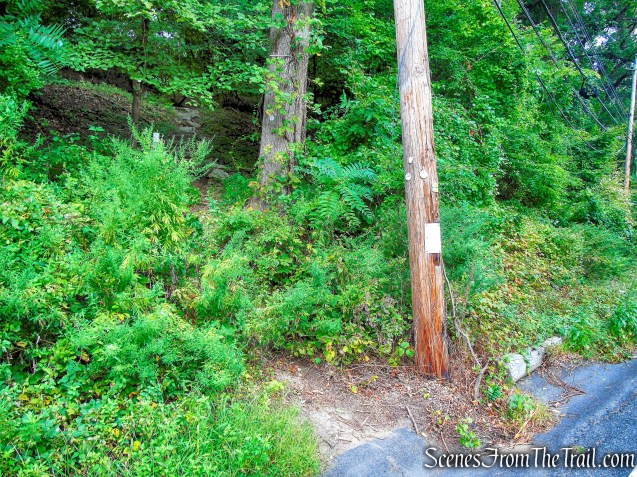
heading north along North Liberty
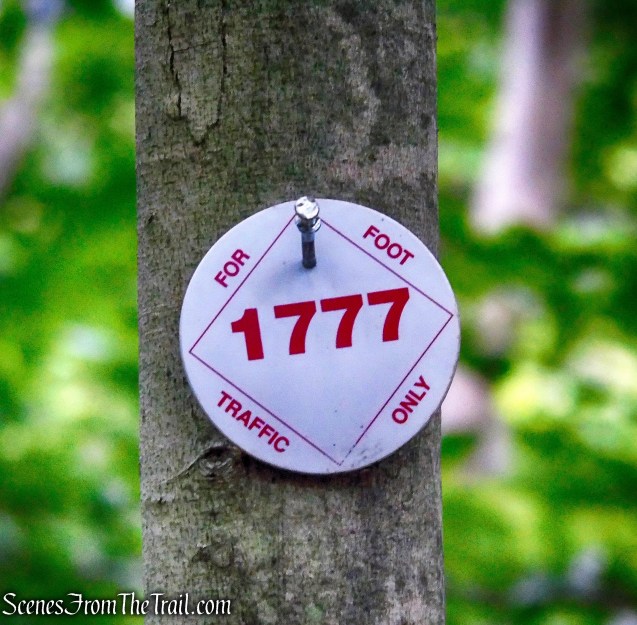
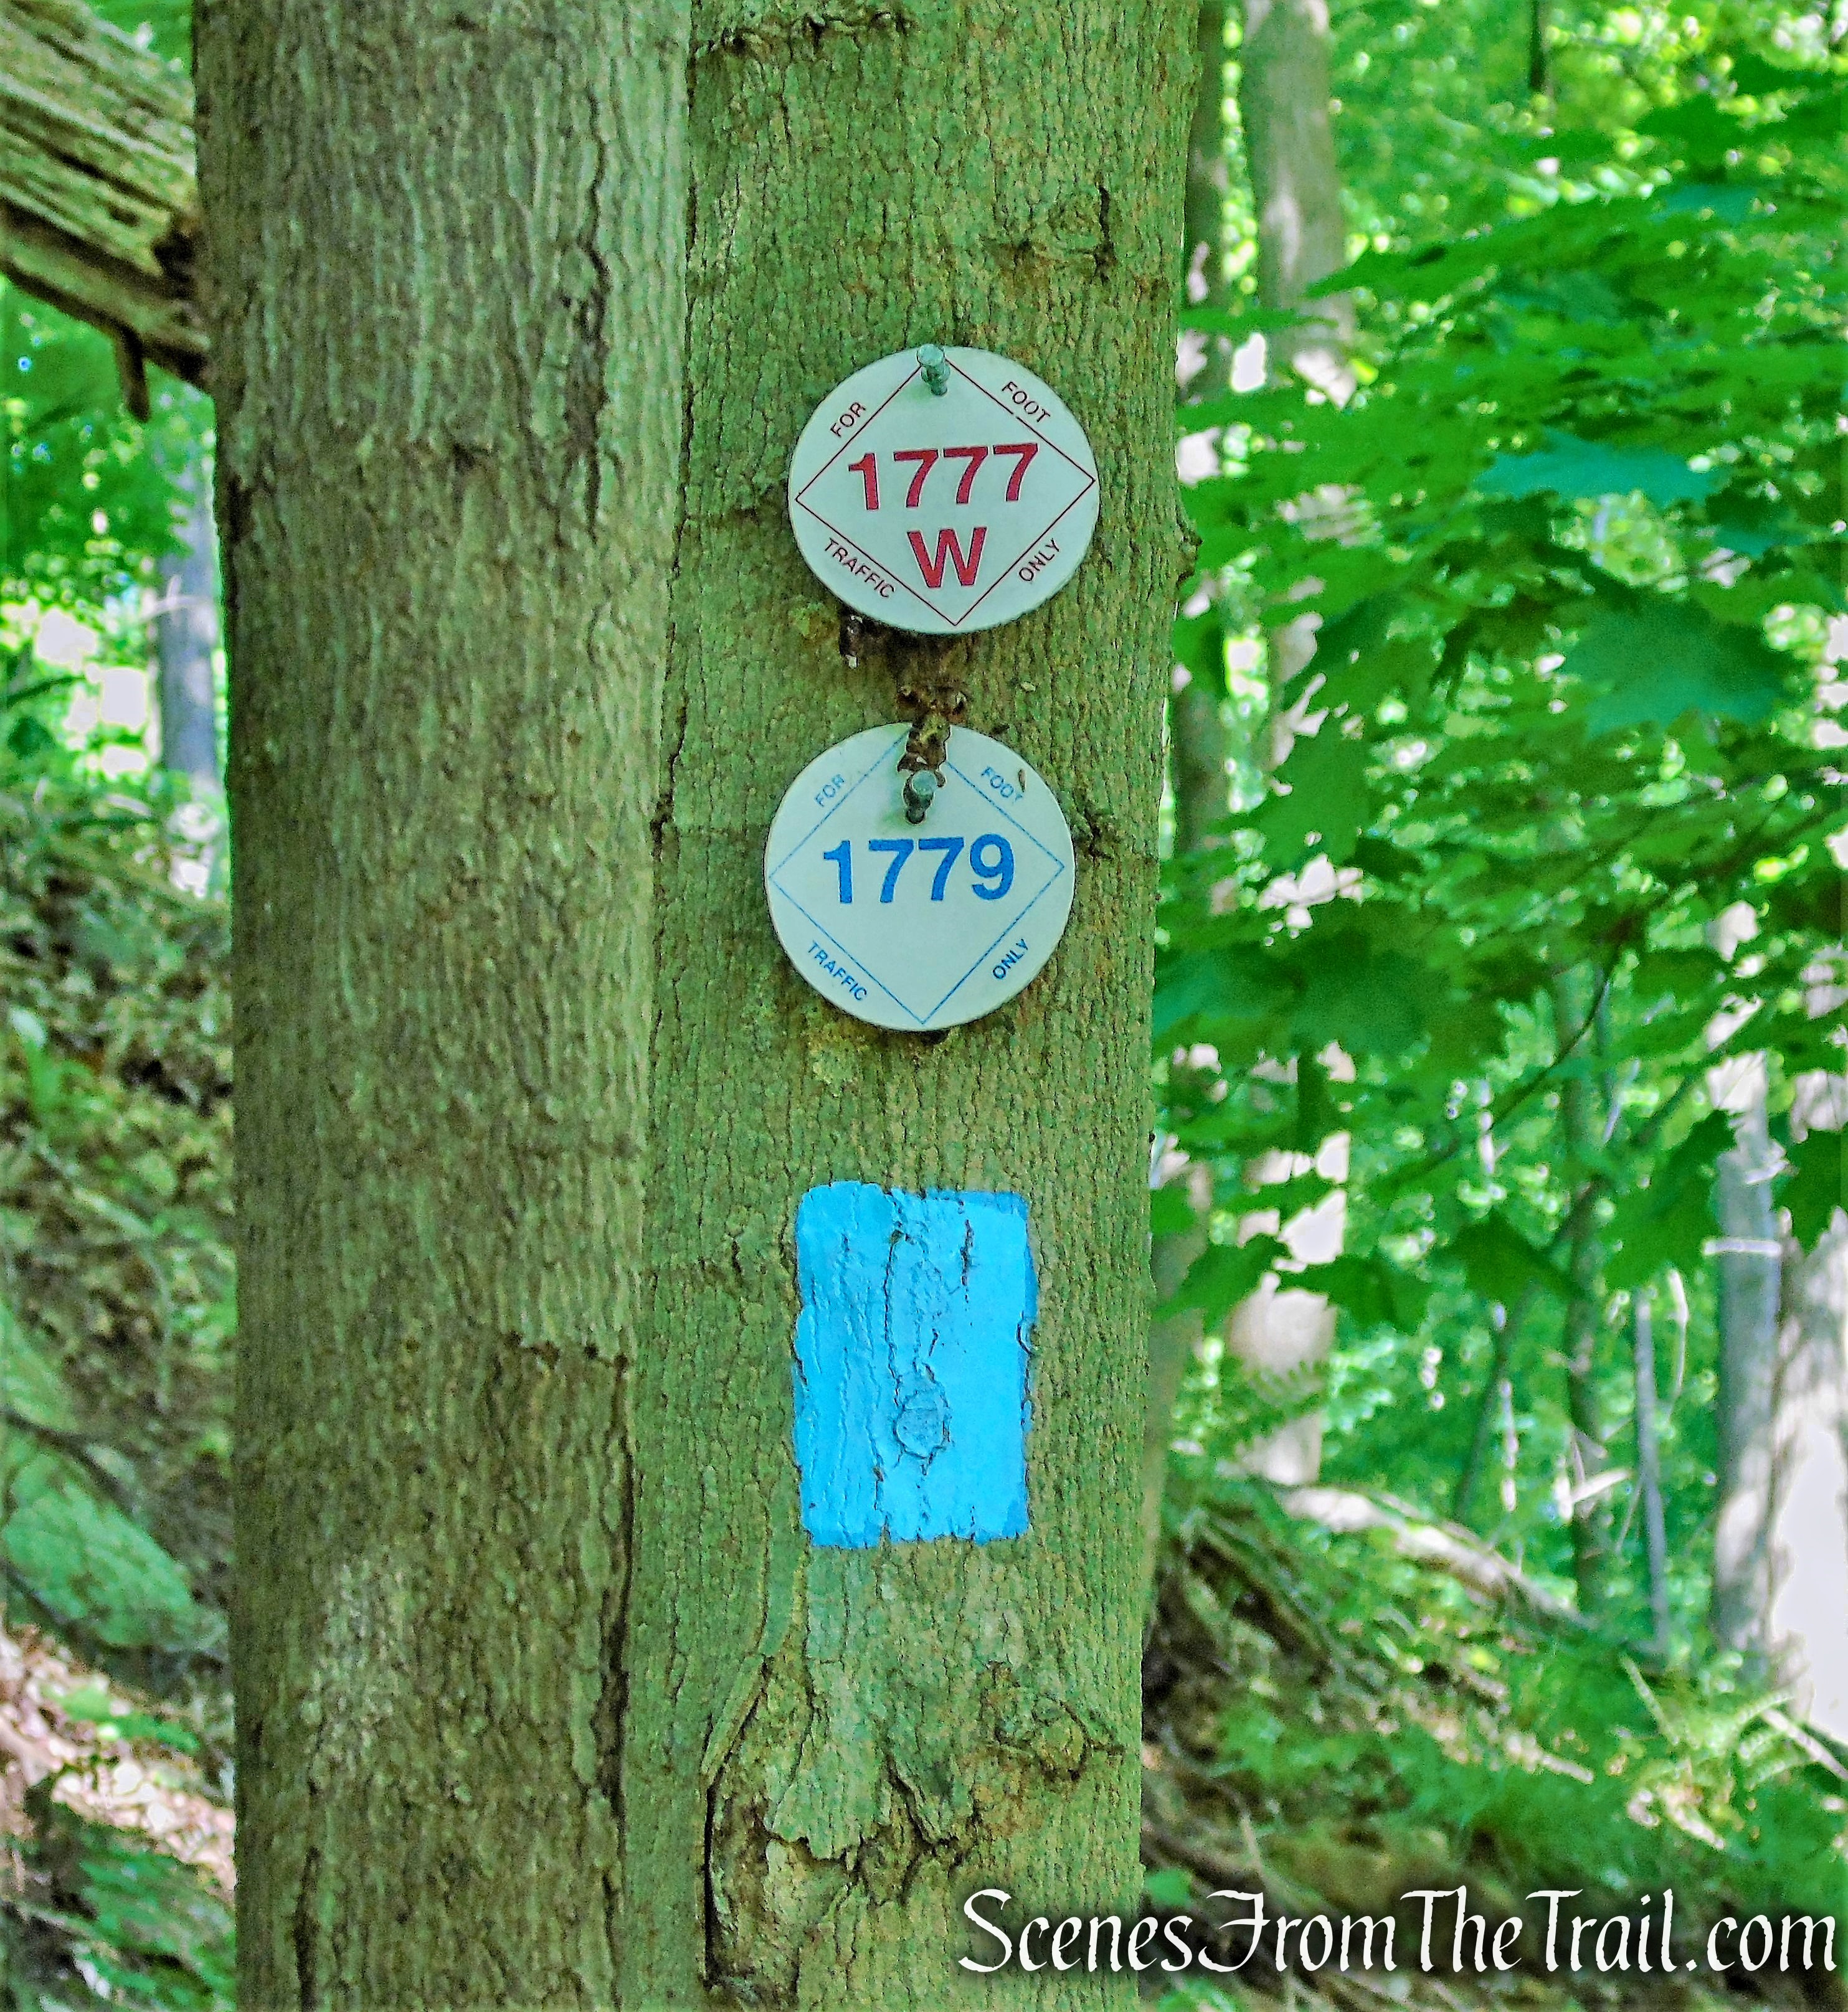
In about 200 feet, we came to a telephone pole marked with three white circular blazes with a red “1777.” This is the start of the 1777 Trail.
1777 Trail
The 1777 Trail marks the route taken by British troops under Sir Henry Clinton on October 6, 1777 from Stony Point, to attack the American forces at Fort Clinton and Fort Montgomery. To avoid private property, the present-day trail starts from Route 9W.
1777 Trail
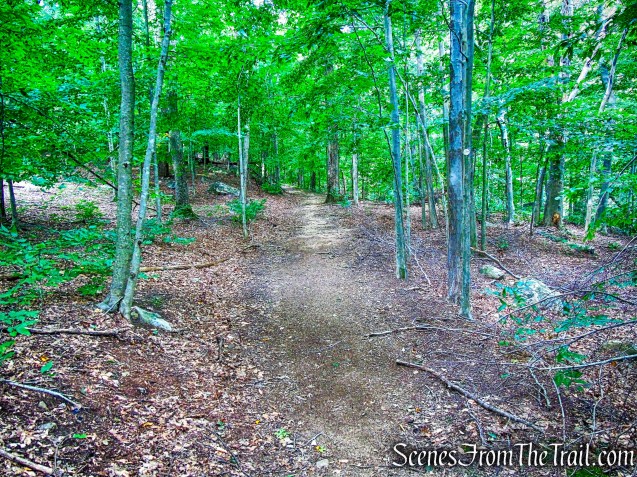
At first, the trail follows an old road known as the Jones Trail, which was built about 1890 to take workmen up to the various levels of the Dunderberg Spiral Railway.
1777 Trail
In 300 feet, it crosses the lowest grade of the railway. Then, at 0.4 mile, the trail crosses a stream on a wooden footbridge, built in 1987 as an Eagle Scout project and rebuilt in 2004, also as an Eagle Scout project.
1777 Trail
At 0.65 mile, the trail has been rerouted to the left to avoid an eroded section of the original road. Then, in 150 feet, the 1777 Trail turns left, while the Jones Trail continues straight ahead (on the old road to the right).
1777 Trail
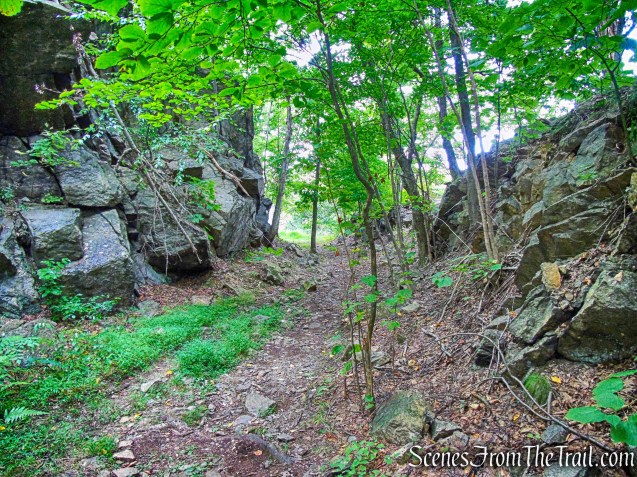
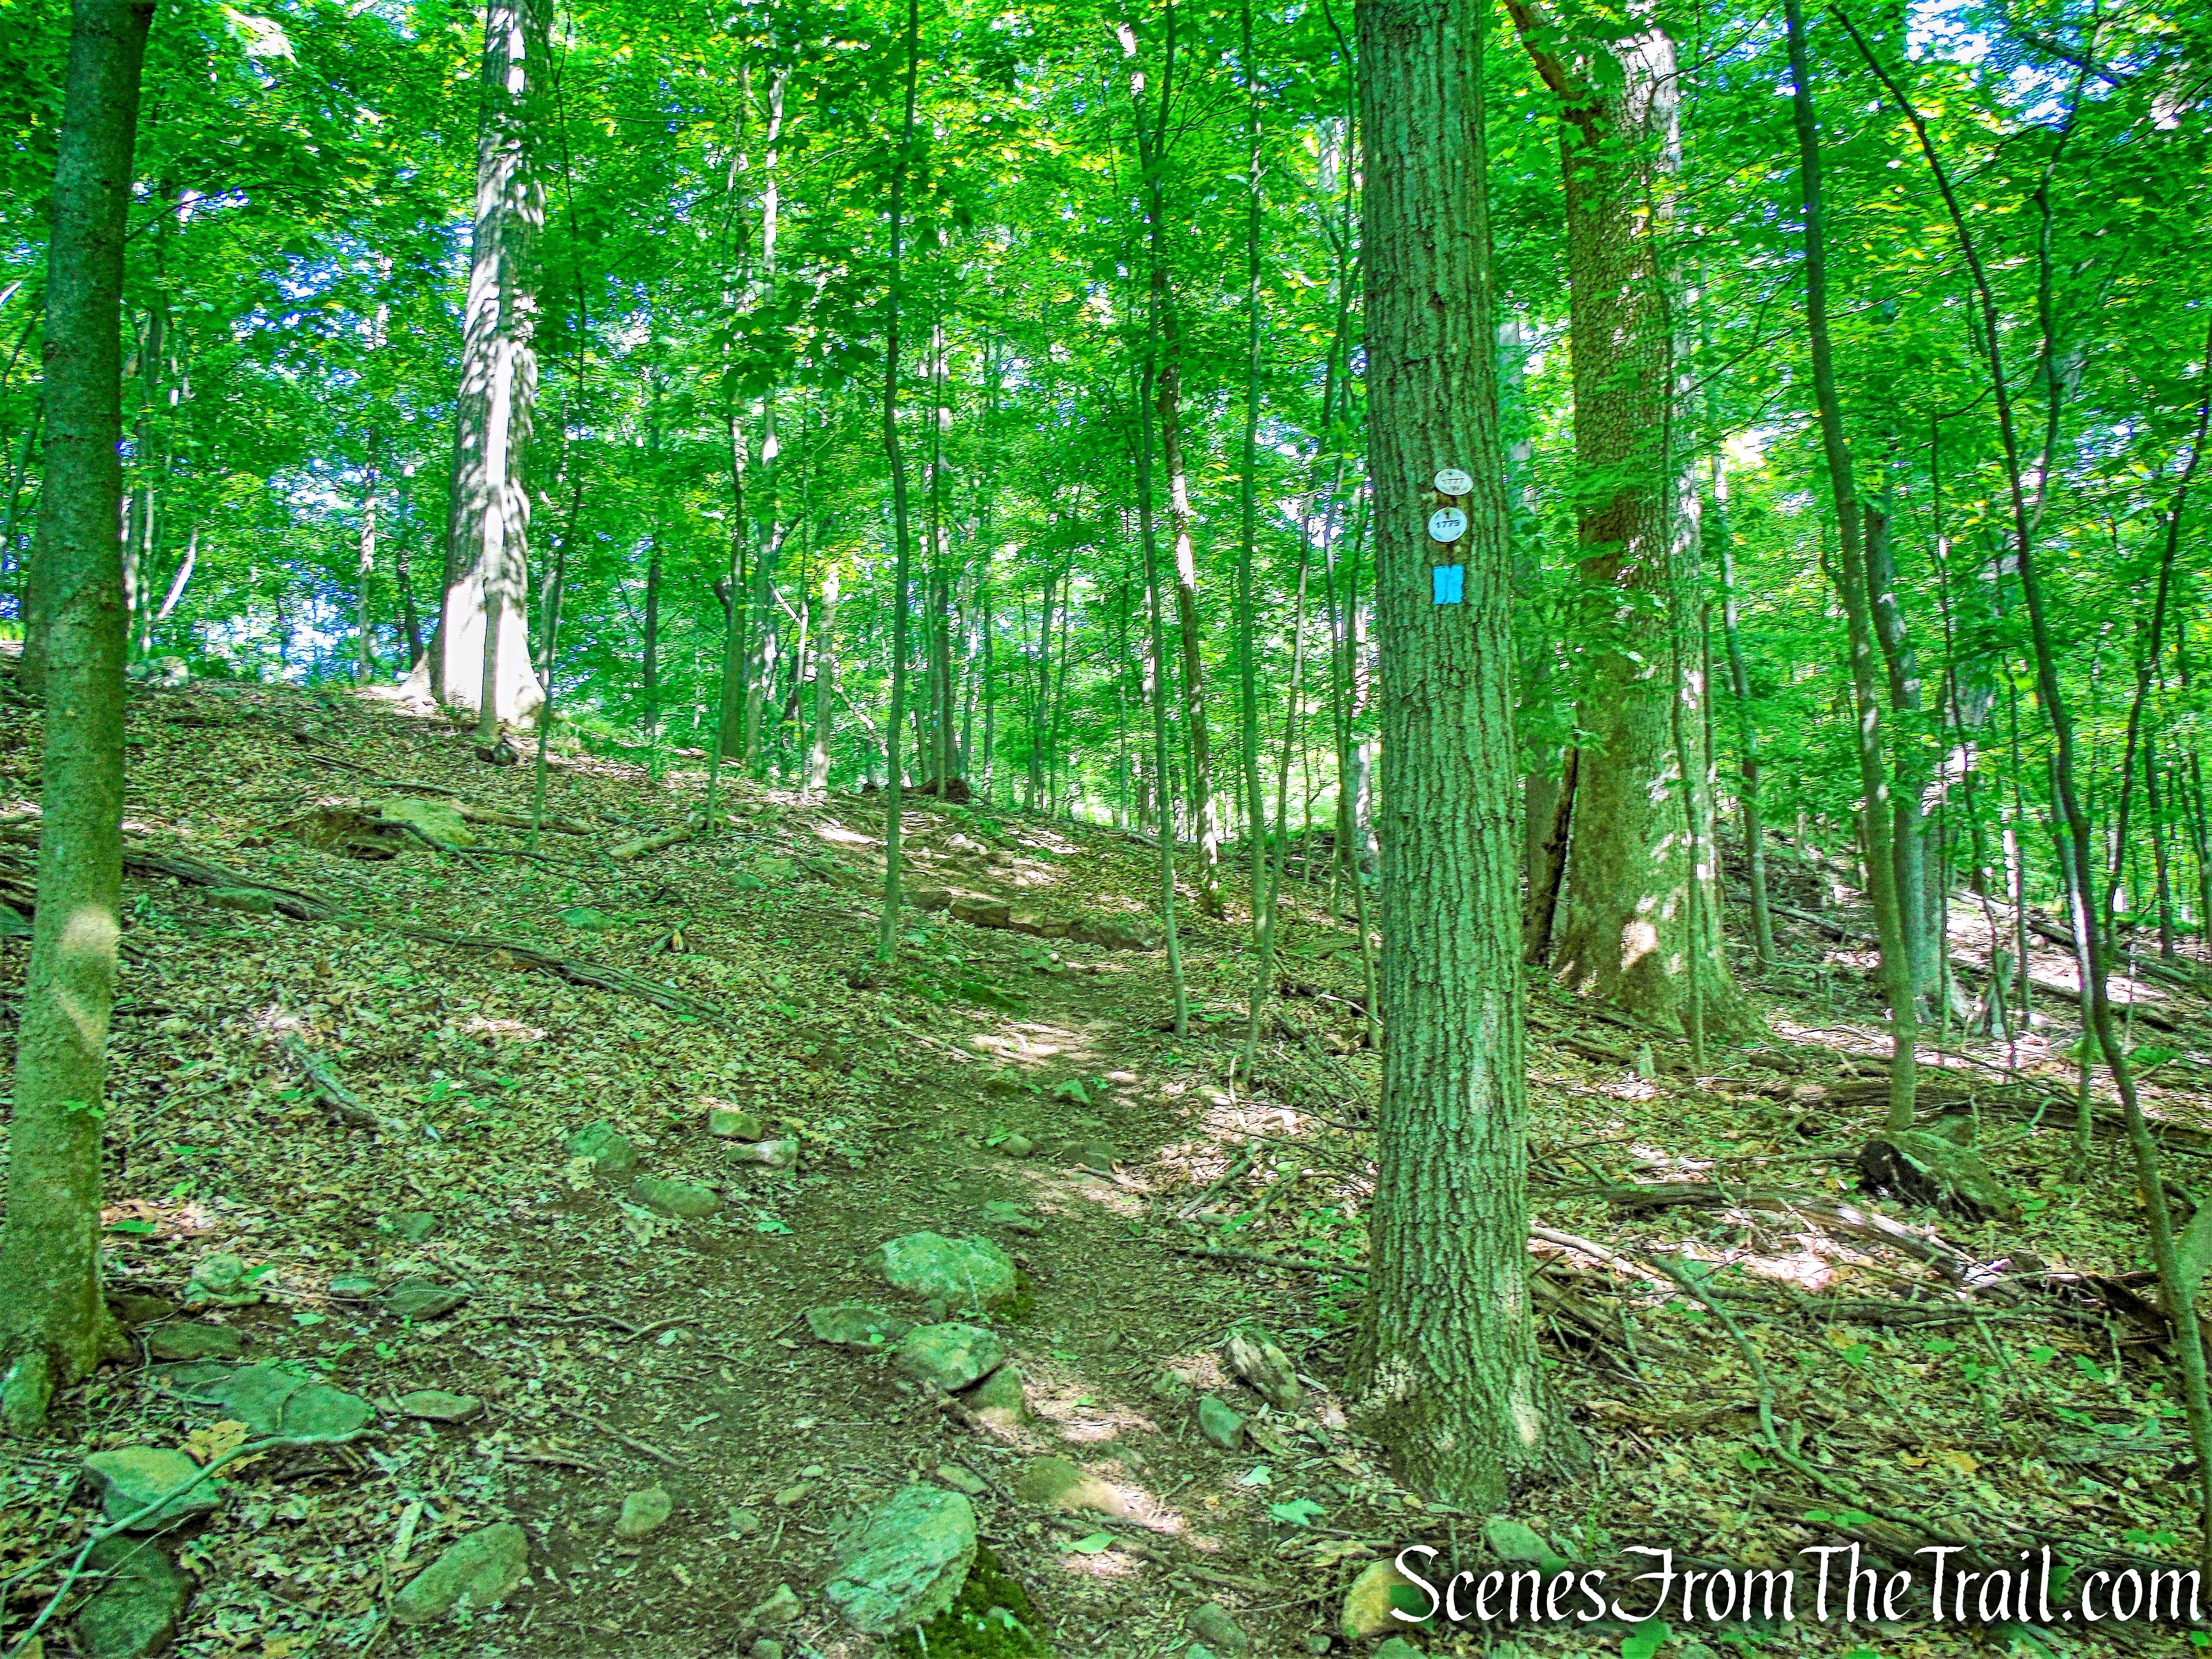
Now the 1777 Trail runs close to the Park boundary, with homes visible to the left. At 1.1 miles, after passing a small wet area to the left, the 1777 Trail turns right and goes steeply up an old road to a saddle on the ridge between The Timp (on the left) and Dunderberg Mountain (on the right).
1777 Trail
At 1.35 miles, the 1777 Trail reaches a junction with the blue-blazed Timp-Torne Trail, marked with a large cairn.
junction with the Timp-Torne Trail
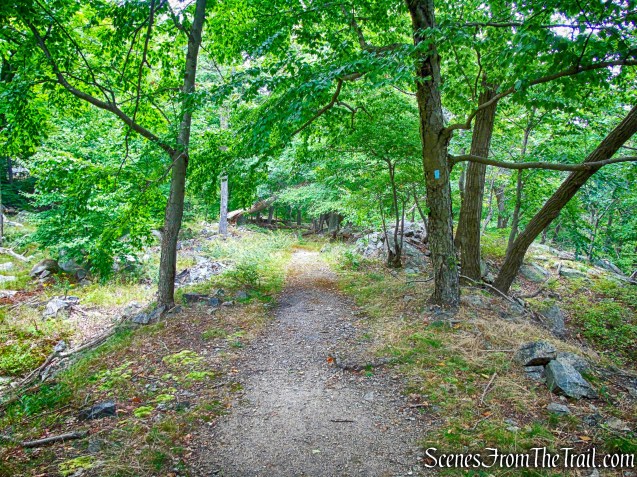
We turned left at the junction and began heading southwest on the blue-blazed Timp-Torne Trail.
Timp-Torne Trail
The Timp-Torne Trail (T-T) was the second trail built by the new Palisades Interstate Park Trail Conference, in the winter of 1921. The 11.2 mile long trail starts on the access road that leads from Route 9W to the Fort Montgomery State Historic Site, 0.2 mile north, of the north end of the Popolopen Viaduct, and ends at Route 9W, just south of Jones Point.
Timp-Torne Trail
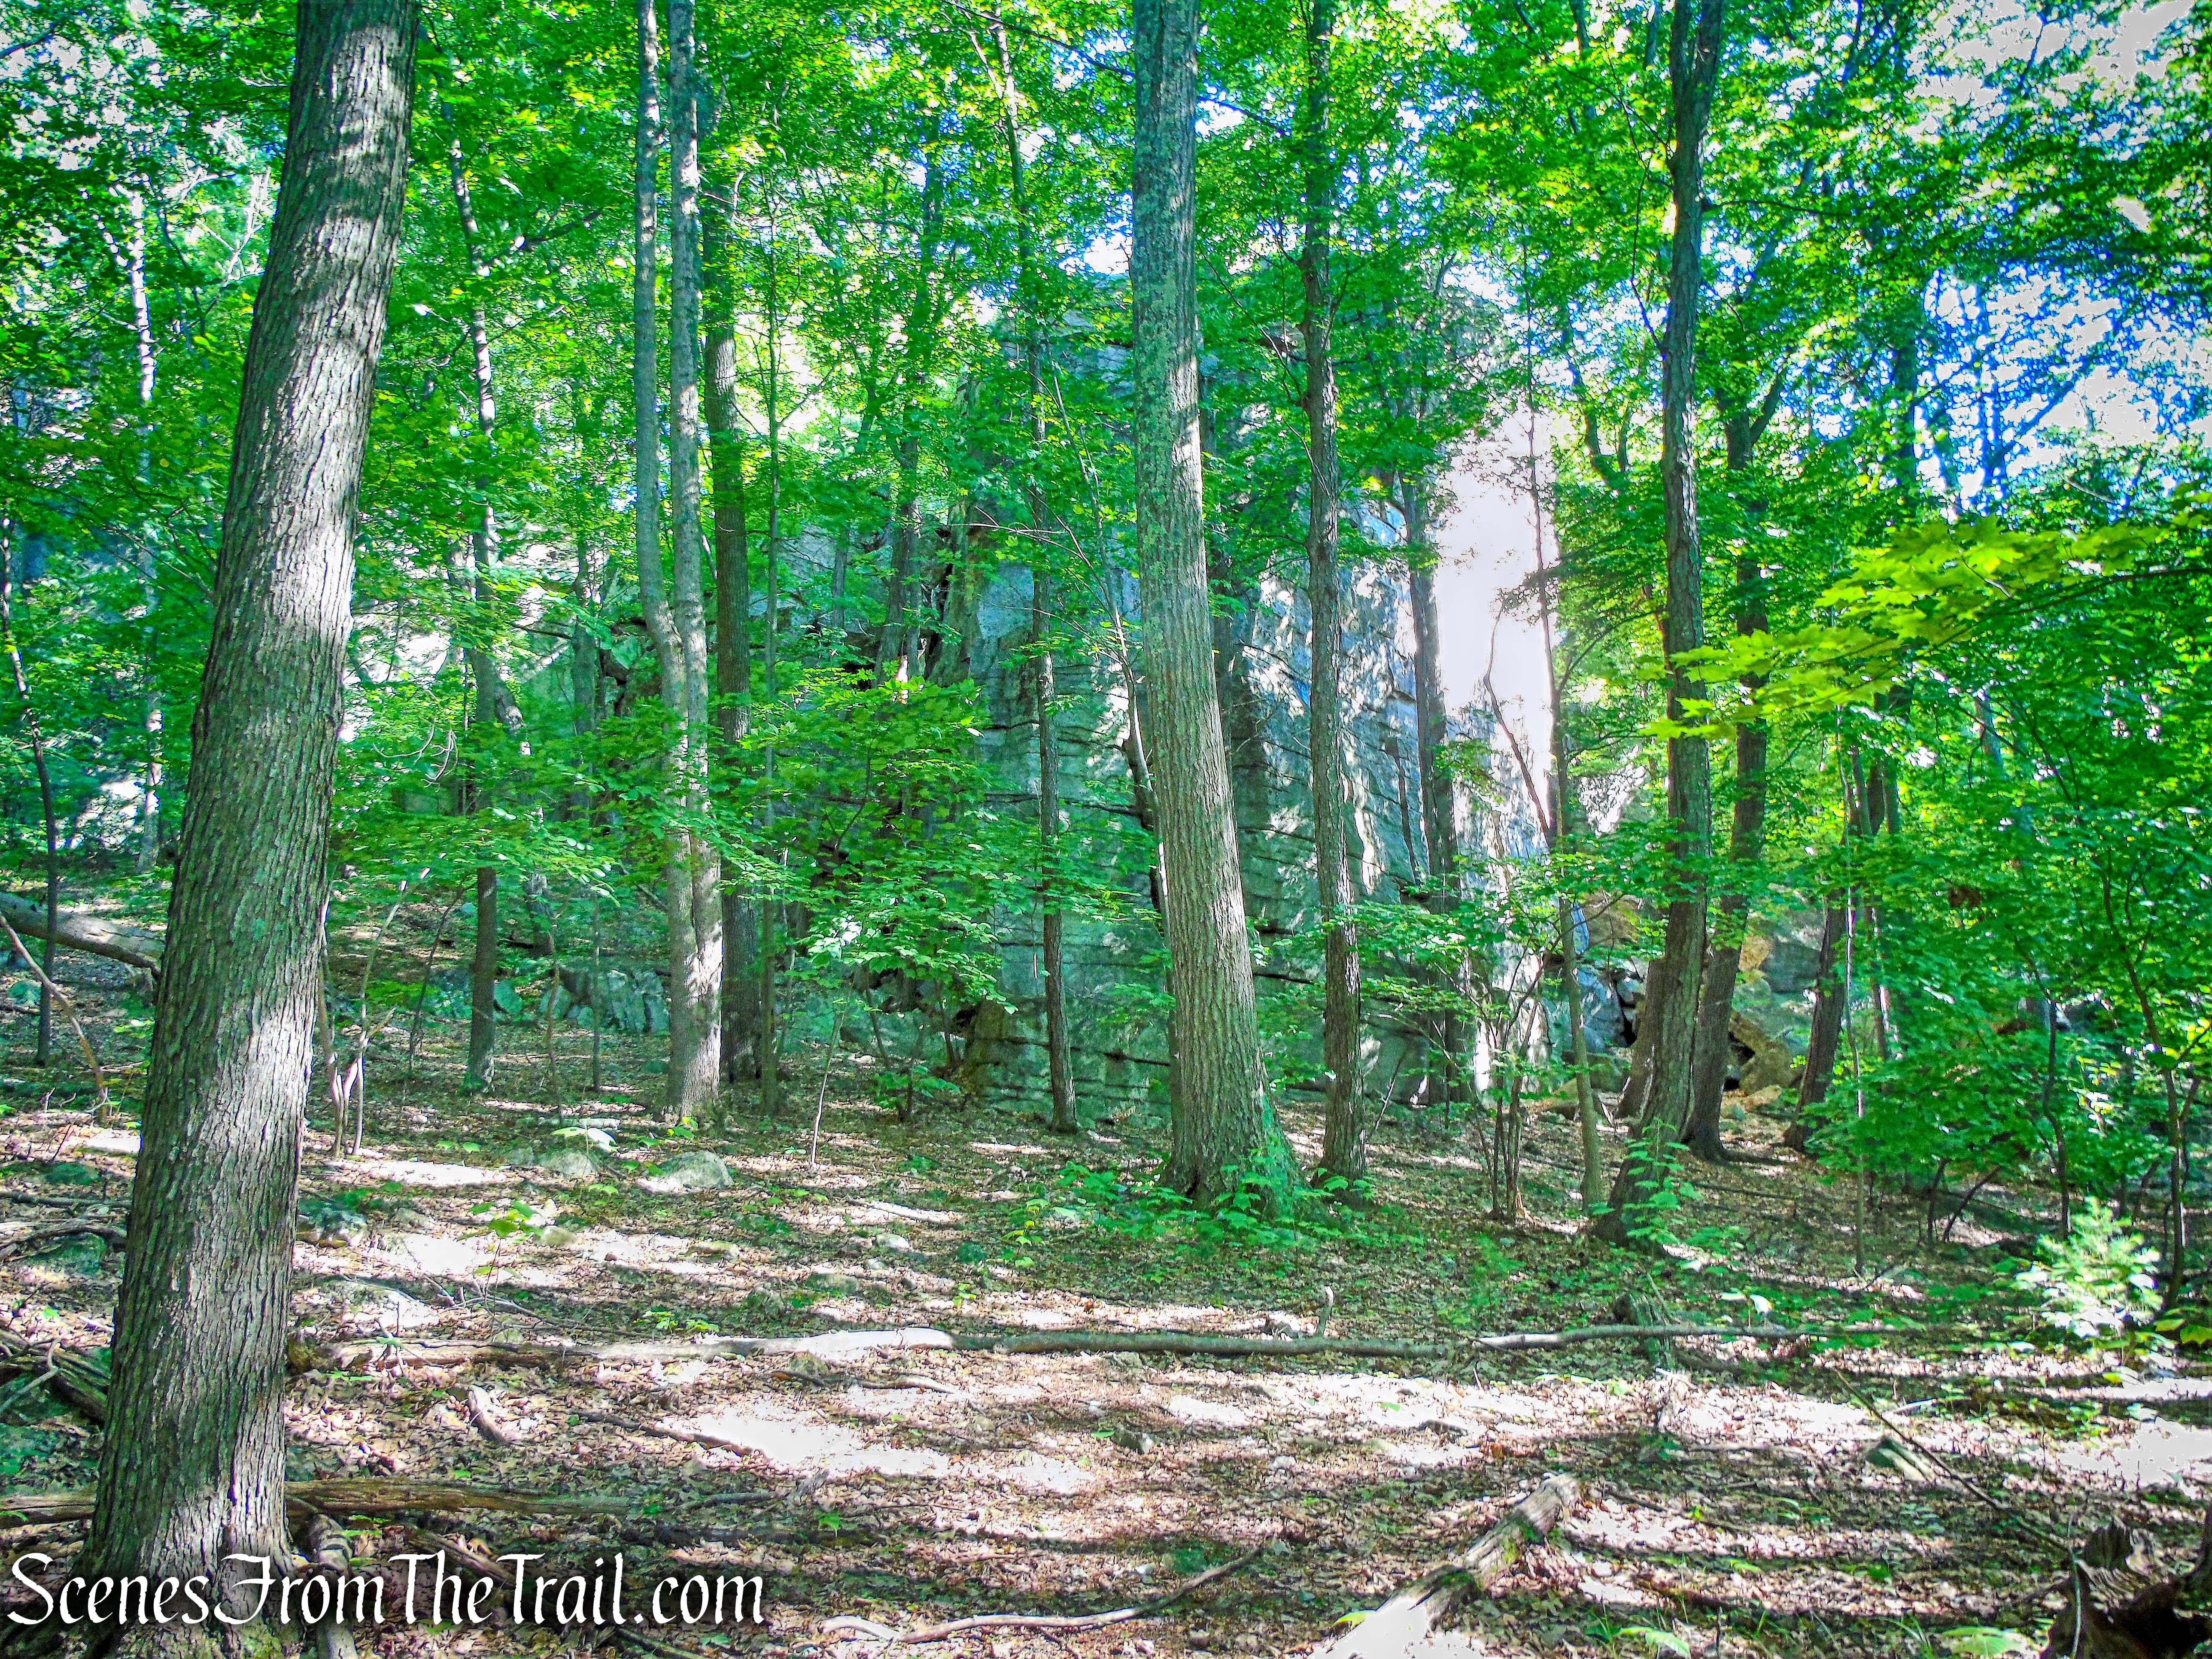
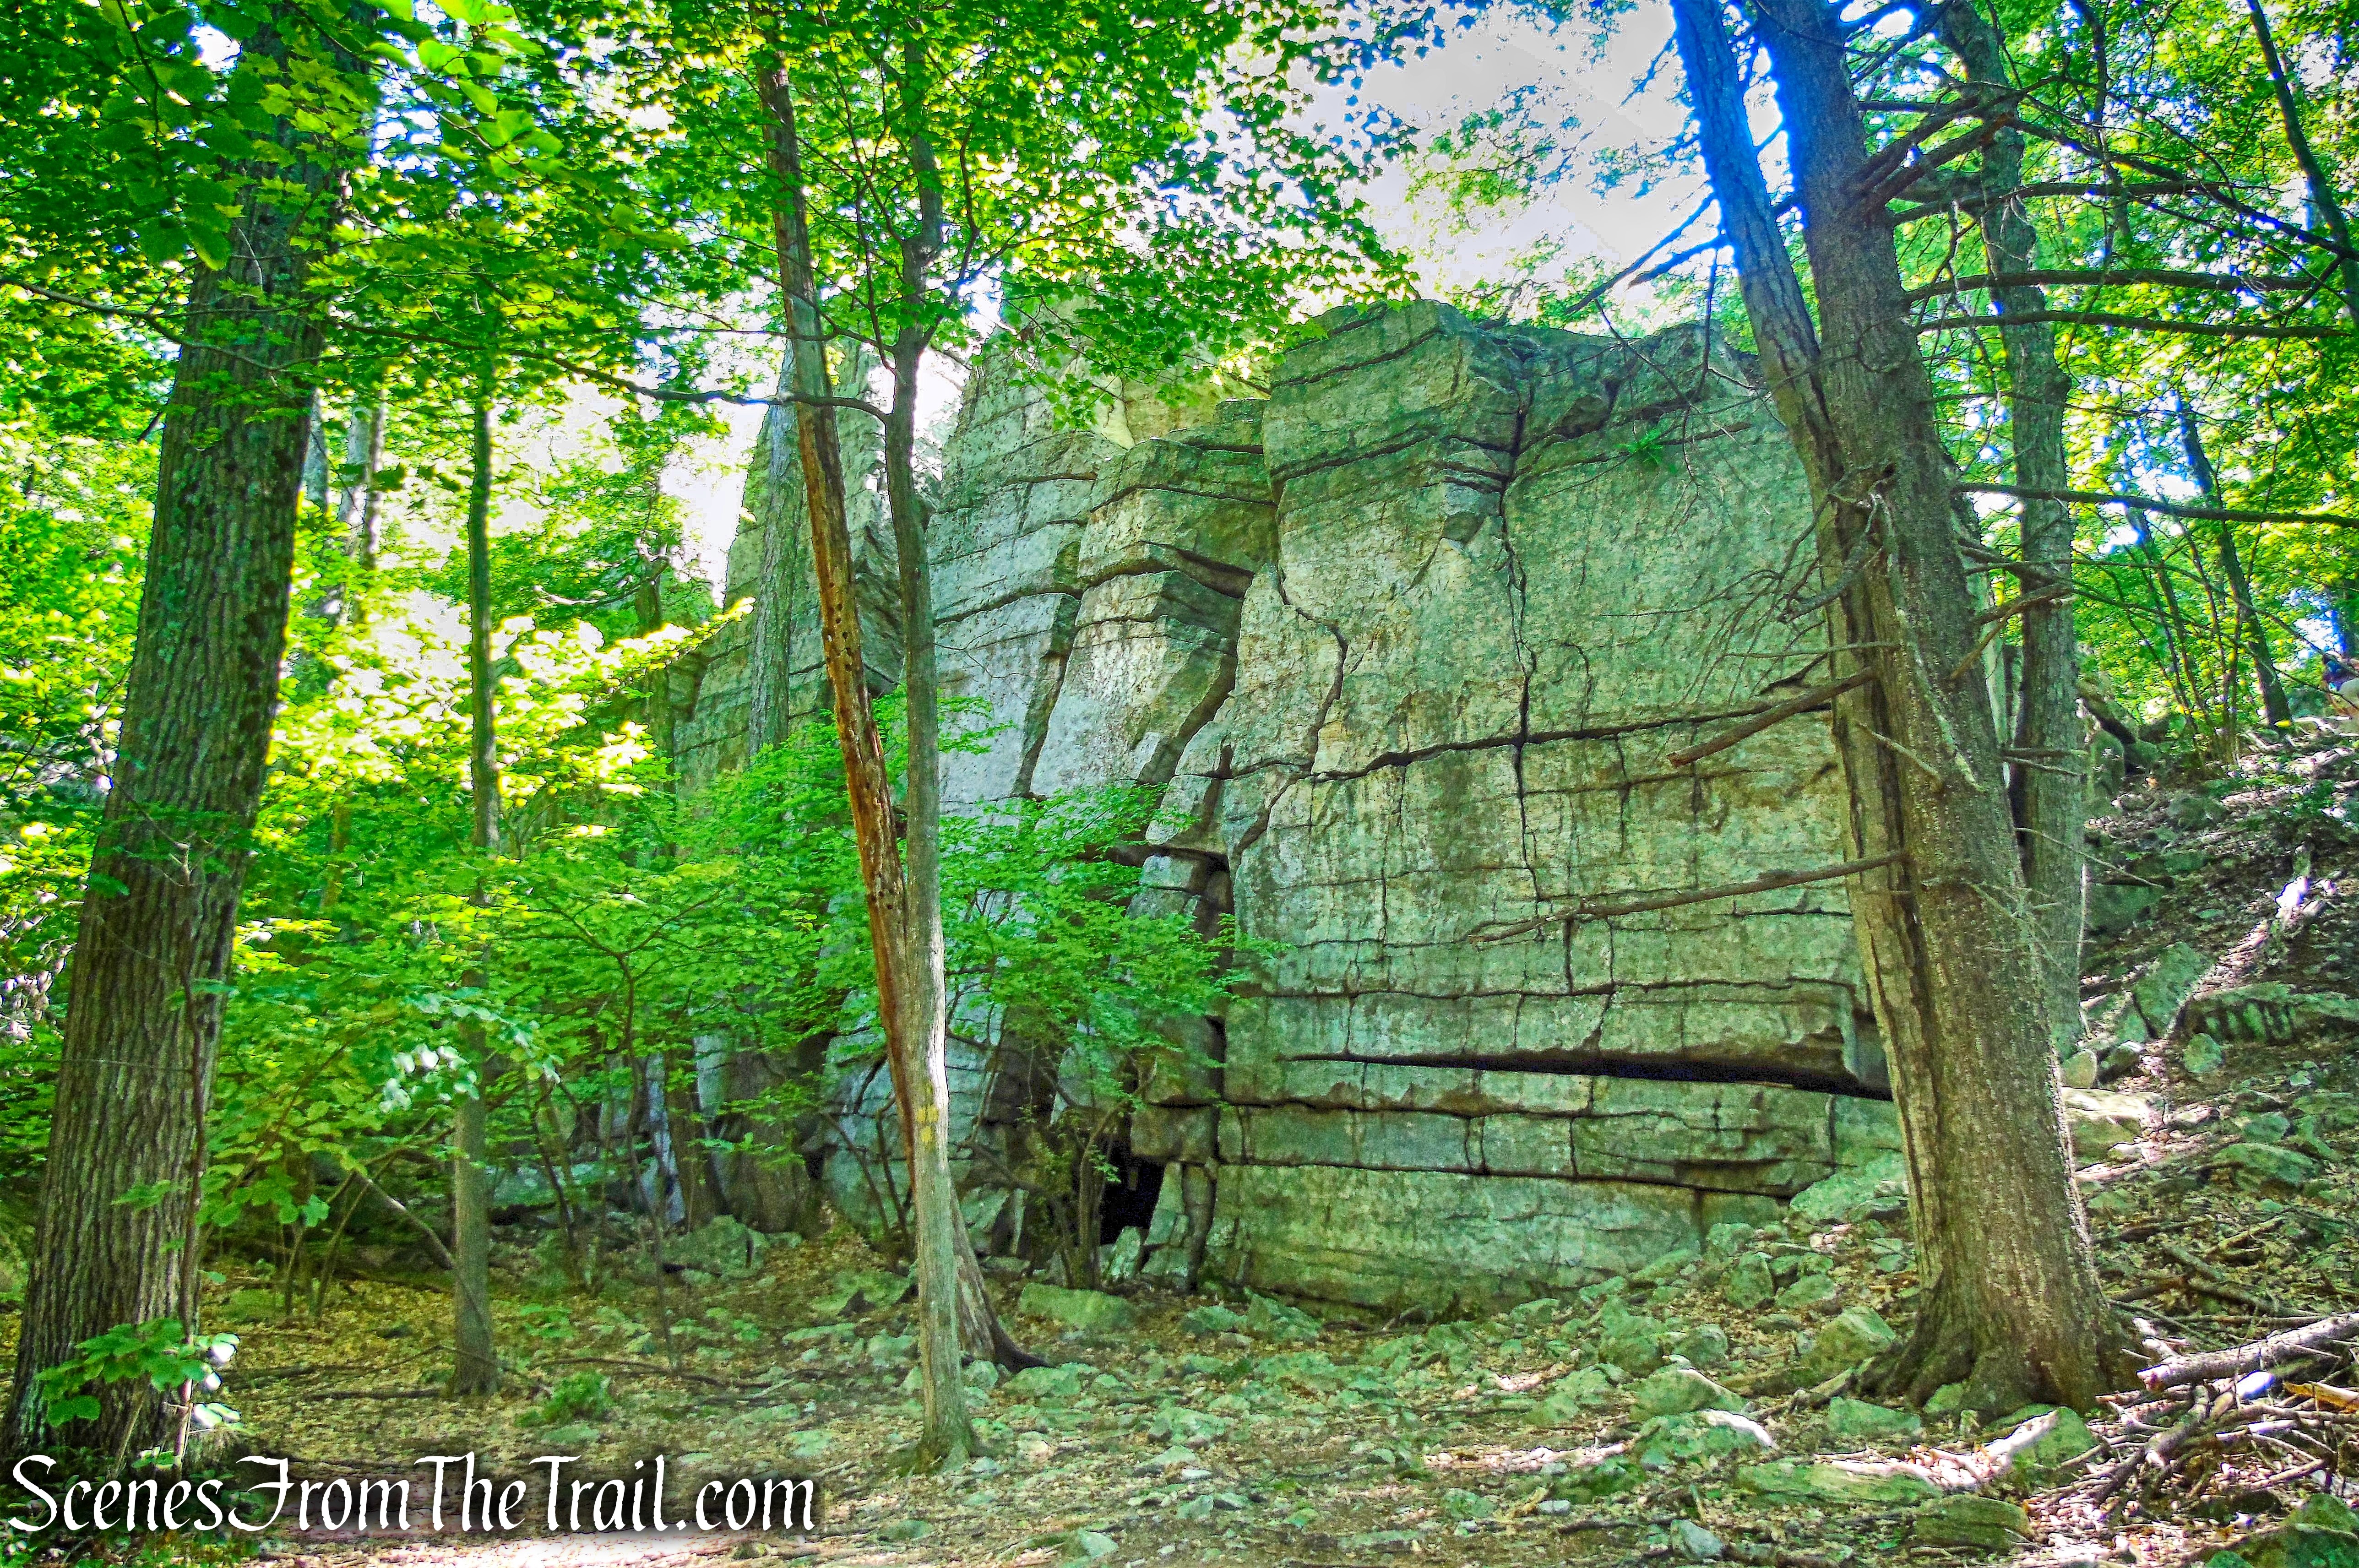
The trail ascends gradually through the woods, filled with some interesting rock formations.
rock formation – Timp-Torne Trail
rock formation – Timp-Torne Trail
After just under 0.5 mile from the junction with the 1777 Trail, we came to another junction. Here the red-dot-on-white-blazed Ramapo-Dunderberg Trail (R-D) comes in from the right and joins the Timp-Torne Trail. The junction is marked by a small cairn.
junction with Ramapo-Dunderberg Trail
We turned left, now following the joint T-T/R-D Trails.
joint T-T/R-D Trails
The trail continues its ascent, and as it approaches the summit of The Timp, comes out on an open area filled with yellow wildflowers.
joint T-T/R-D Trails
From this spot, there are views to the south of the Hudson River.
view south from joint T-T/R-D Trails
A short distance beyond, the trail reaches the summit of The Timp. We had now hiked approximately 2 miles with almost 1,000 feet of elevation gain. We stopped here to enjoy the expansive views of the surrounding area.
The Timp summit
Looking northwest towards West Mountain.
view of West Mountain from the summit of The Timp
Looking north towards Bear Mountain.
view of Bear Mountain from the summit of The Timp
Looking southeast, Buckberg Mountain can be seen along with the Hudson River through the trees.
view of Buckberg Mountain from the summit of The Timp
On a clear day, the Manhattan skyline is visible to the south.
view of Manhattan skyline from the summit of The Timp
We had the summit all to ourselves for a little while until a group of about 20 hikers loudly approached and stopped for lunch. Up to this point, we had not encountered anyone else along the trails. We decided to find a quieter spot and moved on. We continued on the joint T-T/R-D Trails, which enters the woods and curves to the north.
joint T-T/R-D Trails
Approximately 500 feet from the summit, the trail reaches an open rock area with fantastic views to the north.
view north from The Timp
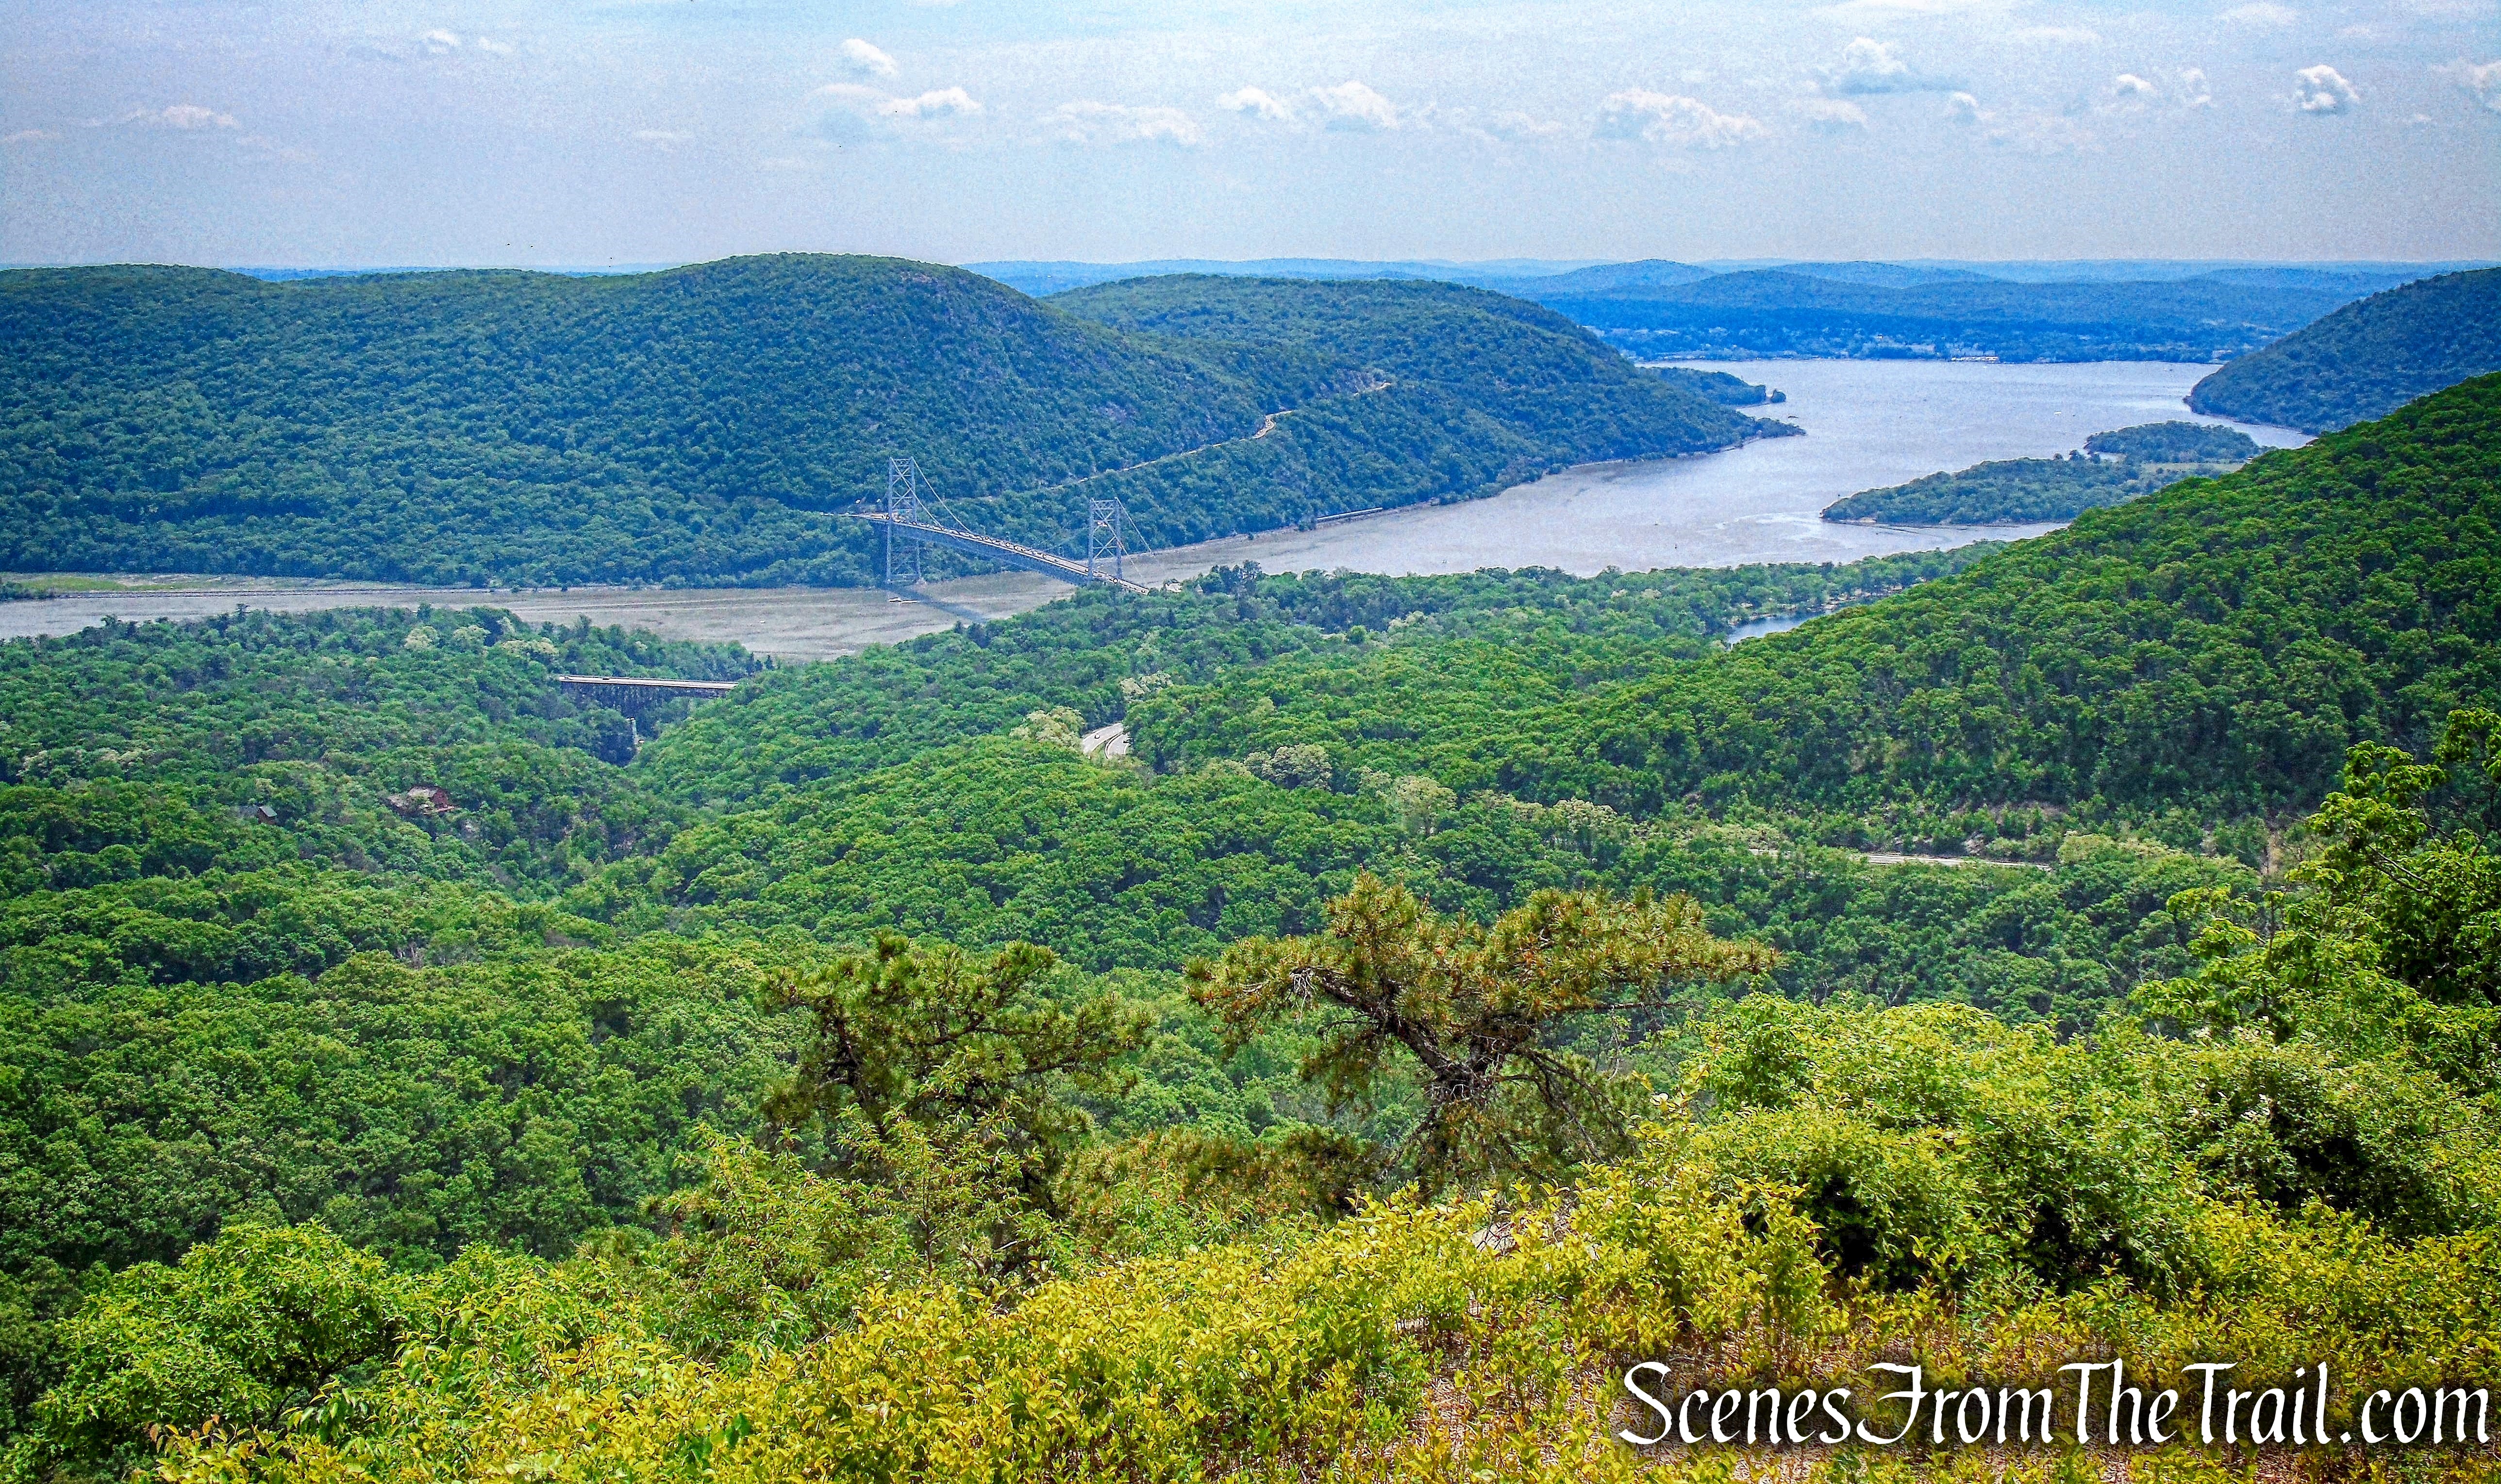
Looking north, the Hudson River, Bear Mountain Bridge, Anthony’s Nose and the surrounding hills can be seen. We stopped here to admire the view for a while.
view north from The Timp
After a short while, a couple of hikers stopped to check out the view. We had enjoyed this spot long enough and decided to resume our hike. From here we began retracing our steps, passing the summit, where the loud hikers were still, well, loud.
joint T-T/R-D Trails
When we reached the junction where the Ramapo-Dunderberg Trail (R-D) leaves to the left, we turned right and continued retracing our steps on the blue-blazed Timp-Torne Trail.
junction with Ramapo-Dunderberg Trail
In another 1/2 mile, we arrived at the junction with the 1777 Trail. We continued straight on the blue-blazed Timp Torne Trail, no longer retracing our steps. For a shorter and less strenuous out and back hike, turning right on the 1777 Trail would have taken us back the way we came.
junction with the 1777 Trail
This section of the Timp-Torne Trail, although very scenic, has a lot of ups and downs, which tacked on some extra elevation gain.
Timp-Torne Trail
Timp-Torne Trail
Now zig-zagging downhill, the Timp-Torne Trail provides a number of good views along the way.
Indian Point from Timp-Torne Trail
view south of Hudson River from Timp-Torne Trail
The Timp-Torne Trail then crosses the Jones Trail and a little brook. The trail turns right at the opposite end of the uncompleted Dunderberg Spiral Railway upper tunnel. For a shorter hike and much less of a road walk at the end, turning right onto the Jones Trail leads back to the 1777 Trail and back down to 9W, where we began the hike. Doing that would have bypassed the two tunnels of the railway, which I was intent on seeing. A shorter hike that includes just the railway, can be viewed HERE.
Timp-Torne Trail
The trail follows the descending grade of the railway through a rock cut.
Timp-Torne Trail
The T-T Trail then follows a work road up to the other end of the tunnel.
Timp-Torne Trail
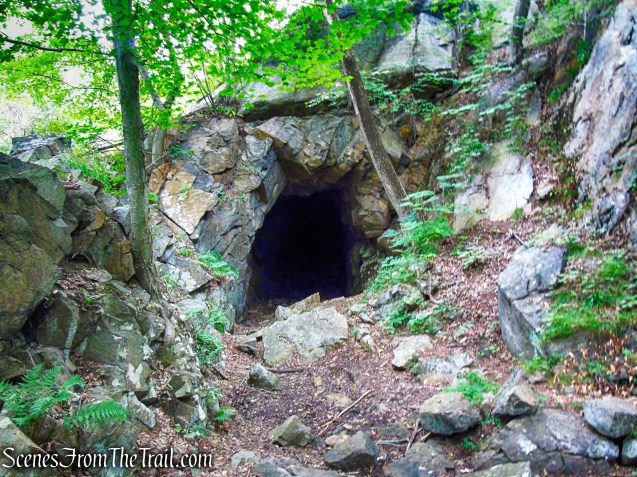
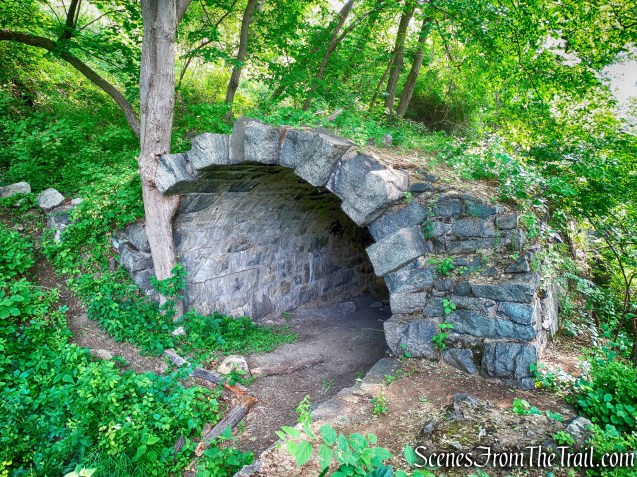
The Dunderberg Spiral Railway was a project started in 1890 and abandoned, unfinished, in 1891. The plan was to have the railcars pulled up the mountain on a cable incline by a stationary steam engine, with the downhill journey being made by gravity.
Dunderberg Spiral Railway upper tunnel
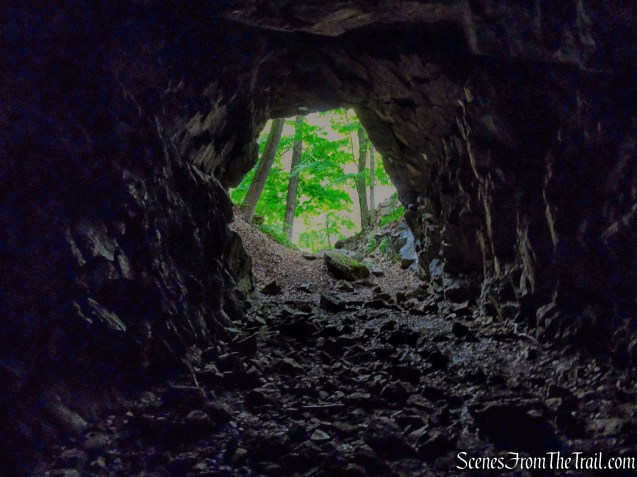
The unfinished tunnel, intended for use by the descending trains, has been excavated for about 75 feet, and is often filled with water.
Dunderberg Spiral Railway upper tunnel
The trail continues its descent on the graded section of the railway.
Timp-Torne Trail
The trail turns sharply right, leaving the graded section of the railway and again joining the Ramapo-Dunderberg Trail. It descends steeply downhill and reaches the lower railway tunnel.
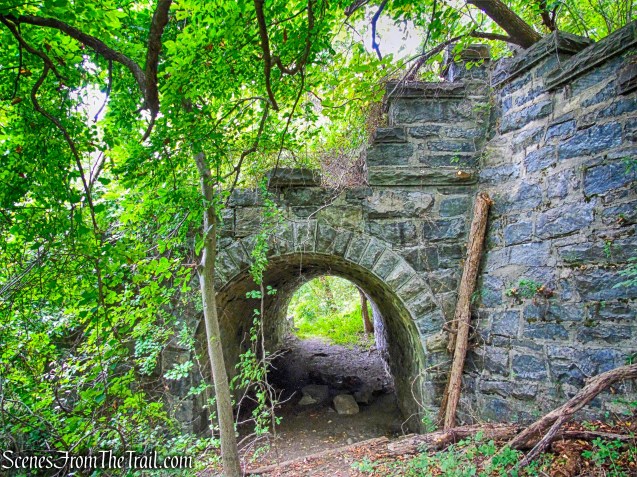
Dunderberg Spiral Railway lower tunnel
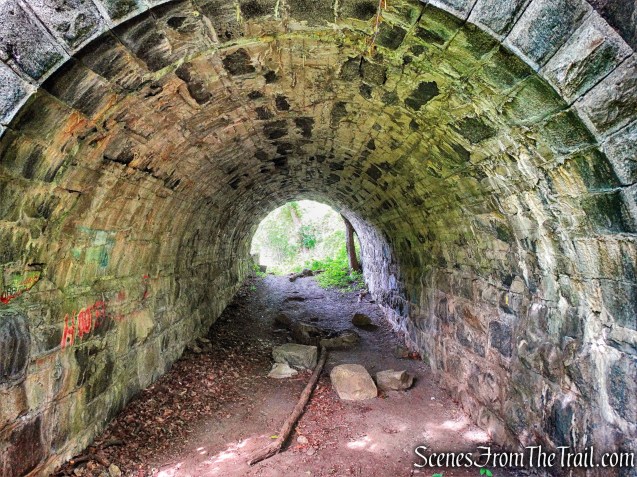
This 50 ft. long stone-arch tunnel was designed to allow the ascending trains to pass over the route of the descending trains.
Dunderberg Spiral Railway lower tunnel
The width of the grade and the height of the tunnel and underpass, show that this was to be standard railroad gauge with normal-sized cars, not narrow gauge or cars of an amusement-ride type. The open passenger cars would have been similar to open streetcars of the day, wooden bodies with benches across the width, possibly roll-down canvas for the sides in case of rain, and a solid roof.
Dunderberg Spiral Railway lower tunnel
After passing the lower railway tunnel, The trail descends on steps built into the hillside and ends at Route 9W, just south of Jones Point.
terminus of joint T-T/R-D Trails
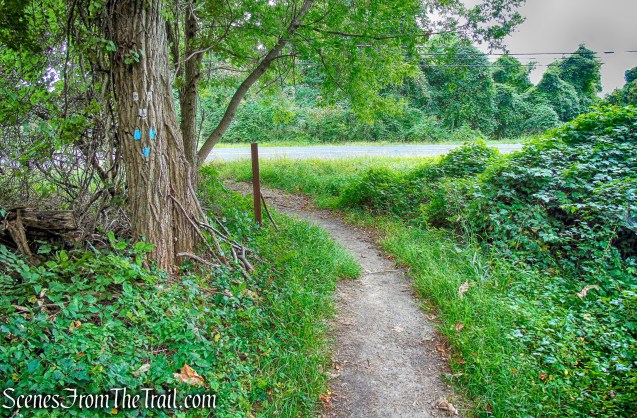
From there we crossed the road and began heading south along 9W. This was my least favorite part of the hike. The highlight was walking past the Hudson River Reserve Fleet Memorial.
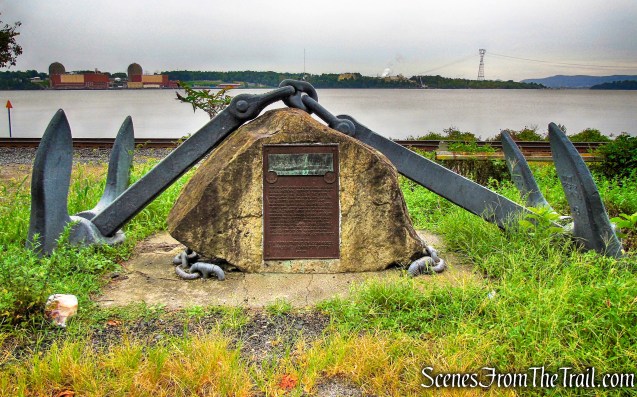
Hudson River Reserve Fleet Memorial
This memorial commemorates the Hudson River National Defense Reserve fleet moored at this point in the river from April 1946 to April 1971. At peak of activity, 189 WW II cargo and passenger ships were anchored here. These ships after heroic WW II service were retained here for possible further need. During years of grain surplus they acted as floating silos. Many were called upon again to carry food, fuel and other essential supplies to aid our overseas friends and to support our armed forces abroad.
Hudson River Reserve Fleet Memorial
The Hudson River National Defense Fleet established by an act of Congress in 1946, was first located off Tarrytown, one of eight anchorages in the United States to provide a sizable group of merchant ships to support the military effort at the outset of any war. On April 30, 1946, the Hudson River fleet was moved further north to Jones Point (at one time known as Caldwell’s Landing) at the foot of Dunderberg Mountain. Here the anchorage remained until the last two ships were towed away on July 8, 1971, to be sold for scrap to Spain.
Hudson River Reserve Fleet Memorial
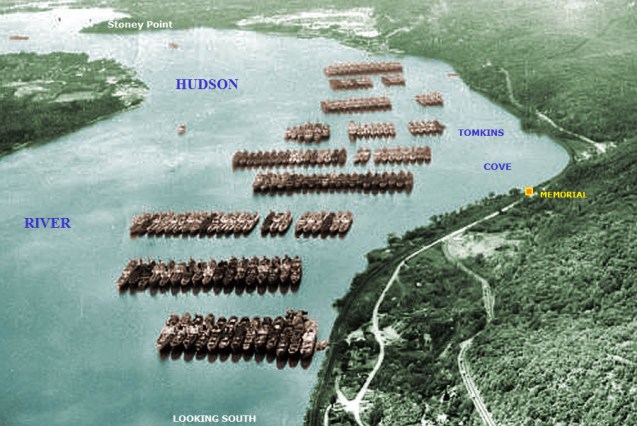
Below is a vintage photograph of the Hudson River Reserve Fleet moored at Caldwell’s Landing (Jones Point).
Hudson River Reserve Fleet
After our roadside history lesson, we continued our 0.7 mile road walk along Route 9W back to the parking area, where our hike began. Despite the road walk, this was another great hike in Bear Mountain State Park. It offered up a little bit of everything, making it a worthwhile day on the trails.
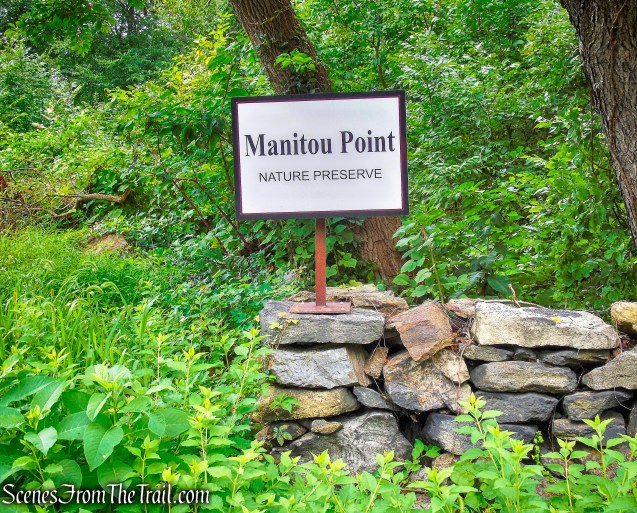
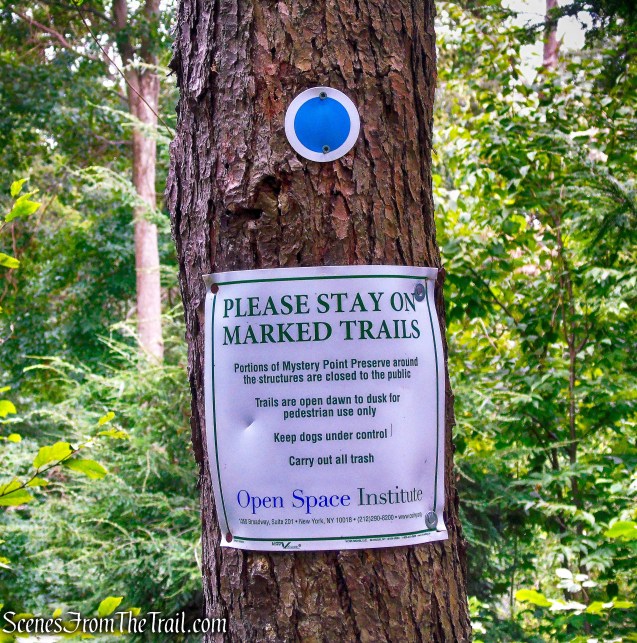
PLEASE NOTE: Although this property is now privately owned, an agreement with the landowner allows for public access to the preserve and its trail network. Please respect the owner’s privacy by paying attention to all signs and avoiding areas marked as private.
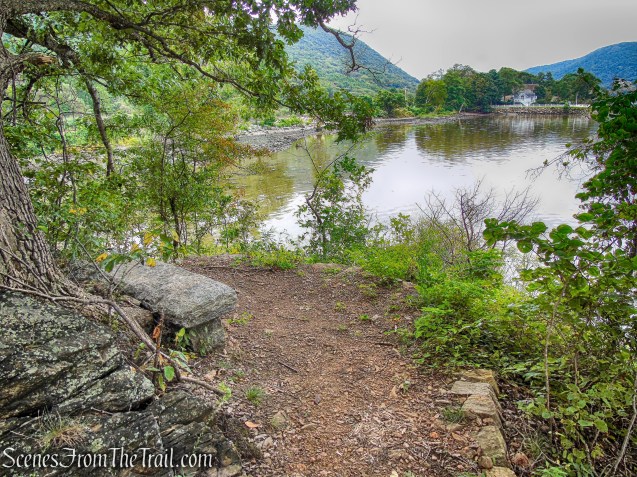
Featuring dramatic rock outcroppings that look out upon the Hudson River, Manitou Point Nature Preserve is comprised of more than 100 acres, all open to the public. Manitou Point is a scenic landscape steeped in history. Formerly known as Mystery Point, Manitou Point was once owned by Edward Livingston, descendent of Philip Livingston, a signer of the Declaration of Independence. 4 miles of trails, most narrow and rocky, traverse Manitou Point’s rugged terrain, exploring Copper Mine Brook, Manitou Marsh and the rocky Hudson River shoreline. Manitou Point Preserve is managed by the Open Space Institute with trail maintenance performed by the New York-New Jersey Trail Conference.
Manitou Point Preserve
With rain possibly in the forecast, I didn’t want to be miles deep in the woods and get caught in a downpour. This small preserve had been on my to-do list for quite some time, and I saved it for a day like this. In late 2017 some of trails were rebuilt and a new larger parking area was established. The parking area comes up kind of suddenly along the fast moving Route 9D and care should be taken entering and exiting. We arrived at approximately 8:45 am on an overcast Saturday morning. There were no cars in the lot when we arrived or when we concluded the hike, and we didn’t encounter anyone else along the trails.
Manitou Point Preserve
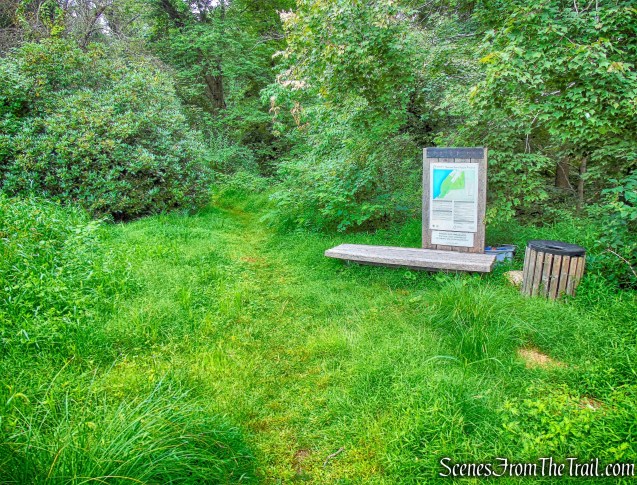
The hike begins to the left of the kiosk, at the southwest end of the parking area.
Manitou Point Preserve
From the kiosk, we headed south on the white-blazed Perimeter Trail, which parallels Route 9D. This trail was overgrown for a good part of the way.
white-blazed Perimeter Trail
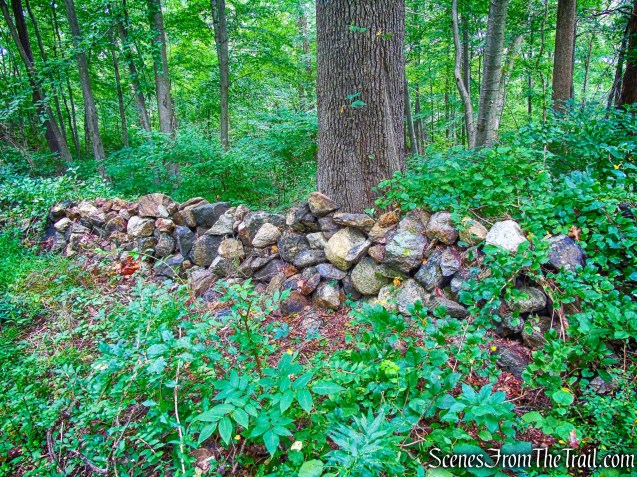
The white trail travels past a stone wall.
white-blazed Perimeter Trail
Soon, a blue trail begins on the right, and then a yellow trail begins on the right, but we continued ahead on the white trail.
Perimeter Trail
In a quarter mile, the white trail bears right, away from the road, and descends rather steeply into a ravine, where it crosses a stream on large boulders.
Perimeter Trail
The trail turns right and briefly parallels the stream, then bears left and climbs out of the ravine. The trail now bears right and continues to parallel the stream.
Perimeter Trail
At the crest of the rise, the pink trail begins on the right, but we stayed left, continuing to follow the white trail, which begins to head south.
Perimeter Trail
We immediately passed the start of the orange trail on the right, but continued on the white trail.
Perimeter Trail
Soon, the white trail begins a gradual descent towards the Hudson River, running close to the southern boundary of the preserve.
Perimeter Trail
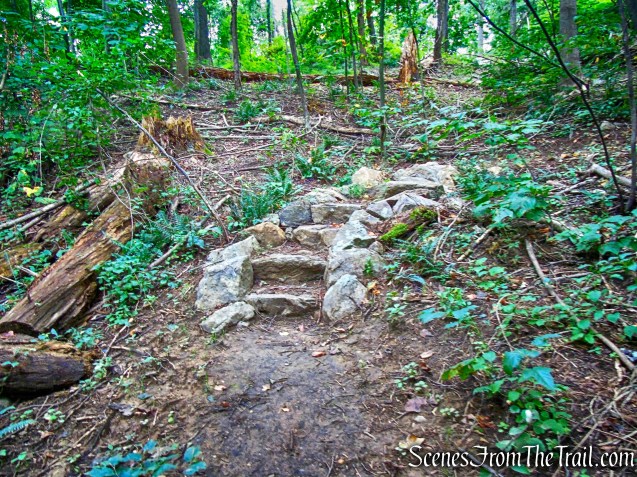
About two-thirds of a mile from the start, after descending through a shallow ravine on rock steps and paralleling an old stone wall,
Perimeter Trail
the white trail ends at a gravel road, referred to on the map as Mystery Point Road.
terminus of Perimeter Trail
We turned right and proceeded north on the road,
Mystery Point Road
passing the Manitou Marsh on the left.
Manitou Marsh
Mystery Point Road snakes its way northeast.
Mystery Point Road
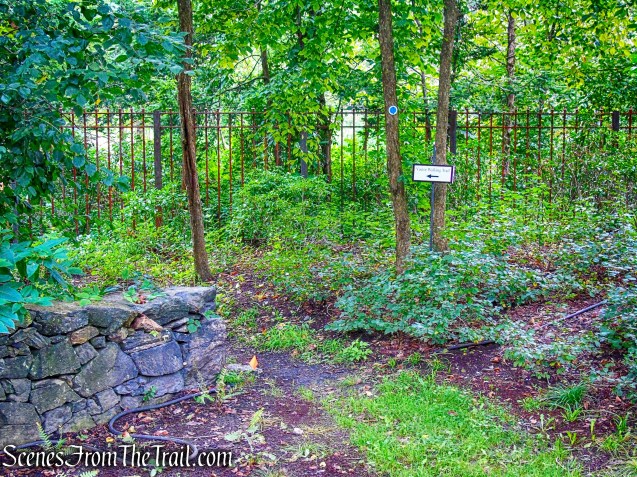
Soon, there is an orange-blazed trail and then a wide green-blazed trail on the right. We noticed an unmarked path on the left, with a structure visible through the trees.
unmarked path
We walked down this path to explore this old roofless structure.
ruins
It appears to be the ruins of a large brick barn.
ruins
ruins
We then retraced our steps back out to Mystery Point Road and turned left. We walked by what appeared to be a private residence on the right and then some old brick buildings on the left.
Mystery Point Road
ruins – Mystery Point Road
ruins – Mystery Point Road
ruins – Mystery Point Road
At the end of the road, we turned left.
turn left – Mystery Point Road
We crossed over the Metro-North railroad tracks on a wide stone-arch bridge. This is an active railroad, and Metro-North or Amtrak passenger trains routinely pass on their way to Poughkeepsie, Albany or New York.
stone-arch bridge
To the right (north), the cone-shaped hill in the distance is Sugarloaf Hill.
looking north to Sugar Loaf Hill
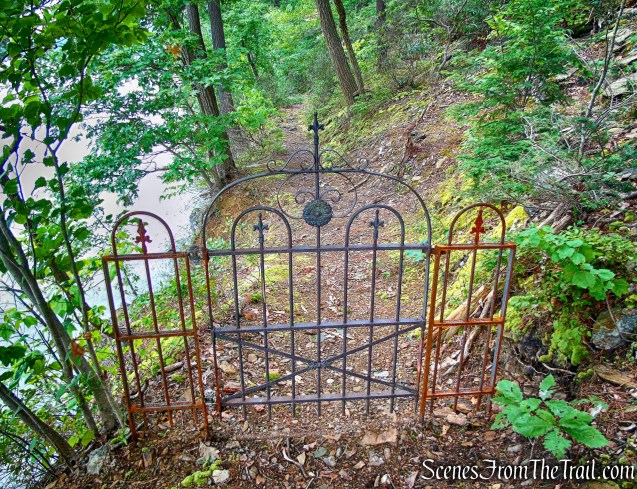
On the other side of the bridge, beyond an iron gate, is the historic Livingston Mansion.
gate – Livingston Mansion
Just before reaching the gate, we turned left onto the blue-blazed River Trail, which parallels the railroad tracks.
start of River Trail
River Trail
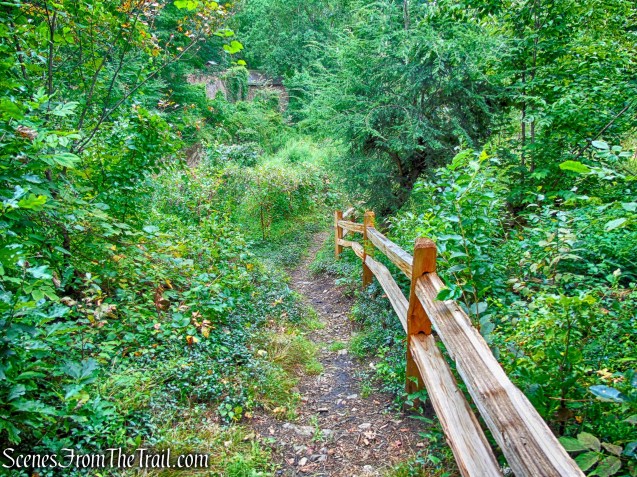
On the right, beyond a wooden fence,
River Trail
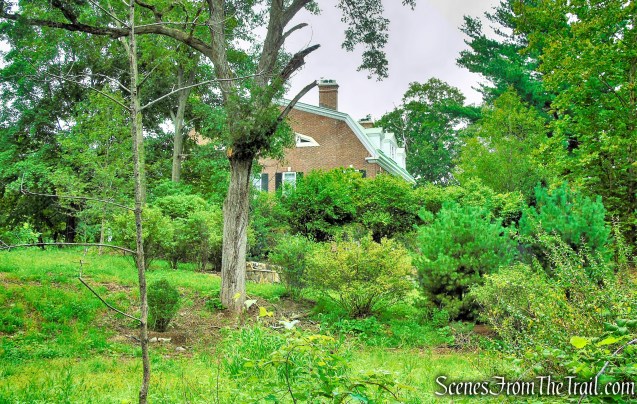
is the Livingston Mansion, built in 1897 (the mansion and its grounds are privately owned and not open to the public).
Livingston Mansion
Soon, the trail curves right, away from the tracks, and reaches a dirt road. We crossed the road and continued on the blue-blazed trail, which climbs over a rise on switchbacks and stone steps.
River Trail
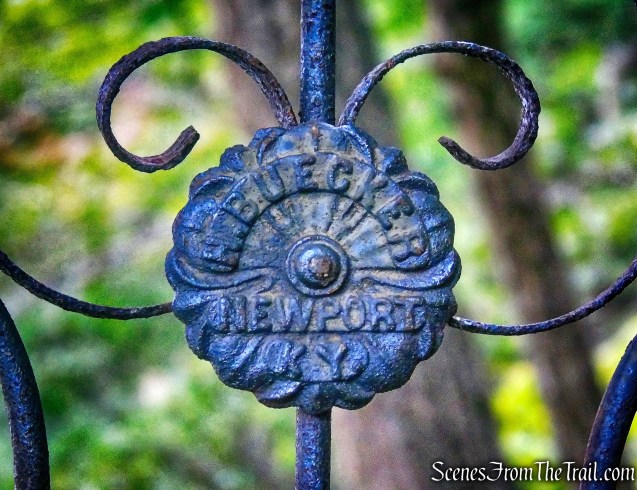
The trail then descends to the shore of the Hudson River. There is an ornate wrought iron gate to the right that leads to the mansion property.
wrought iron gate – River Trail
wrought iron gate – River Trail
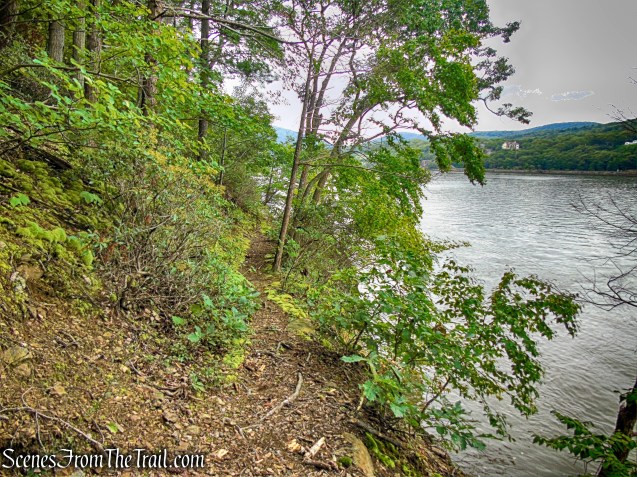
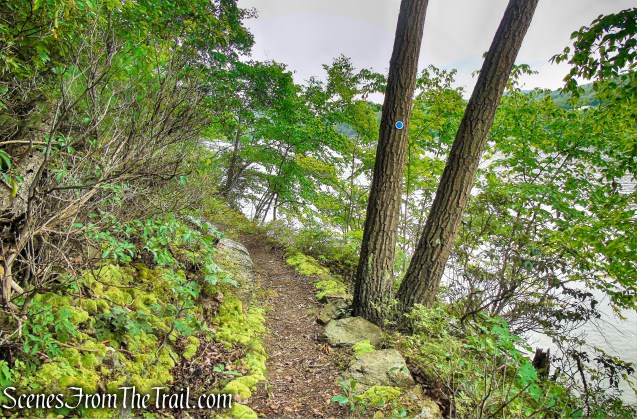
The trail turns left onto a narrow footpath, heading south along a bluff overlooking the Hudson River, with views across the river.
River Trail
Using caution, as there are steep drop-offs on the right.
River Trail
At one point, the trail crosses a wooden bridge over an area where the footpath had become eroded.
River Trail
The trail follows closely along the river for about a quarter of a mile.
River Trail
River Trail
The trail turns left and steeply climbs rock steps. In a short distance, the trail bears left again and heads inland, soon reaching a complex junction, with a grassy carriage road on the left and two branches of the blue-blazed River Trail on the right. We turned sharply right and followed the branch of the blue-blazed trail that runs closest to the river. In another quarter mile (after bearing right at a fork), the blue-blazed trail ends at a south-facing viewpoint, with a stone bench.
After taking in the view, we retraced our steps on the blue-blazed trail for 200 feet, then turned sharply right at a trail junction.
turn sharply right at trail junction
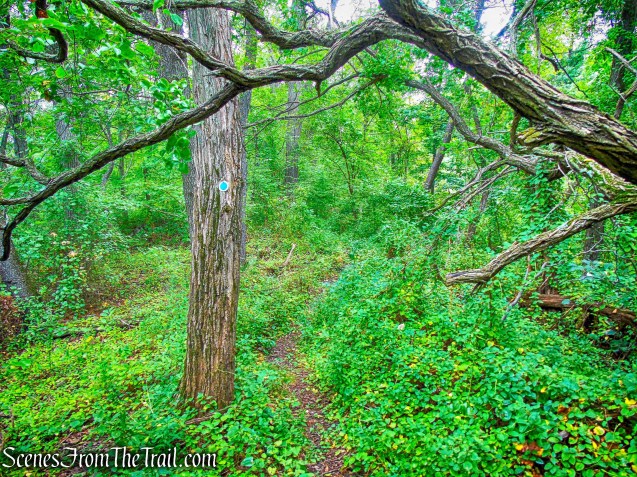
We were now following the inland branch of the blue-blazed River Trail.
inland branch of the blue-blazed River Trail
This section of trail was also overgrown on our visit.
inland branch of the blue-blazed River Trail
The trail leads to the complex junction we encountered earlier in the hike. The blue-blazed River Trail turns right onto the carriage road, but we turned left onto the grassy road.
turn left onto the grassy road
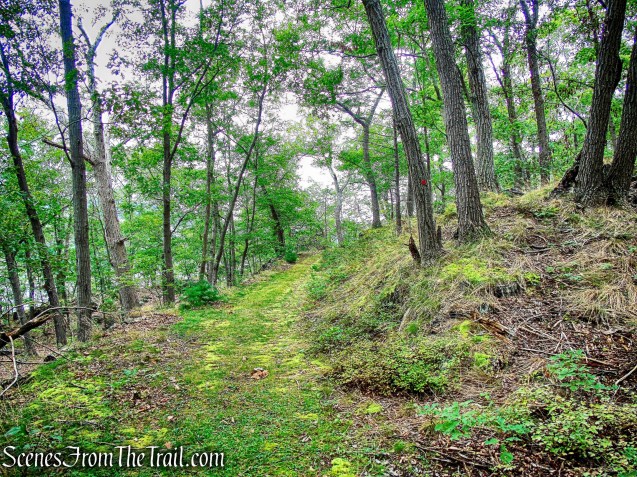
We were now on the red-blazed Battlement Loop Trail. The trail heads north, paralleling the river, just above the blue trail we were on earlier.
red-blazed Battlement Loop Trail
A bench sits on the hill to the right of the trail, possibly offering a view when there are no leaves on the trees.
red-blazed Battlement Loop Trail
The red trail loops around and reconnects with the blue trail. We turned left on blue, heading north on the carriage road.
blue-blazed River Trail
When we reached the next junction (the road ahead is blocked off with a gate), we turned right and retraced our steps on the blue-blazed trail to its terminus at the bridge over the railroad. Turning right again, we recrossed the bridge, and veered left, following the gravel road uphill.
follow the gravel road uphill
The road heads uphill and comes to a stone bridge that spans Copper Mine Brook. There is a small cascade that flows underneath the bridge.
Copper Mine Brook
After crossing a stream, the road curves to the left. On the right, there are stone steps, which mark the start of the yellow-blazed Copper Mine Trail.
turn right on yellow-blazed Copper Mine Trail
We turned right, climbed the steps, and followed the yellow trail uphill as it briefly parallels the brook. Through the trees, a dam and an old structure across the brook (possibly an icehouse) can be seen.
Copper Mine Trail
The Copper Mine Trail reaches a T-intersection, where we turned left onto the blue-blazed Connector Trail.
turn left onto the blue-blazed Connector Trail
In a short distance we reached the white-blazed Perimeter Trail, turned left and followed it a short distance to the parking area where the hike began.
Perimeter Trail
This is a nice hike if you are short on time or prefer some solitude. The trails could use a little work, which would make this place more enjoyable. Walking the blue-blazed River Trail along the Hudson River was very enjoyable. The brick ruins along the way were fun to explore as well.
Pros: Lesser traveled area, well marked trails, ruins, Hudson River views.
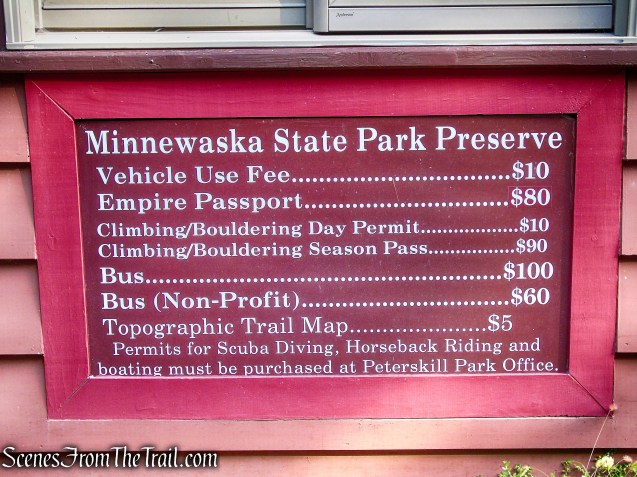
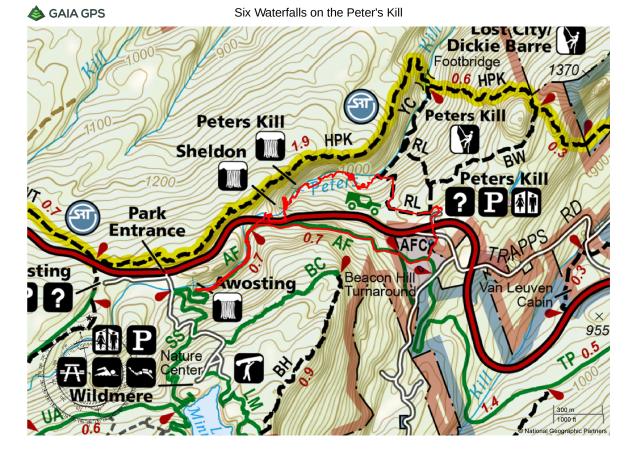
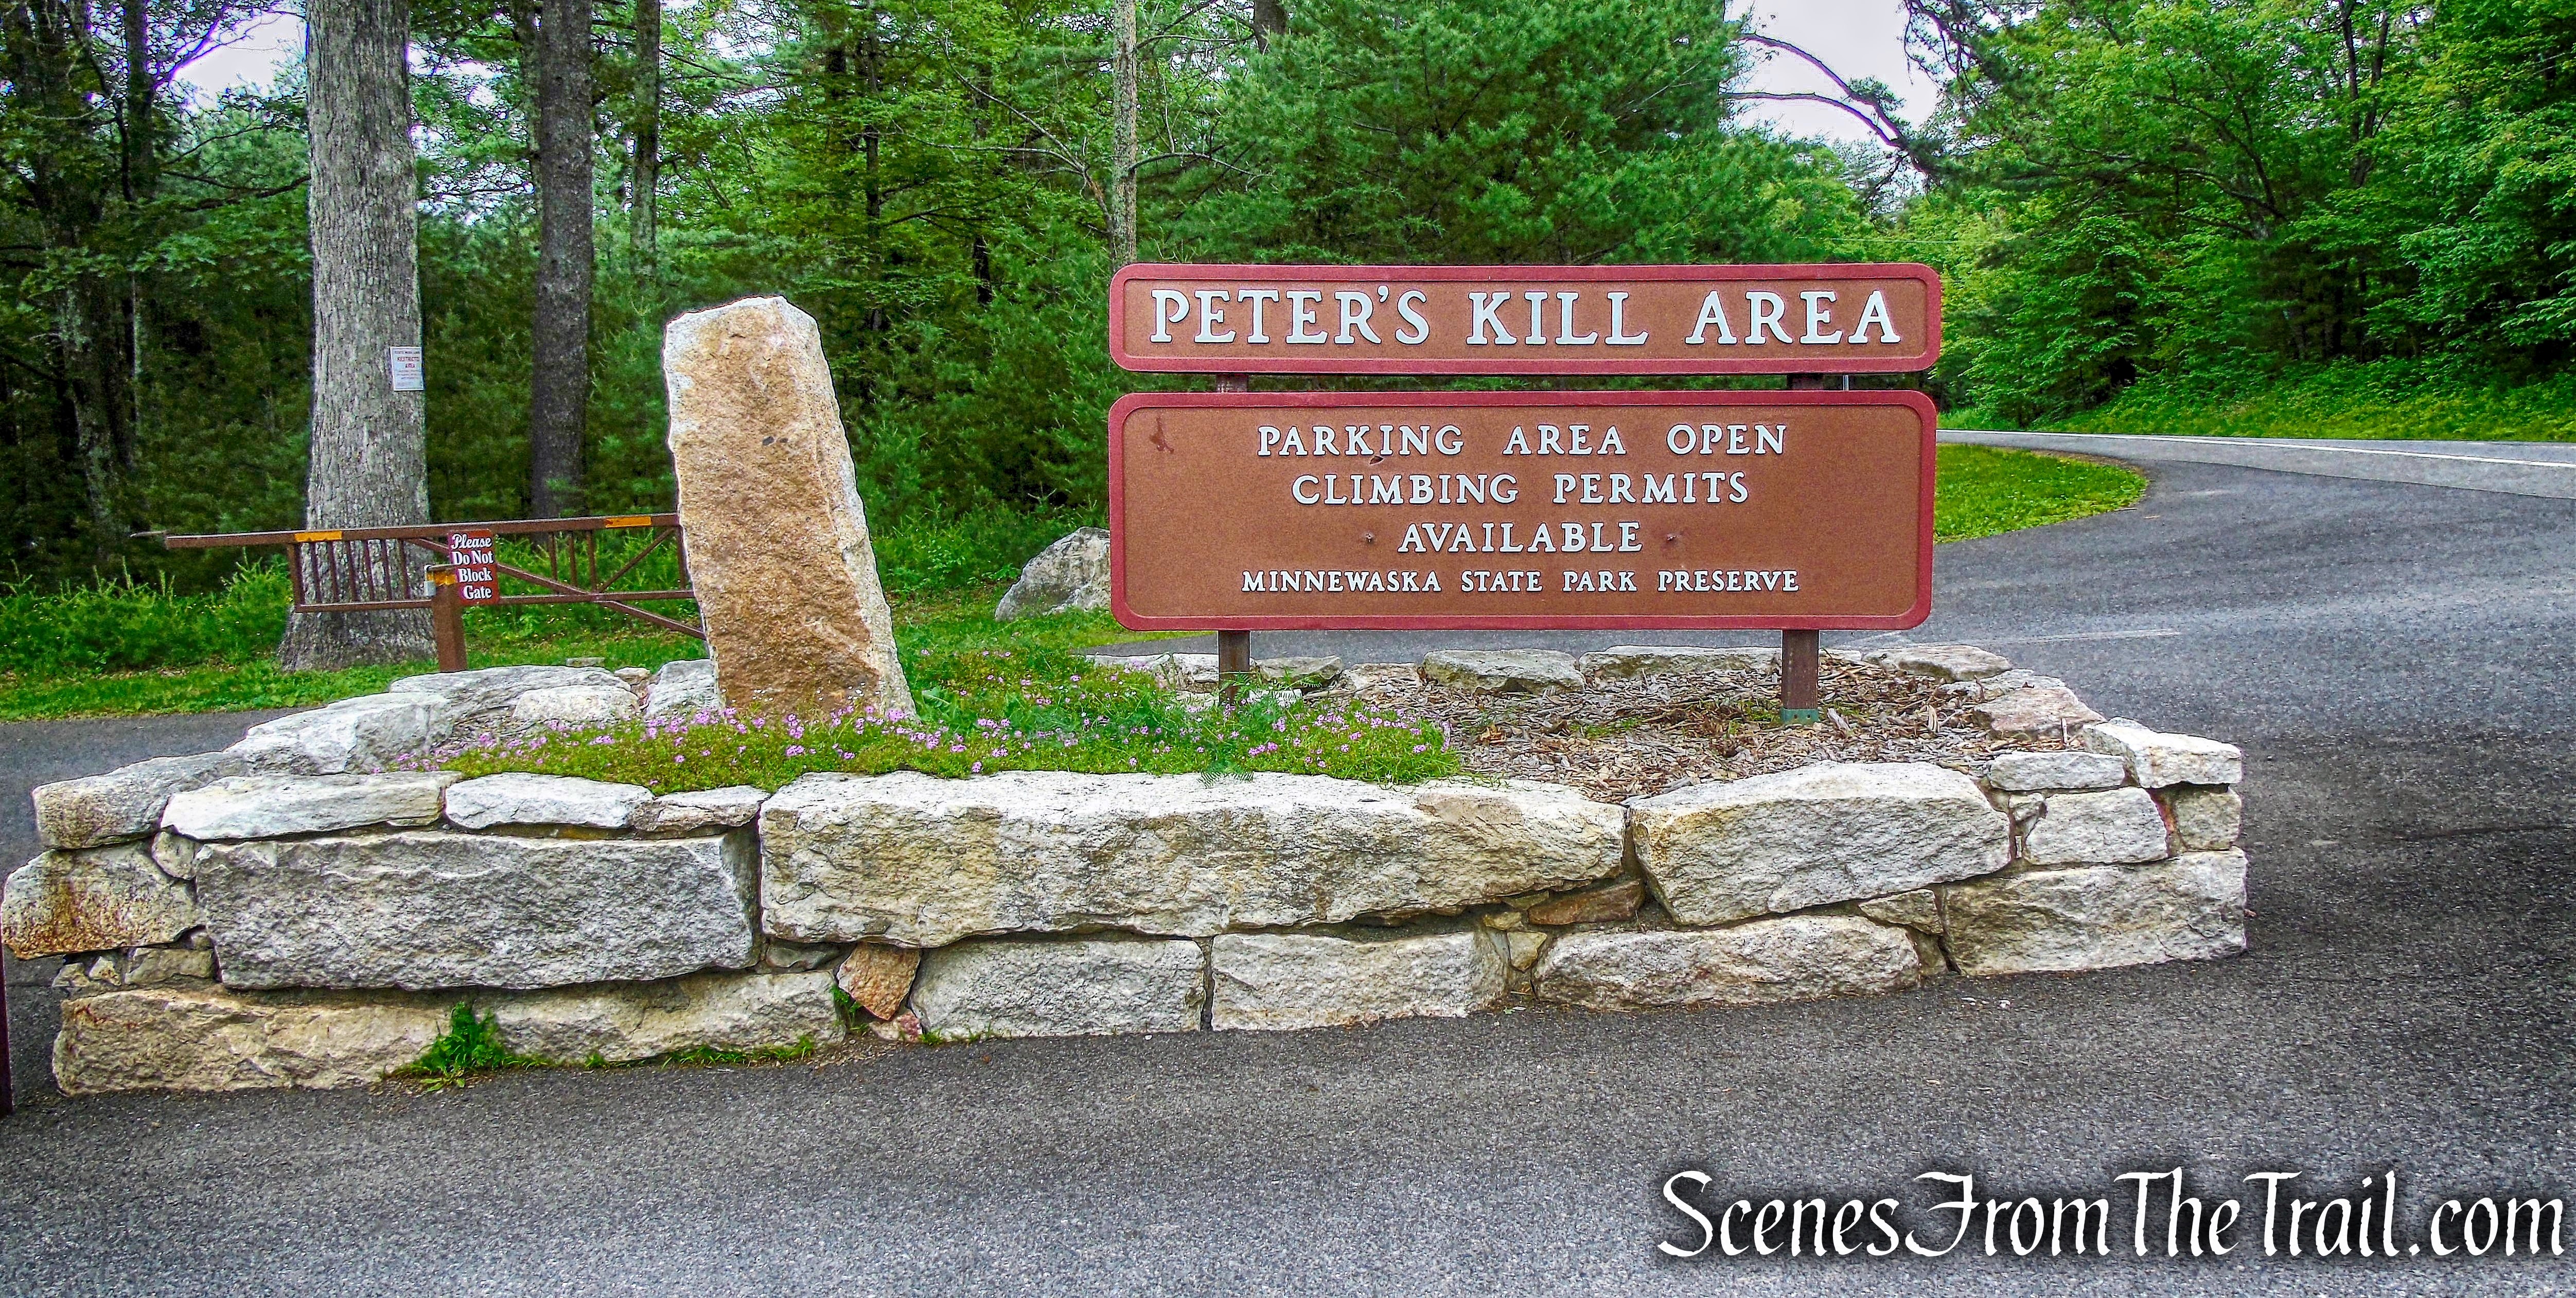
Trailhead parking: Peter’s Kill Area – 5080 Route 44-55, Gardiner, NY 12525
Please note: Waterfall conditions are dynamic, changing with weather and seasons. Stay on the trail when possible and be cautious of your surroundings, like slippery or rocky terrain, fast moving water, or steep drops.
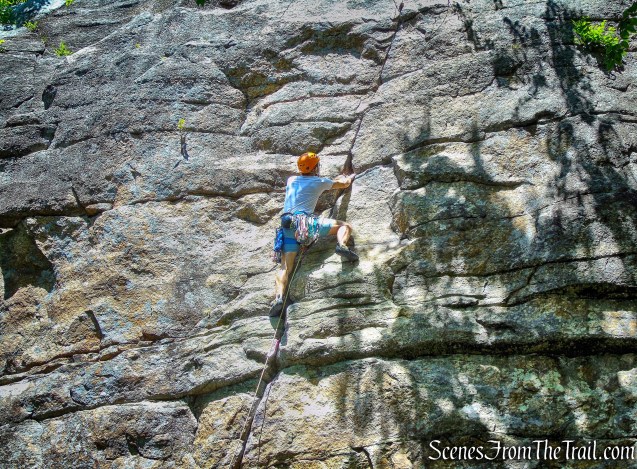
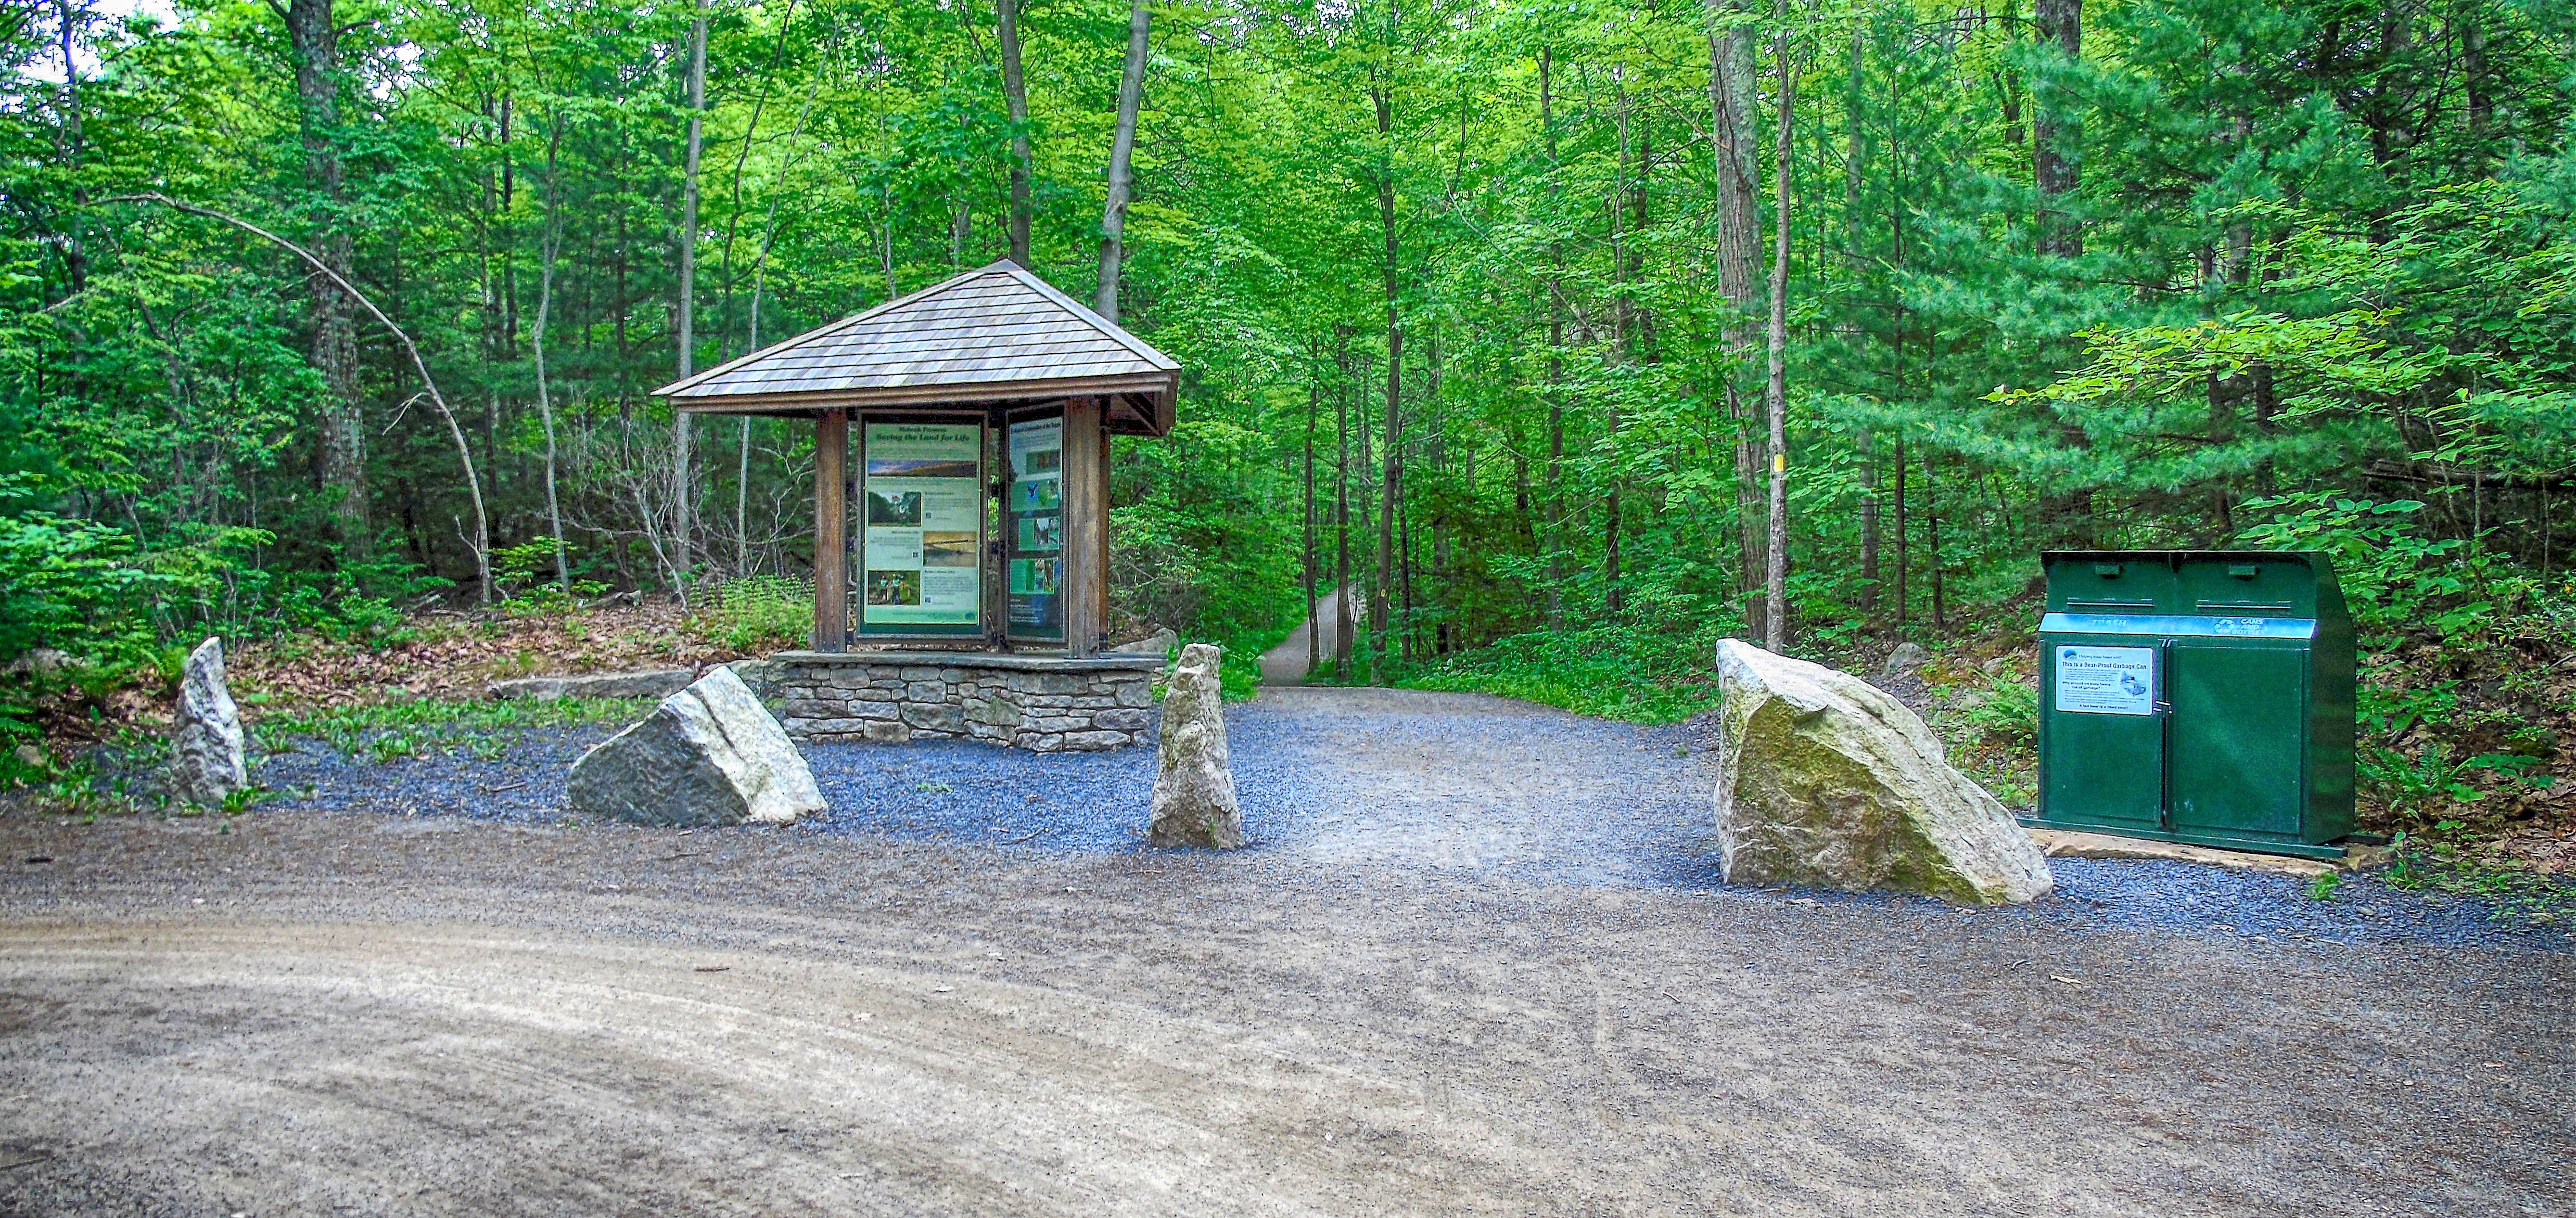
Located in Ulster County, NY, Minnewaska State Park Preserve is situated on the dramatic Shawangunk Mountain ridge, which rises more than 2,000 feet above sea level and is surrounded by rugged, rocky terrain. The park features numerous waterfalls, three crystalline sky lakes, dense hardwood forests, incising sheer cliffs and ledges opening to beautiful views, clear streams cut into valleys, world-class rock climbing and 35 miles of carriageways and 35 miles of footpaths on which to bike, walk, hike and simply enjoy. And, all this within an hour and a half drive from New York City.
Minnewaska State Park Preserve
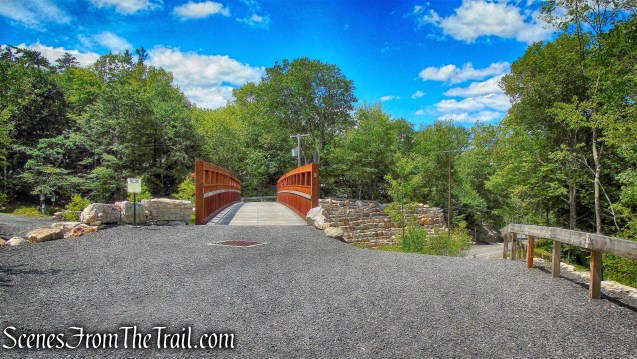
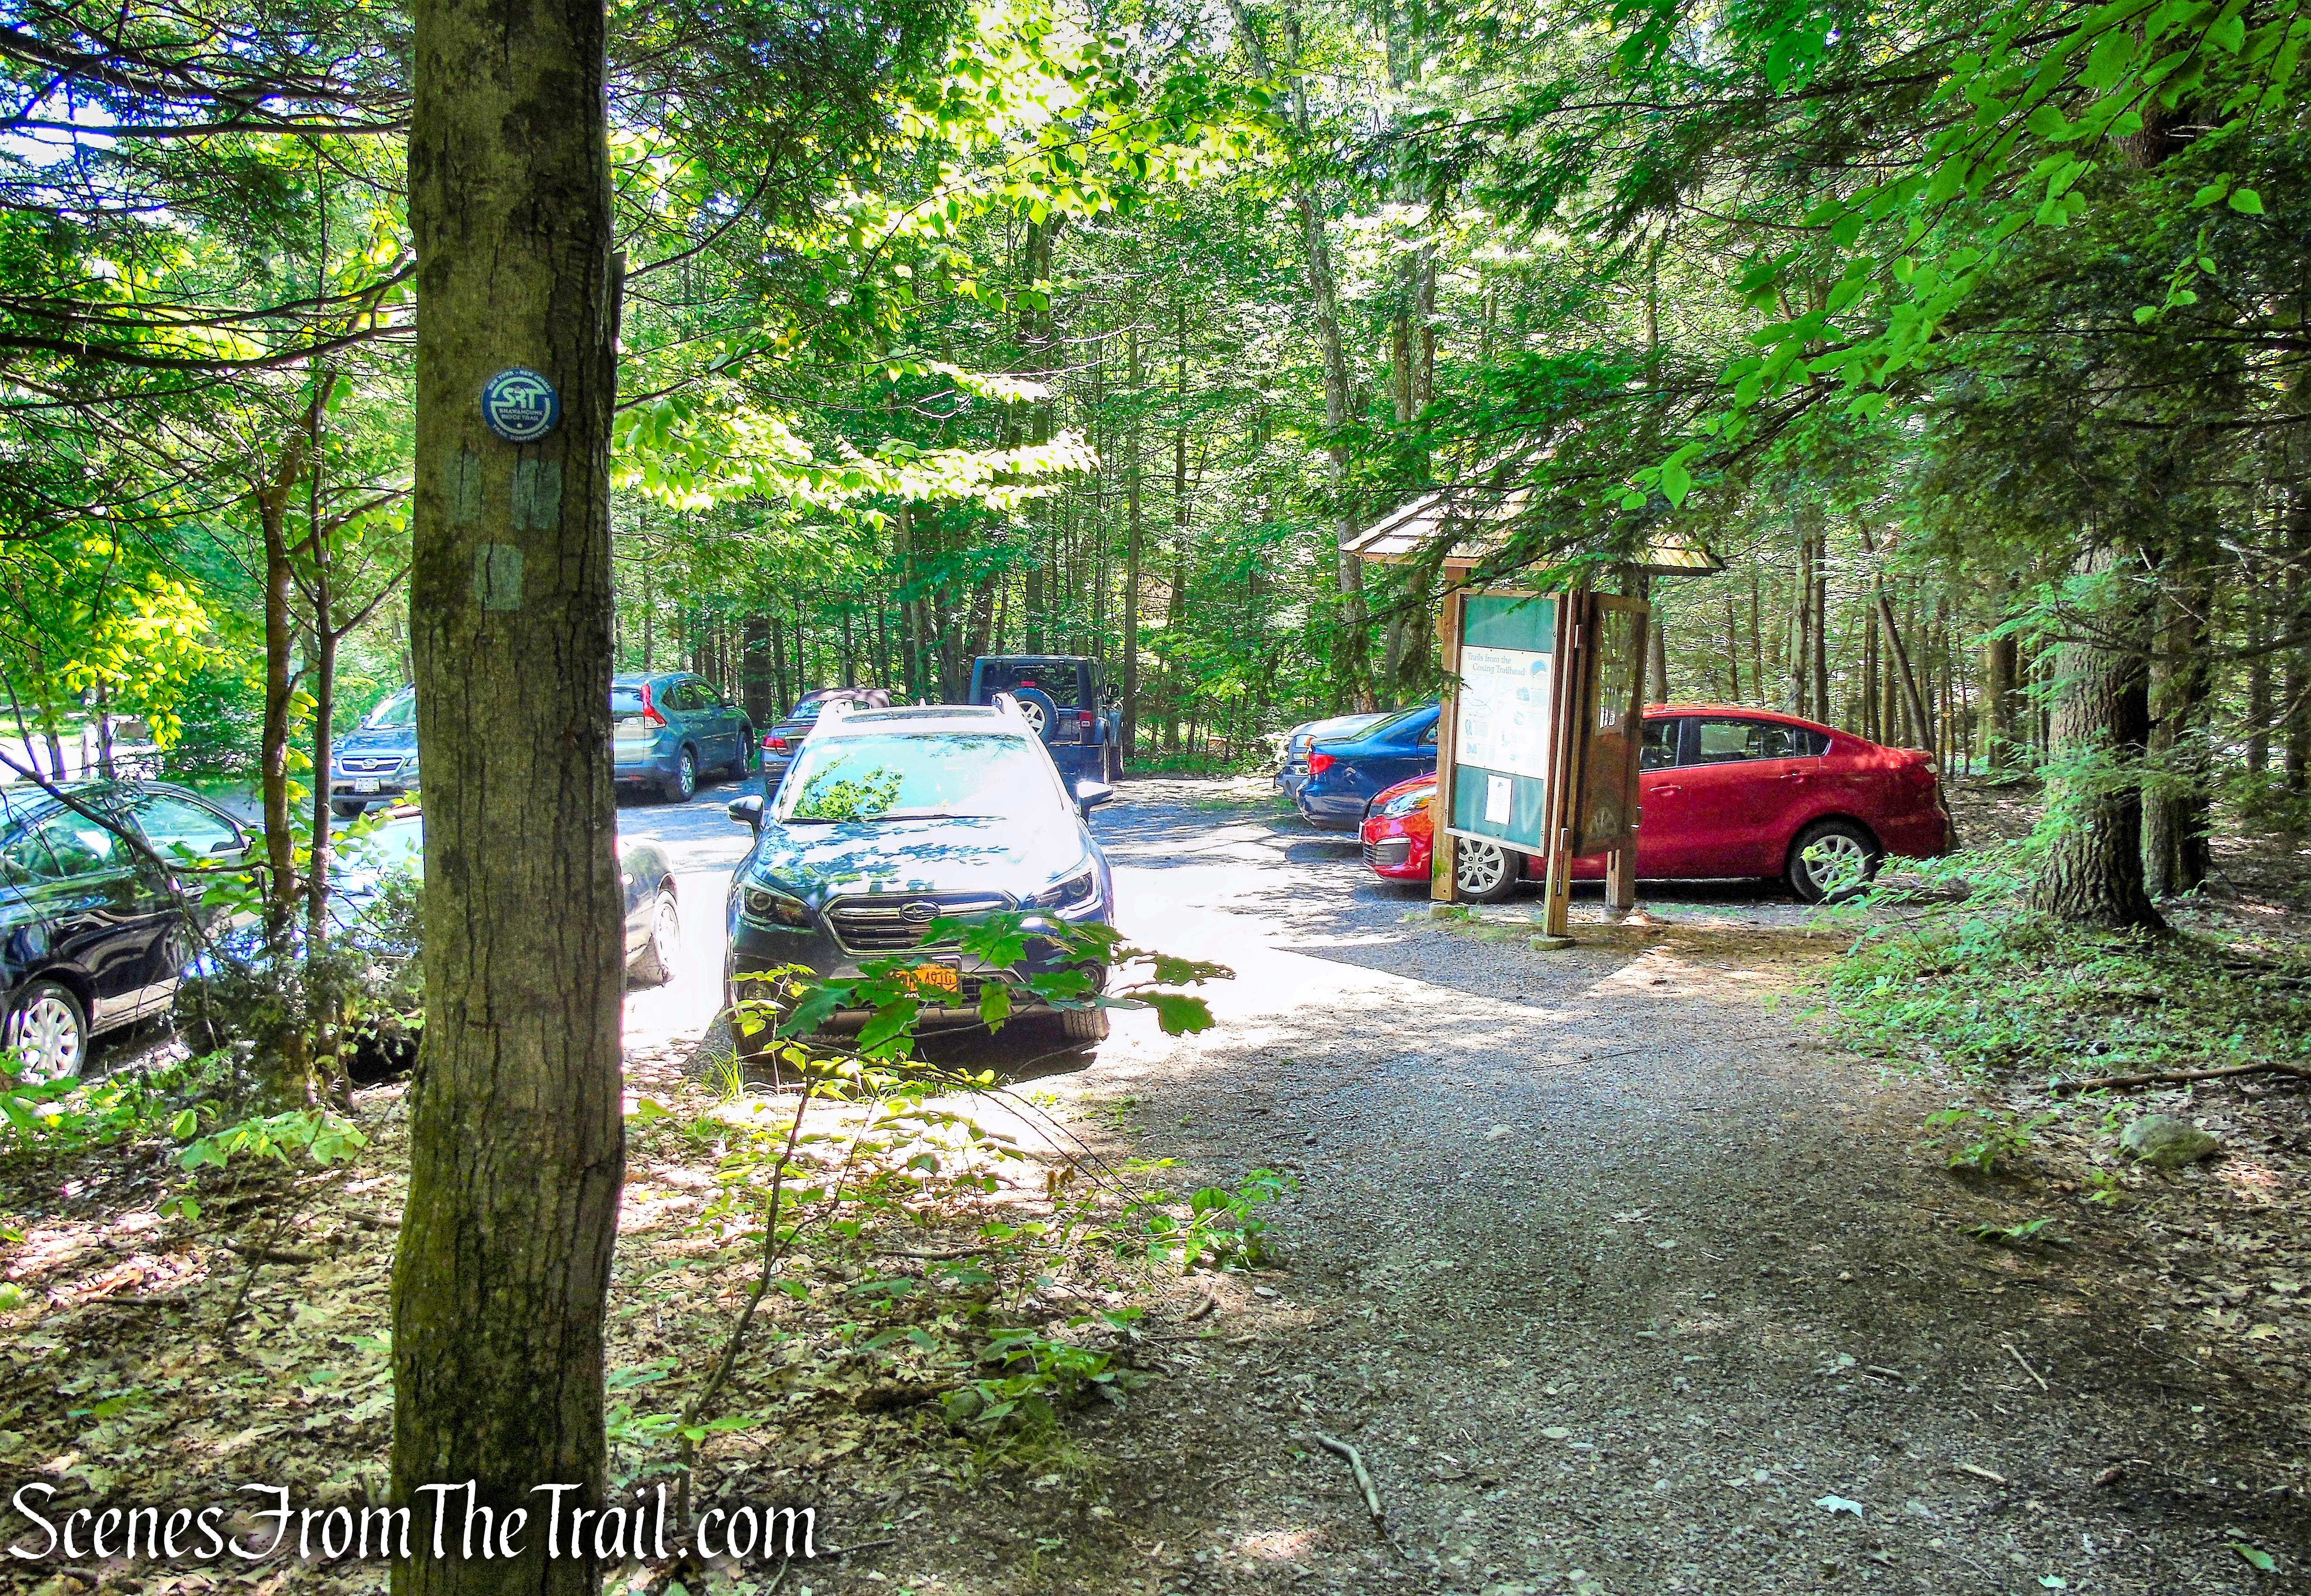
Visitors have twelve potential access points onto Preserve property. The entrance to the Peter’s Kill Area and Preserve office is accessed from Highway 44/55 and provides 120 parking spaces.
Peter’s Kill Area – Minnewaska State Park Preserve
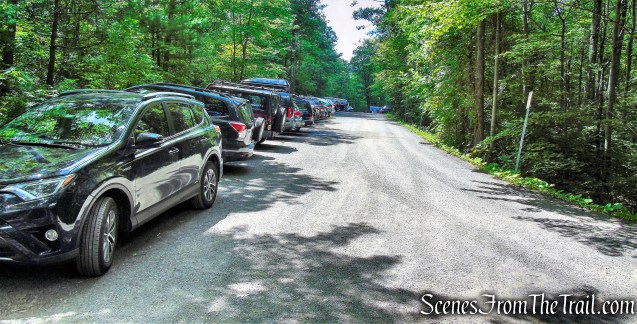
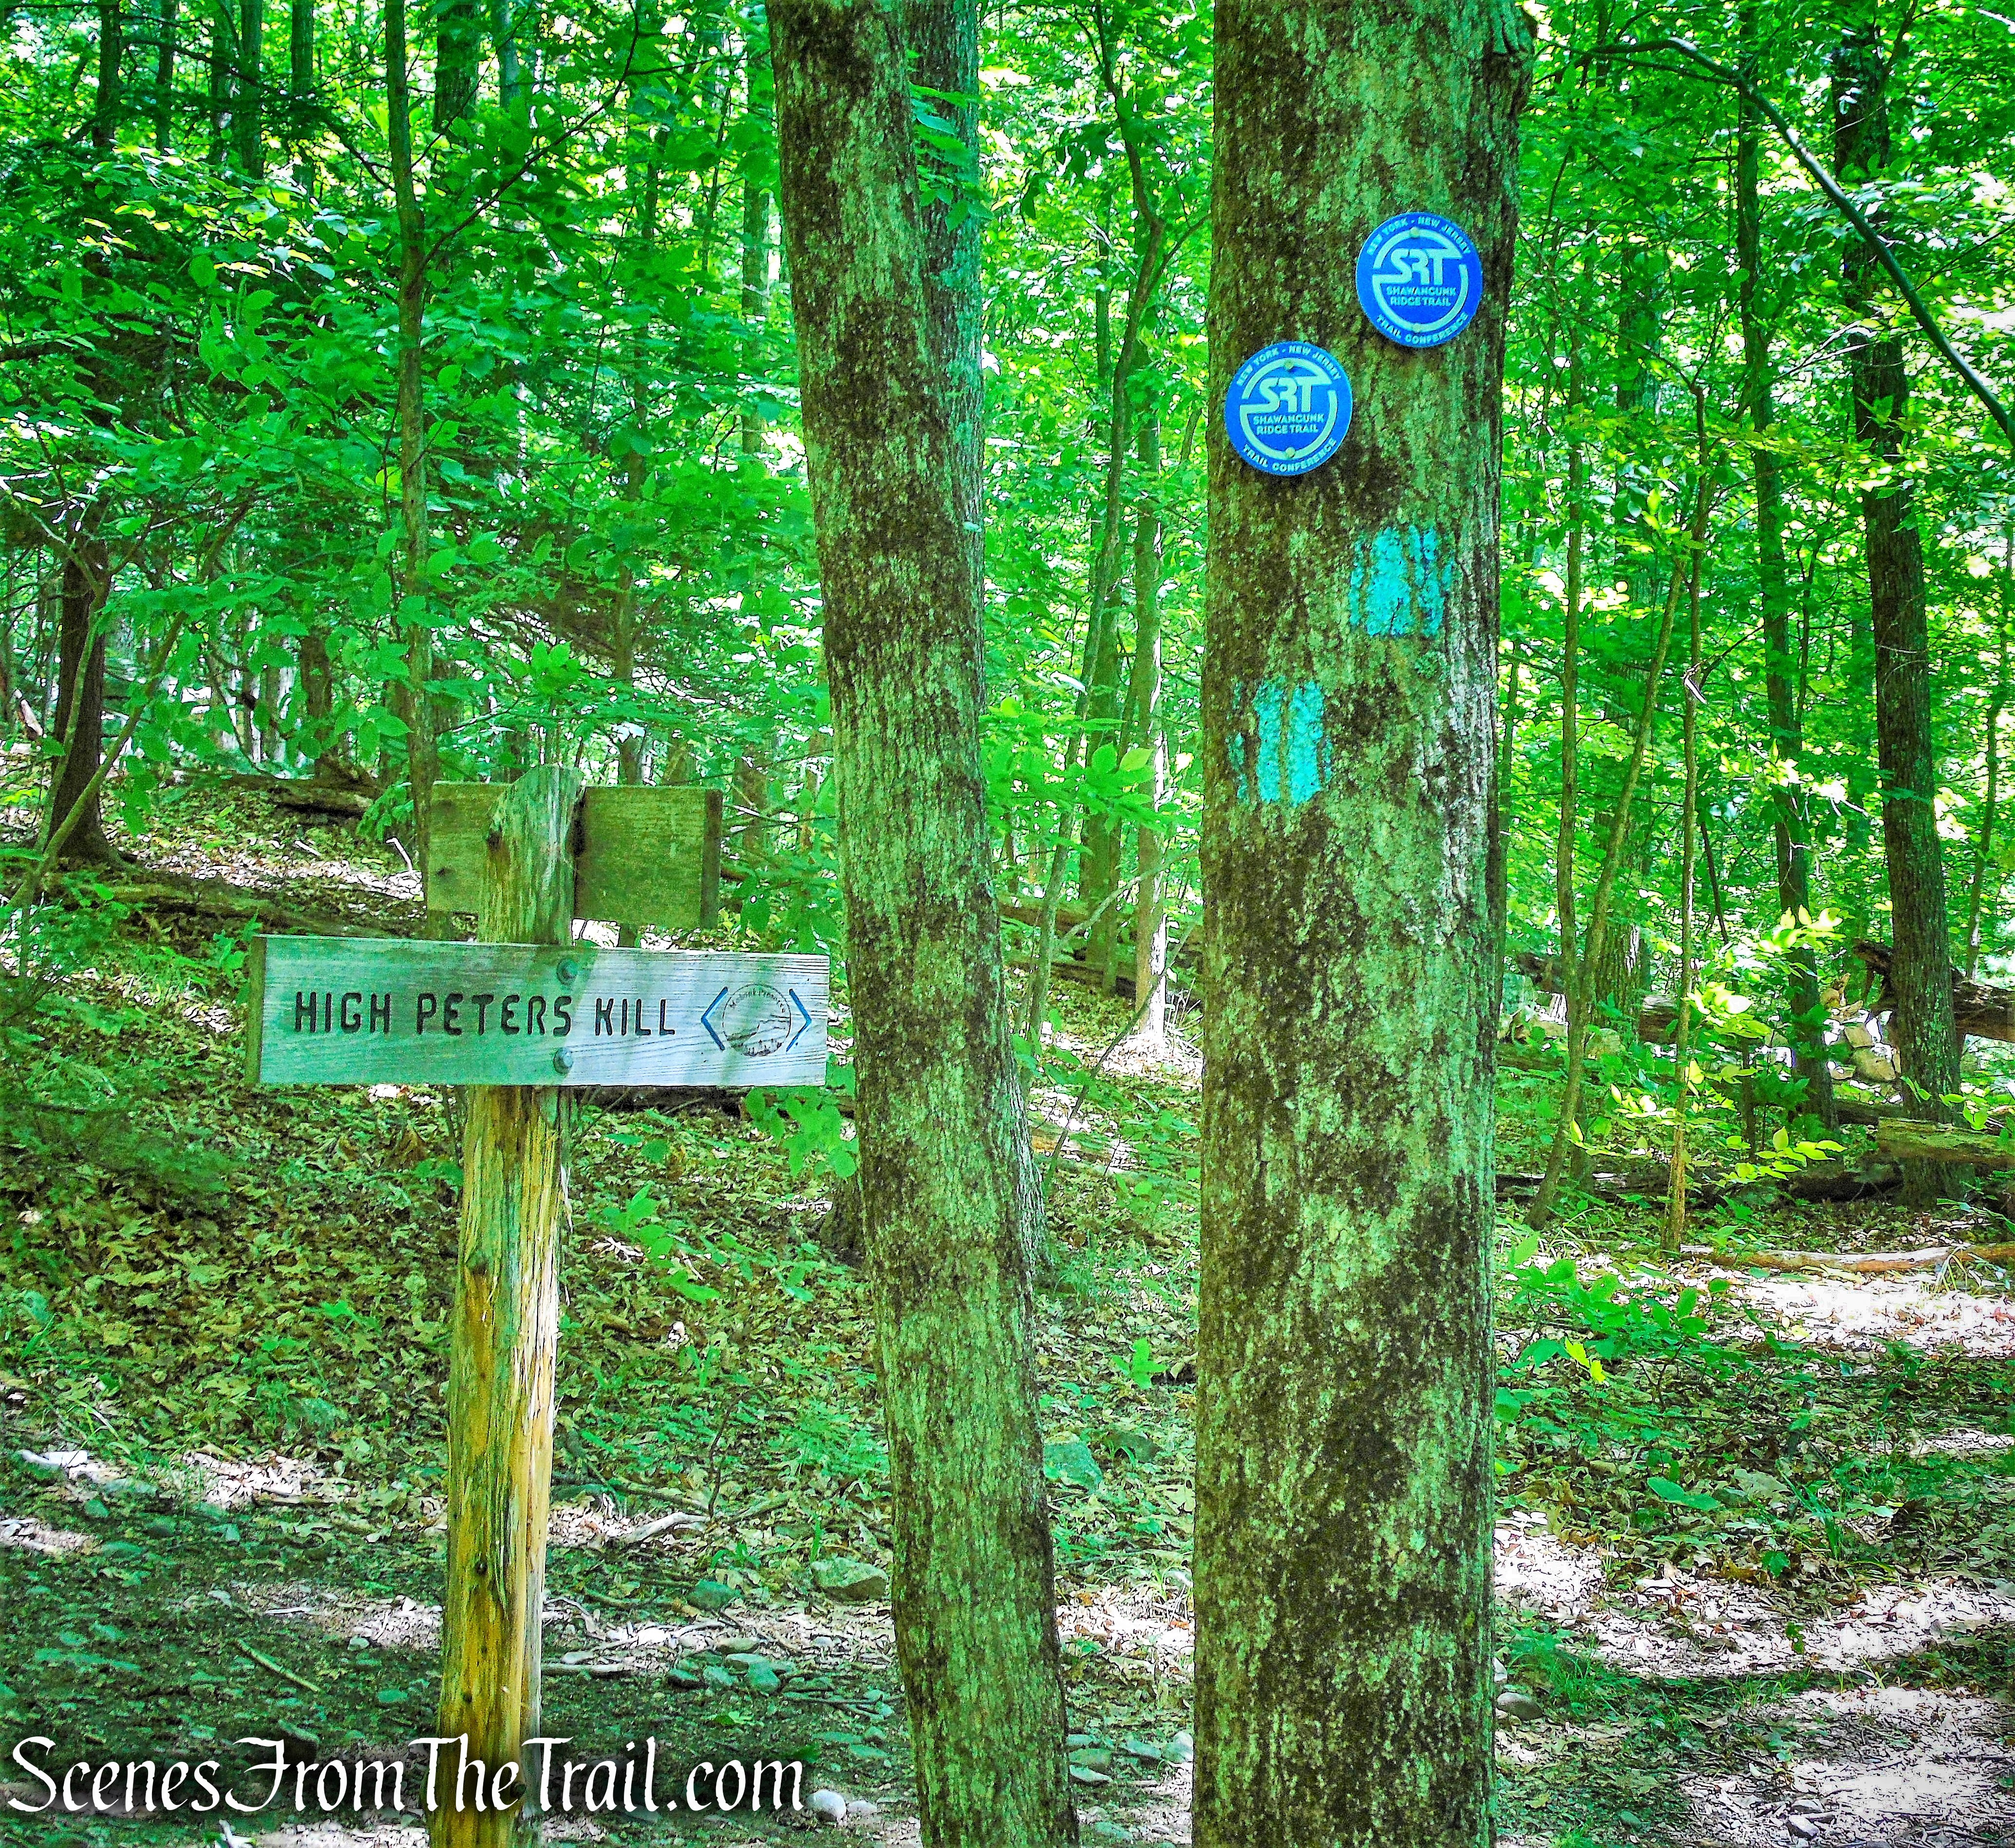
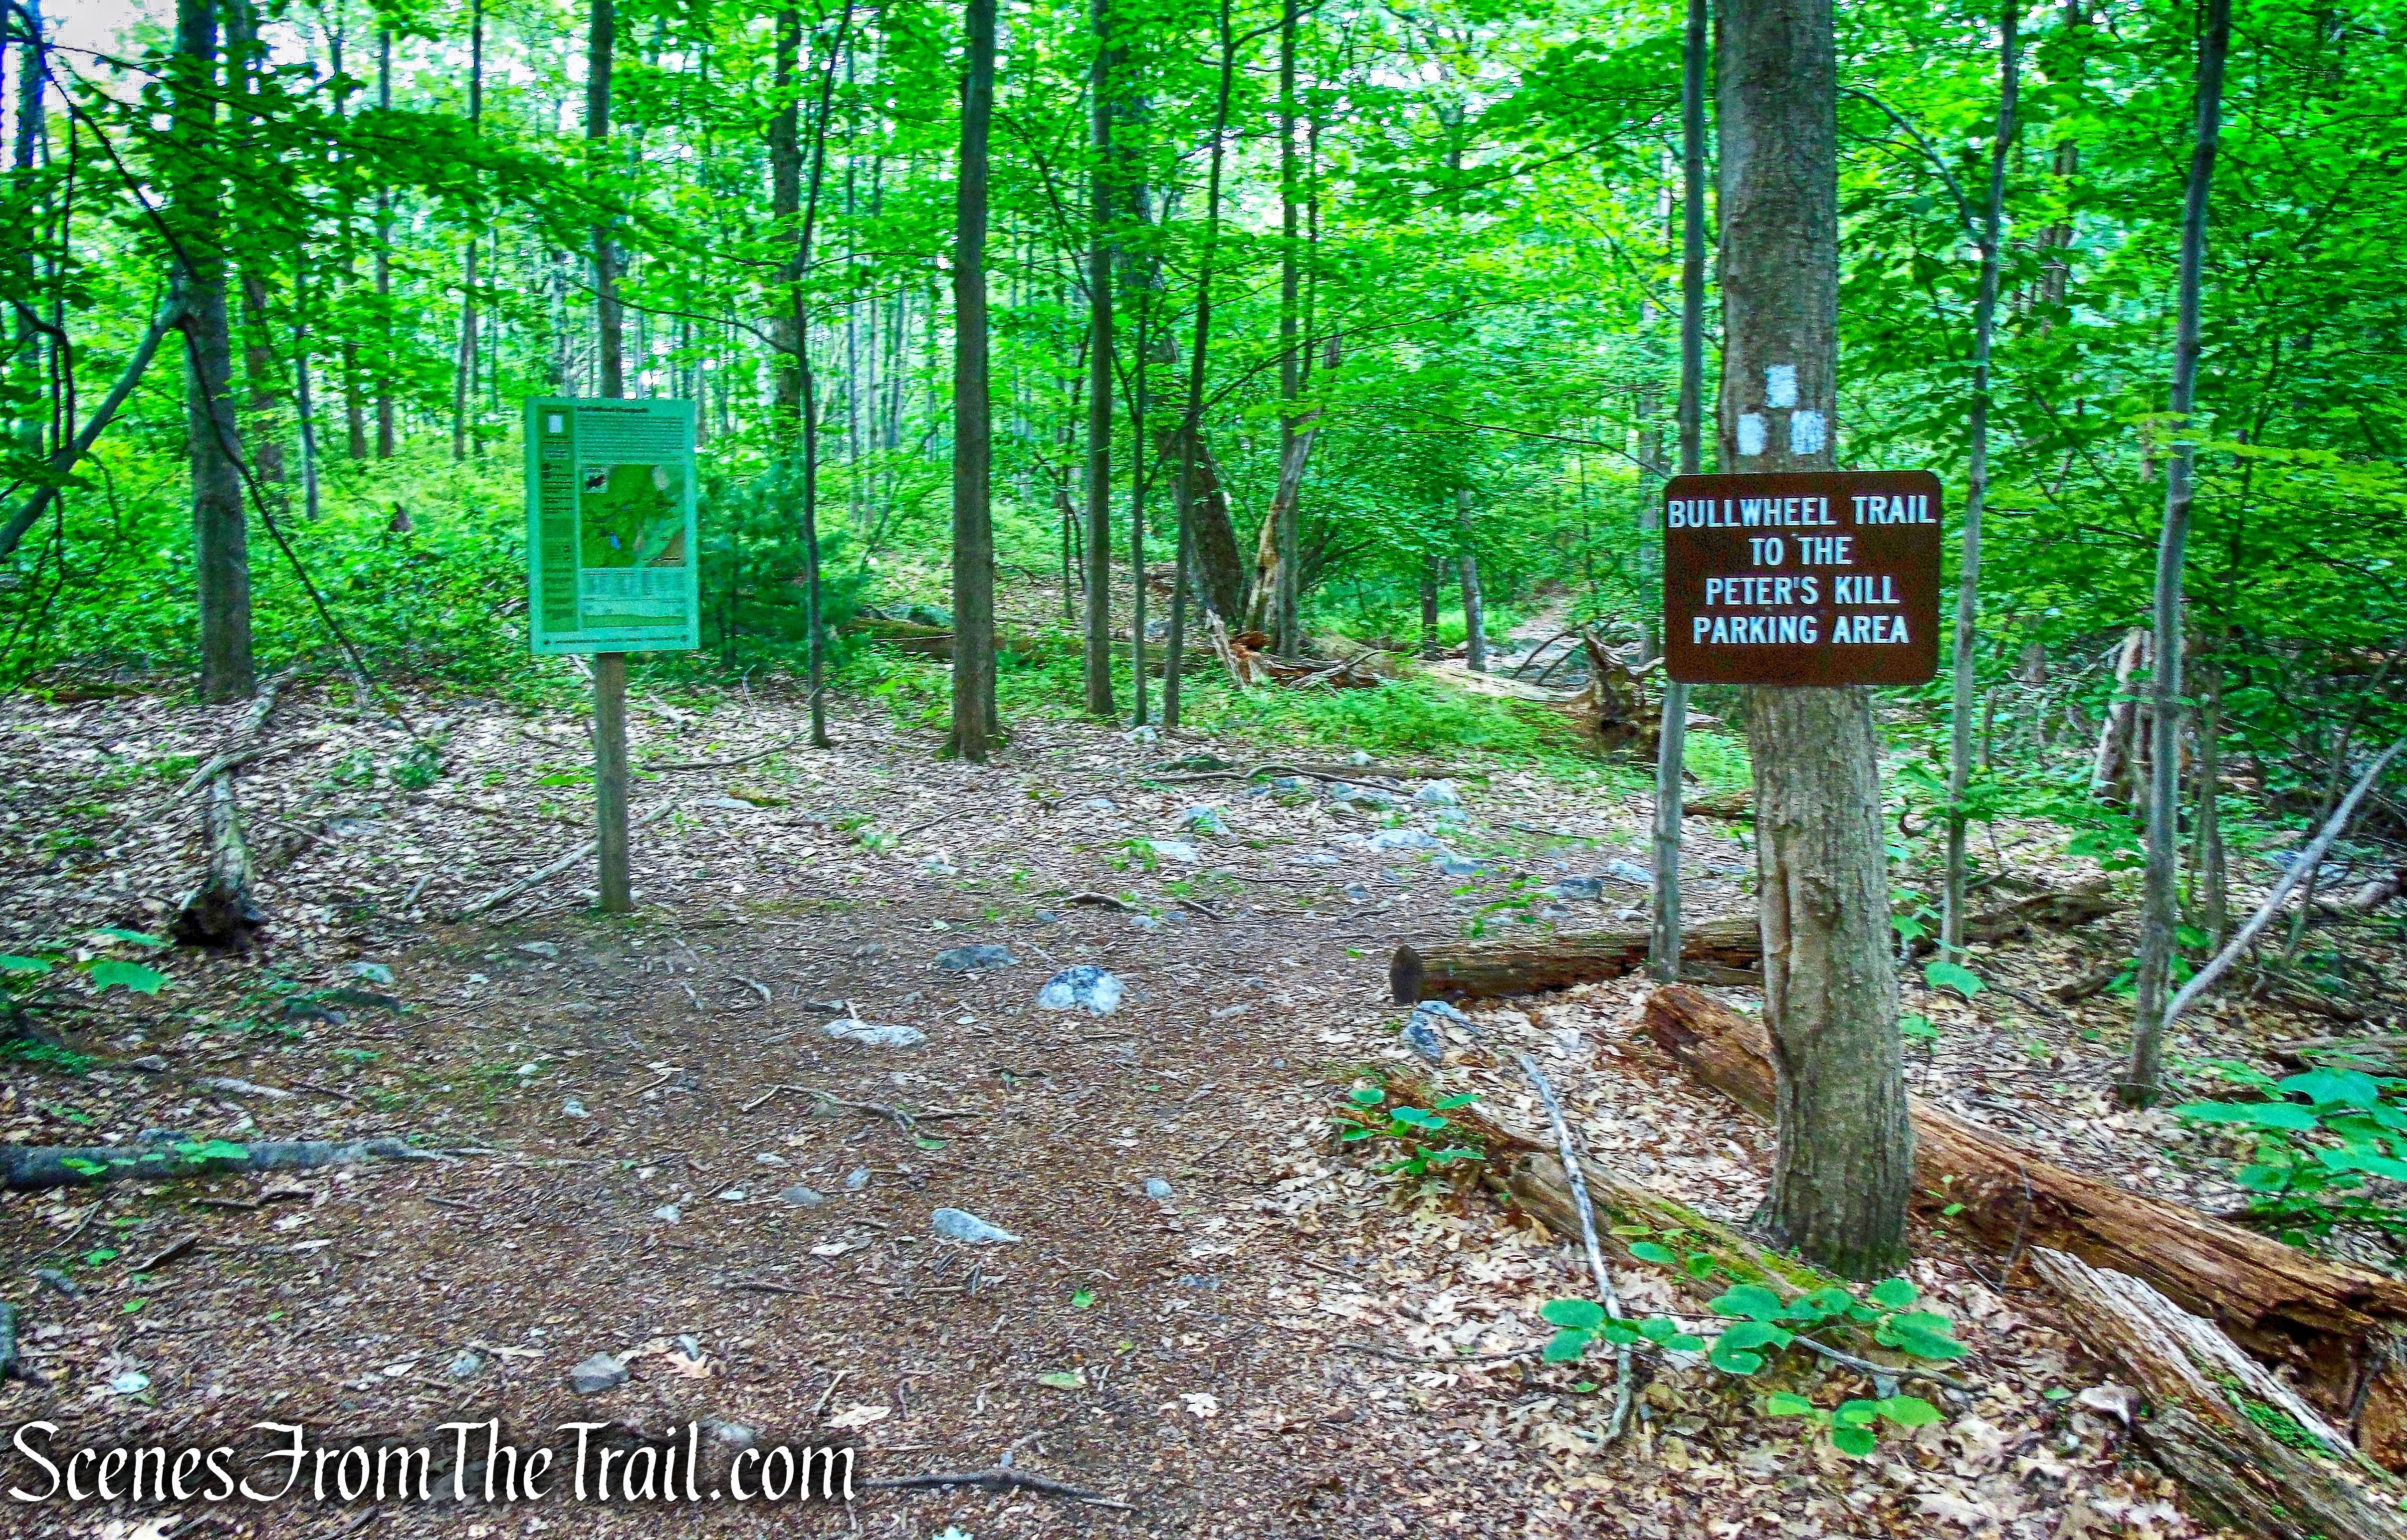
The Peter’s Kill parking lot is used by visitors accessing the Peter’s Kill climbing area, by hikers heading for the Peter’s Kill Creek and High Peter’s Kill Trail and by visitors wishing to talk with staff.
Peter’s Kill Area – Minnewaska State Park Preserve
The Shawangunks (or “Gunks,” as they are more popularly called) have long been acclaimed as a rock climber’s paradise, but they could equally as well be celebrated for their waterfalls. Waterfalls of significant height are important viewpoints within the Preserve. These include: Stony Kill Falls on the Stony Kill near the Preserve’s northern edge. Rainbow Falls, Awosting Falls, Peter’s Kill Falls, and Sheldon Falls can be found along the Peter’s Kill. There is an unnamed falls which is located near the Sanders Kill in the northeastern corner of the Preserve. Verkeerder Kill Falls lies immediately adjacent to the southern edge of the Preserve along the Verkeerder Kill Falls Trail, in the Sam’s Point Area. A smaller secondary waterfall, situated along the Sanders Kill, just south of Routes 44/55, is visible from vehicles traveling west along that route. These falls are scenic features, characteristic of the Preserve.
Awosting Falls
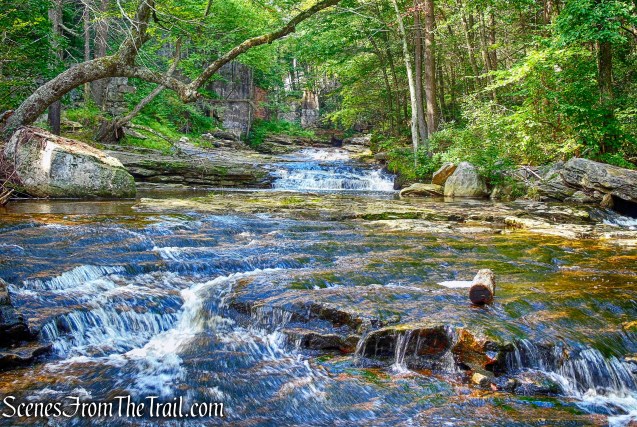
Streams flowing within the Preserve form another example of small and intimate visual resources to be experienced. The Peter’s Kill flows northeast, approximately 9 miles from Lake Awosting into Rondout Creek in Alligerville, NY.
Peter’s Kill
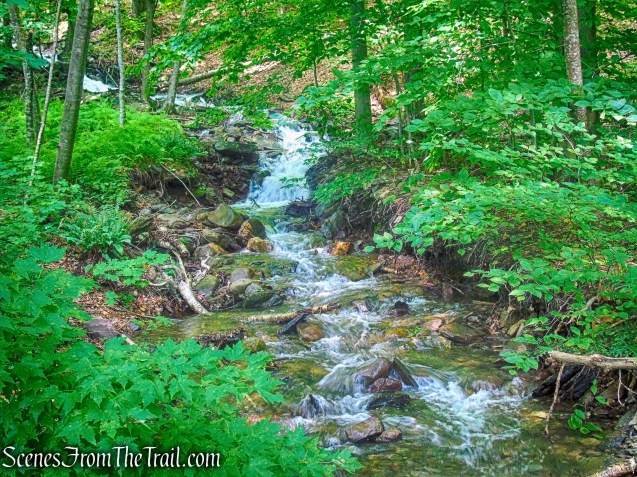
Along the way, there are a series of picturesque cascades and waterfalls that flow within a relatively narrow channel.
Peter’s Kill
With all the recent rain, waterfalls that are normally a trickle in August, are flowing quite nicely this year. The previous week, we visited Stony Kill Falls and intended to do this hike right afterwards. It had rained throughout the previous night and the rocks were quite slick and hazardous to walk on. Fast forward one week and we were back to give it a another shot. The objective of this hike was to walk down to the Peter’s Kill and then follow it upstream and see the beautiful cascades and waterfalls. There are no formal trails in this area, so this hike entails bushwacking, walking on the rock slabs along the bank and several water crossings. The level of difficulty is determined by the volume of water flowing through the Peter’s Kill.
I have seen descriptions of similar hikes that have been done in the opposite direction, but I think it is a much better hike walking upstream. First off, you get to see the falls/cascades as you approach instead of constantly turning around to look back at them, Also, it is easier to assess your route around the falls and/or uphill from below. We did this hike counterclockwise from the Peter’s Kill Area.
Chasing Waterfalls Along the Peter’s Kill
A new feature that I have added is the Google Earth Fly-Through. It follows the path that we hiked and it gives you a good idea of the terrain, layout, amount of parking etc. Check it out, it’s pretty cool.
View the Google Earth Fly-Through video of the hike below.
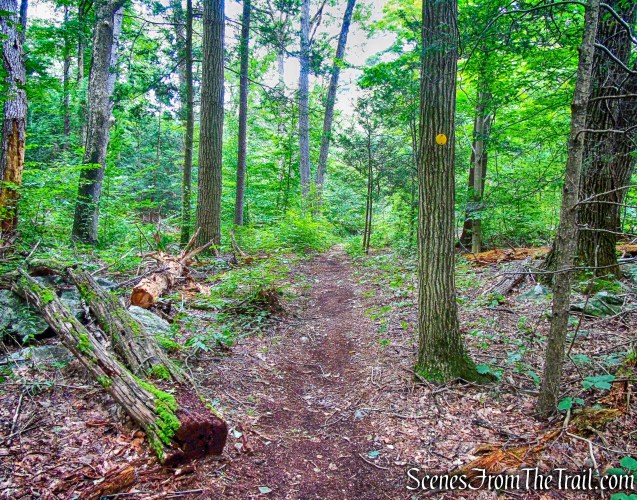
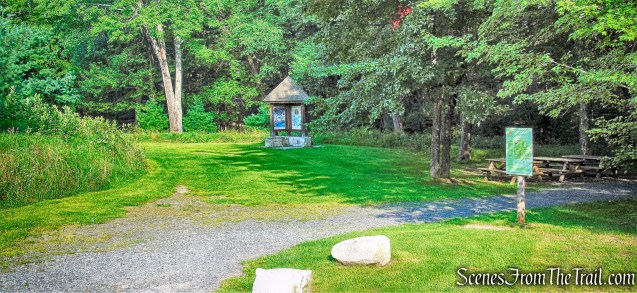
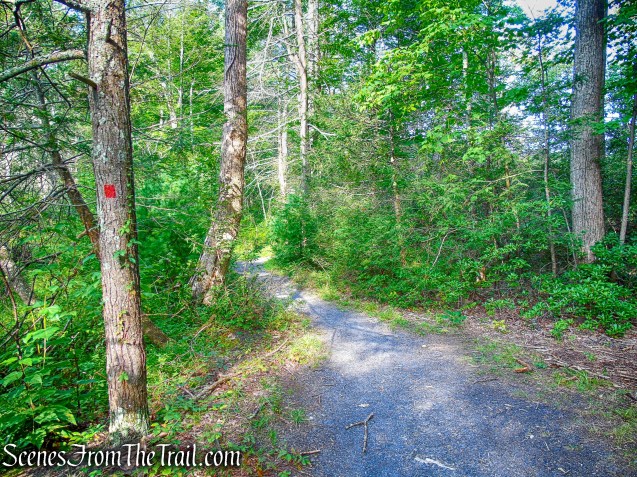
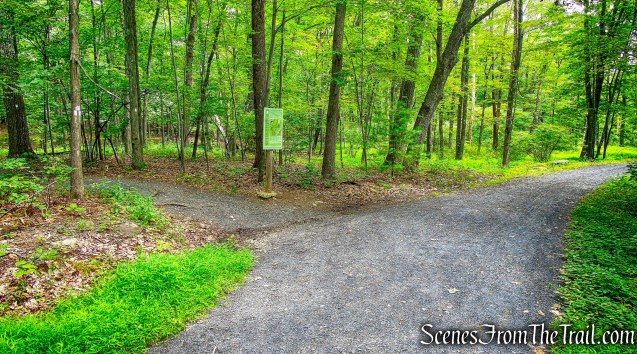
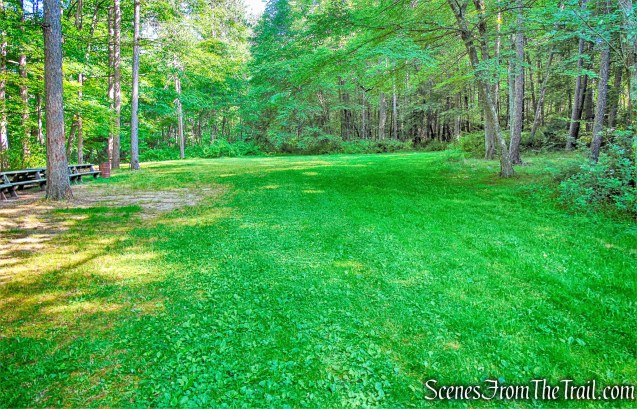
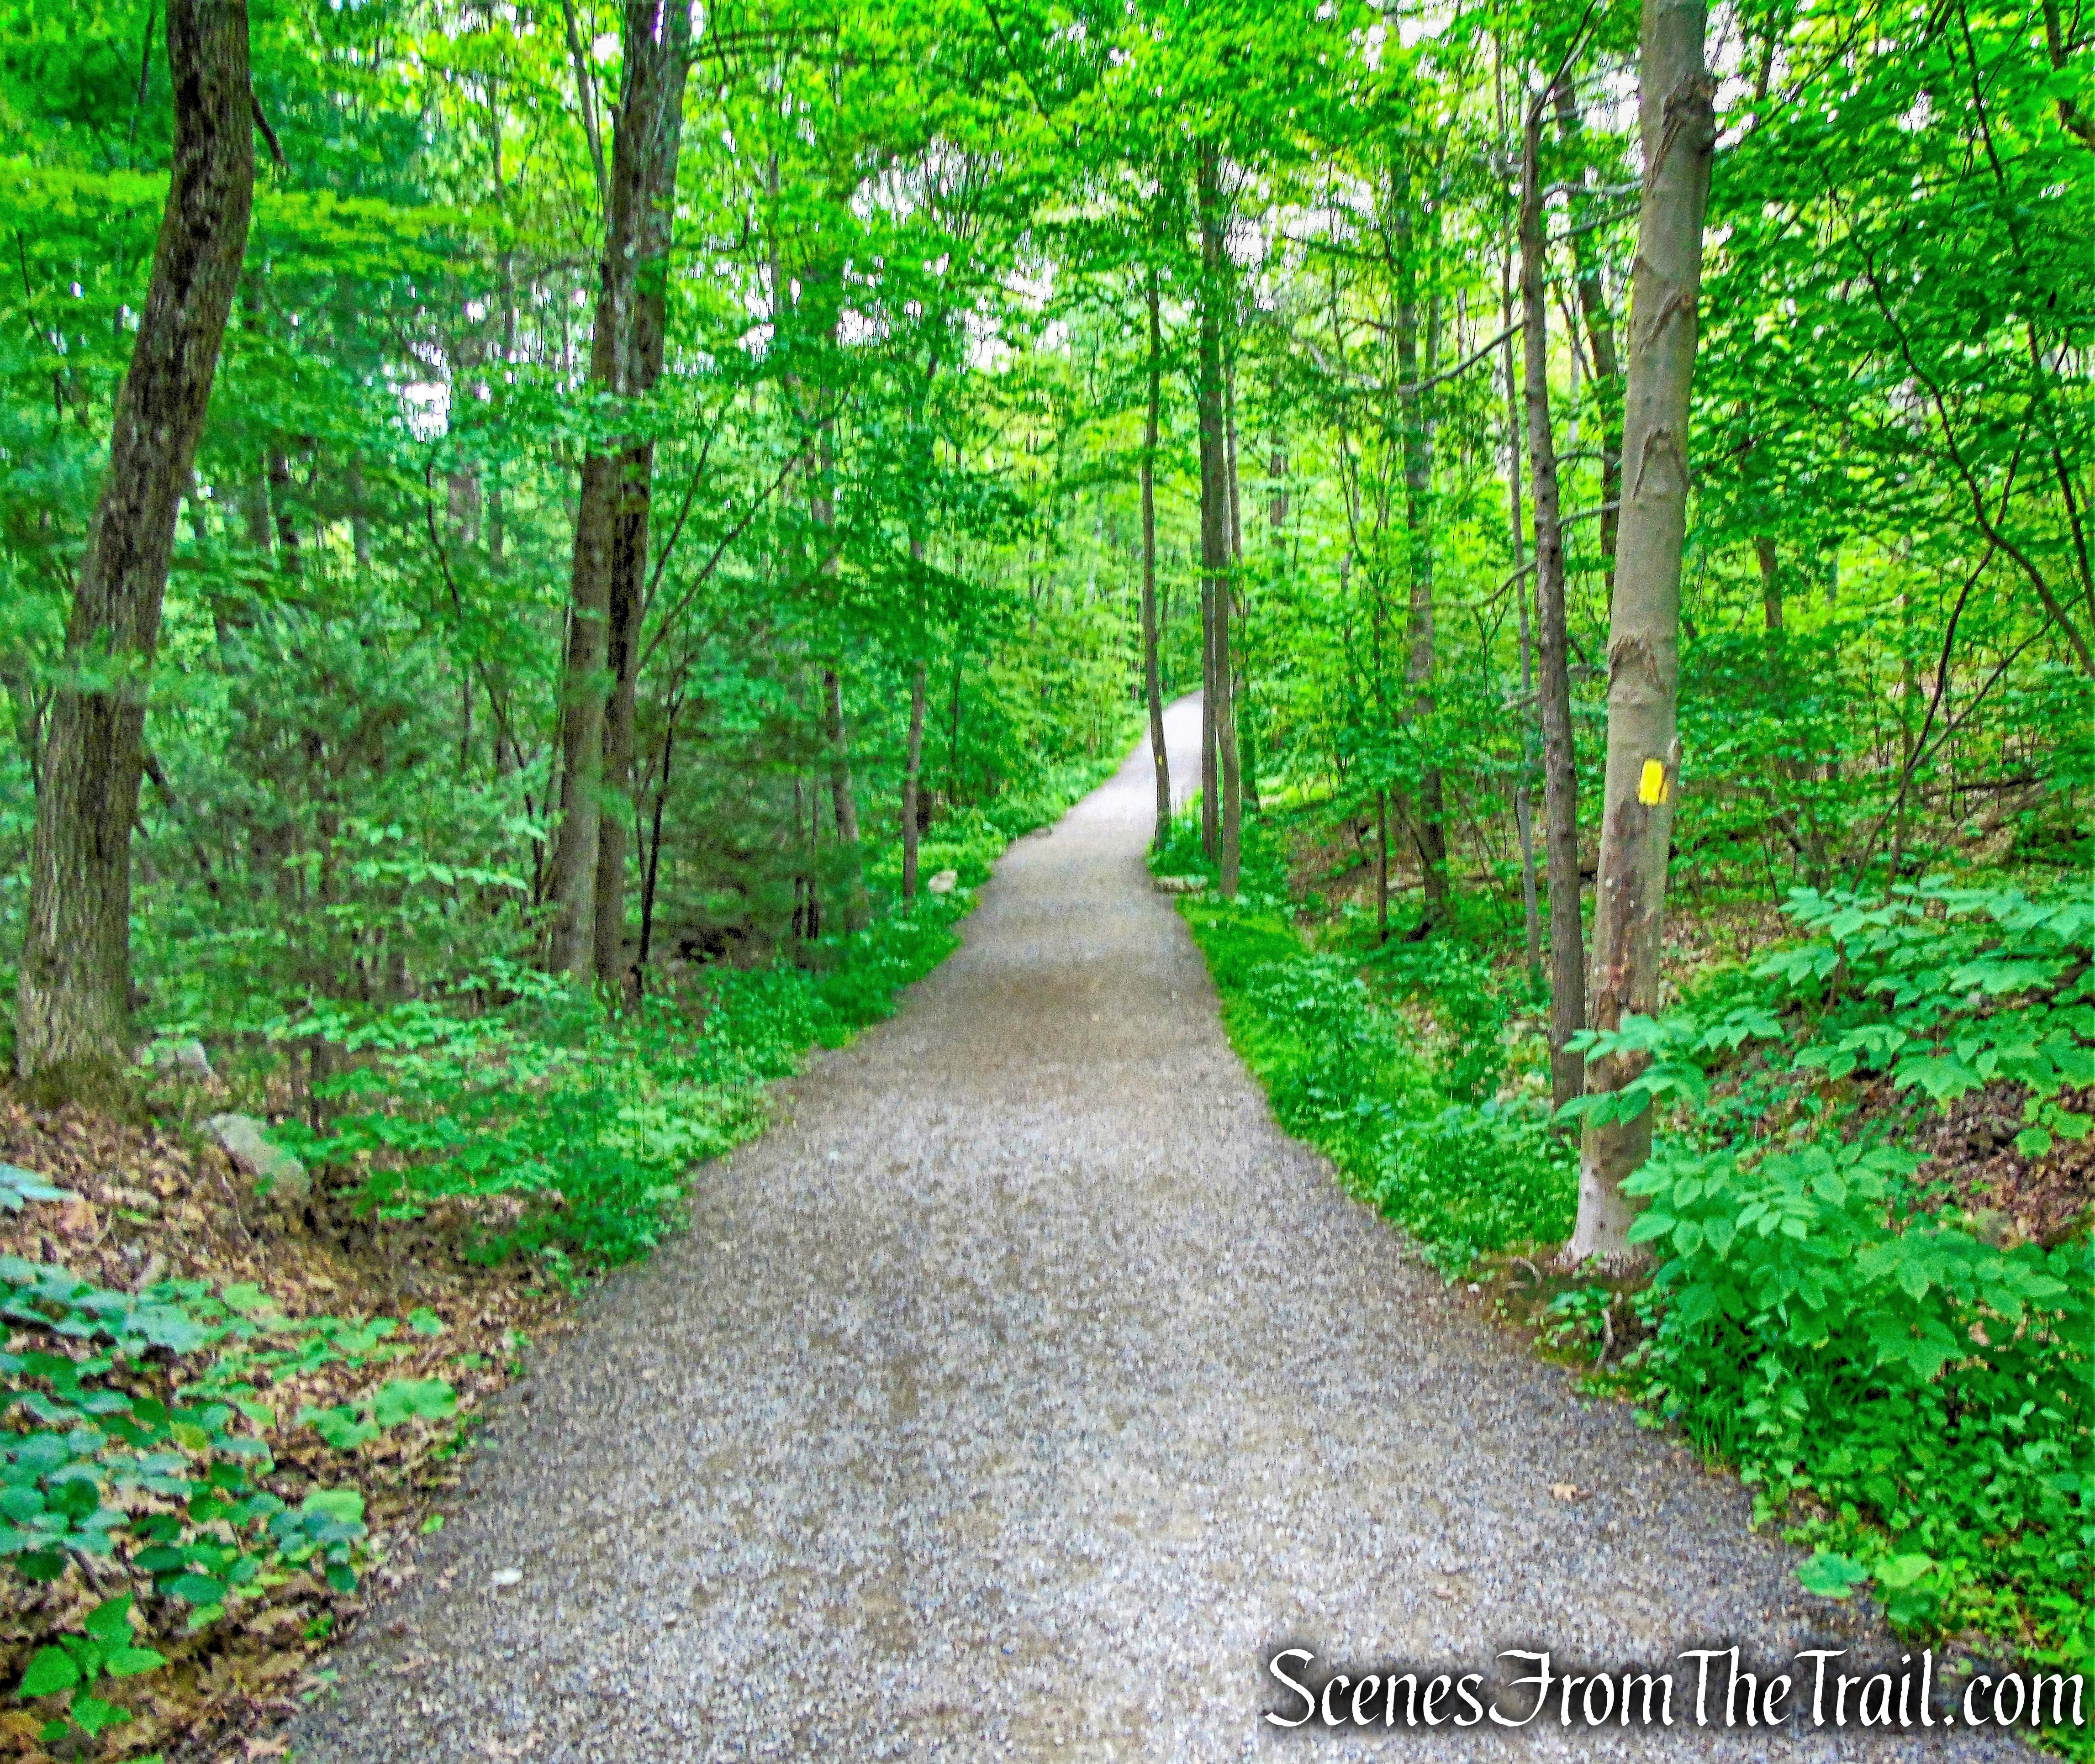
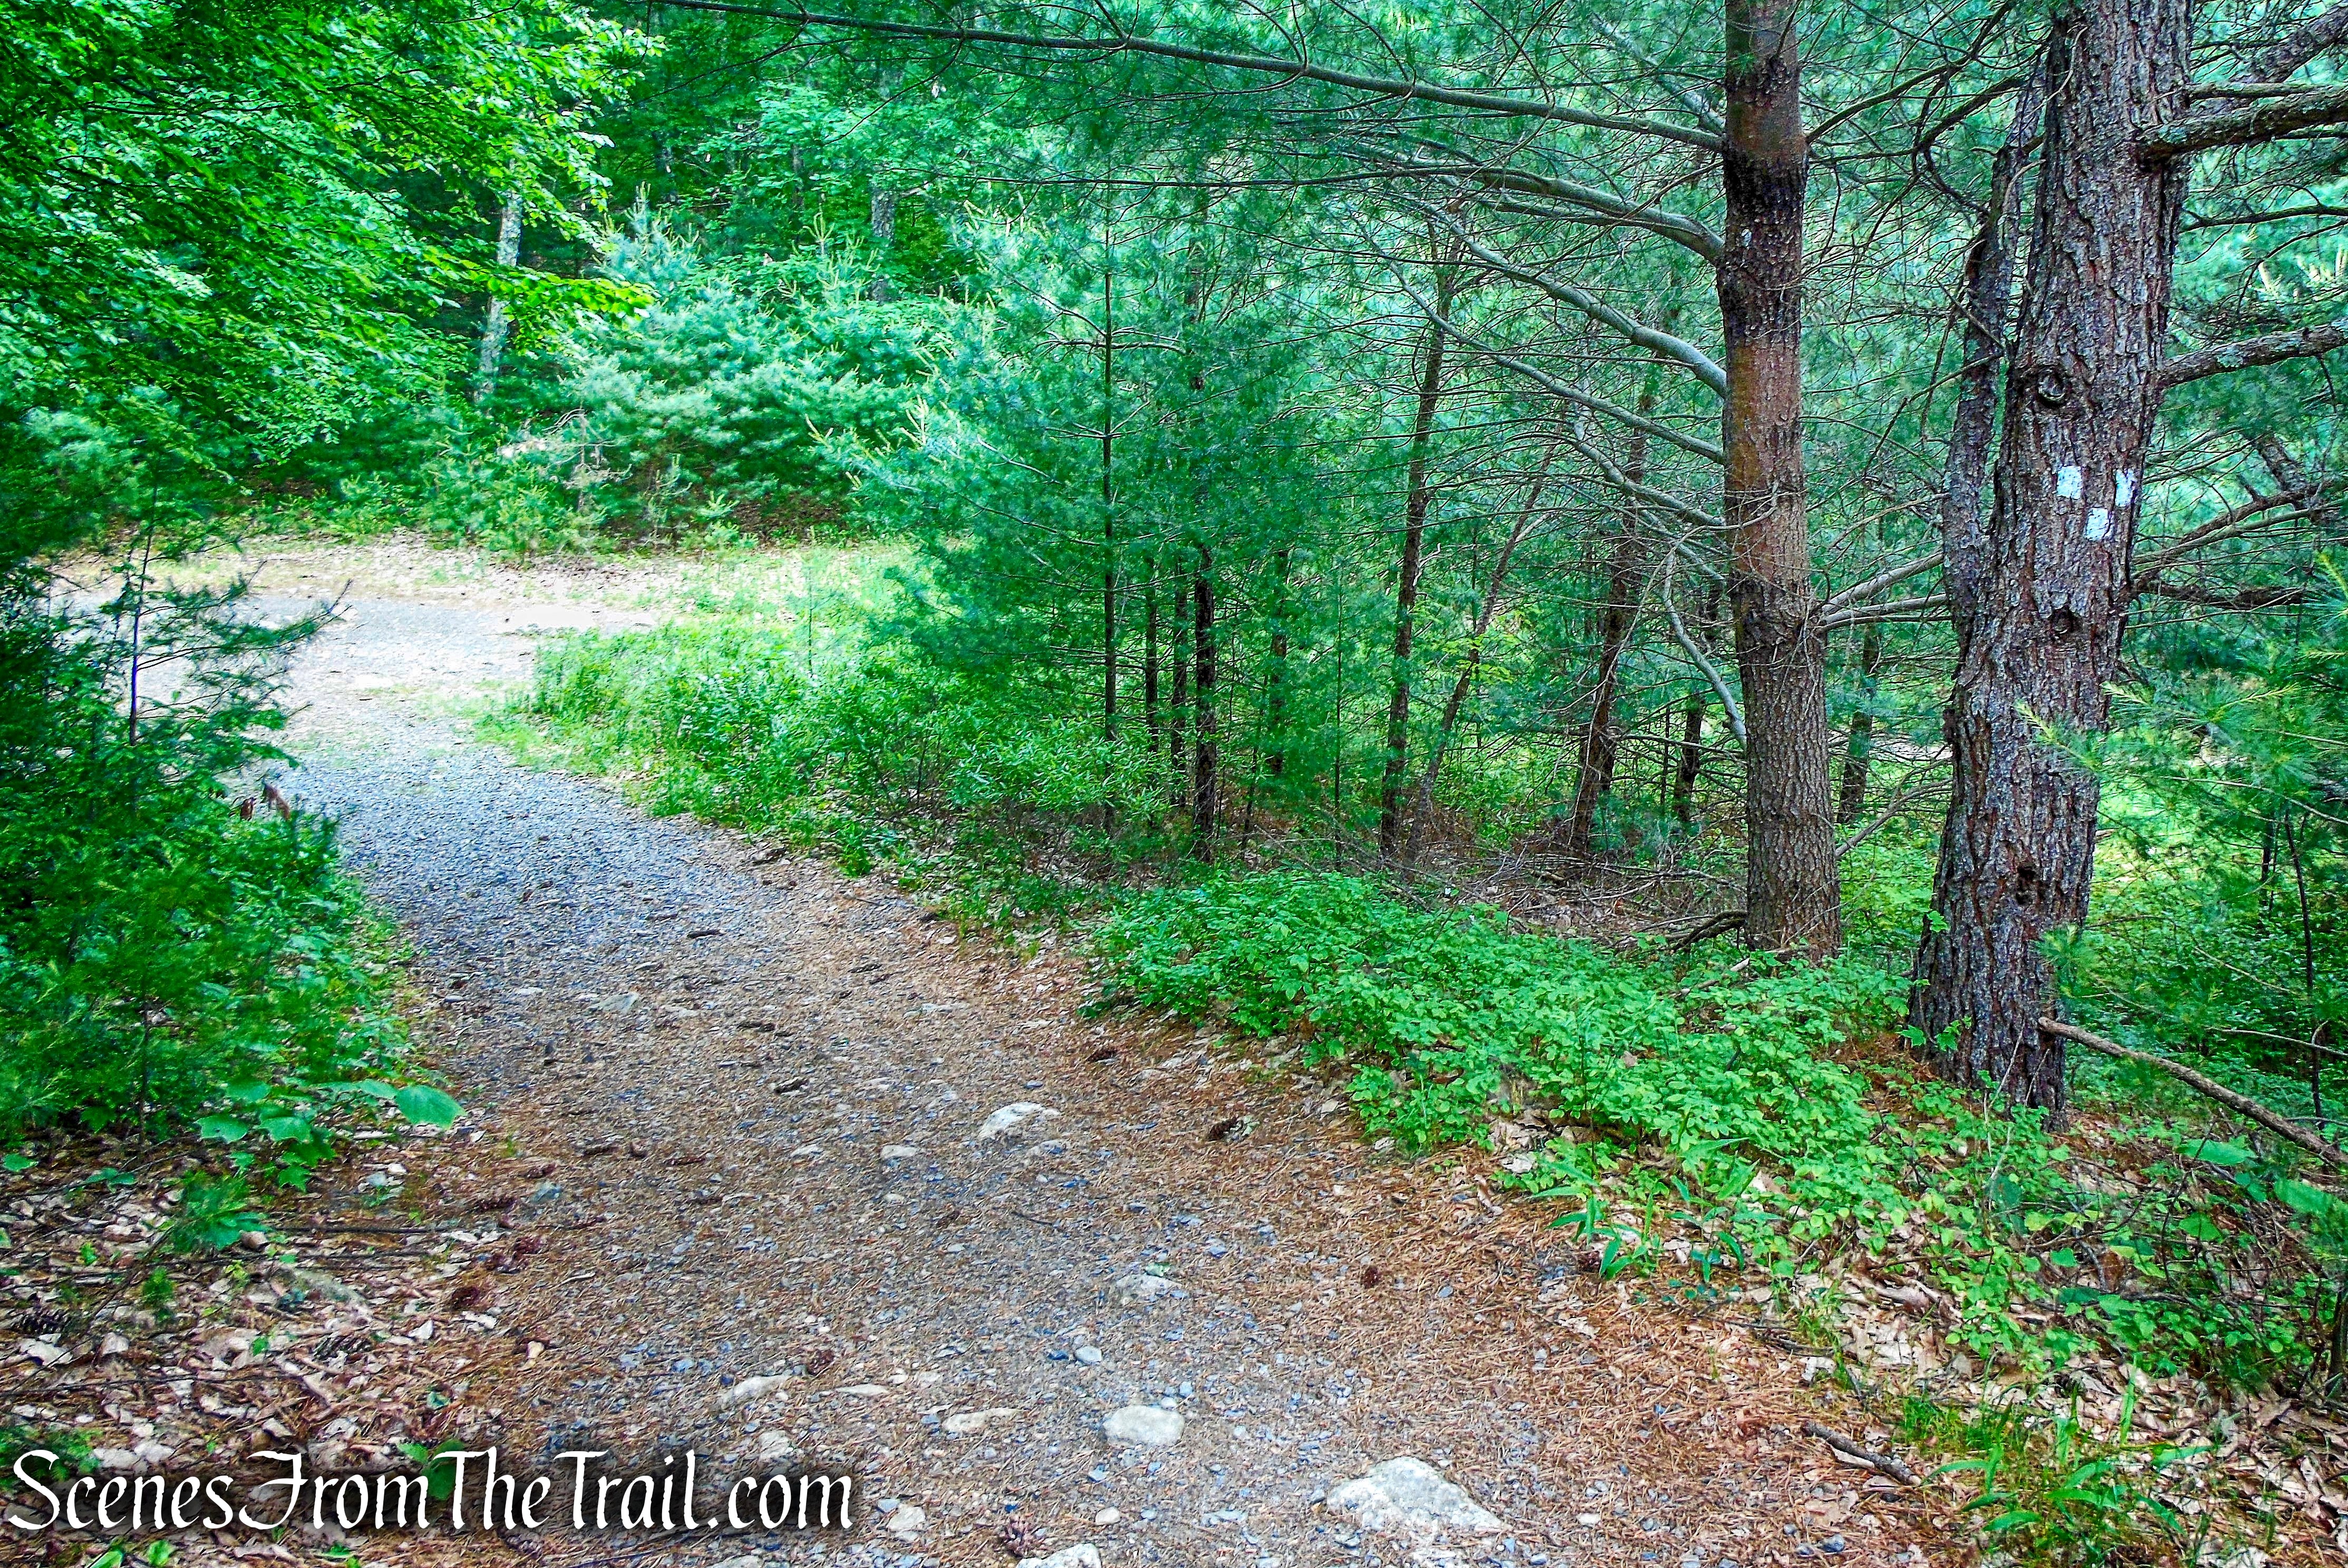
We began the hike on the red-blazed Red Loop Footpath, which begins at the western end of the lower parking area. The Red Loop Footpath, as its name implies, is a loop and one can either go to the right or to the left, and will end up right back here by following the red blazes. We went to the left of the kiosk, following a mowed path through a grassy area.
Red Loop Footpath
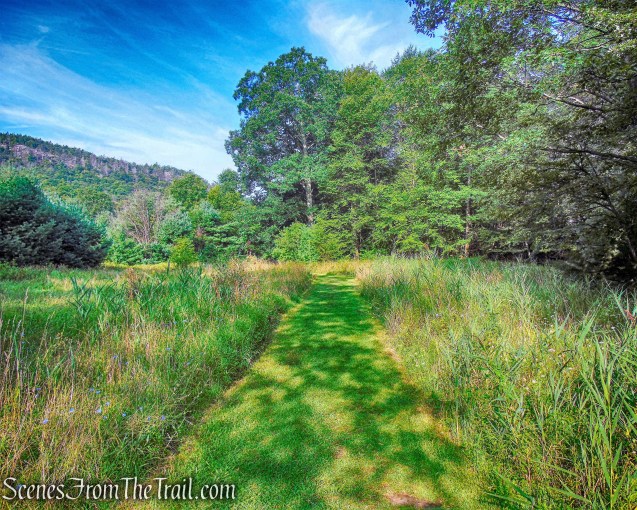
The trail heads west through a field, with the cliffs of Beacon Hill visible to the left. There are no trail markers through the field, but the path is obvious.
Red Loop Footpath
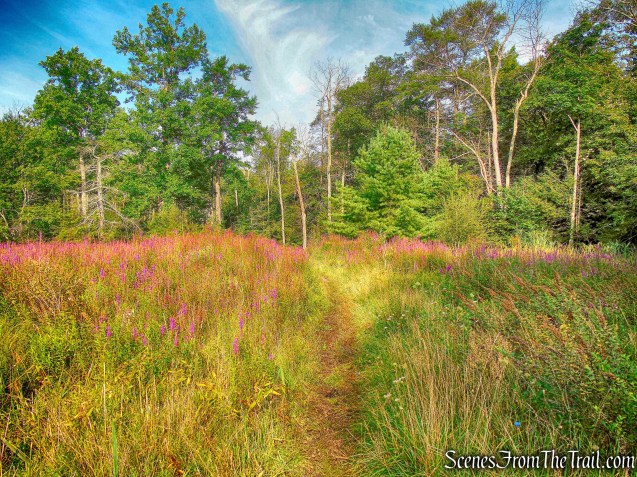
The trail descends gradually through a field of Purple loosestrife.
Red Loop Footpath
The trail then enters the woods and where we spotted the first red blaze.
Red Loop Footpath
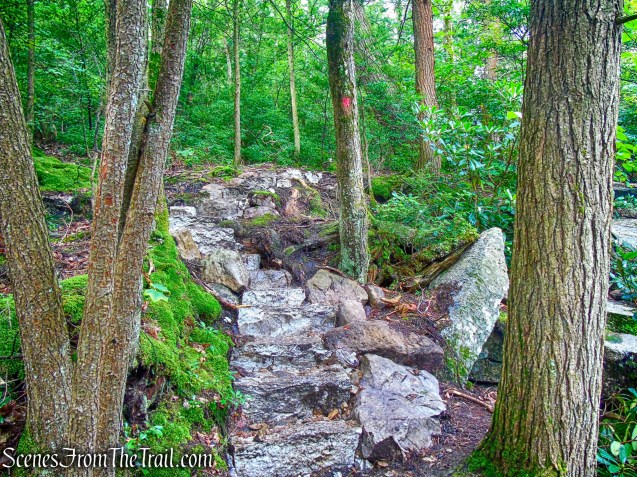
The trail continues descending through the woods and turns right at a large rock outcrop, briefly levels off, then switchbacks down the hill. At the base of the descent, the Red Loop Footpath reaches the Peter’s Kill and turns right. Here we left the red-blazed trail and proceeded straight a few feet, to the Peter’s Kill.
leave the Red Loop Footpath and turn left onto the Peter’s Kill
Now walking on the slanted rock slabs of the Peter’s Kill, we began heading upstream.
Peter’s Kill
There is a faint footpath that we followed briefly along the shore, then came out again on the rock slabs. At this point the Peter’s Kill curves to the north (right). To the left of the stream, the hillside is quite steep, so we decided to cross in this area. The Peter’s Kill is not very deep, but you will get wet if you are not careful. Hiking poles come in very handy for water crossings.
Peter’s Kill
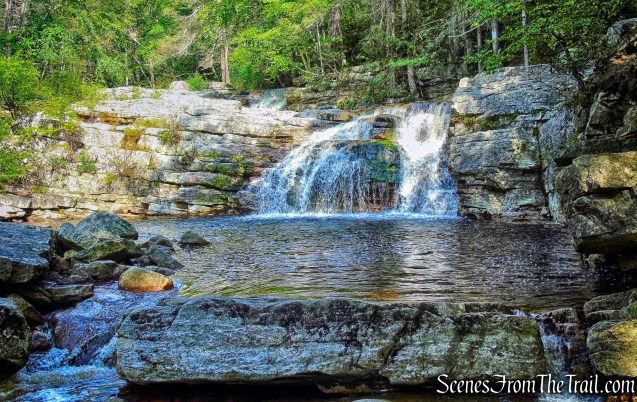
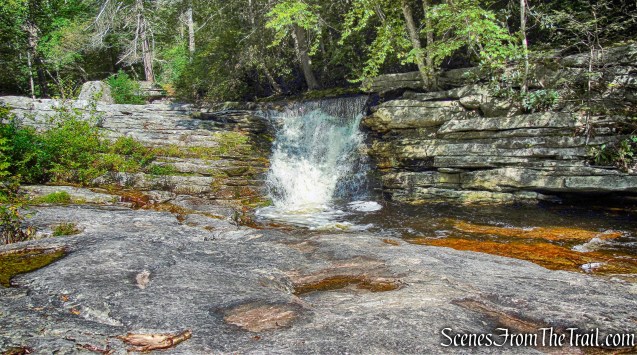
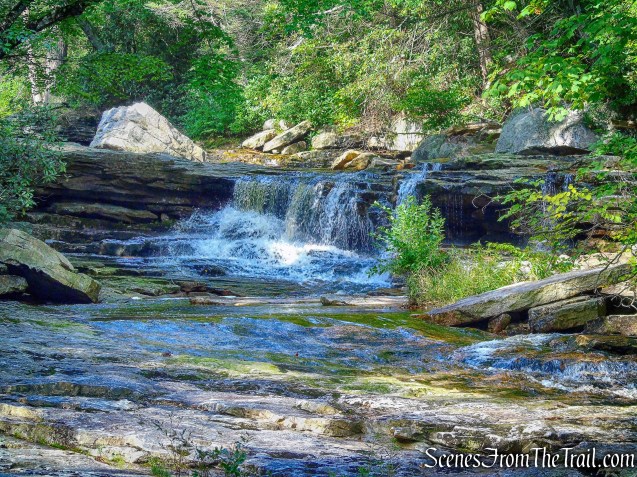
After crossing over to the right side of the stream, we continued upstream, a short distance to Saw Mill Falls. Saw Mill Falls is a cascade over cascade type of falls and measures about 18 feet. This is a swimming hole that gets a little crowded on hot days, but we were out early and there was not a soul in sight.
Saw Mill Falls
We recrossed the stream here, which was a little more difficult due to the water level and rocks being spaced farther apart, but we managed just fine.
Crossing the Peter’s Kill in front of Saw Mill Falls
Once on the other side, another angle of Saw Mill Falls.
Saw Mill Falls
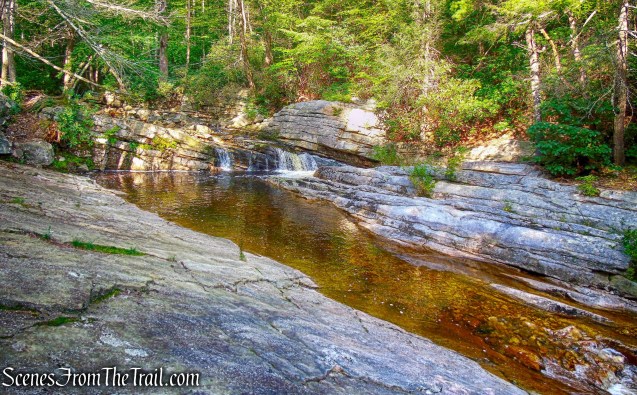
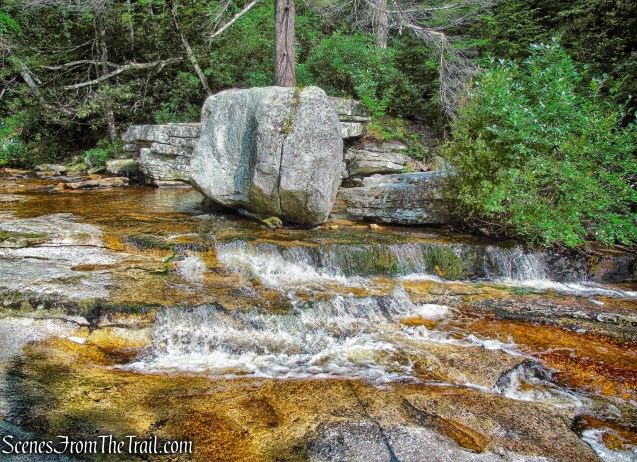
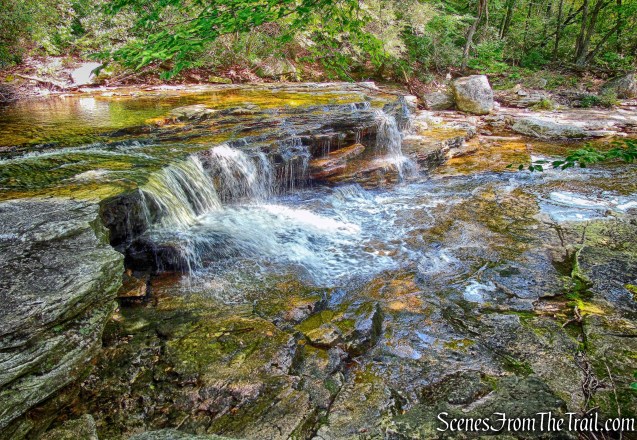
Now walking along the left side of the Peter’s Kill, we came to the upper cascade of Saw Mill Falls.
Upper Saw Mill Falls
We stopped here briefly to enjoy the beauty of our surroundings.
Upper Saw Mill Falls
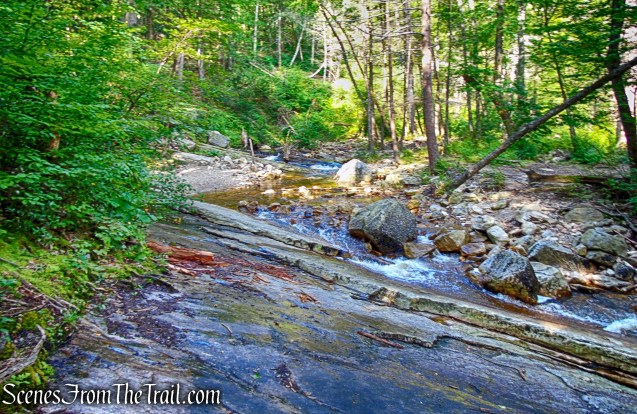
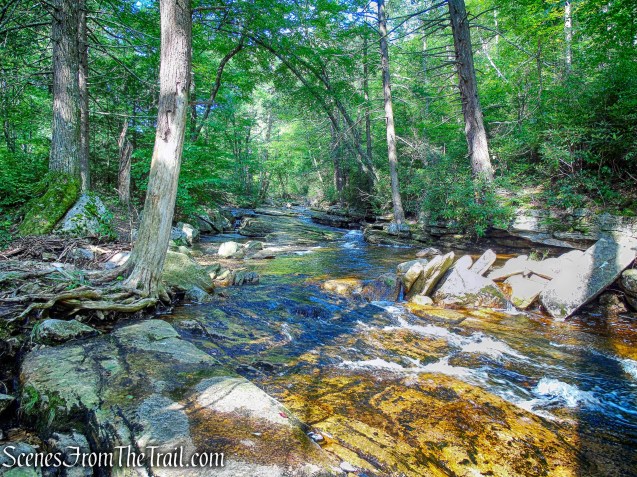
The entire route upstream is very scenic and secluded. Some road noise could be heard from nearby 44/55 at times, but the sound of the water mostly blocked it out.
Peter’s Kill
The water level on this day was just perfect, allowing us to walk on the smooth rock slabs for most of the way.
Peter’s Kill
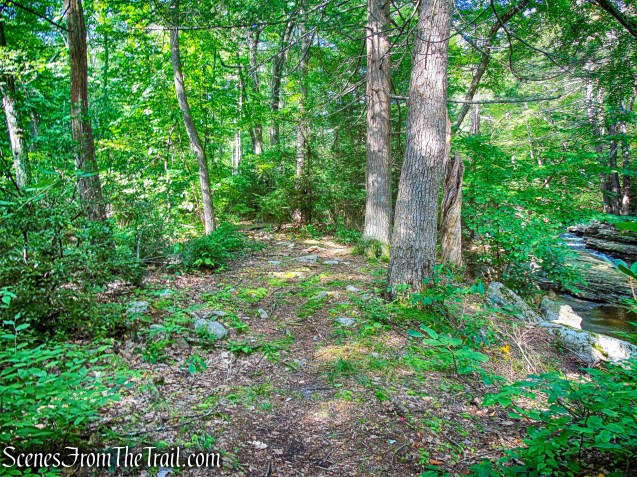
At times when the water was higher, we found footpaths which we followed alongside the Peter’s Kill. There are footpaths that go in different directions, but we made sure to stay close to the water.
footpath along the Peter’s Kill
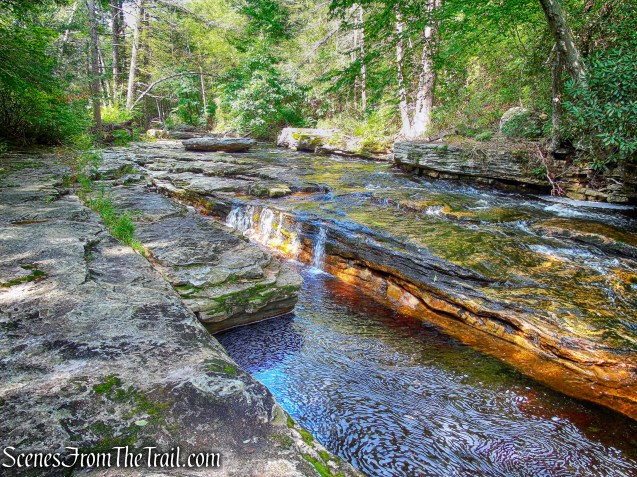
The Peter’s Kill weaves a rugged path down to Rondout Creek. Along that path, it has carved its way down to bedrock in many places, leaving the stream flowing over smooth rock slabs and a series of lovely cascades and waterfalls.
Peter’s Kill
Same cascade, different angle.
Peter’s Kill
While making our way upstream, I couldn’t help but wonder why there is no formal trail through this area.
Peter’s Kill
I came across this while doing a little research: The Red Loop Trail in the Peter’s Kill area was approved for a reroute in 2006. This trail provides a connection between the Peter’s Kill parking lot and the Peter’s Kill. Due southwest of the Red Loop Trail, there is an historic Power House and two waterfalls along the stream, the Peter’s Kill Falls and Sheldon Falls. Currently, there is no designated trail providing access to these historic and natural resources. Due to the location of the falls, this is a high use area and a myriad of social trails has therefore developed. The historic Power House provides a unique opportunity for interpretation and the falls represent some of the natural beauty that exists at Minnewaska State Park Preserve. The potential exists to develop a sustainable trail to provide a connection from the Peter’s Kill parking lot (via the Red Loop Trail) to the Power House and the two falls.
To be honest, I prefer that they just leave it the way it is.
Peter’s Kill
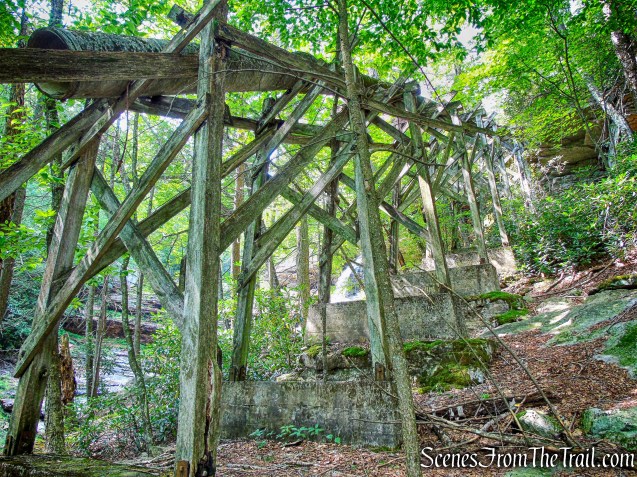
As we continued upstream, I could make out a large stone structure on the left.
Peter’s Kill
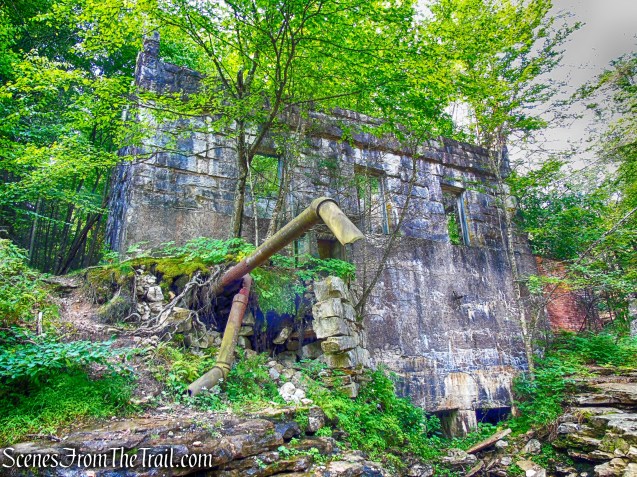
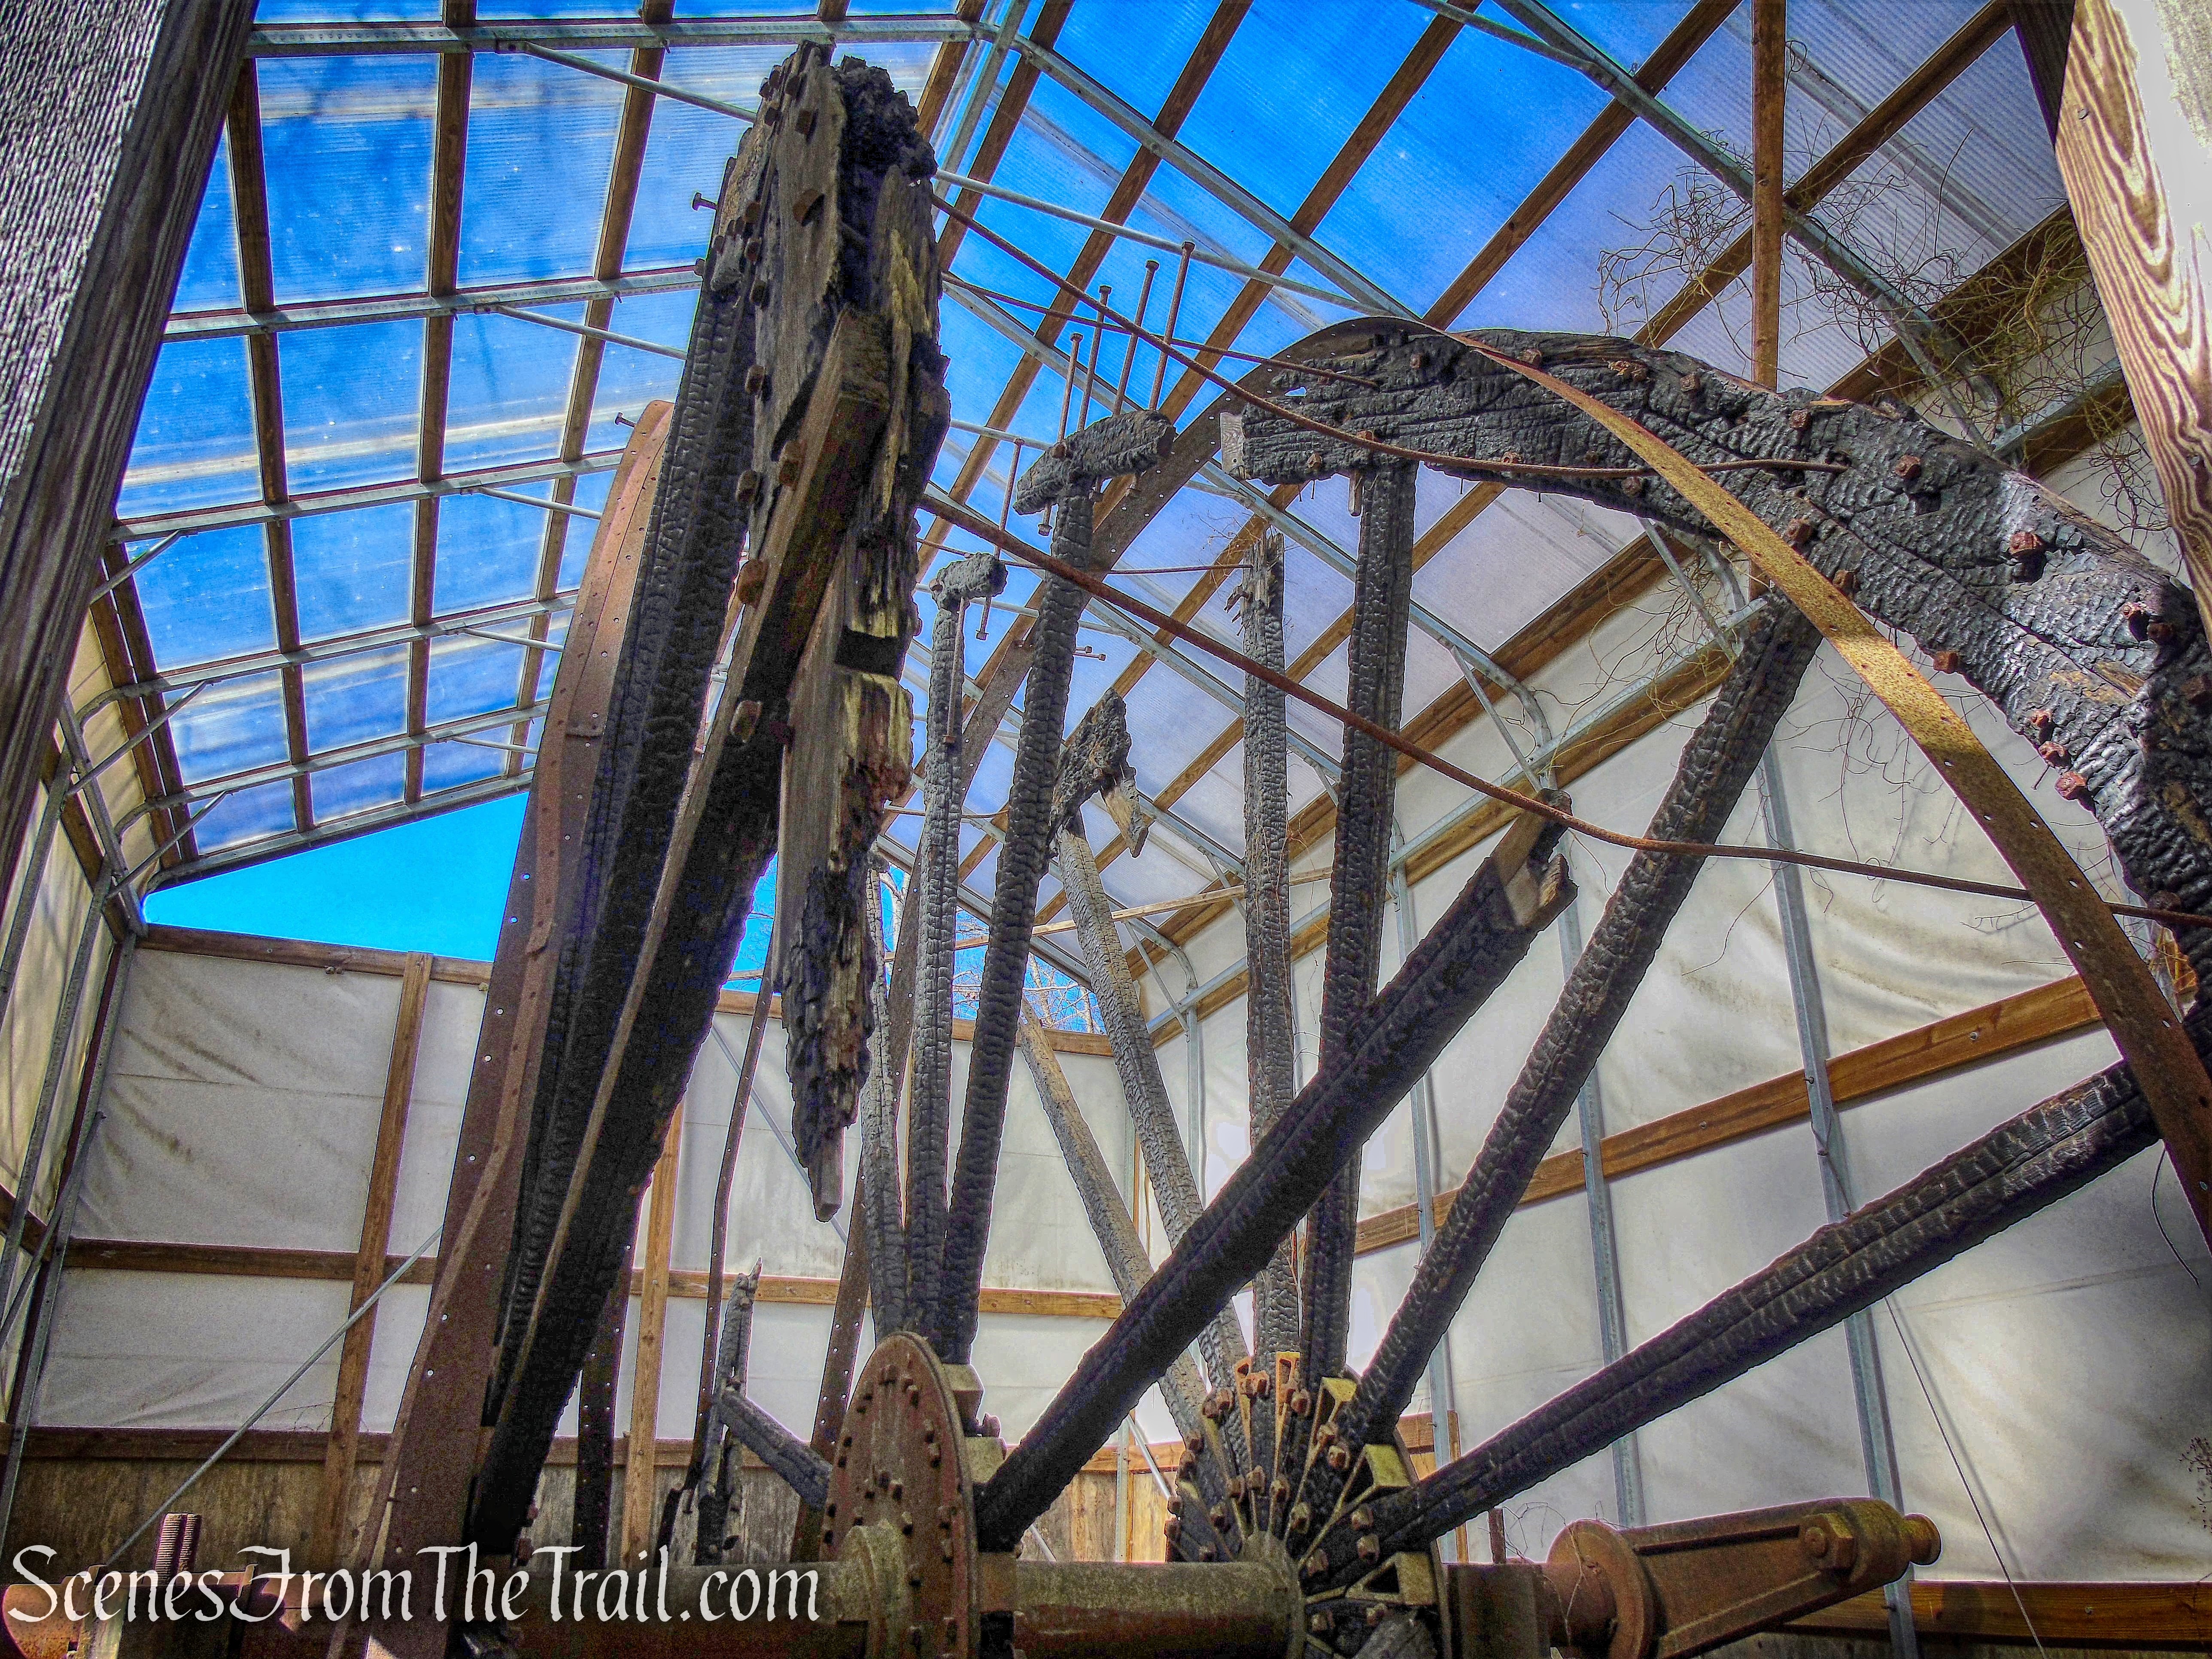
The historic resorts that were once located on Lake Minnewaska were served by a hydroelectric power house located on the Peter’s Kill.
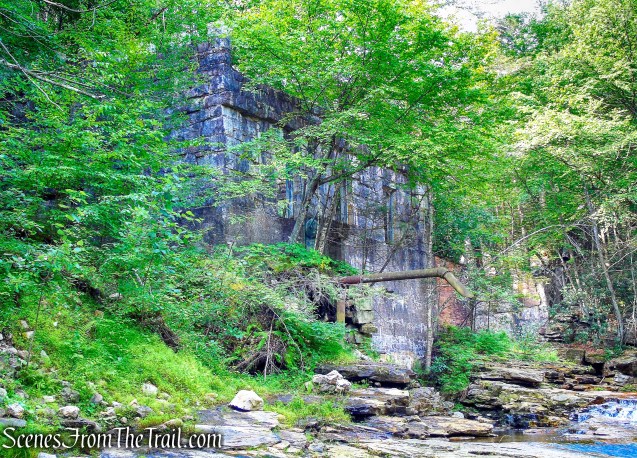
Hydroelectric Power House ruins on the Peter’s Kill
Construction was finished on the power house in 1921. It began operation on October 14th, 1922 and continued to provide hydroelectric power until the late 1960’s.
Hydroelectric Power House ruins on the Peter’s Kill
This power house was for generating electricity at both The Wildmere and The Cliff House, two big resort hotels on Lake Minnewaska.
Hydroelectric Power House ruins on the Peter’s Kill
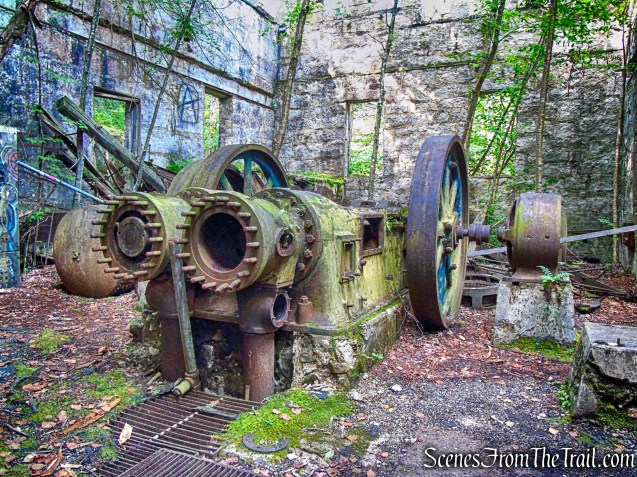
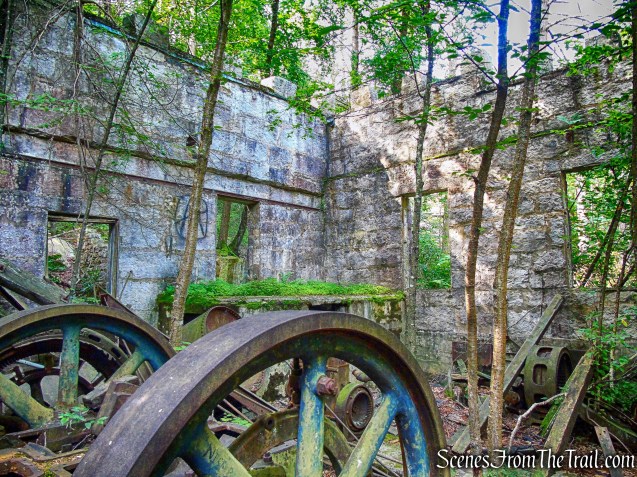
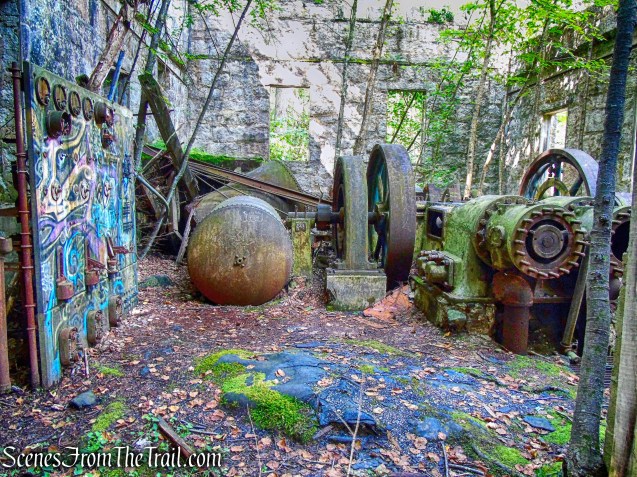
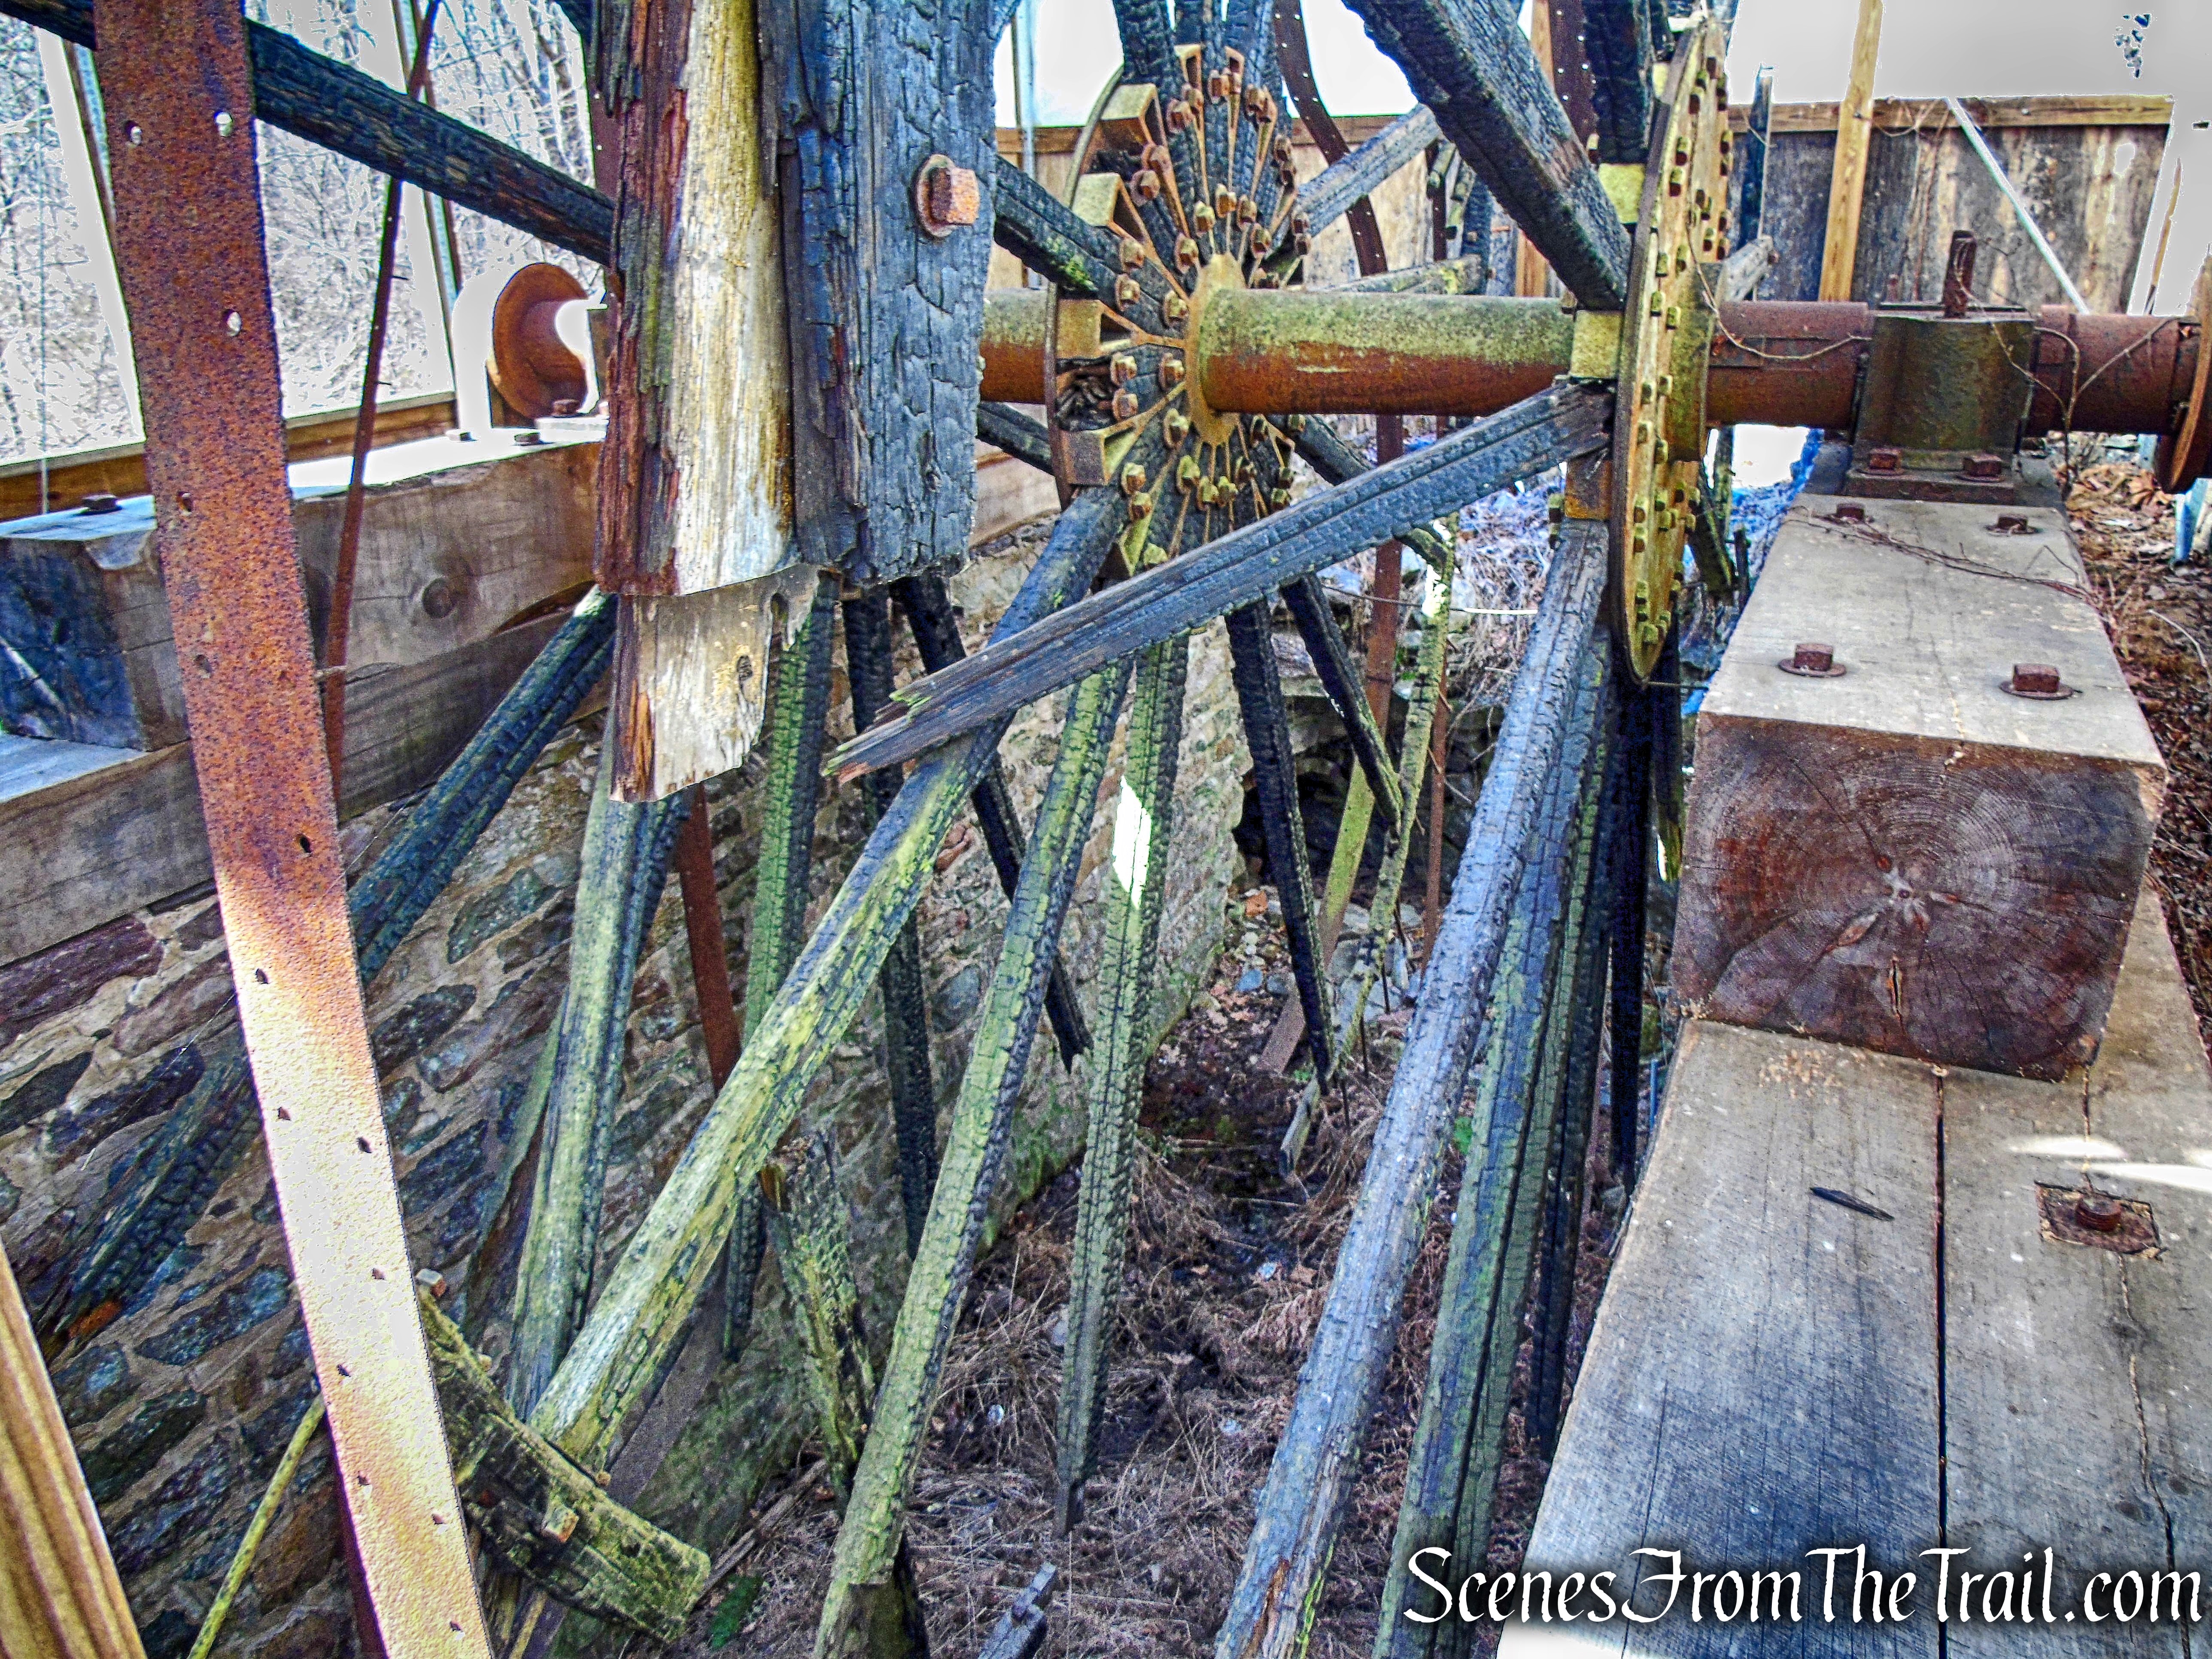
The power house is a stone structure that is not secured and is open to visitor exploration. The walls, entrance bridge and interior equipment are largely intact; the roof collapsed many years ago.
Hydroelectric Power House ruins on the Peter’s Kill
Water from the Peter’s Kill was diverted under this structure, which fed a large generator. When the Peter’s Kill didn’t have sufficient flow, an oil combustion engine was used to generate the electricity.
Hydroelectric Power House ruins on the Peter’s Kill
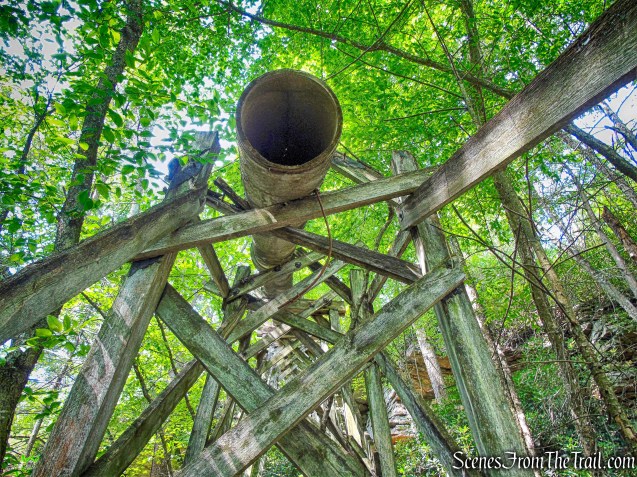
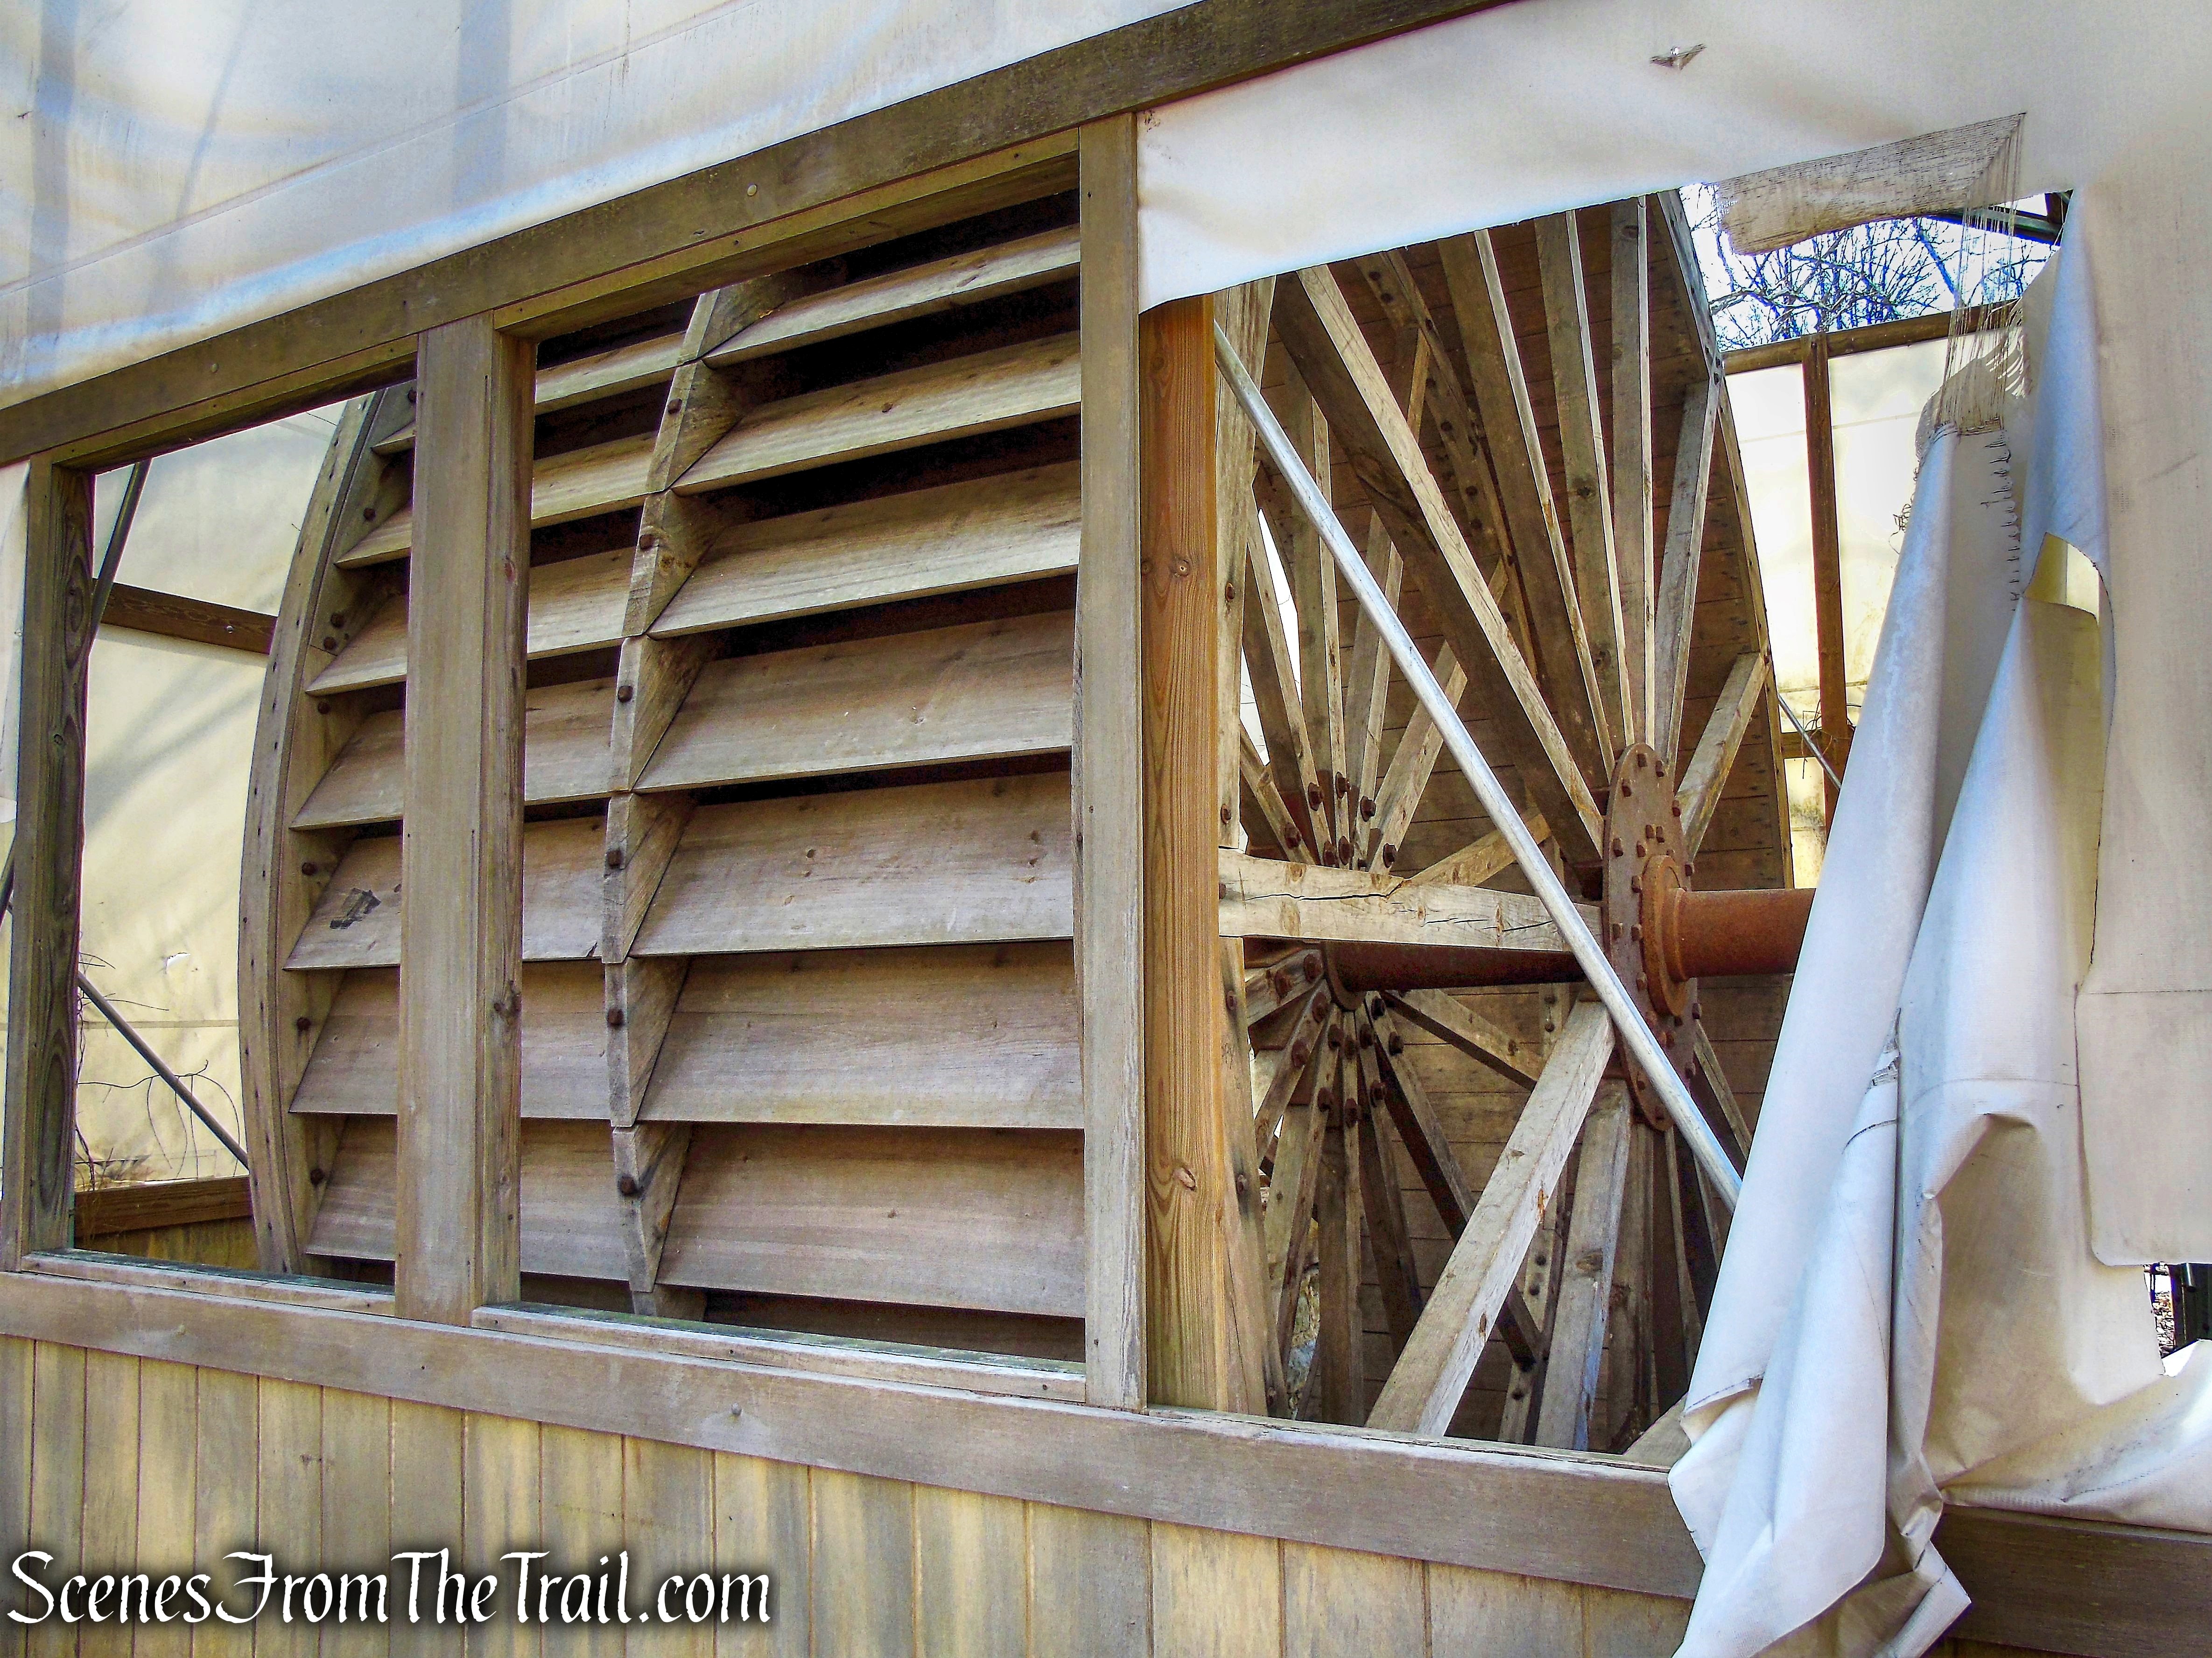
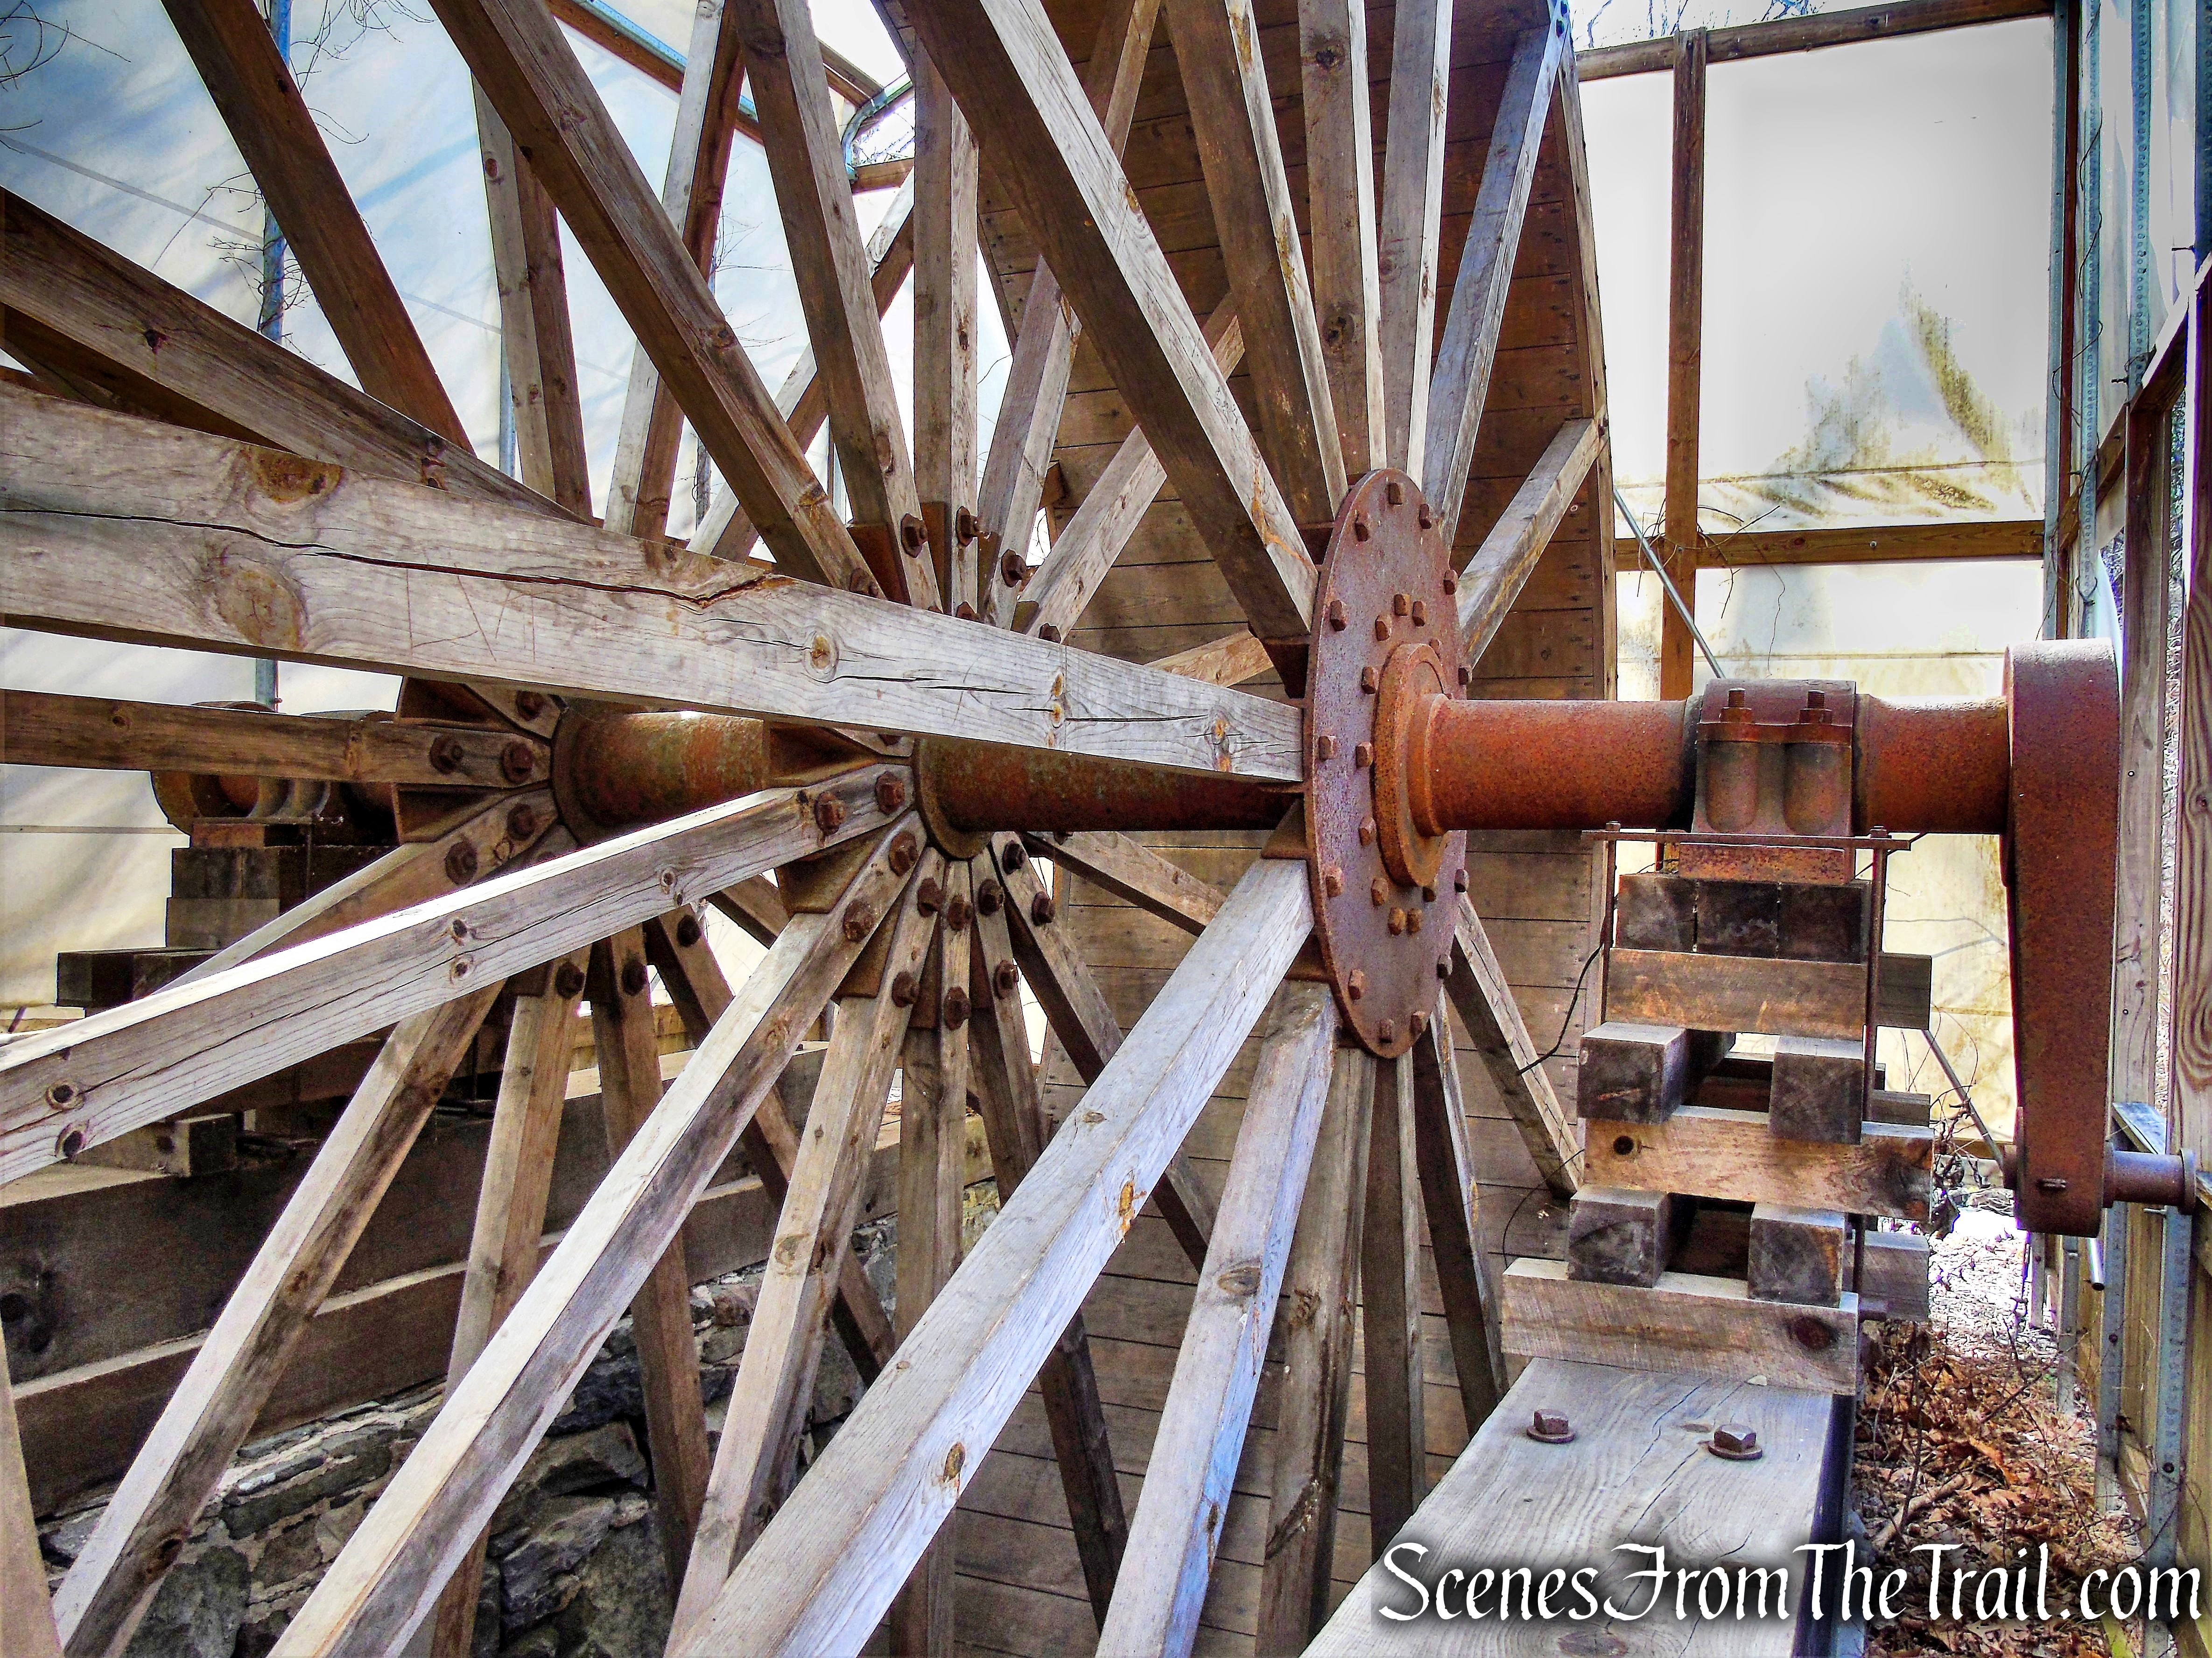
A wooden and metal sluiceway runs from a concrete dam at the top of the Peter’s Kill Falls to the power house.
sluiceway
The sluiceway is largely intact with only a few missing sections.
sluiceway
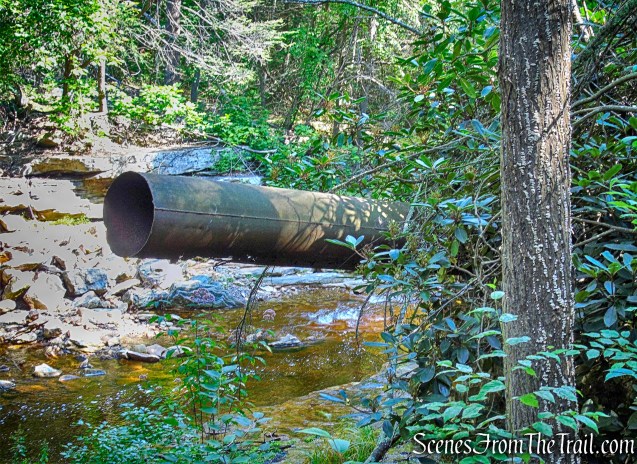
There are two stone abutments that use to carry the sluiceway pipe over the Peter’s Kill. A section of pipe that enters the power house, is visible to the right.
stone abutments
A closer look at the massive pipe.
sluiceway pipe sticking out from Hydroelectric Power House ruins on the Peter’s Kill
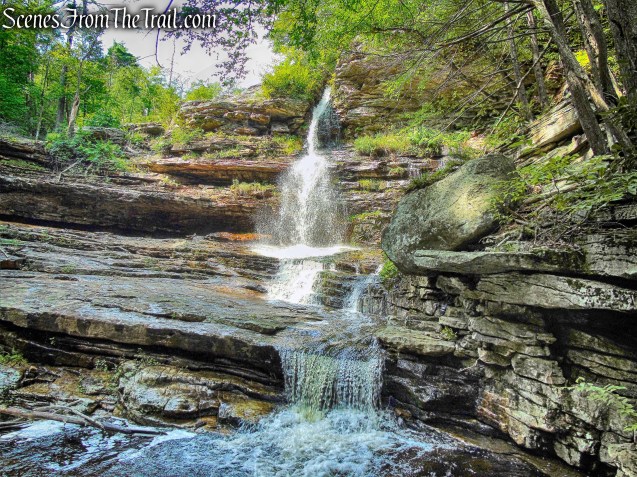
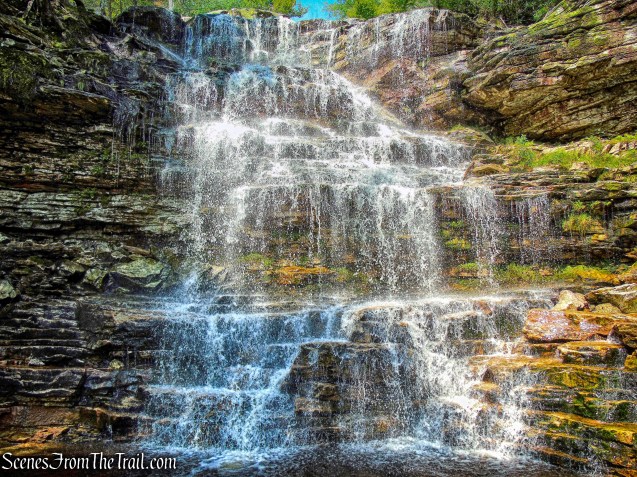
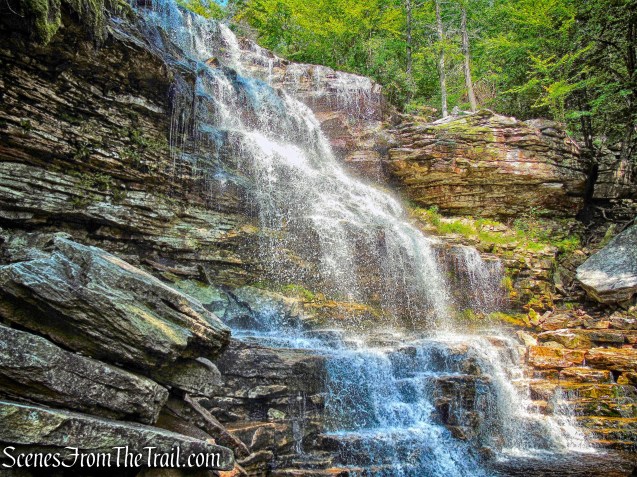
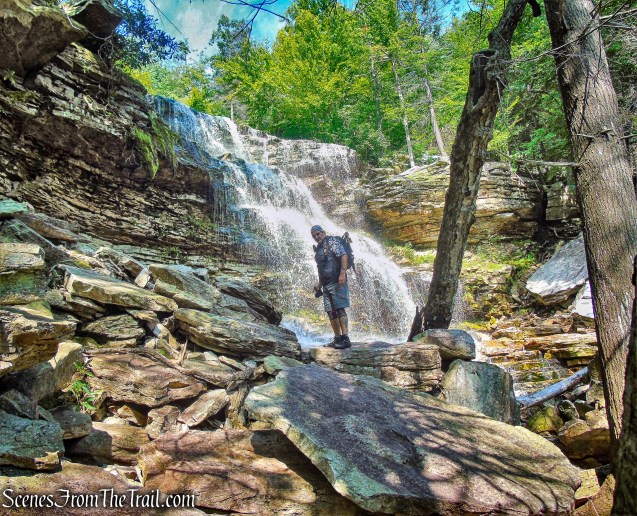
Adjacent to the power house is Peter’s Kill Falls as it drops off rock ledges. We would be on that ledge in a short while.
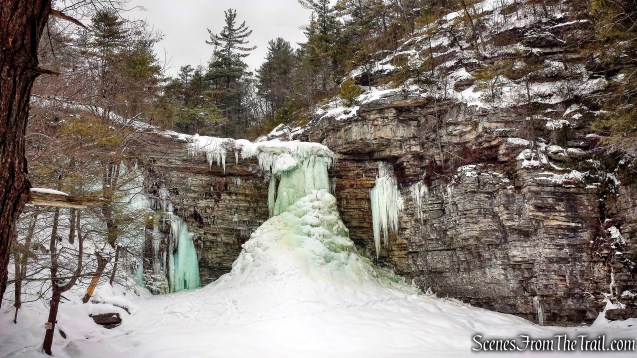
Peter’s Kill Falls
Peter’s Kill Falls is a chute and cascade type of falls and measures about 53 feet high. In times of high water, such as spring thaw, the water covers most of the rock ledge.
Peter’s Kill Falls
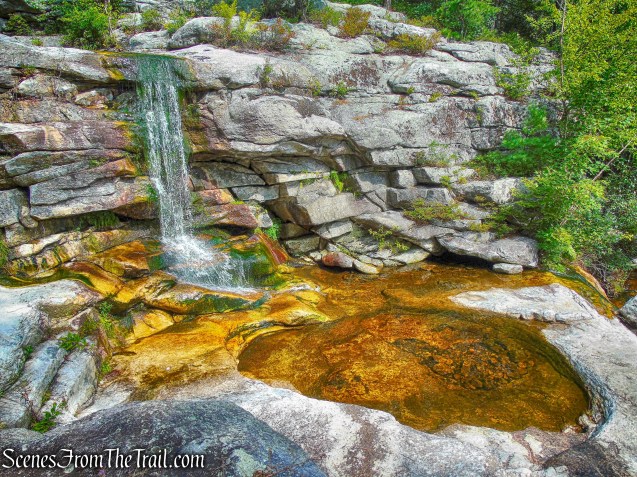
We crossed to the other side, which may be more difficult in times of high water, to get an up close view of Sheldon Falls.
Sheldon Falls
There is conflicting information about this waterfall online. It is referred to as Peter’s Kill Falls on some sites, but after viewing some vintage photographs, I am confident that I got the names right. I am not sure of the height, but it is spectacular as it cascades over a staircase of rock ledges.
Sheldon Falls
We then made our way back near the power house and bushwacked up the steep hillside. It is possible to climb up the left side of Peter’s Kill Falls, but the rocks were a little wet and we decided against it. We came out on Route 44/55 and turned right. In a short distance, there is a footpath that leads to Upper Peter’s Kill Falls.
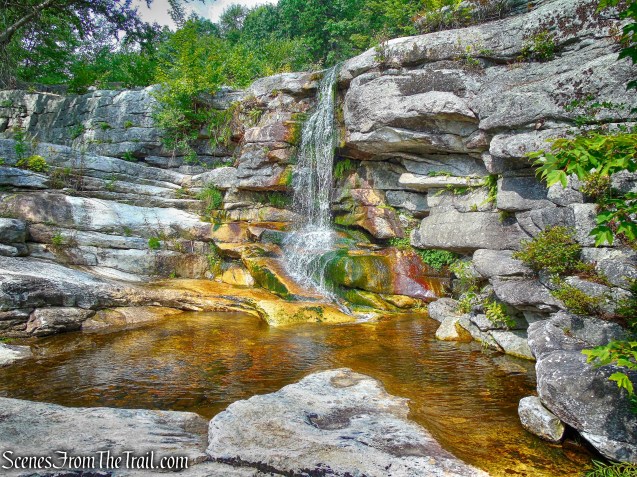
Upper Peter’s Kill Falls
Upper Peter’s Kill Falls has a dam above it. When the water is high, one side overflows and courses down a stream bed to make a secondary waterfall
Upper Peter’s Kill Falls
Looking east from atop the falls.
view north from Upper Peter’s Kill Falls
A massive stone structure sits between the road and the waterfall. During the mid 1800’s, this roadside spot was the site of a sawmill operated by George Davis, who eventually orchestrated the sale of hundreds of acres of land, including Lake Minnewaska itself, to Alfred Smiley.
stone ruins
The dam above Peter’s Kill Falls, which can be seen from the road.
Peter’s Kill dam
We headed out to Route 44/55 and carefully crossed.
looking out at Route 44/55 from the dam at Upper Peter’s Kill Falls
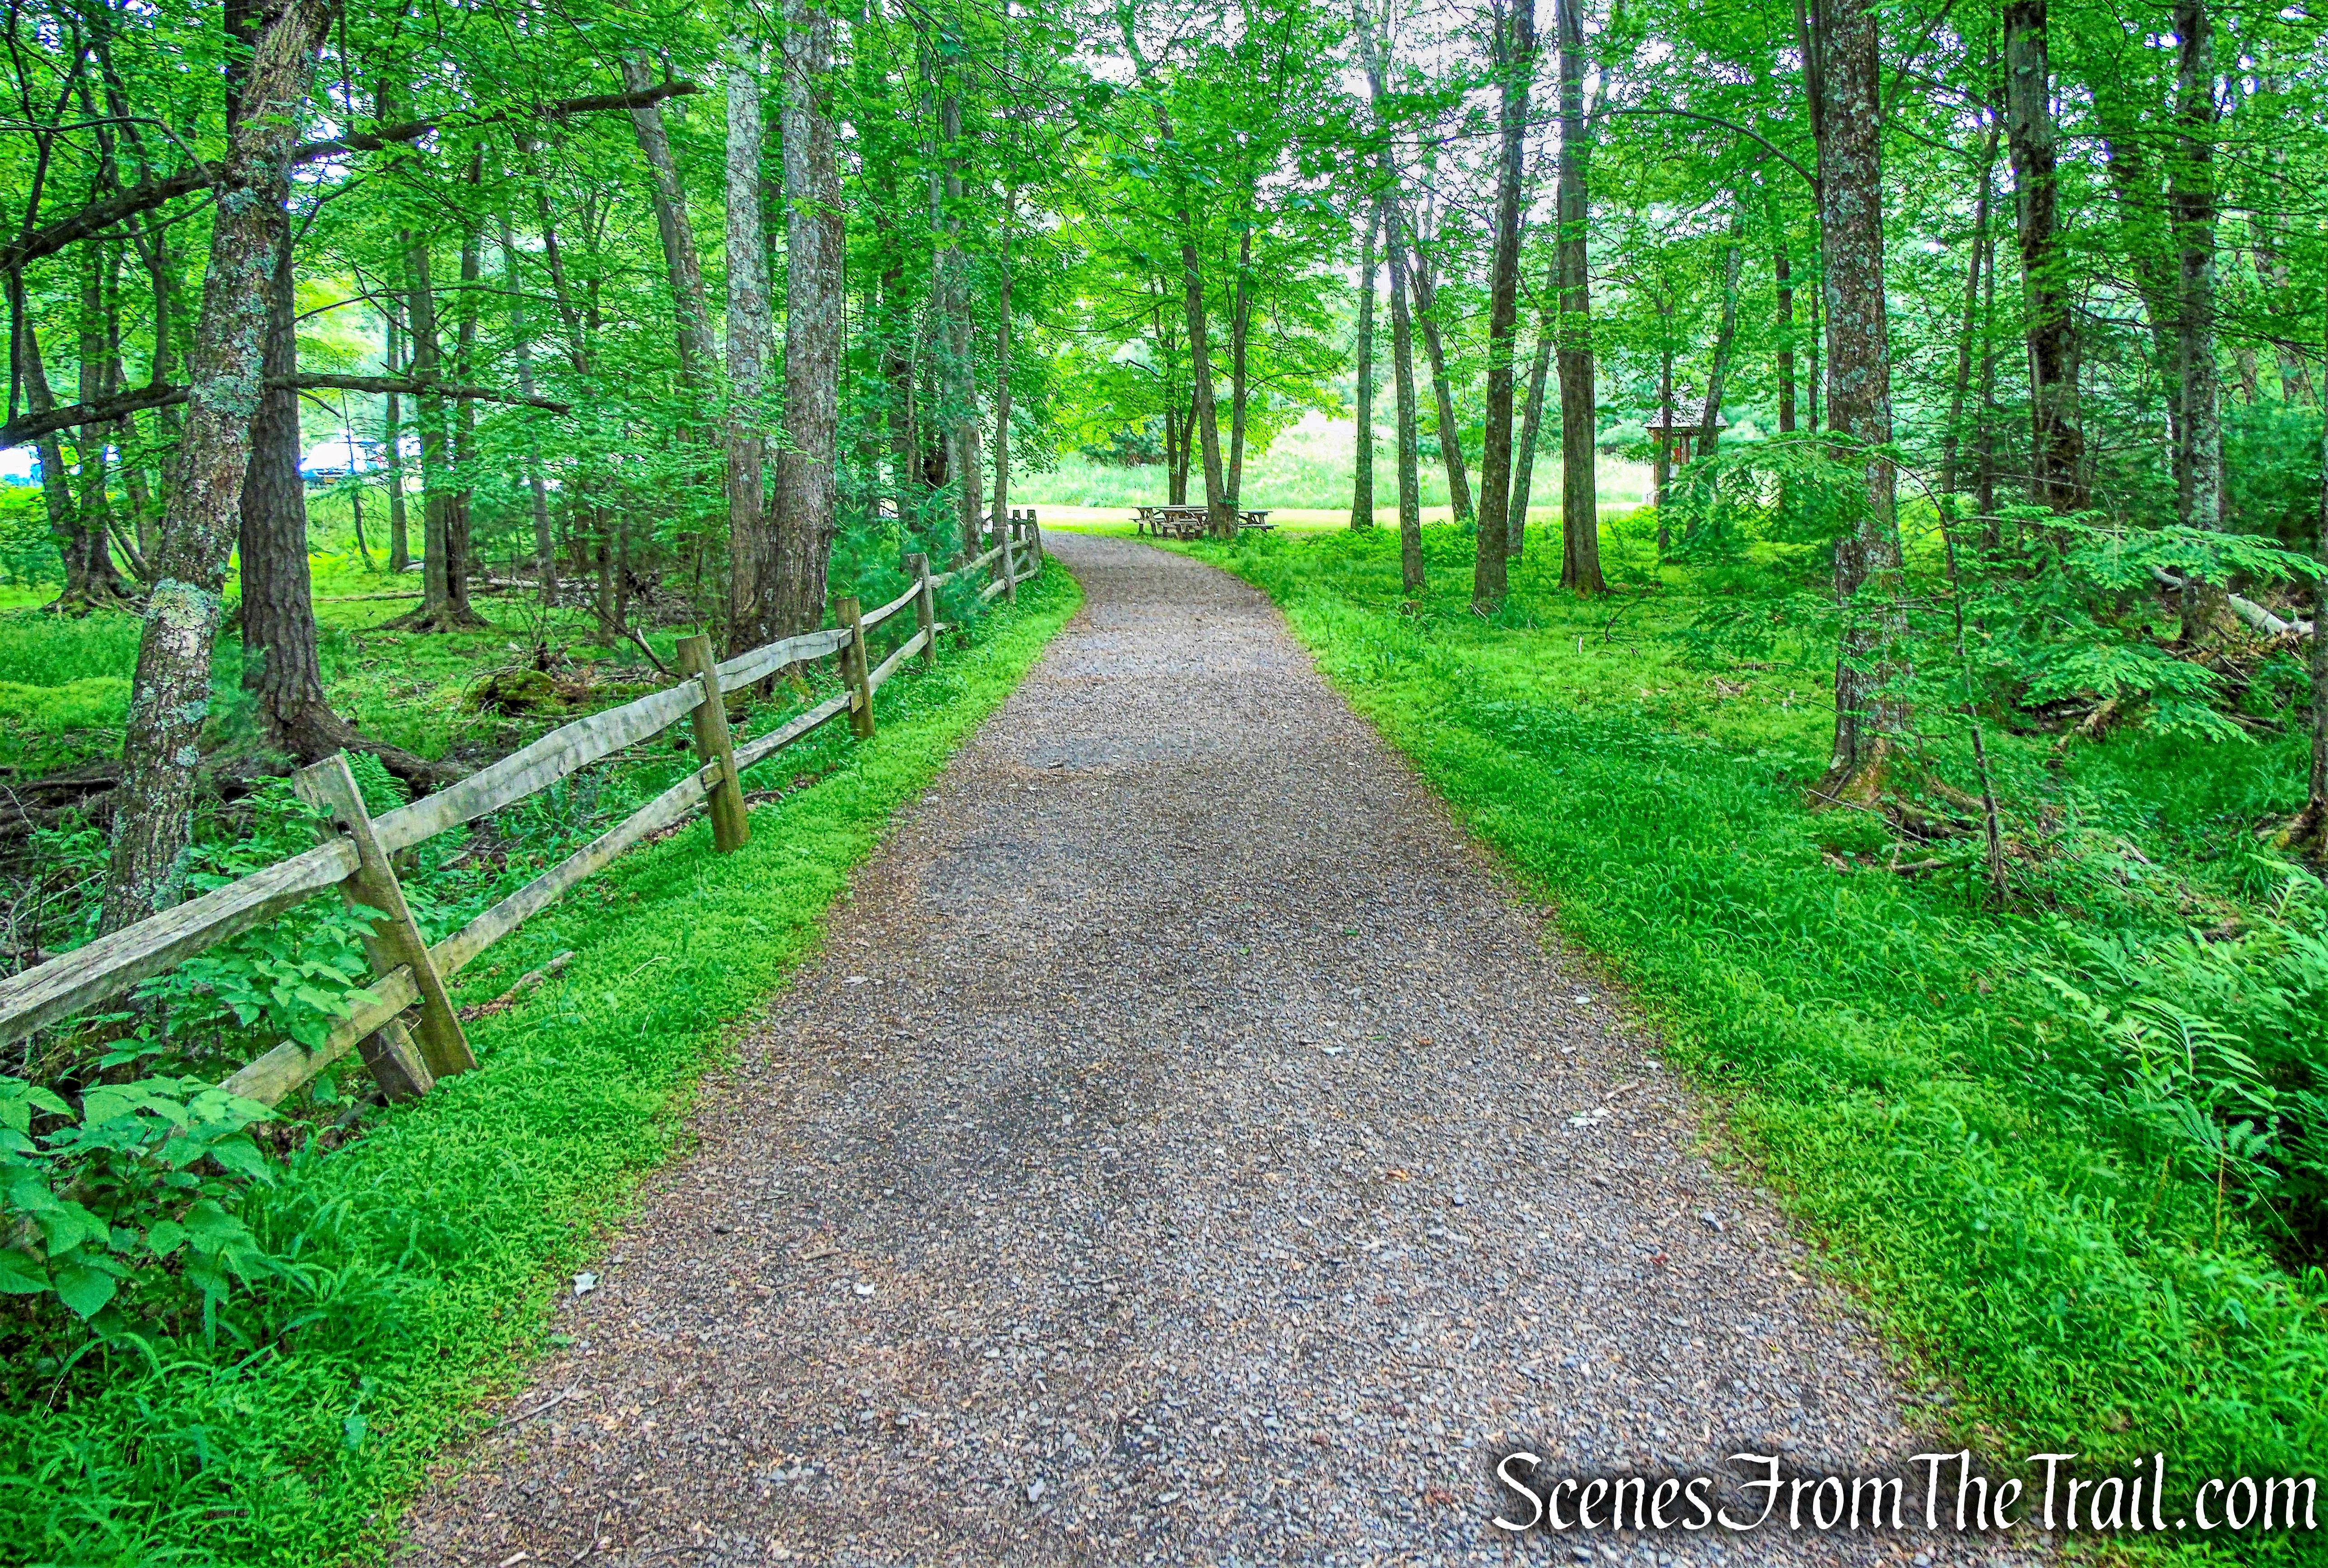
We walked past the gate and began walking on the Awosting Falls Carriage Road.
Awosting Falls Carriage Road
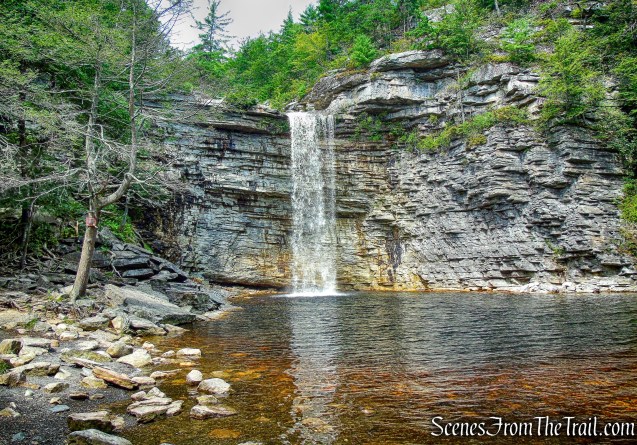
The Awosting Falls Carriage Road was built in 1907 to link the Mohonk Mountain House with Minnewaska, and it is marked with red diamond blazes. The road descends on a broad curve to reach the base of Awosting Falls, which is particularly spectacular after heavy rains.
Awosting Falls Carriage Road
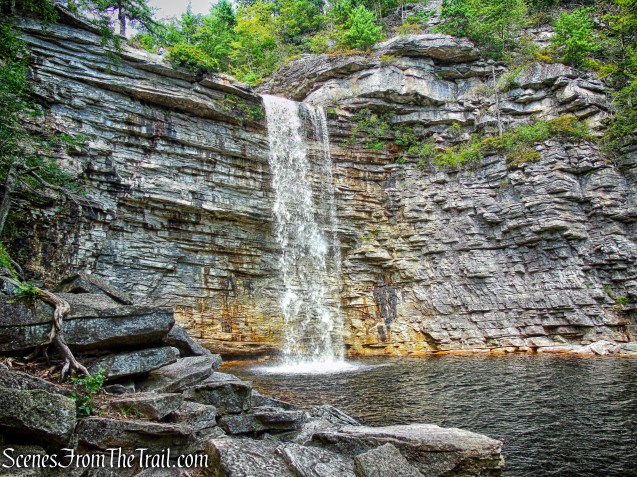
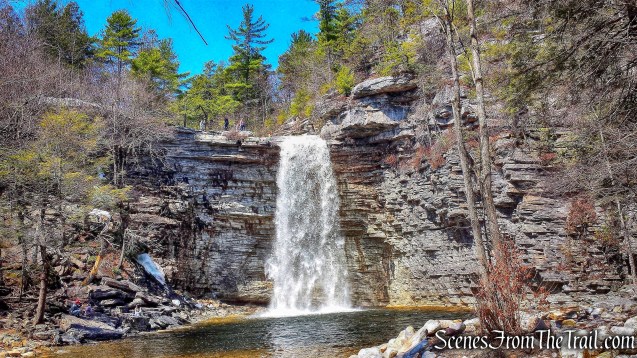
Due to its close proximity to the entrance and parking area, Awosting Falls is probably the most visited and photographed of all the Minnewaska State Park waterfalls.
Awosting Falls
Awosting Falls is a vertical drop over gorgeous Shawangunk conglomerate into a plunge pool. I have seen it listed anywhere from 60 – 80 feet tall.
Awosting Falls
In an unusually dry summer, I visited the Awosting Falls in August of 2014 and it was nothing but a trickle.
Awosting Falls – August 30, 2014
The falls are gorgeous at most anytime of the year, but during the early spring thaw, the flow is usually stronger. Below is an image from a visit in April of 2015.
Awosting Falls – April 18, 2015
Awosting Falls is also beautiful in the wintertime when the base of the Falls become frozen. Below is an image from a visit in February of 2015.
Awosting Falls – February 8, 2015
After spending a little time at Awosting Falls, we retraced our steps along the carriage road. When we reached the fork, we veered right. The left fork leads out to Route 44/55, the way we came in.
veer right on Awosting Falls Carriage Road
The Awosting Falls Carriage Road weaves through the hillside as it descends gradually. At first it travels close to the road, then veers away from it.
Awosting Falls Carriage Road
The road descends through massive cliffs that were blasted in order to construct the road.
Awosting Falls Carriage Road
A look back at the cliff.
Awosting Falls Carriage Road
At a fork with an unmarked road, we stayed left.
stay left on Awosting Falls Carriage Road
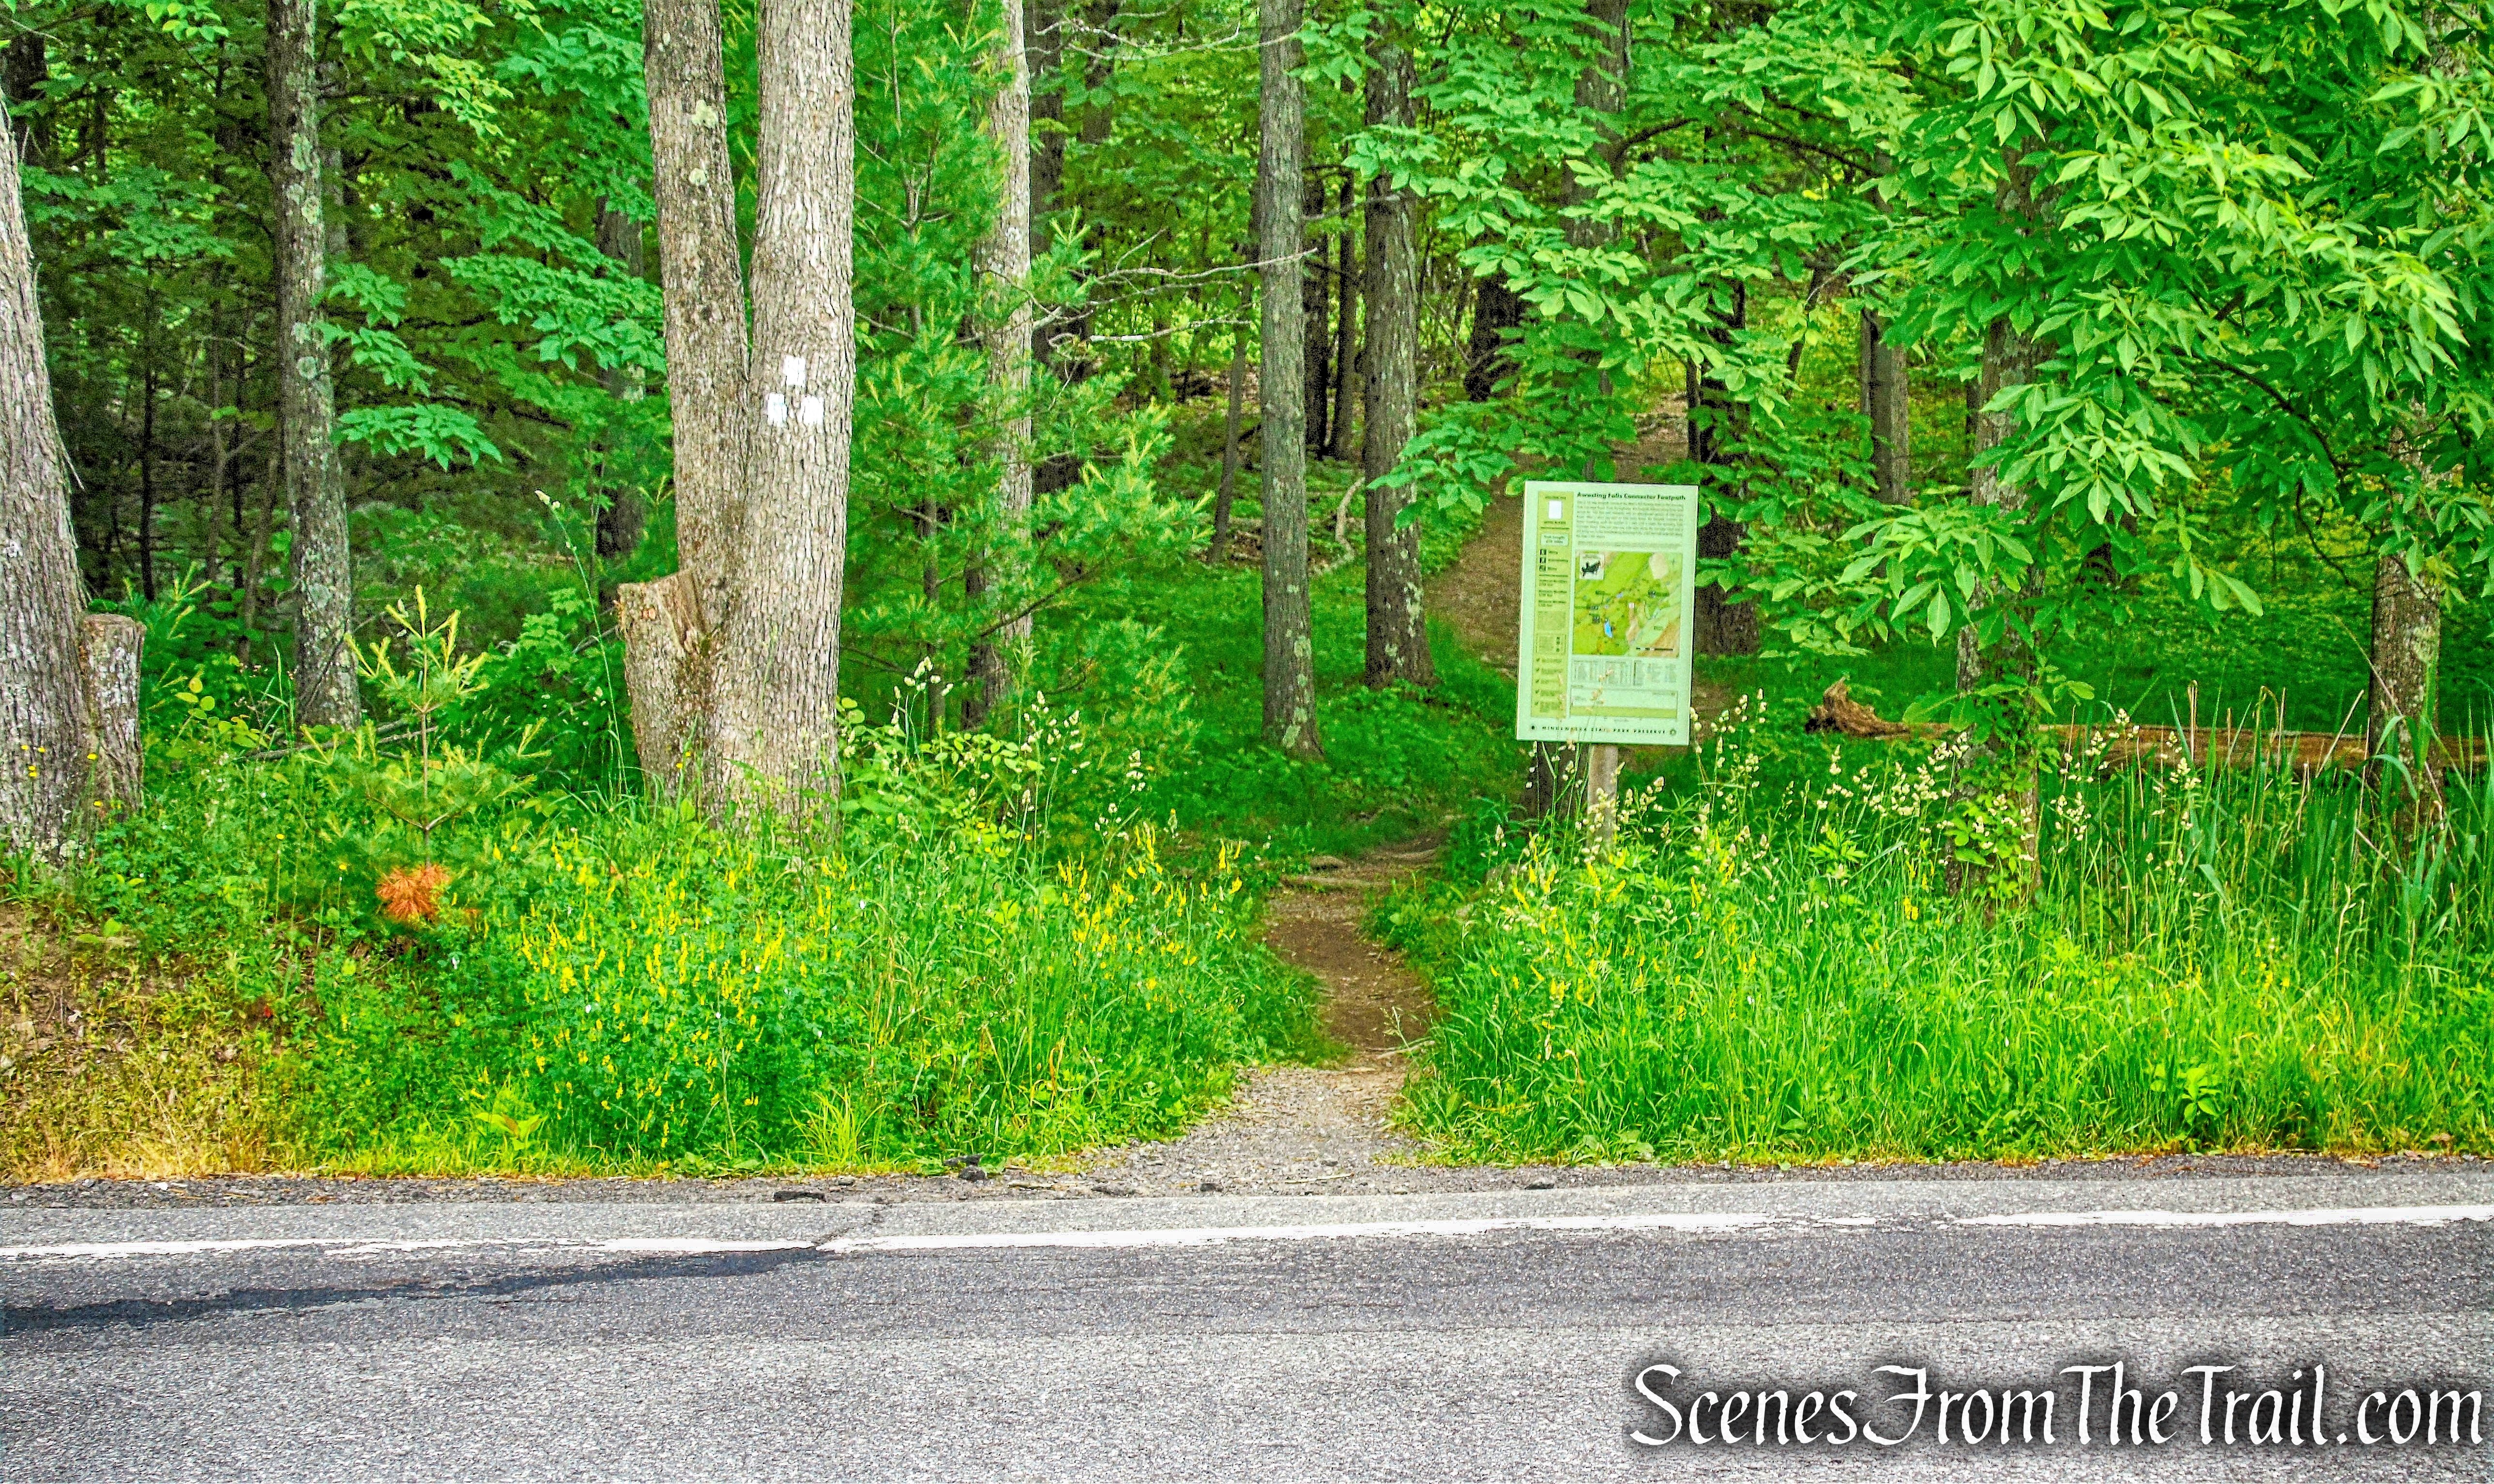
Approximately one mile from Awosting Falls, we turned left on the white-blazed Awosting Falls Connector Footpath.
turn left on Awosting Falls Connector Footpath
In about 260 yards, we arrived at the terminus of the Awosting Falls Connector Footpath, at Route 44/55. We crossed the road and returned to the Peter’s Kill Area, where our hike began.
terminus of Awosting Falls Connector Footpath
Another great hike in The Gunks! The weather was perfect and the falls were flowing. The Peter’s Kill is definitely worth a visit and since there are no blazed trails, it gets less foot traffic than the rest of Minnewaska.
Pros: Peter’s Kill, waterfalls, lovely cascades, lesser traveled, The Gunks.
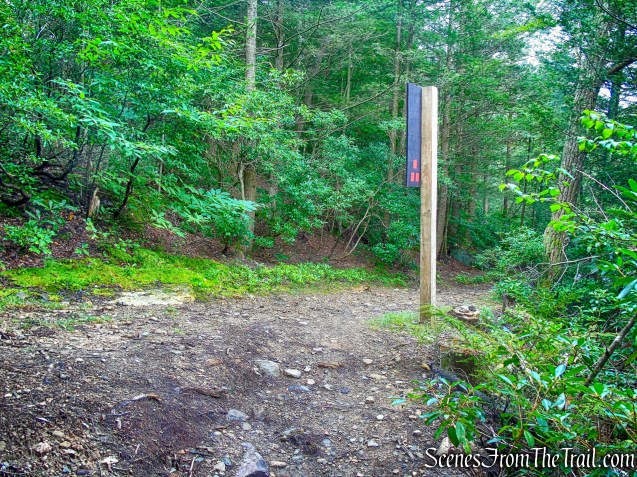
Trailhead parking: Shaft 2A Road Wawarsing, NY 12446
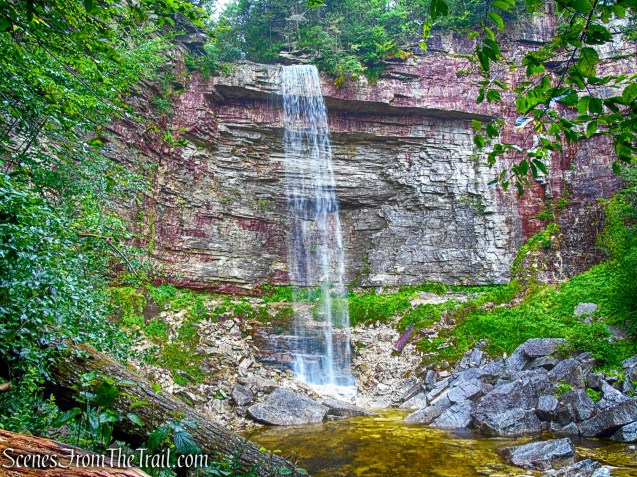
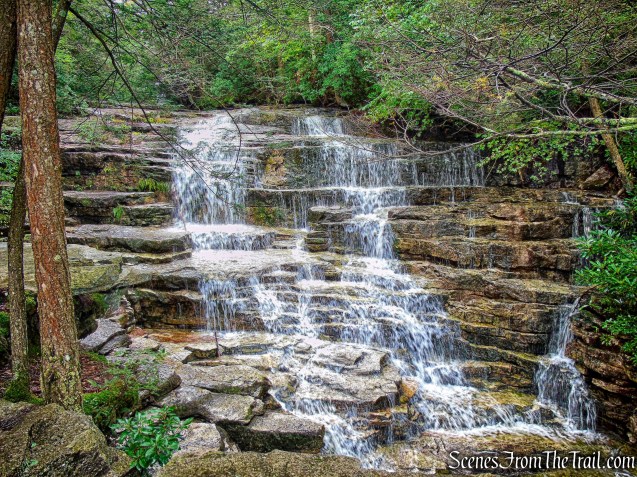
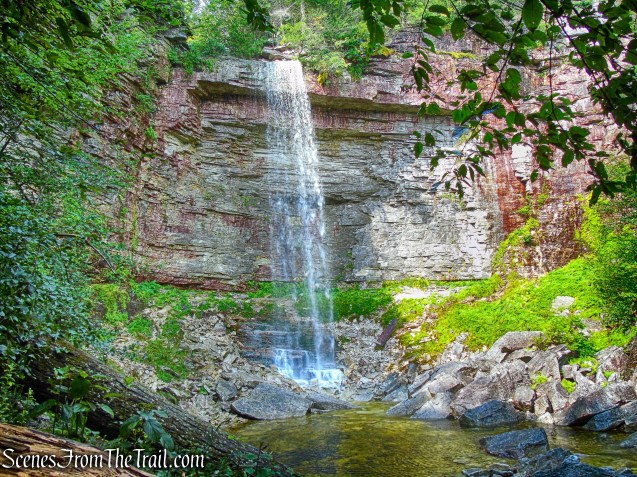
For decades Stony Kill Falls had been a secret gem known to locals and avid tourists of the famed Shawangunk Ridge. Hidden in the southwest flank of the Minnewaska State Park Preserve, a towering 87 foot drop swelled every Spring into a roaring waterfall with no official access route. Gated off at the end of an unassuming road with the unappealing name of Shaft 2A Road, only those in the know, knew where to go.
Stony Kill Falls
The land it sits on was acquired in 2001 by the State of New York, The Open Space Institute and the New York-New Jersey Trail Conference from Napanoch Sand and Gravel Company, that once owned the land.
Stony Kill Falls
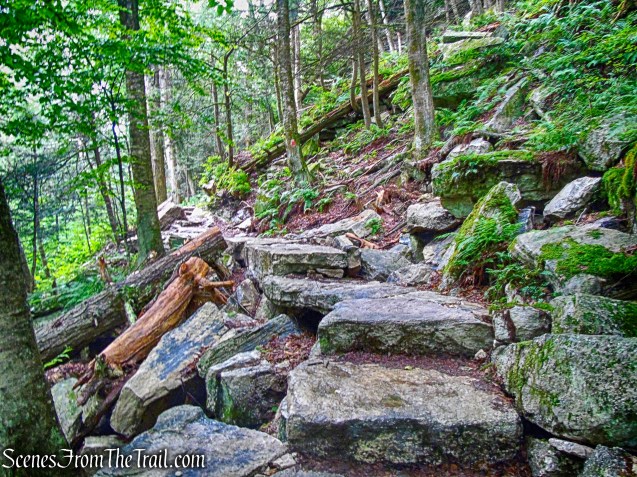
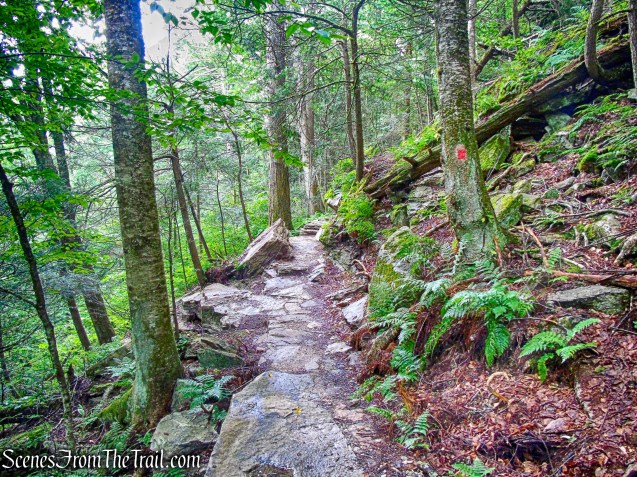
The Stony Kill Area Trail Project at Minnewaska State Park Preserve, created a formal, sustainable hiking trail to provide safe access and views of the Stony Kill Waterfall. The trail includes two footbridges, multiple stone steps through a boulder field and a sustainable route up the steep slope to access the upper falls.
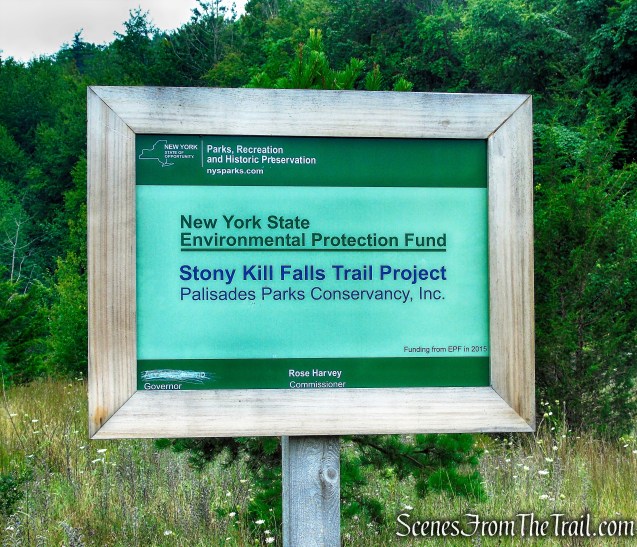
The project was paid for by a grant from NYS Parks and by the Palisades Park Conservancy. Tahawus Trails LLC was contracted by the Palisades Park Conservancy for all aspects of the project and supervised and managed volunteer contributions to the project.
Stony Kill Falls Trail
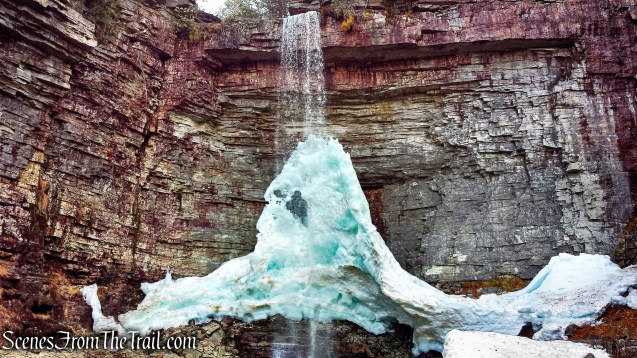
I first visited Stony Kill Falls in April of 2015 and at that time there was little information about its location online. Once on site, there was no set route to get to the falls and definitely no safe way to reach the top. Reaching the base of the falls entailed scrambling over boulders strewn about the Stony Kill. Below is an image from April of 2015 with ice formed from the spray. The Falls are unusually beautiful in the wintertime when cold temperatures create an icy, cone like structure at the base of the Falls.
Stony Kill Falls – April 18, 2015
Upon hearing that the new trail was complete, it was time to pay a return visit. I was not only impressed, but also in awe of the exceptional work that was done in order to create safe and easy access through this marvelous place. This is a fairly easy out and back hike, but can be combined with the Stony Kill Carriage Road at the terminus of the Stony Kill Falls Trail, past the top of the falls, for longer hikes.
Stony Kill Falls
A new feature that I have added is the Google Earth Fly-Through. It follows the path that we hiked and it gives you a good idea of the terrain, layout, amount of parking etc. Check it out, it’s pretty cool.
View the Google Earth Fly-Through video of the hike below.
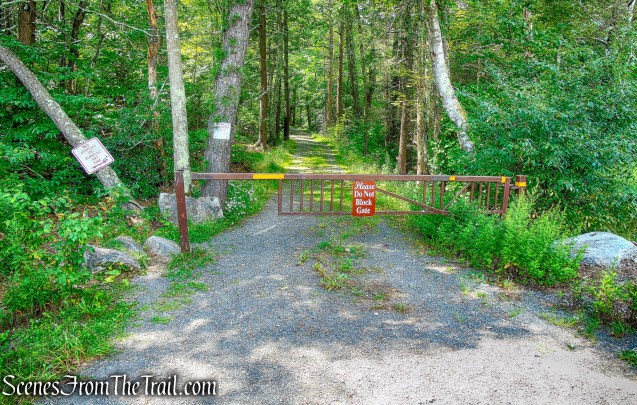
Parking is at the end of Shaft 2A Road, alongside the road. The road is narrow and its a good idea to turn around and park facing away from the gate, as sometimes the road gets lined with vehicles.
Shaft 2A Road
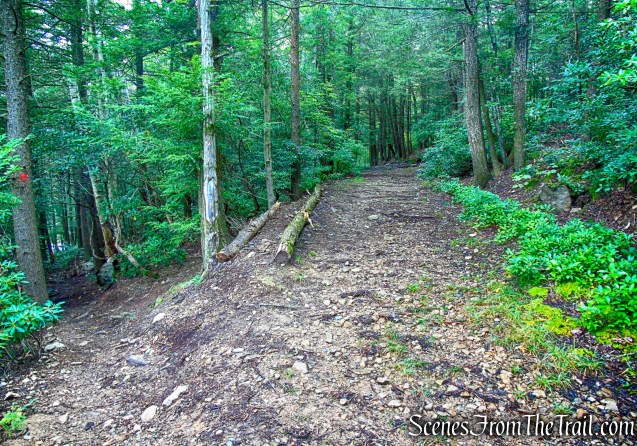
Shaft 2A Road continues past the gate. We walked around the gate and proceeded down the gravel road.
Shaft 2A Road
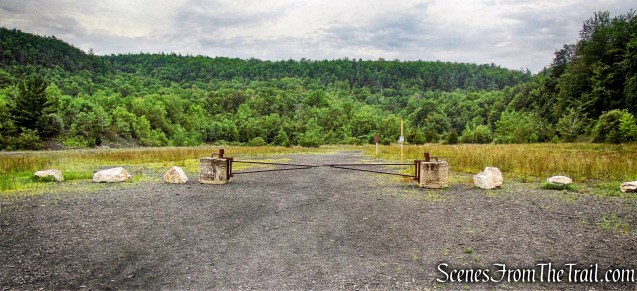
In about 300 yards, the road splits at a clearing. We stayed to the left.
Shaft 2A Road
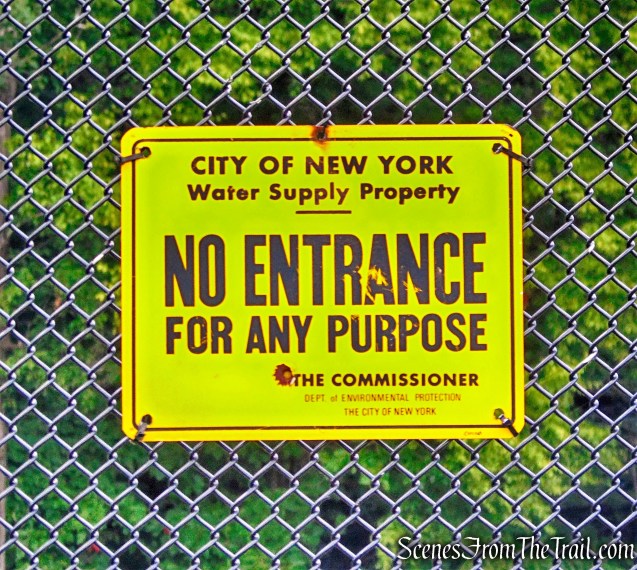
To the right of the clearing is a fenced in shaft, a deep water valve, running hundreds of feet below the earth to the Catskill Aqueduct. A feature of this area’s history was the building of two aqueduct lines through it, aqueducts that brought Catskill Mountain water to New York City. The first line, the Catskill Aqueduct, was built from 1909 to 1915, and the second line, the Delaware Aqueduct, was built from 1937 to 1945. The entire aqueduct system provides 350 to 400 million gallons of water per day to New York City or about 40% of their water supply.
Shaft 2A
Shaft 2A, located near Stony Kill Falls within the Preserve, is one of 67 access shafts along the aqueduct. An easement agreement between OPRHP/PIPC and the New York City Water Authority allows for authorized access by the Authority to Shaft 2A from Shaft 2A Road.
Shaft 2A
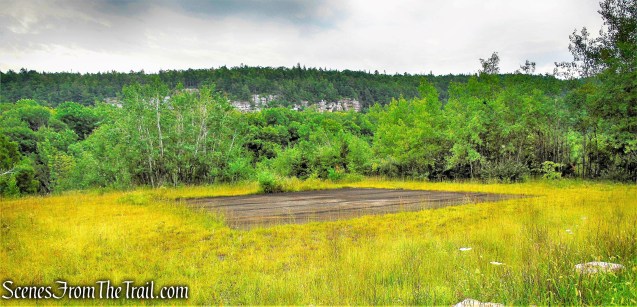
On the left is an aging helipad, possibly utilized as a quick access point for repairs to the Aqueduct.
helipad
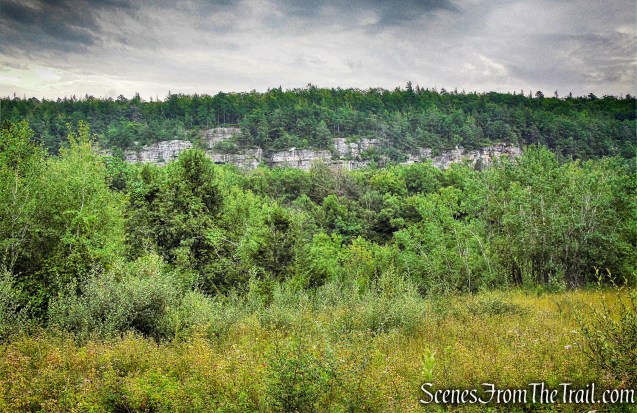
Just beyond the helipad, the cliffs of the Shawangunk Ridge come into view.
Shawangunk Ridge
Continuing along the gravel road, the path dips down into a gravel pit that has been transformed into a parking area. I presume that at some point they will open this up, which would make the parking, much more visitor friendly.
Update 2019: The new parking area is now open (9am – 5pm) and the hike now begins from here.
Shaft 2A Road
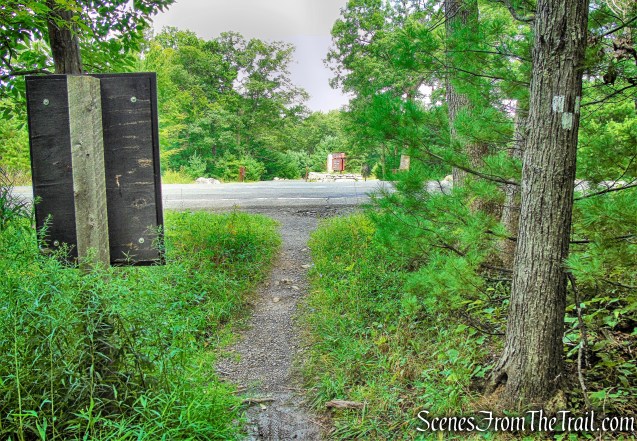
The Stony Kill Falls Trail begins at the southern end of this parking area just past the gate.
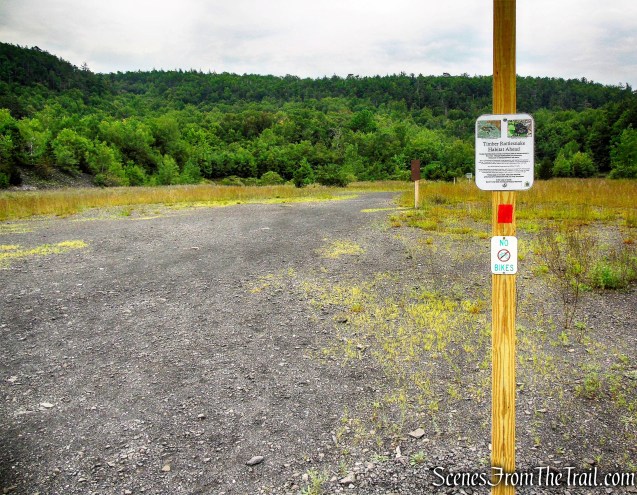
Stony Kill Falls Trail
The trail is marked with red blazes and begins at the southern end of Shaft 2A Road.
Stony Kill Falls Trail
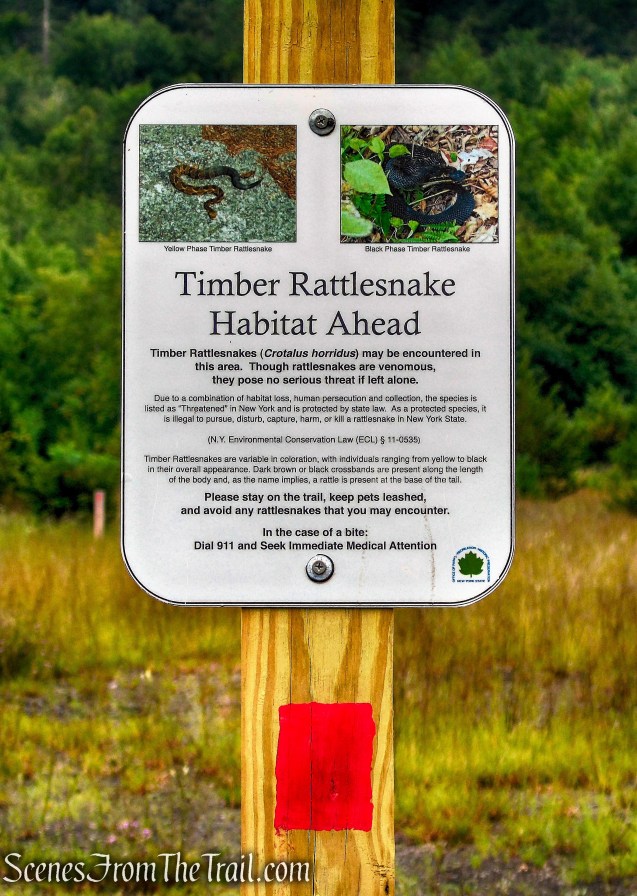
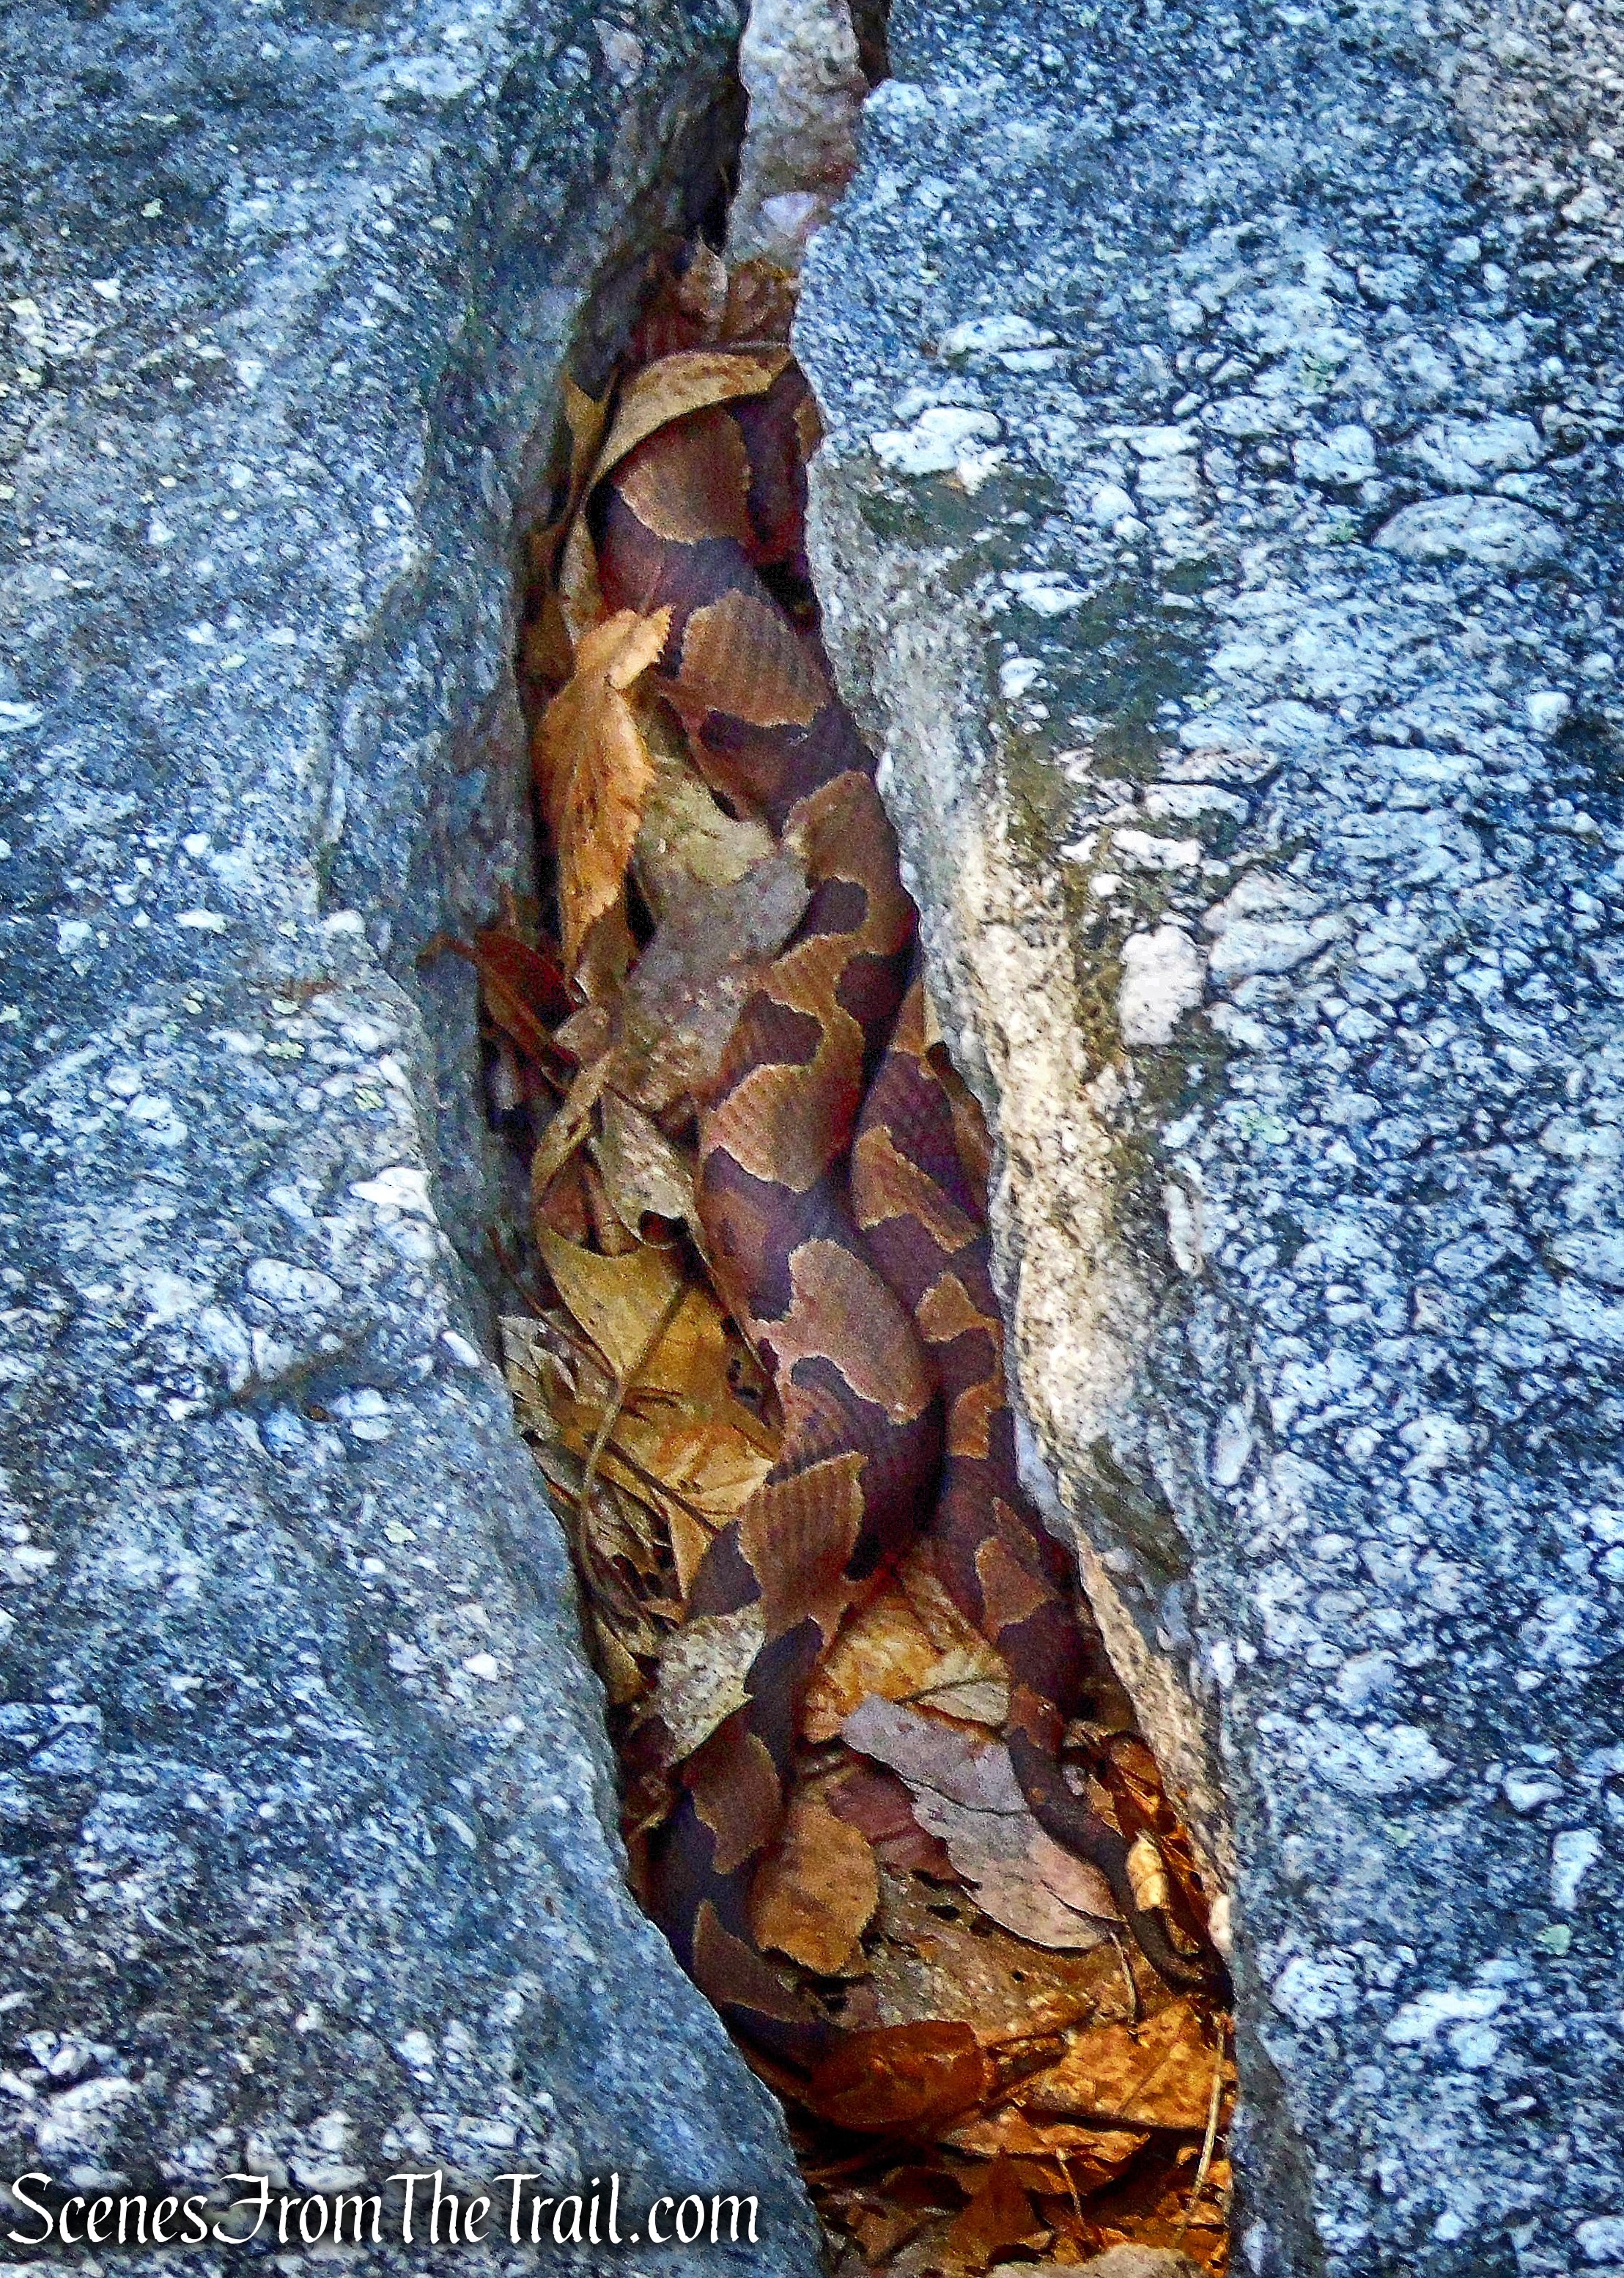
A sign on the post warns of Timber Rattlesnakes that inhabit this area. None were encountered on our visit, but care should be taken by remaining on the designated trail.
Stony Kill Falls Trail
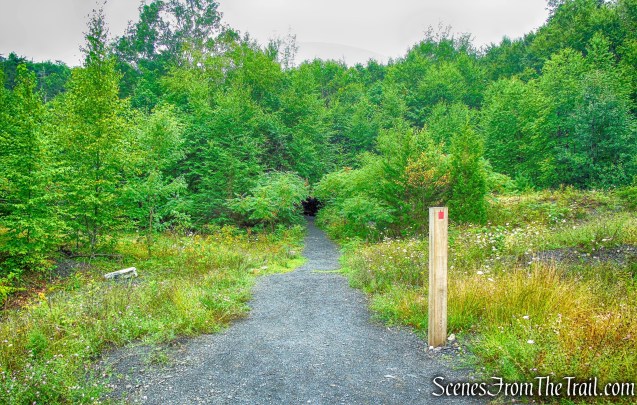
The well blazed trail soon leaves the open area and ducks into the woods.
Stony Kill Falls Trail
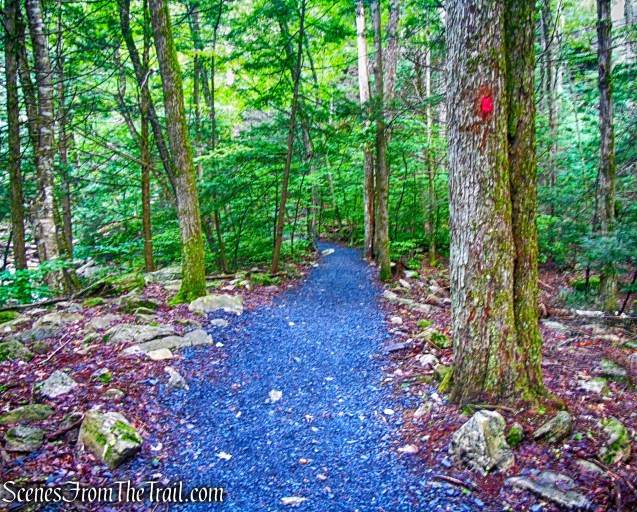
The trail continues on a crushed stone tread, constructed of shale, from the piles quarried from the Aqueduct shafts. The path is packed down so firm, that it resembles blacktop.
Stony Kill Falls Trail
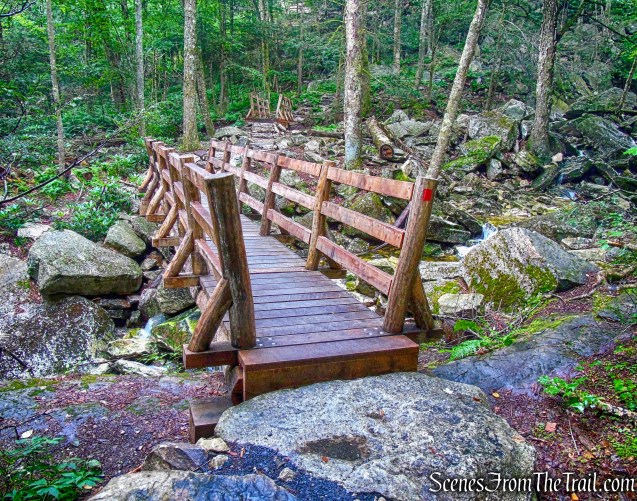
In a short distance, the trail crosses the Stony Kill on a rustic timber footbridge, built by Tahawus Trails LLC in 2017. The bridges are constructed with Black Locust railings and decking. The first bridge is 30 ft. long and is framed with Galvanized I-beams.
footbridge – Stony Kill Falls Trail
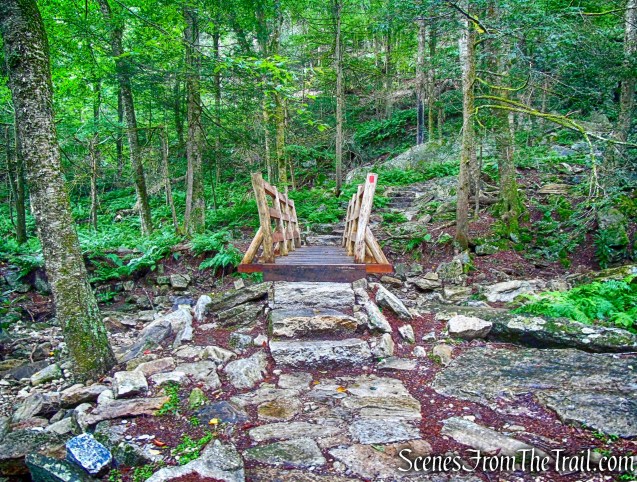
The trail then almost immediately, crosses another. The second bridge is 19 ft. long and framed with Pressure Treated Pine.
footbridge – Stony Kill Falls Trail
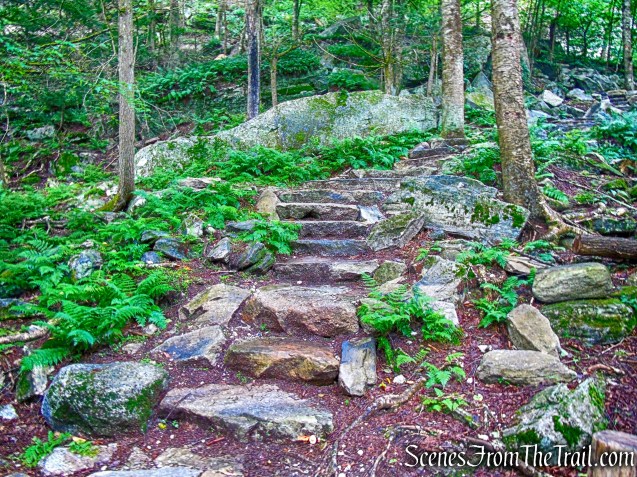
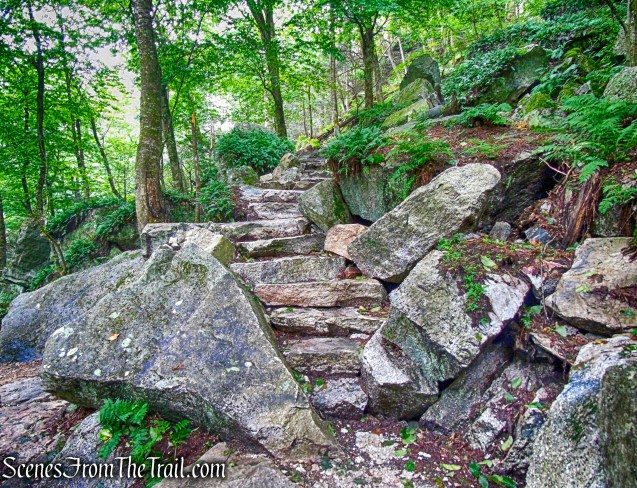
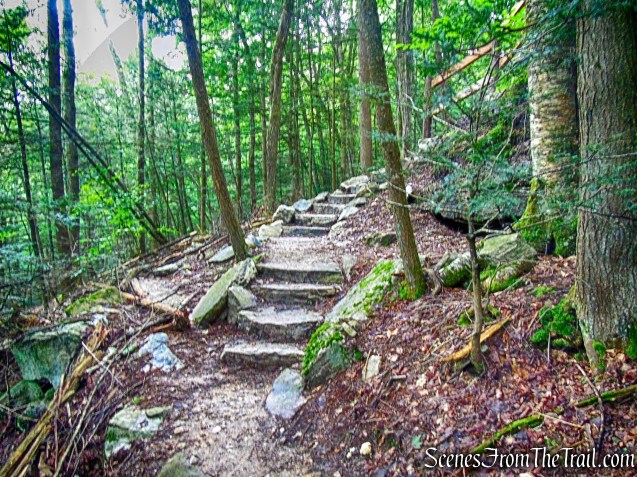
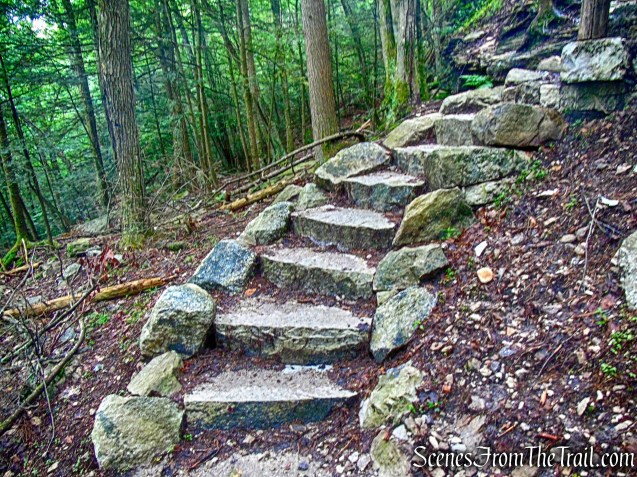
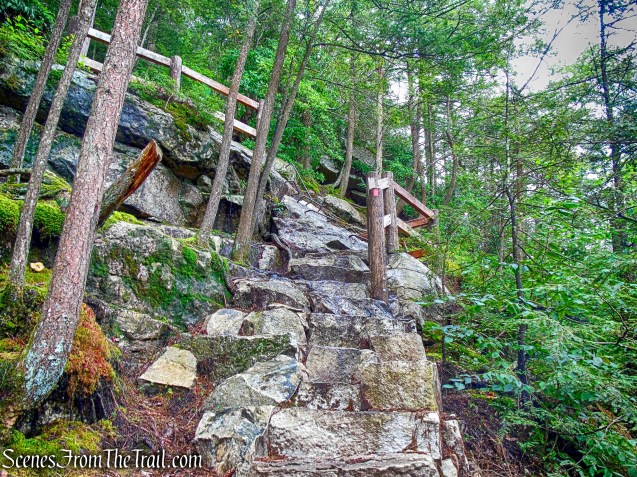
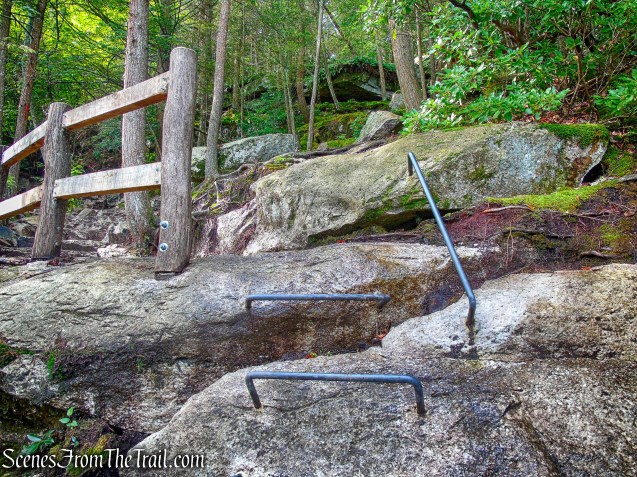
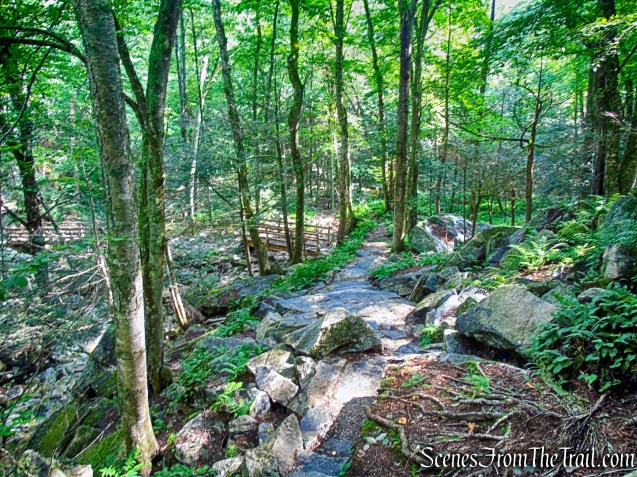
The trail now ascends stone steps. The Jolly Rovers Trail Crew built the 35 step stone staircase leading to the stone paved viewing platform, overlooking the falls.
stone steps – Stony Kill Falls Trail
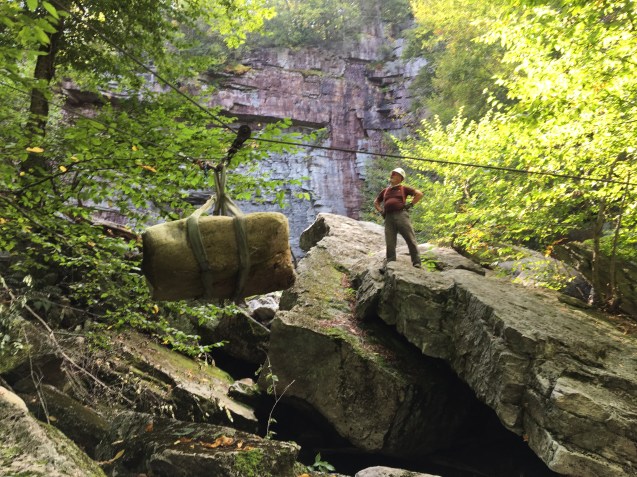
Chris Ingui, Executive Director and Founding Member of The Jolly Rovers states: “To accomplish this, our volunteers donated 3,000 work hours over the course of 30 days through the Fall of 2016 through the Fall of 2017. The stone was all native Shawangunk conglomerate and was split and shaped onsite and flown into place via overhead zip lines that we rigged into the surrounding trees.”
Jolly Rovers Trail Crew – Photo Credit: Chris Ingui
Jolly Rovers Trail Crew – Photo Credit: Chris Ingui
The finished product is outstanding, and and I for one am grateful to have these dedicated men and women put in such effort to make this place more easily accessible and enjoyable.
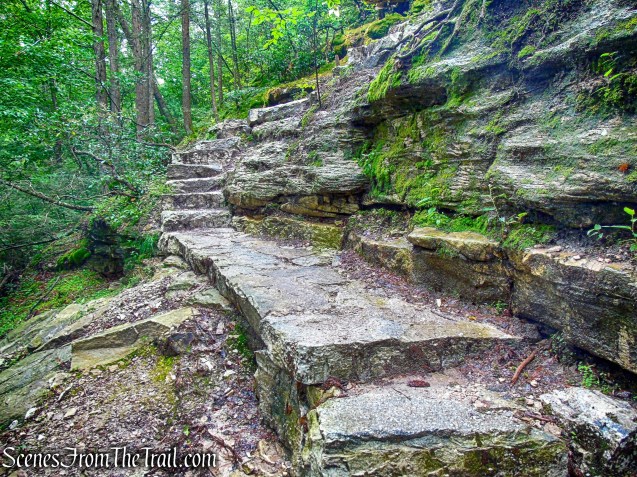
stone steps – Stony Kill Falls Trail
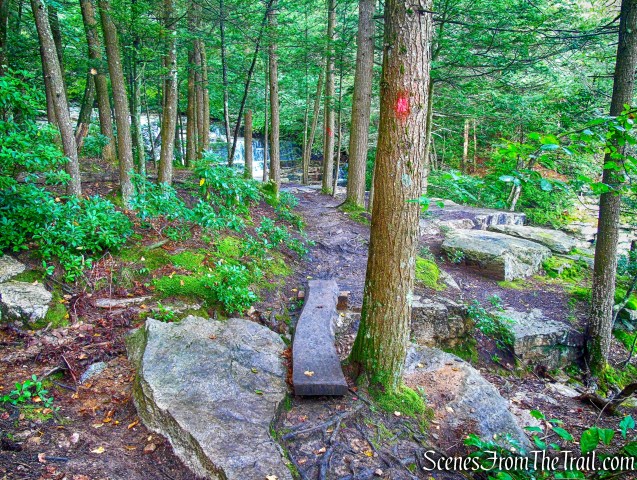
The stone steps lead to a stone paved 12′ by 12′ viewing platform with a keyhole view of Stony Kill Falls. This was constructed as a collaborative effort with Tahawus and the Rovers.
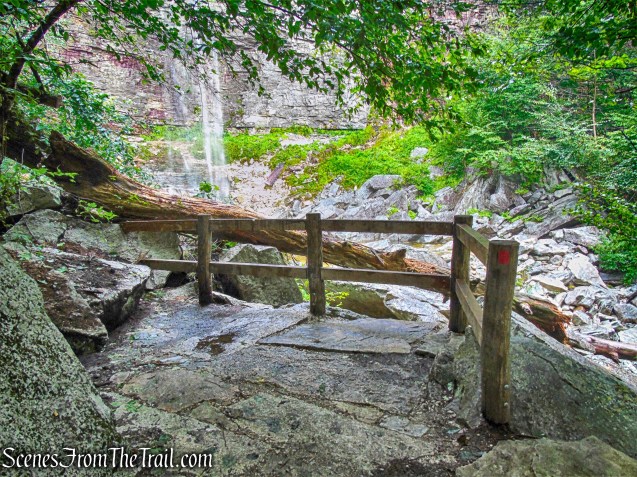
viewing platform – Stony Kill Falls Trail
The 87-foot Stony Kill Falls, is one of the major waterfalls in the Shawangunks and is a popular destination for hikers, bird watchers and photographers. The volume varies with the season and the rainfall, but at any time, it is a beautiful sight.
Stony Kill Falls
From the viewing platform, Tahawus Trails LLC constructed the remaining ascent up the steep bedrock ledge to the summit of the Falls.
Stony Kill Falls Trail
The trail switchbacks using stone steps and paved landings. According to Eddie Walsh, founder of Tahawus Trails LLC, Tahawus put in about 2,300 man hours into the project.
Stony Kill Falls Trail
The trail includes 140 linear feet of Stone Paved Tread Surface.
Stony Kill Falls Trail
Stony Kill Falls Trail
In total, Tahawus Trails installed 230 steps, shaped from stone on site.
Stony Kill Falls Trail
The trail blends in so well to its surroundings, that it looks like it was always there.
Stony Kill Falls Trail
The stone steps seem to disappear into the hillside.
Stony Kill Falls Trail
There are 6 Iron Rungs to help navigate a short steep section, along with 70 linear feet of Barrier Railings.
Stony Kill Falls Trail
Stony Kill Falls Trail
A 9-foot plank bridge is bolted down and secure over a wet area.
Stony Kill Falls Trail
The trail reaches the top of the falls, where there is a 30-foot cascade. Previously, there was no safe access to this area from the base of the falls.
Stony Kill Falls Trail
Having never been to the top of the falls before, this was a great place to relax and enjoy the scenery.
upper falls – Stony Kill Falls Trail
The Stony Kill cascades down the staircase like rock formation before it plummets 87 feet off the cliff.
upper falls – Stony Kill Falls Trail
The trail continues southwest along the Stony Kill.
Stony Kill Falls Trail
It moves away from the Stony Kill briefly.
Stony Kill Falls Trail
The trail heads upstream along the Stony Kill, which flows northeast from Minnewaska State Park to Rondout Creek.
Stony Kill Falls Trail
The trail now climbs gradually.
Stony Kill Falls Trail
The Stony Kill Falls Trail ends at the northern end of the Stony Kill Falls Carriage Road, where we turned right.
terminus of Stony Kill Falls Trail
A short distance away is the “nudist pool,” that is lined with smooth rock slabs. Beyond the pool, the Stony Kill can be followed upstream for several miles, where the hiker will come across many pools and small cascades, as it flows from Minnewaska State Park.
nudist pool – Stony Kill
Retracing our steps, we turned left and departed the Stony Kill Carriage Road and got back on the red-blazed Stony Kill Falls Trail. The Stony Kill Carriage Road runs south for 1.5 miles and ends at a junction with the Smiley Carriage Road, just north of Lake Awosting.
junction with Stony Kill Carriage Road
We retraced our steps back to the viewing platform to get one last look at Stony Kill Falls before heading out. We passed two women and a little girl just before reaching the viewing platform. The only people we would see on this hike. It pays to get an early start.
Stony Kill Falls
Walking back along the trail, I looked around and felt very fortunate to have such a charming place to explore.
Stony Kill Falls Trail
Recrossing the footbridges, I had to stop again and take a long look around. I honestly hated leaving here.
Stony Kill Falls Trail
Stony Kill Falls Trail
Back out in the open area, we followed the gravel road back the way we came.
Stony Kill Falls Trail
Stony Kill Falls Trail
While getting ready to leave, several cars drove up. We were fortunate enough to arrive early and for the most part, had the place to ourselves.
Shaft 2A Road
Having visited Stony Kill Falls before there were any formal trails, I was blown away with all the work that has been done there. Such great care has been taken to make it this trail blend in to the natural landscape. Thanks to the creativity, vision and sweat of Tahawus Trails LLC, The Jolly Rovers and all the volunteers, making a magnificent place even more alluring.
Pros: One of the most attractive trails that I have hiked on, Stony Kill Falls, Easy to follow trail, scenic landscape.
Cons: Slippery when wet, parking situation hopefully improves if they open up the new parking area.
The 2,000-acre Abram Hewitt State Forest encompasses a section of the Bearfort Ridge between Greenwood Lake and Upper Greenwood Lake, north of Warwick Turnpike. Bearfort Ridge, formed of the unusual Skunnemunk Conglomerate or “puddingstone,” is an anomaly in the midst of the Highlands. With its many overlooks, colorful bedrock, and stunted pitch pines, it is one of the most picturesque mountain ridges in all of New Jersey. The challenge: all of the trails “climb steeply” in places.
Bearfort Ridge
The forest is isolated and untouched, accessible only on foot. Marshes and wetlands are scattered throughout the forest with several brooks and streams crisscrossing the lower areas. Hemlock and oak are the dominant species of this relatively undisturbed forest. The glacially-smoothed ridge is studded with pitch pines. Rocky outcrops and upland swamps characterize Abram S. Hewitt State Forest. The glacially carved ridge offers spectacular views eastward along Greenwood Lake.
Ernest Walter Trail – Bearfort Ridge
While searching for a place to hike, Bearfort Ridge was cited numerous times as one of the most scenic areas in all of New Jersey. About an hour drive from where I reside, it was definitely worth the trip. I mapped out a loop hike using the various trails, but with extreme heat and poor air quality, the strenuous hike that I had mapped out would be made more difficult. I wanted to have options for a shorter out if it became necessary. As it turned out, the hike became an out and back once we got to Surprise Lake. We could have continued and completed the loop, but to be honest, the ruggedness of the trails made this three mile hike more than enough on this hot and humid day. We were satisfied with the hike and the effort that we put forth on this sweltering Sunday in August.
Bearfort Ridge and Surprise Lake from State Line Trailhead
A new feature that I have added is the Google Earth Fly-Through. It follows the path that we hiked and it gives you a good idea of the terrain, layout, amount of parking etc. Check it out, it’s pretty cool.
View the Google Earth Fly-Through video of the hike below.
Since it was going to be a scorcher, we got an early start, arriving at the trailhead at approximately 8:00 am. The parking area has room for about 8 cars, but when we arrived there was only one car there. Upon returning to the parking area shortly after noon, the lot was at capacity with cars parked alongside the woods and cars filing in then turning around. The trailhead for the State Line Trail begins just below the hikers parking.
State Line Trail
The trail can also be accessed alongside the kiosk by the hikers parking as well. This is where we began the hike.
State Line Trail
From the kiosk at the end of the parking area, we began following the blue-on-white-blazed State Line Trail, which follows a wide, rocky path up Bearfort Mountain.
State Line Trail
The ascent is moderate at first, and the trail soon levels off.
State Line Trail
The heavy rainfall the previous several days. turned the State Line Trail into a stream bed. On the level areas, there were numerous water crossings, some deeper and wider than others.
water crossing – State Line Trail
As the trail ascends, the water streamed over and around the rocks, making it slippery and a little slow going. At times we walked along the edge of the trail rather than walk through the flowing water or wet rocks.
State Line Trail
With a private home visible directly ahead, the trail turns right and begins to climb more steeply. Taking care to follow the blue-and-white blazes, as there are many side trails that branch from the main route.
State Line Trail
Although the trail is steep, it is nicely shaded on the section that we hiked. Even though it was still early morning, I had already worked up quite a sweat.
State Line Trail
In about 3/4 mile, we reached an intersection with the yellow-blazed Ernest Walter Trail. This turn can be easily missed as the blazes are not easily visible going uphill. I was on the lookout for them and spotted two yellow blazes on a tree as I was walking past the trail. I assume that one of the blazes is missing because this is either the start or end of the trail, depending on which direction one is traveling. We turned left and followed the yellow-blazed trail uphill.
junction – Ernest Walter Trail
The trail climbs over rocks as it heads steeply uphill. In a short distance, we began to traverse a long, glacially-smoothed outcrop of Skunnemunk Conglomerate “puddingstone” rock. This unusual reddish-matrix conglomerate rock, studded with pebbles of pink sandstone and white quartz, is characteristic of Bearfort Ridge.
Bearfort Ridge – Ernest Walter Trail
As the trail climbs along the ridge, views open up over Greenwood Lake to the east.
Greenwood Lake – Ernest Walter Trail
The trail continues to climb steeply over the bare rock of the ridge. The bottom of my boots were still wet from the State Line Trail and I slipped a little, several times. I wouldn’t recommend this section of the trail in times of rain or snow.
Bearfort Ridge – Ernest Walter Trail
It’s a nice walk, up the ridge, but without tree cover it is also very hot.
Bearfort Ridge – Ernest Walter Trail
We continued to the top of the summit ridge, which offers a panoramic view over the six-mile-long Greenwood Lake, 600 vertical feet below. Although the air was thick and hazy, the view was still quite stunning.
Greenwood Lake – Ernest Walter Trail
We wanted to spend some time here, taking in the magnificent view and resting from the steep climb, but instead walked a little further and found a shady spot.
Greenwood Lake – Ernest Walter Trail
We continued along the Ernest Walter Trail, which briefly dips into the woods, but soon comes out again on another long conglomerate outcrop. After passing through an area studded with pitch pines…….
pitch pines – Ernest Walter Trail
the trail bears right and descends to cross the outlet of a wetland to the right of the trail. The water here was about 12 inches deep and we walked across the fallen tree on the left, to cross over.
water crossing – Ernest Walter Trail
A short distance beyond, the yellow-blazed Ernest Walter Trail, reaches the eastern shore of pristine, spring-fed Surprise Lake.
Surprise Lake
We sat here in the shade, and even though it was barely 10:00 am, we enjoyed our lunch. I had read, that this place attracts crowds, on this day, we had this beautiful spot to ourselves. We then began contemplating on our next move regarding the hike. I laid out the pros and cons of continuing on the loop and/or retracing our steps, which would shorten the hike by about a mile or so. We decided on retracing our steps and making this an out and back hike.
Surprise Lake
While relaxing here, three hikers and their dog came along. We struck up a conversation and as it turns out, one of them reads this blog. He told me that he recently followed one of my hikes. I was glad to hear that and offered to take their photograph. I didn’t catch their names, but the dog’s name is Roxie. They continued on to do the loop.
Roxie and her 3 friends
Now returning the way we came, we made our way through the woods and back out onto the scenic ridge.
Bearfort Ridge – Ernest Walter Trail
We didn’t mind revisiting these views, but we did mind the blazing sun.
Greenwood Lake – Ernest Walter Trail
This place is as beautiful as advertised.
Bearfort Ridge – Ernest Walter Trail
After making our way along the ridge, we reached the junction with the blue-on-white-blazed State Line Trail. There were about 25 hikers making their way up and stopped at the junction to wait for stragglers. We turned right and proceeded to navigate our way down the rocky trail. On two occasions, we bushwacked to the left, in order to view the cascades that tumbled down the mountain. We continued descending on the State Line Trail until we returned to the parking area, where the hike began. The best view of the cascades are right from the parking area.
cascades – State Line Trail
This was an excellent hike and I plan to return, possibly in the fall, to complete the loop. The area is really beautiful and the views are amazing. This is a wonderful area to explore and there are connecting trails, including the AT, making long or short loop hikes possible. The State Line Trail is steep, but once up on the mountain, it does get easier, with some minor ups and downs.
With over 8,000 acres on the Shawangunk Ridge, Mohonk Preserve is the largest member and visitor-supported nature preserve in New York State. The Mohonk Preserve is a private land conservation organization established to protect the Shawangunk Ridge, it is not public land funded by the government. Therefore, there is a day use fee to use the preserve which funds its maintenance and programs.
Mohonk Preserve
The Mohonk Mountain House property consists of 1,325 acres, and much of it is landscaped with meadows and gardens. It adjoins the Mohonk Preserve, which is crisscrossed by 85 miles of hiking trails and carriage roads. The Mohonk Mountain House charges $22.00 Monday-Friday and $27.00 weekends/holidays for a day hiking pass. A hiking pass does not include access to the interior of the house or lake swimming. The Mohonk Preserve (non-profit nature preserve) and the Mohonk Mountain House (resort hotel) are two separate places. The Mohonk Preserve charges $15.00 for a day pass (annual memberships available) which also allows access to the Mohonk Mountain House property. The only drawback is that you have to hike a couple of miles in order to get to the Mountain House grounds. That normally adds about five miles to any hike unless you pay to park on their property.
Although Mohonk is famous for its Lemon Squeeze, which lies within the Labyrinth rock scramble. There are other notable hikes that involve rock scrambles, agility, and the use of hands as well as feet, including Arching Rocks Path, Cathedral Path, Giant’s Workshop, Humpty Dumpty Path and Rock Rift Crevices. I have done several of them and along with being challenging, they are also quite enjoyable.
This hike focuses on the Rock Rift Crevices, which is mostly a horizontal rock scramble and is fun to explore. It is a great introduction to rock scrambling for those that want a thrill without requirement of any real advanced skills. The rock scramble on this hike is less than a 1/2 mile long, but it feels much longer. It involves a lot of twisting and squirming through rock crevices and climbing over rock formations and boulders. The key is to keep an eye on the blazes as there seem to be numerous routes in which to go. This 6 mile loop also uses easy walking carriage roads to reach the crevices, a brief detour onto Mohonk Mountain House property to some magnificent views and returns on different carriage roads.
Rock Rift Crevices from Spring Farm Trailhead
The hike:
We began the hike on the Northwest Trail, which is located directly across from the booth where you stop to pay or show your membership card.
Northwest Trail
We headed south on the Northwest Trail, on a mowed path along the edge of a field.
Northwest Trail
The trail then plunges into the woods, crosses a small stream and begins to climb on a footpath, gradually at first. The trail reaches a collapsed stone wall, briefly parallels it then crosses through it. The trail then steepens as it climbs the hillside. The trail is not well marked, but easily discernible. I did spot an occasional red blaze along the way.
Northwest Trail
After about 1/2 mile and approximately 160 feet of elevation gain, we reached Cedar Drive and turned right, now heading southwest. Cedar Drive is one of several broken-stone carriage roads that connects the Spring Farm Trailhead area to the Mohonk Mountain House property.
Cedar Drive
In approximately 0.6 mile, we came to the Cedar Drive Carriage Road Bridge. The original rustic stone and wood bridge that crossed Mohonk Road was removed in the 1960’s when the public roadway was widened.
Cedar Drive Carriage Road Bridge
This new span, installed in 2011 once again links the historic carriage roads north of Mohonk Road to the remainder of the network on the southern side. The prefabricated steel pedestrian bridge with wooden decking is similar in appearance to the Trapps Bridge.
Cedar Drive Carriage Road Bridge
We crossed the bridge and continued walking on Cedar Drive. In approximately 0.7 mile, we reached the Cedar Drive Bridge.
Cedar Drive Bridge
This wide wooden bridge spans Mossy Brook and is very solidly built.
Cedar Drive Bridge
After crossing the bridge, we walked about another 500 feet and reached Glen Anna Road and turned left.
turn left on Glen Anna Road
Glen Anna Road snakes its way up the hillside…..
Glen Anna Road
then arrives at a junction with the red-blazed Rock Rift Trail.
Rock Rift Trail
We turned right onto the Rock Rift Trail and began following the red blazes and arrows. A short walk on the footpath leads to the start of the rock scramble.
Rock Rift Trail
The arrows point in which direction to go, otherwise it would be hard to figure out with so many crevices and rock formations.
Rock Rift Trail
Some of the crevices are tighter than others, but they are all doable. I am 6′ and 220 lbs. and although I had to remove my backpack at times to fit through the tighter squeezes, there were no spots where I had too much difficulty.
Rock Rift Trail
The trail twists and turns through a maze of jumbled boulders and a labyrinth of high rock walls.
Rock Rift Trail
Yes, I was able to squeeze through there.
Rock Rift Trail
There isn’t much elevation gain on this trail, although we did work up a sweat.
Rock Rift Trail
Some of the enclosed areas are very dark, but I had my trusty flashlight with me to help light the way.
Rock Rift Trail
Rock Rift Trail
We only encountered a lone female hiker going in the same direction as us. Near the end, we passed two male hikers going in the opposite direction.
Rock Rift Trail
With no other hikers breathing down our necks, we were able to go at our own pace. Although one of my fellow hikers commented later that we should have gone slower in order to further enjoy the beauty of this area.
Rock Rift Trail
Rock Rift Trail
Hiking this trail was like being in the Land of the Lost.
Rock Rift Trail
It rained heavily the two days before we did this hike and the rocks were slick in some areas.
Rock Rift Trail
There was one dark, cave like crevice where we had to walk about 25 feet in 12 inches of water. Luckily, I always carry spare socks in my pack.
Rock Rift Trail
This is a really fun trail and I truly enjoyed hiking it.
Rock Rift Trail
Rock Rift Trail
Surprisingly, this trail is not well-known. It travels inside caves and tunnels and is challenging, but at the same time, very rewarding.
Rock Rift Trail
This passageway, near the end of the crevices, was a little tight. My shoulders scraped against the sides, but I was able to squeeze through.
Rock Rift Trail
The Rock Rift Trail leads out to Rock Rift Road, where we took a short break and reflected on the wondrous adventure we had just undertook.
Junction of Rock Rift Trail and Rock Rift Road
After our brief moment of reflection, we continued on our journey. The Rock Rift Trail continues ahead on the other side of the road, where the path now becomes a maintained trail rather than a scramble.
Rock Rift Trail
The trail steeply climbs the hillside on switchbacks, making this the steepest ascent of the day.
Rock Rift Trail
In about 800 feet, the Rock Rift Trail ends at North Lookout Road, leaving the Mohonk Preserve and entering Mohonk Mountain House property. We decided to turn right in search of some views.
North Lookout Road
We didn’t have that far to walk. In about 600 feet, we reached North Lookout.
North Lookout Road
A gazebo, known as a “Summer House” on Mohonk property, marks the North Lookout. It offers a spectacular viewpoint over the Rondout Valley, with the Catskills in the distance.
North Lookout
We took a lunch break here while enjoying the magnificent view. I took this opportunity to remove my wet boots and socks and let my feet air out. Those fresh socks I had in my pack felt like heaven. While there, a group of horseback riders came by and asked me to take their photographs with their phones, and I obliged.
North Lookout
After a lengthy break, we tore ourselves from this splendid spot and retraced our steps on North Lookout Road, past the junction with the Rock Rift Trail.
North Lookout Road
As we continued on North Lookout Road, we were looking for a shortcut trail that cuts down the hillside, but we weren’t paying attention and missed it. No worries though, North Lookout Road wraps around and we stayed left to remain on it.
stay left to continue on North Lookout Road
We then came to a junction with the shortcut trail (the one we missed) on the left and Whitney Road on the right. This junction is a little confusing because it is not clearly labeled, but I consulted my map and continued ahead on North Lookout Road, now re-entering the Mohonk Preserve. A short distance ahead, we came to a three way junction that was easier to decipher. Here, we turned right onto Bonticou Road.
turn right on Bonticou Road
We walked northeast on Bonticou Road for about 0.8 mile, arriving at the paved Mohonk Road and crossed the street to continue on Bonticou Road.
Bonticou Road
We stayed on Bonticou Road for approximately another 0.6 mile and turned left onto Spring Farm Road.
turn left on Spring Farm Road
With the vast network of carriage roads that seem to intersect each other, a lot of the junctions can at times be a little confusing. From here it was made easier by the signs posted on the trees pointing us in the right direction.
Spring Farm Road
We stayed on Spring Farm Road for just under 1/2 mile as it led us downhill.
Spring Farm Road
We then turned left onto the red-blazed Crag Trail.
turn left on Crag Trail
The Crag Trail heads northwest on a footpath.
Crag Trail
The Crag Trail is also the route of the Shawangunk Ridge Trail (SRT).
Crag Trail
I didn’t see any more red blazes, but kept following the blue ones and the paper signs attached to the trees.
Crag Trail
In about 500 yards after turning onto the Crag Trail, we arrived back at the parking area, where the hike began.
Spring Farm Trailhead parking
We took a brief rest then headed up a short distance from the parking area, to what is referred to as “The Million Dollar View.”
Million Dollar View
This was a perfect way to end another great hike in “The Gunks.”
Million Dollar View
Review:
This was a truly great hike and the carriage roads were nicely shaded throughout, which was a bonus. The Rock Rift Crevices are about as much fun as one can have on a hike. This hike took place on a Sunday and we only ran into a handful of people on the trails/carriage roads. An all around good day on the trails with perfect weather to boot. I hope that you enjoyed the hike and will be inspired to hit the trails. Don’t forget to subscribe to my blog and get notified whenever I publish a new post. Now get out there and take a hike!
Pros: Rock Rift Crevices, scenic views, mostly shaded trails, well maintained carriage roads, The Gunks.
Cons: Junctions along carriage roads can be confusing.
With over 8,000 acres on the Shawangunk Ridge, Mohonk Preserve is the largest member and visitor-supported nature preserve in New York State. The Mohonk Preserve is a private land conservation organization established to protect the Shawangunk Ridge, it is not public land funded by the government. Therefore, there is a day use fee to use the preserve which funds its maintenance and programs.
Mohonk Preserve
I normally prefer to hike the Mohonk/Minnewaska area on weekdays due to the large crowds on weekends. Having been gifted an annual Mohonk Preserve membership, I wanted to take advantage of it and hike some trails that I hadn’t yet done. Parking is always an issue when visiting the Mohonk Preserve, so it makes for an early rise. The preserve’s website lists the parking areas as opening at 9:00am on weekends, but when we arrived at about 8:30am, it was near capacity.
West Trapps Parking Area
This hike began from the West Trapps Parking Area, travels along several lesser used trails and returns along Undercliff Road. Undercliff Road is always filled with walkers, cyclists and rock climbers, but it is a very scenic walk. Originally, the hike was going to be a simple 6 mile loop, but upon arriving at the trailhead, We decided to visit Van Leuven’s Cabin. That added about 1.5 miles to the hike, but well worth it.
Old Minnewaska Trail and Undercliff Road Loop
This hike begins on the Trapps Hamlet Path, which is located to the left of the booth when entering the parking area. The 0.8 mile long trail has numbered wooden posts along the way that mark areas of historical significance. A pamphlet with the history of the area is available in a box attached to the post at the start of the trail. On our visit, the box was empty, but the booth attendant supplied us with one.
Trapps Hamlet Path
This blue-blazed trail travels through what was once a 19th century mountaintop community. Once home to the huckleberry-pickers and stone-cutters, the Trapps Mountain Hamlet housed as many as 40-50 families by the time of the Civil War.
Trapps Hamlet Path
This vanished hamlet now consists of the restored Van Leuven Cabin; 60 cellar holes and foundations of dwellings, mills, barns, a school, a tavern, a chapel, and other structures; over 40 charcoal pits; and four family burying grounds. This historic district is a subsistence hamlet listed on both the New York State and National Register of Historic Places.
The trail is well marked and travels through an attractive forest. Most of the tall trees are from the 1920’s. The original forest had been cut down by the end of the 1800’s to clear land for pastures, meadows and to provide wood for local sawmills and firewood for cooking and heating.
Trapps Hamlet Path
It’s an easy walk through the secluded and shaded woods. In about 400 yards, the trail crosses the start of the yellow-blazed Enderly’s Path. We continued following the blue blazes as they cross a small stream on wooden planks.
Trapps Hamlet Path
In a short distance, we came to a large, rounded piece of Shawangunk Conglomerate (sometimes called Shawangunk Grit) that a millstone cutter abandoned long ago.
millstone – Trapps Hamlet Path
In some parts of the Shawangunks, ready access to more suitable exposures of the conglomerate bedrock made it possible to produce excellent gristmill stones, an important source of income for Trapps families in the 19th century.
millstone – Trapps Hamlet Path
The trail then crosses a brook located at a point where a farm wagon road once crossed the stream. Its existence is indicated by a number of stones laid on top of one another on each side of the brook to form bridge abutments. The bridge would have allowed the passage of wagons carrying hay, firewood, or cut millstones.
Trapps Hamlet Path
The trail continues over an old stone fence, leaving one property and entering onto another. The lands ahead belonged to Ben Fowler who owned about 150 acres.
Trapps Hamlet Path
The trail continues through the forest then crosses Clove Road.
Trapps Hamlet Path
Shortly after crossing Clove Road, the trail turns left onto an old dirt road. This road was an early track, leading to the pioneer Van Leuven homestead. Later, this track became a Gardiner town road, well-traveled by pedestrians, horseback riders, horse-drawn wagons, and even an early Ford or two, before the road fell into disuse. The trail parallels the Coxing Kill which flows over conglomerate outcrops amid large boulders. The Coxing is a major stream flowing down from Lake Minnewaska, two miles upstream from here.
Trapps Hamlet Path
The trail ascends gradually and arrives at the Van Leuven Cabin. It is one of the few remaining homes of the nearly vanished Trapps Mountain Hamlet. Its small size and simple, unadorned lines were typical of the Hamlet. The cabin is a plank house built in 1889 or 1890 by William Hagen and bought by Eli Van Leuven in 1898. Eli’s family occupied the house into the 1920’s when the Mohonk Mountain House bought the property.
Van Leuven Cabin
After checking out the cabin and reading the informational signs, we turned around and began retracing our steps on the Trapps Hamlet Path. We stopped at post marker 8, which we had passed on our way to the cabin, to visit the Fowler Burial Ground.
Fowler Burial Ground
A short walk up the spur path, is one of several family burying grounds established by the people of the Trapps Mountain Hamlet as an alternative to public cemeteries. The oldest headstone to be recognized here dates from 1866.
Fowler Burial Ground
We then returned to the Trapps Hamlet Path and continued retracing our steps. When we reached the junction with Enderly’s Path, just beyond a stream crossing, we turned left.
junction with Enderly’s Path
The Enderly’s Path is a 0.7 mile footpath, marked by yellow blazes. It connects the Trapps Hamlet Path with the Shongum Path.
Enderly’s Path
We walked the Enderly’s Path to its terminus at the Shongum Path and turned left.
Shongum Path
Marked by signs and red blazes, the Shongum Path connects the Old Minnewaska Trail with the West Trapps Connector Trail, linking the Coxing Kill area with the West Trapps parking area.
Shongum Path
We hiked the Shongum Path to its terminus at a junction with the Old Minnewaska Trail. We turned left and crossed a wooden bridge that spans the Coxing Kill. We then turned right and walked down to check out Split Rock.
Split Rock
The Coxing Kill plunges into a small gorge of solid rock and streams out on the other end into a pool.
Split Rock
While there is no “official” swimming area or lifeguard, swimming seems to be allowed and this is a very popular swimming hole. The channel flows into a small sloped pool that is about 3-4 ft deep with a sandy/small rock bottom.
Split Rock
We relaxed here for a short while and had the place to ourselves. By mid afternoon on a nice day, this place is crawling with people. We walked back up to the Old Minnewaska Trail and turned left. We recrossed the wooden bridge over the Coxing Kill and continued ahead on the gravel road, known as the Old Minnewaska Trail.
Old Minnewaska Trail
Built in 1879 to link Mohonk with Minnewaska, this 2.3 miles long carriage road was abandoned in 1907. It is marked with light blue blazes and also with the dark blue plastic discs of the Shawangunk Ridge Trail.
Old Minnewaska Trail
At times the trail narrows to a footpath as it ascends gradually along the hillside. This was the steepest ascent of the day and it was relatively easy.
Old Minnewaska Trail
After climbing gradually, the trail descends slightly to cross a stream (the stream was dry on this day). The stone abutments of a former bridge can be seen ahead, but the trail dips down to the stream, which It crosses on rocks.
Old Minnewaska Trail
The road again narrows to a footpath and begins a gradual climb. As the trail levels off, the remains of an old quarry can be seen down to the left when there are no leaves on the trees. The hand-cut drill holes at the edges of the large conglomerate stone blocks are still visible. The trail continues along a relatively level route, with some minor ups and downs. Huge slanted rock slabs begin to appear on the right. After a while, we came to a broad viewpoint to the left, with pitch pines lining the slope below, and the Catskills visible in the distance.
View of the Catskills from the Old Minnewaska Trail
The trail now begins a steady but gentle climb through mountain laurel thickets. In half a mile, the trail begins to descend. Soon, we reached a spot where the old road has been eroded down to the bedrock. Here, a slanted rock slab on the left affords a superb view across the Rondout Valley to the Catskills. This is a good spot to take a break, and we did. Just beyond the viewpoint there is a trail junction with the start of the Undivided Lot Trail (marked by a signpost). We veered right to remain on the Old Minnewaska Trail.
stay on Old Minnewaska Trail
The Old Minnewaska Trail climbs on switchbacks and ends at a junction with Laurel Ledge Road.
junction with Laurel Ledge Road
Laurel Ledge Road is a wide, maintained carriage road, which is open to bicyclists as well as hikers.
Laurel Ledge Road
We continued ahead to the end of Laurel Ledge Road at Rhododendron Bridge and continued straight ahead at the intersection, to Undercliff Road (marked by a sign).
straight ahead at the intersection onto Undercliff Road
To the right is Overcliff Road, which connects with Undercliff Road at Trapps Bridge. Either carriage road can be used for this hike and both are the same distance. We opted for Undercliff Road because it’s on the eastern side of the cliffs and thus shaded for most of its entirety in the afternoon. Overcliff Road has less foot traffic and offers views similar to those of the Old Minnewaska Trail.
straight ahead at the intersection onto Undercliff Road
After the road makes a sharp S-curve, the trail reaches the famous Trapps Cliffs, considered the best rock climbing area in the East.
Trapps Cliffs
The cliffs sit away from the road, with many spur trails that lead up to them that are intended for rock climbers. Jumbled slabs of Shawangunk conglomerate sit piled near the edge of the road, some forming cave like structures.
caves – Undercliff Road
After about two miles along Undercliff Road, we passed a junction with the yellow-blazed East Trapps Connector Trail, which begins on the left. Route 44-55 is visible below to the left, along with views of the Wallkill Valley. We continued ahead, along Undercliff Road.
Wallkill Valley – Undercliff Road
The Trapps Cliffs begin more closely to approach the road, and we encountered many rock climbers along this stretch.
Undercliff Road
Undercliff Road
We stopped and watched them scale the cliffs.
climber – Undercliff Road
climber – Undercliff Road
From here to the Trapps Bridge, there are views to the left over the Wallkill Valley. Undercliff Road ends at a junction with Overcliff Road, with the Trapps Bridge to the left. We descended on a gravel road, the yellow-blazed West Trapps Connector Trail, just to the right of the bridge.
West Trapps Connector Trail, just to the right of the bridge
Soon after the road levels off, the trail reaches a junction with the red-blazed Shongum Path, marked by a sign, on the right. We continued ahead, following the yellow blazes.
West Trapps Connector Trail
The West Trapps Connector Trail ends at the West Trapps Trailhead parking area, where the hike began.
West Trapps Trailhead parking area
Another great hike in The Gunks, with some history and some views. With the exception of Undercliff Road, the trails we hiked were mostly deserted. The crowds on Undercliff Road were not overwhelming and we enjoyed watching the climbers scaling the cliffs and practicing their hand holds. This area has such an extensive network of trails that can be used for a variety of loop hikes. I will be back soon to explore some more trails.
Pros: The Gunks, views, Trapps Hamlet, Split Rock, cliffs, shaded trails, well marked trails.
Cons: Undercliff Road gets a lot of foot and bike traffic.
This hike follows trails that were recently rerouted and reblazed over existing trails. An updated map is essential to avoid confusion and/or getting lost. The NY-NJ Trail Conference has released a new 2023 Appalachian Trail Detour Map that reflects the recent trail additions and changes.
Please note: From late September to late October, Oktoberfest is held at the Anthony Wayne Recreation Area on Saturdays and Sundays.
Overview:
West Mountain is a peak that is located in both Orange and Rockland County, NY, just east of the Palisades Interstate Parkway. Most of the mountain is within the boundaries of Bear Mountain State Park, but part of it is in Harriman State Park as well. In November 1923, the Palisades Interstate Park Commission decided that “all of the Park lying west of Bear Mountain (later, west of West Mountain) shall be designated Harriman State Park.” The summit is at an elevation of 1,257 ft. and the western ridge (the section that is part of this hike), is about 1.5 miles long. The narrow ridge offers hikers many fine outlooks both to the west and to the east as the trail jogs from one side of the ridge to the other.
West Mountain as viewed from The Timp
This is one of my favorite spots in the Harriman-Bear Mountain State Park area. It’s a great hike to do at any given time and parking is never an issue if you get a late start. Some of the best views in the area can be had from the West Mountain ridge and many different trails can be accessed from the Anthony Wayne Recreation Area, making longer hikes possible. I have hiked the ridge previously via different routes and plan to be back. This loop hike was done clockwise from the Anthony Wayne Recreation Area South Lot.
West Mountain Loop via Fawn Trail and AT
Normally an early riser on hike day, we arrived at the parking area at around 9:30am. There was one other car in the south lot when we began the hike by heading north along the sidewalk.
Anthony Wayne Recreation Area South Lot
We turned right near the northern end of the lot, walked past a gate and crossed the bridge over Beechy Bottom Brook.
Anthony Wayne Recreation Area
We then turned left and continued heading north through a picnic area.
Anthony Wayne Recreation Area
At the northeast end of the picnic area, we jumped on a gravel park road and continued north.
park road – Anthony Wayne Recreation Area
In a short distance, the gravel road heads away from the parking areas and leads uphill. The road then turns right at a Y-intersection with a grassy road and heads steeply uphill. We left the gravel road and continued straight, now following the blue-on-white-diamond-blazed Horn Hill Loop Mountain Bike Trail.
stay left at junction to Horn Hill Loop Mountain Bike Trail
The 4.8 mile Horn Hill Loop Mountain Bike Trail, forms a figure-eight loop. It is the only trail in Harriman-Bear Mountain State Parks on which bicycles are permitted.
Horn Hill Loop Mountain Bike Trail
Soon the trail comes to a junction with the white-blazed Anthony Wayne Trail, which continues straight and left. To the right is the start of the red-“F”-on-white blazed Fawn Trail, which ascends stone steps.
Fawn Trail
The Fawn Trail was shown on the first Park trail map in 1920. The Fawn Trail provides an easy route from the Appalachian Trail (AT) and Doodletown Road to the Anthony Wayne Recreation Area on the other side of West Mountain. It is a fairly level trail, and in June it passes through masses of laurels in bloom.
Fawn Trail
The Fawn Trail climbs using switchbacks and rock steps for part of the way, and crosses a junction with the blue-blazed Timp-Torne Trail.
Fawn Trail
It then passes around the northern end of West Mountain and turns towards the southeast.
Fawn Trail
After approximately 0.6 mile from the start of the Fawn Trail, we reached a junction with the Appalachian Trail and turned right, now following the white blazes. This junction is easy to miss and we walked past it. I stopped and checked my map and even while writing this post, the map and the actual trail don’t seem to match up. I have an older map (2015) and it’s possible that one of the trails were re-routed.
Appalachian Trail
The AT begins a steady climb up the eastern face of West Mountain.
Appalachian Trail
The section of the Appalachian Trail that passes through Harriman and Bear Mountain State Parks is the oldest section of the trail, completed in 1923.
Appalachian Trail
Appalachian Trail
Near the top, there is an outstanding viewpoint to the left over Bear Mountain,
view of Bear Mountain from West Mountain
Iona Island and the Hudson River.
Iona Island and the Hudson River – Appalachian Trail
The stone building on the summit of Bear Mountain is the Perkins Memorial Tower.
Perkins Memorial Tower from West Mountain
After a brief descent to a valley, the AT climbs steeply up to the ridge of West Mountain.
Appalachian Trail
Appalachian Trail
Appalachian Trail
The AT reaches a junction with the blue-blazed Timp-Torne Trail, which comes in from the right. We turned left, now following the joint AT/Timp-Torne Trail, as it heads south.
Appalachian Trail
The trail passes another viewpoint to the left over Bear Mountain, Iona Island and the Hudson River.
view of Bear Mountain from West Mountain
The trail now swings to the west side of the ridge and soon reaches a west-facing viewpoint over Black Mountain.
Appalachian Trail
west-facing viewpoint – Appalachian Trail
The Palisades Interstate Parkway and two large parking areas for the Anthony Wayne Recreation Area are visible in the valley below.
west-facing viewpoint – Appalachian Trail
The joint AT/Timp-Torne Trail continues south along the ridge and dips into the woods.
Appalachian Trail
The trail traverses an open rock ledge,
Appalachian Trail
then descends steeply…..
Appalachian Trail
Appalachian Trail
and crosses back to the west side of the ridge, soon passing more viewpoints to the west.
view southwest from West Mountain
Appalachian Trail
Balancing Rock – West Mountain
Appalachian Trail
Appalachian Trail
After reaching another east-facing viewpoint, Bear Mountain is visible to the northeast.
view of Bear Mountain from West Mountain
A Black Vulture posing.
Black Vulture – West Mountain
A short distance later, we came to a junction, marked by a post. Here, the AT continues ahead as the blue-blazed Timp-Torne Trail turns left. We continued ahead still following the white blazes.
continue straight on Appalachian Trail
A rock outcrop at the junction affords hikers a great west-facing view.
view southwest from West Mountain
The AT descends steeply on stone steps that were recently added by NY/NJ Trail Conference’s Long Distance Trails Crew.
Appalachian Trail
The LDTC have relocated some sections of the heavily eroded trail and have installed switchbacks to eliminate some of the steeper sections in this area.
Appalachian Trail
Appalachian Trail
The AT crosses Beechy Bottom West Road (also part of the Horn Hill Loop) and then comes to a junction with the Horn Hill Loop Mountain Bike Trail, marked by a sign.
Appalachian Trail junction
We turned right and began heading north, now following the blue-on-white-diamond-blazes.
Horn Hill Loop Mountain Bike Trail
The trail continues through the woods and crosses several bridges.
Horn Hill Loop Mountain Bike Trail
Horn Hill Loop Mountain Bike Trail
Horn Hill Loop Mountain Bike Trail
In approximately 1/2 mile from the junction with the AT, the trail reaches the south lot of the Anthony Wayne Recreation Area. We walked along the sidewalk and returned to our vehicle, where the hike began.
Anthony Wayne Recreation Area South Lot
Another outstanding hike in Bear Mountain State Park. This hike has views galore and varied terrain to keep it interesting. This approach of West Mountain is less steep than the other two hikes I have done here. Surprisingly, the ridge didn’t have that much foot traffic for a gorgeous Saturday in July. There is also enough tree cover along the ridge to keep from baking in the sun.
Pros: Views galore, Appalachian Trail, plenty of parking, shaded trails except for some sections along the ridge.
Cons: September – October the Anthony Wayne Recreation Area is used for Oktoberfest.
The Lasdon estate, originally called Cobbling Rock Farm, was acquired by William and Mildred Lasdon in 1939. The Lasdon estate was simply used as a country retreat. In 1976, William Lasdon created the Mildred D. Lasdon Bird and Nature Sanctuary. This is a twenty-two acre preserve which was donated to the county. There is an intricate system of trails that run through an array of wildlife habitats. Many different species of birds, and up to twenty different types of warblers can be observed there during migration.
Lasdon Park, Arboretum & Veterans Memorial
When William Lasdon died in 1986, Westchester County purchased the estate for $4.2 million. Several companies were interested in using the 234 acres to put up condominiums. The county wanted to obtain this land in order to preserve the land and history of the area. For the most part, the formal grounds remain as they were designed initially. Westchester County has been continuously developing and embellishing the collections on the property.
Lasdon Park, Arboretum & Veterans Memorial
The William and Lasdon Memorial Garden site was donated by their daughter, Mrs. Nanette Laitman. This is the main garden present at the front of the estate. It is a one-acre garden created in memory of Mr. and Mrs. Lasdon.
Lasdon Memorial Garden
Lasdon Memorial Garden
Lasdon Memorial Garden
The Famous and Historic Tree Trail features trees and other species that honor historic events and famous Americans, such as Martin Luther King, Jr., and John F. Kennedy, from our country’s past. Each station features a panel describing the famous person or even to which the original parent tree was witness.
Historic Tree Trail
Historic Tree Trail
Lasdon Park also features the Westchester County Veterans Museum, with exhibits of photographs, historical documents, artifacts and memorabilia about Westchester County residents who served in the United States armed forces in time of war, from the Revolutionary War to the present. There is no admission charge to the museum.
Lasdon Park, Arboretum & Veterans Memorial
The Trail of Honor is dedicated to the veterans of Westchester County, from The American Revolution to Desert Storm. On this trail you will walk among the natural surroundings and wildlife featured in Lasdon Park as you journey through our nation’s past.
Trail of Honor
At the entrance to the trail, you are welcomed by the flags of the six branches of the military: the Merchant Marines, Army, Navy, Marines, Coast Guard and Air Force, arranged by date of organization.
Trail of Honor
The Trail of Honor features 12 stone cairns that display the busts of combat soldiers from the American Revolution through Operation Desert Storm; the Korean War Memorial; and the Westchester Vietnam Veterans Memorial, a sculpture of three seven-foot bronze statues that depict a soldier carrying a wounded comrade, with a nurse reaching out to assist them. Nearby, an obelisk with inscriptions of Westchester County servicemen and eight women nurses killed in Vietnam.
Trail of Honor
As you proceed on the path into the woods, there are a series of 12 stone cairns that display the busts of combat soldiers from every major American conflict, dating from the American Revolution through Operation Desert Storm.
Korean War
The cairns are covered with stones from the 44 towns in Westchester County.
Vietnam War
At the end of the Trail of Honor is the Westchester Vietnam Veterans Memorial, a sculpture that is comprised of three seven-foot bronze statues that depict a soldier carrying a wounded comrade, with a nurse reaching out to assist them.
The Westchester-Putnam chapter of the Vietnam Veterans commissioned local artist Julia Cohen to design the sculpture.
Westchester Vietnam Veterans Memorial
The sculpture design and casting, took a year to complete. A Sikorsky Sky Crane flown by the 169 Aviation Regiment of the Connecticut National Guard was used to put the statues in their place on Tuesday October 12, 1987.
Westchester Vietnam Veterans Memorial
Nearby, a black obelisk featuring 217 names of natives of Westchester County that were killed serving in the Southeast Asia conflict. Surrounding the obelisk is a path made up of 5,900 paving stones, each one representing ten soldiers who were killed in the Vietnam War.
Westchester Vietnam Veterans Memorial
The area in front of the monument is used for memorial ceremonies done by the Vietnam Veterans of America chapter 49.
Westchester Vietnam Veterans Memorial
Also located along the trail is the Korean War Memorial. This memorial is the largest in the park, and was built shortly after the Vietnam Veterans Memorial. It was erected with the intention of giving special recognition to veterans of Korea, a war that some feel has been overlooked by the American people. The monument is a massive black obelisk inscribed with the names of all the servicemen from Westchester County who died serving in Korea.
Korean War Memorial
The Combat Infantryman’s Memorial represents the award given to soldiers who have been under fire while serving their country. The badge commands a great deal of respect, and is awarded for the extreme bravery the recipient has demonstrated. Infantrymen are soldiers who are specifically trained to fight on the front lines while on land, and make up the majority of the armed forces.
The Combat Infantryman Monument
As you continue to the end of the trail and witness each of the fifteen memorials you will remember that our freedom truly is not free. These brave men and women from Westchester paid the ultimate price to ensure the freedom of our great nation, and we owe them our deepest respect and gratitude.
Lasdon Park, Arboretum & Veterans Memorial
“You silent tents of green, We deck with fragrant flowers; Yours has the suffering been, The memory shall be ours” ~Henry Wadsworth Longfellow.
Trailhead parking: Kanawauke Rd – Stony Point, NY 10980
Overview:
Harriman State Park, located in Rockland and Orange counties, is the second-largest park in the NYS parks system, with 31 lakes and reservoirs, 200 miles of hiking trails, two beaches, two public camping areas, a network of group camps, miles of streams and scenic roads, and scores of wildlife species, vistas and vantage points.
Harriman State Park
Living in relatively close proximity to Harriman, it is my go to place for either a well planned or spur-of-the-moment hike. On this day, I had scheduled a different hike that involved some bushwacking through an area filled with Rattlesnakes. Not being in the mood to worry about being bit, I decided to reschedule that hike for cooler weather. A few days earlier, I had read that the Jackie Jones Fire Tower had been recently restored. I visited the tower in December 2016 and it was in really bad shape and not safe to climb. I was eager to see the restored tower and check out the view from the top. We were already in the car when we decided on this hike and since it was last minute, we kept it simple.
Jackie Jones and Big Hill Loop
The Hike:
We parked in the hikers parking area on Kanawauke Road (CR 106). It’s a sizable pull off parking and there was only one other car when we arrived at 8:30am. On our return at approximately noon, it was at capacity.
hikers parking area on Kanawauke Road
From the parking area, we walked west along Kanawauke Road (CR 106) for about 300 feet, crossing over Minisceongo Creek.
Kanawauke Road
The trail crosses the road, but after crossing over Minisceongo Creek, we turned left and proceeded past the gated road to commence the hike, following the yellow-blazes of the Suffern-Bear Mountain (S-BM) Trail.
Suffern-Bear Mountain (S-BM) Trail
We would be following the yellow blazes for the first 2 miles of the hike. The trail starts off on a paved park road as it proceeds uphill.
Suffern-Bear Mountain (S-BM) Trail
In about 1/4 mile, the S-BM Trail bears left onto a woods road…..
S-BM Trail veers left
and passes some boulders across the trail.
S-BM Trail
In a short distance, the S-BM Trail passes a stone gatehouse.
stone gatehouse – S-BM Trail
The gatehouse is part of a large estate, known as ORAK.
stone gatehouse – S-BM Trail
A little further up the trail, to the left, are more extensive ruins. At this time of year, they are covered with foliage and harder to see.
ORAK Ruins
Known as ORAK, the mansion was built in 1923 by George Briggs Buchanan, a vice president of the Corn Products Refining Company, which manufactured Karo syrup (Orak is Karo spelled backwards). After Buchanan died in 1939, his heirs sold the mansion to the park. The home, gardens and outbuildings were rented to Park employees until 1973, when the main house and hothouse were demolished.
ORAK Ruins
The dining room of the house resembled a ship’s cabin, with portholes for windows, and a floor that rocked gently to simulate a ship’s motion.
ORAK Ruins
There’s plenty to explore here, including the remains of a greenhouse, but it is best done during winter when it is more exposed. Once we were done exploring the ruins, we continued heading uphill on the Suffern-Bear Mountain (S-BM) Trail.
S-BM Trail
Soon, we reached a fork in the trail. The unmarked woods road that comes in from the left would be our return route, but for now, we veered right to continue on the S-BM Trail.
turn right on S-BM Trail
The trail soon bears left, leaving the woods road, and climbs to a large open rock ledge. A short distance beyond, it passes communications towers on the right and soon arrives at the 1,276-foot summit of Jackie Jones Mountain, marked by a steel fire tower.
Jackie Jones Fire Tower
The last steel fire tower in the Bear Mountain-Harriman State Park, Jackie Jones Lookout was constructed in 1928 by the Palisades Interstate Park Commission, who operated the facility until 1931. From that time, the facility was operated by Forest Fire Control until it closed in the 1970’s. The 60’ Aermotor LS-40 tower with 7’x7’ metal cab, features windows of an unusual design.
Jackie Jones Fire Tower
The fire tower was restored in 2018 by the New York State Chapter of the Forest Fire Lookout Association (FFLA). A great job and big thanks to them. I climbed the tower and hardly a shake. Although the cab was locked on our visit, the view from just below the cab was very nice. Looking northwest, one can see Lake Welch from the tower.
Lake Welch – Jackie Jones Fire Tower
Looking southeast, the Hudson River is visible, with High Tor Mountain to the right.
Looking southeast – Jackie Jones Fire Tower
Looking south, the Manhattan skyline is visible in the distance.
Manhattan skyline – Jackie Jones Fire Tower
Looking northeast, Bear Mountain is visible, just to the right of center, with the Harriman hills to the left.
View northeast – Jackie Jones Fire Tower
After stopping briefly at the tower we resumed our trek. The S-BM Trail now descends, steeply in places. After crossing a stream, it climbs a little and then resumes its steep descent. At the base of the descent, it crosses another stream and then the Old Turnpike, a wide woods road, which is now the route of a buried telephone cable. After ascending slightly, it reaches a junction with the aqua-blazed Long Path, which comes in from the left. We continued ahead on the joint S-BM/Long Path, which turns right onto a woods road. A short distance ahead, the joint trails turn left and climb to the Big Hill Shelter.
Big Hill Shelter
Built in October 1927, this stone shelter offers a panoramic view to the south, with the New York City skyline visible in the distance on a clear day.
Big Hill Shelter
The shelter has 2 fireplaces and a wooden platform for sleeping. It also has a fire ring just outside the entrance.
Big Hill Shelter
We took a break here, had a snack and chatted briefly with several hikers that passed by while we were there. We also watched a pair of hawks soaring above us and making quite a racket. Once our break was over, we went back and descended on the S-BM/Long Path, following the same route we took up to the shelter. When we reach the fork where the two trails diverge, we stayed left and continued on the S-BM Trail. We retraced our steps on the S-BM Trail until we came to the Old Turnpike. Here we turned right and began walking on the unmarked road. The Old Turnpike was rather overgrown until 1969, when AT&T widened it to 20 feet and buried a coaxial cable along one side.
Old Turnpike
The Old Turnpike was a road from Monroe (now known as Southfields) to Haverstraw. It is not known when it was first built, but it became the “old” turnpike in 1824, when a new turnpike (now Gate Hill Road/Route 106) was built.
Old Turnpike
It was a very pleasant walk along this wide woods road. After about 0.5 mile on the Old Turnpike, we turned left onto another unmarked woods road. The turn was not easily discernible due to a large fallen tree across the road. I had to walk up to the tree in order to determine that this was indeed the road we were looking for. The image below was captured after stepping over the tree and looking back towards the Old Turnpike.
unmarked woods road
The unmarked woods road heads north and uphill.
unmarked woods road
In about 0.3 mile, we reached a junction with the yellow-blazed S-BM Trail. The yellow blazes head both right and straight ahead, but we turned right, now retracing our steps along the S-BM Trail. We followed the trail downhill past the ORAK ruins and back to Kanawauke Road/Route 106. We then turned right on Route 106 and walked 300 feet along the shoulder to reach the parking area where the hike began.
Review:
This was a very nice hike for a hot and humid day. Not much elevation gain and mostly shaded throughout. Since I was familiar with the area, it made for a good impromptu hike.
Pros: ORAK ruins, fire tower, Big Hill Shelter, views, shaded trails, not much foot traffic.
Trailhead parking: South Mountain Pass Road – Garrison, NY 10524 (A 3-4 car lot and a wide shoulder is available for parking where the AT crosses South Mountain Pass Road).
Details on hikes to Anthony’s Nose via different routes:
Anthony’s Nose is a peak along the Hudson River at the north end of Westchester County, New York. Together with Dunderberg Mountain, it comprises the South Gate of the Hudson Highlands. The 910 ft. peak has been known as Anthony’s Nose since at least 1697, when the name appears on a grant patent. Pierre Van Cortlandt, who owned this mountain, said it was named for a pre-Revolutionary War sea captain, Anthony Hogan. This captain was reputed to have a Cyrano de Bergerac type nose.
Anthony’s Nose as viewed from The Torne
Anthony’s Nose is one of the more popular hikes in the Hudson Valley and on weekends the cars are lined up along Route 9D as a testament to its popularity. I visited Anthony’s Nose recently, on my birthday, via the Camp Smith Trail. Being that it was July 4th, I wanted to do a hike that leads to an American Flag. Sadly, there aren’t that many options in the area. I had raised a bright new flag on the summit of Hook Mountain on July 4, 2017. Unfortunately the flag that I placed there was taken down by unknown person(s). I wanted to keep the hike somewhat local due to holiday traffic and my choices were whittled down to Anthony’s Nose or The Torne. Having just done The Torne on Memorial Day weekend, I decided on Anthony’s Nose. There are several different routes one can take to the scenic view where the flag flies proudly. I wanted to check out a route that isn’t as well known and do some exploring as well.
Anthony’s Nose via Military Road
A new feature that I have added is the Google Earth Fly-Through. It follows the path that we hiked and it gives you a good idea of the terrain, layout, amount of parking etc. Check it out, it’s pretty cool.
View the Google Earth Fly-Through video of the hike below.
We arrived at the Trailhead shortly before 8:30 am and there was one car in the lot. While we were gearing up, two cars pulled up and quickly got out and hit the trail. We gave them a head start so we wouldn’t be on their heels and then began our hike. We took a short footpath at the western end of the lot to the white-blazed Appalachian Trail, which crosses South Mountain Pass Road here. We walked a short distance to the AT and turned left onto a woods road and passed a locked gate.
Appalachian Trail – South Mountain Pass Road
This woods road, also the route of the AT, is labeled on maps as Military Road.
Appalachian Trail/Military Road
The road ascends gently and in about 300 yards from the gate, the AT leaves to the right as it descends slightly. We continued straight to stay on Military Road.
Stay left on Military Road
Military Road now ascends steadily and passes a primitive campsite.
Military Road
In about 0.4 mile, Military Road reaches a fork where we veered right.
Military Road
To the left is a locked gate where the road continues into Camp Smith.
gate to Camp Smith
We continued following the road to the right, skirting the northern boundary of Camp Smith.
sign – Military Road
The road curves to the west as it levels off.
Military Road
There is a sign to the right of the road. I believe the TA stands for “Training Area.” It is not shown on Camp Smith’s Training Area Map, so I’m not sure if it’s old or new.
sign – Military Road
The trail continues west, with the Hudson River visible through the trees. The road then turns left and joins the Appalachian Trail, which comes in from the right. The AT begins a steep descent here.
turn left on Appalachian Trail
In a short distance, the AT turns right and leaves the road, descending steeply towards Route 9D. We stayed to the left, to remain on the woods road.
continue straight on the woods road
We now began following the blue-blazed Camp Smith Trail, which ascends steadily on a moderate grade.
Camp Smith Trail
Even though it was still early, we passed several hikers going in the opposite direction.
Camp Smith Trail
It was already getting hot and a little humid, but the entire hike thus far on the woods road, had been shaded.
Camp Smith Trail
In approximately 1/2 mile from the junction with the AT, the Camp Smith Trail turns left, and leaves the woods road. We turned right and walked a short distance to the large rock outcrop that is Anthony’s Nose.
Anthony’s Nose
Looking southwest, Iona Island and the Hudson River is visible below. Just beyond, starting from the left of center, is Dunderberg and Bald Mountains, The Timp is to the left of the notch and West Mountain to the right. The notch is Timp Pass.
view southwest – Anthony’s Nose
The Bear Mountain Bridge is visible below to the west, with Bear Mountain on the left and The Torne, just right of center.
Bear Mountain Bridge – Anthony’s Nose
One of the finest views in Westchester County. It is such a popular spot on nice days, that it is hard to find solitude up here, but worthy of a visit nonetheless.
view southwest – Anthony’s Nose
No wind at the summit, kept the air warm, but the clouds blocked the sun, at least for the time being.
American flag – Anthony’s Nose
Across the river, a bronze sculpture of an Elk’s Head, can be seen on a rock outcrop.
Elk’s Head – Bear Mountain State Park
Directly across the river is Bear Mountain with Hessian Lake at its base.
Bear Mountain and Hessian Lake
The blueberries were just starting to ripen.
blueberries – Anthony’s Nose
Happy Birthday America! We stayed at Anthony’s Nose for quite some time enjoying the view as well as a snack. What better way to celebrate America’s birthday than at this spot right here?
American flag – Anthony’s Nose
The whole time we were there, people came and went. Then it was our turn. We walked back out to the Camp Smith Trail and turned left.
Camp Smith Trail
We headed northeast on the Camp Smith Trail as it descends.
Camp Smith Trail
In a 1/2 mile, the Camp Smith Trail ends at the junction with the Appalachian Trail. We stayed on the woods road as the AT ascends steeply.
Appalachian Trail
At the top of the rise, the AT continues straight and leaves the woods road, but we turned right to continue on Military Road. The trail curves southeast then curves northeast as it begins to descend.
Military Road
Please note: If you would like to skip the bushwacking section of the hike, continue on Military Road a short distance back to the parking area, where the hike began.
When we reached the primitive campsite that we passed early, on the hike. We began bushwacking east up the hill towards Mine Mountain. We were now looking for Philips Mine and its workings, that sit just up the hill. It wasn’t an easy bushwack and there was no clear path, After about 400 yards of zig-zagging through the heavy brush, we arrived at a tailings pile on the slope of the hill.
tailings near Philips Mine
As we walked around this area, there was evidence of mining operations throughout. The Philips Mine is on the northwestern flank of Mine Mountain. It was first operated for iron ore. It is unclear when the mine was first opened.
mining remnant near Philips Mine
Standing on the rusty tailings, looking north towards Canada Hill. We walked around looking for any one of the several mine openings. I was under the assumption that the tailings would be near the adit.
Looking north towards Canada Hill
We walked on Coppermine Road as it heads northeast……
Coppermine Road
and then loops around to the southwest.
old mining road near Philips Mine
We walked off the trail, being careful where we stepped. An old metal railing lays in the woods.
metal railing near Philips Mine
After looking around for a little while, we were sweating bullets as there is not much tree cover in this open area. I was told by someone to be careful up here because there are vent shafts that may be covered with vegetation that are not visible. Someone else told me that there are rattlesnake dens up here as well. We were a little tired and dripping in sweat and decided to call off our hunt for the mine. When I did some post hike research, it turns out that we came within 100 feet of the main opening. The route up to it, which I stood right in front of, is a steep uphill and was heavily overgrown on our visit. I plan on going back near the end of the year before it snows and explore this area again.
Coppermine Road
Not wanting to bushwack back down the hill, we opted to walk northeast on Coppermine Road.
Coppermine Road
Once the original entrance road to Philips Mine, Coppermine Road is now a private road with a sign that reads: “No Trespassing.”
Coppermine Road
We walked downhill on Coppermine Road to the intersection with South Mountain Pass Road.
Coppermine Road
We turned left and continued downhill, now on South Mountain Pass Road.
Coppermine Road
We walked southwest on South Mountain Pass Road for approximately 550 yards until we reached the parking area, where the hike began.
South Mountain Pass Road
A nice 4th of July hike with a little exploring thrown in. I was a little disappointed that we didn’t find the mine, but I know that I will return soon and resume the search. The route that we took to Anthony’s Nose, is possibly the easiest way to go. It’s not as steep as the other available routes, but slightly longer. I can see why the place attracts crowds, it’s an amazing spot with great Hudson Valley views. I hope that you enjoyed the hike. Tell me what you think and don’t forget to follow my blog.
Pros: Anthony’s Nose, Hudson Valley views, Hudson River, woods road the entire way to the nose.
Trailhead parking: Mohonk Preserve Coxing Trailhead – Gardiner, NY 12525
The Lost City is a line of cliffs with glacially created vertical fractures. They resemble a city skyline when viewed from a distance. The Lost City area offers a series of crevices and boulders similar to the well-known Lemon Squeeze of the Mohonk Mountain House. Like the Lemon Squeeze, it requires the use of hands and feet to traverse the talus field which leads up the cliffs.
Lost City
I had heard about the Lost City, but there isn’t a lot of info online, so I decided to go check it out and play it by ear. My intention was to go with someone that had hiked it before. Since there is no blazed path through the talus fields and crevices, I didn’t want to climb and crawl through tight openings and end up at a dead end atop a monolith. Recently I hiked nearby and did the High Peter’s Kill and Millbrook Ridge Loop. While on that hike, I walked briefly on an unmarked trail along the edge of the cliffs. I wanted to see if that trail continued to the top of the Lost City cliffs. As it turned out, the trail did indeed run along the top of the cliffs, from Lost City to the High Peter’s Kill Trail. The people that I went with had never hiked the Lost City and I only found that out once we were at the base of the cliffs. Since none of us knew a precise route up to the cliffs, this hike turned into a short loop, but was still a really good hike.
Lost City Loop – Mohonk Preserve
A new feature that I have added is the Google Earth Fly-Through. It follows the path that we hiked and it gives you a good idea of the terrain, layout, amount of parking etc. Check it out, it’s pretty cool.
View the Google Earth Fly-Through video of the hike below.
We arrived at the Coxing Trailhead at about 8:30 am on a Saturday morning.
Coxing Parking Area
There were about a dozen cars in the lot when we arrived, but as is always the case on weekends at Mohonk Preserve, the lot fills up quickly. At the southern end of the parking area, there is a kiosk, which marks the start of the light-blue-blazed High Peter’s Kill Trail. This is also the route of the blue-blazed Shawangunk Ridge Trail (SRT).
High Peter’s Kill Trail – Coxing Trailhead
The High Peter’s Kill Trail follows a woods road.
High Peter’s Kill Trail
In a short distance, the trail passes the Enderly Burial Ground on the right.
Enderly Burial Ground
Enderly Burial Ground
The trail then crosses a wet area on a boardwalk and continues through a hemlock forest.
High Peter’s Kill Trail
After crossing a stream on a wooden bridge, the trail begins a gentle climb, paralleling the stream for a short distance. It then crosses the stream on rocks and bears right, away from the stream. A short distance later, we came to a junction with the yellow-blazed King’s Lane Trail, which continues straight ahead.
King’s Lane Trail
King’s Lane is an old woods road, once used for hauling loads of conglomerate to be made into grindstones. The road now serves as a path for rock climbers to reach the cliffs of The Lost City.
King’s Lane Trail
The road leads gradually uphill, with the cliffs visible through the trees on the left. We walked on King’s Lane for about 550 yards, to its terminus. We passed a few side trails on the way up, but continued to the end, trying to figure out which was the best way to go. We reached a clearing and we left the trail to approach the cliffs and have a look around.
Lost City
It was eerily quiet and not knowing which way to go or if even we were in the right place, made me a little uneasy. I like to plan things out and study the route before I head anywhere I haven’t been. The imposing cliffs in front of us had many openings and hiding places for critters, which didn’t make me feel any better. I didn’t want to climb into a bear or snake den.
Lost City
Lost City
I wanted to feel the place out before we started exploring in depth, so we found a path around a large rock formation and climbed up top for a better vantage point.
Lost City
As soon as we got to top, one of my colleagues sat down right beside this Copperhead and immediately jumped up. It was nestled in a crack in the rock and very nicely camouflaged among the leaves. It appeared to have just finished shedding.
Copperhead
Needless to say, after that encounter, we were all a little hesitant about crawling through any tight spaces. We made our way back down and retraced our steps on King’s Lane, passing different rock formations with all kinds of nooks and crannies.
Lost City
We walked up another side trail that we had passed earlier and found a gap in the cliffs. There is a path leading up the side that climbs rather steeply. We decided to take that route.
Lost City
We began following a faint path that heads southwest atop the cliffs.
unmarked path atop the cliffs
We stopped to examine the fissures in the cliffs.
fissure in the cliff
As we walked along the edge of the cliffs, views opened up. Looking southeast, to the left of the narrow notch is The Trapps and Millbrook Mountain is on the right.
The Trapps and Millbrook Mountain
Looking northeast, Skytop Tower is visible in the distance.
looking northeast
Looking straight down from the edge of the cliffs, possibly a route up.
Lost City
Walking along this unmarked path on the edge of the cliffs was really enjoyable. The scenery in this area is exceptional.
Lost City
Looking down one of the fissures of The Lost City.
Lost City
We continued heading southwest, stopping occasionally to take in the views.
Lost City cliffs
The beauty of this area is that we did not encounter any other hikers from the time we got on King’s Lane.
Lost City cliffs
We decide to stay along the edge of the cliffs rather than follow the path that led away from it. We then began to descend steeply, scrambling down some giant boulders and talus fields. We passed many more crevices on the way down.
Lost City
This massive monolith looks like a skyscraper.
monolith – Lost City
Even though we didn’t do the rock scrambling and crevice exploration that we expected when we set out on this hike, the downhill scramble was fun.
Lost City
Climbing over the massive boulders on our way down.
Lost City
Since there is no set path, we just figured out the best way down.
Lost City
Lost City
When we cleared the talus field, we bushwacked through the woods until we reached the High Peter’s Kill Trail. Here we turned left and headed northeast.
High Peter’s Kill Trail
When we reached the junction with King’s Lane, we turned right to remain on the High Peter’s Kill Trail.
High Peter’s Kill Trail
We then retraced our steps along the light-blue-blazed High Peter’s Kill Trail until we reached the Coxing Trailhead, where our hike began.
Coxing Trailhead
After we completed the hike, we took an obligatory walk over to Split Rock and relaxed a bit. It was quite crowded at noon when we arrived there, but nonetheless a gorgeous spot.
Split Rock
Although this was supposed to be more of an exploration of The Lost City than an actual hike, I have no regrets. My hikes are never written in stone and I can adapt and improvise whenever necessary. Bottom line is that as long as I am in the woods or on a mountain top, it’s a good day. I now discovered new areas to roam and I fully expect to be back soon and fully explore. The walk along the cliffs and the downhill scrambling were very enjoyable.
Pros: Lost City, cliff walk, views, rock scrambling, The Gunks.
Trailhead parking: Haverstraw Rd, New City, NY 10956 (roadside parking)
The mountainous ridge within High Tor State Park is part of the Palisades escarpment, which ends at New York State Route 45. At 832 feet above sea level, High Tor is the highest point on the Hudson Palisades. One of Rockland County’s best-known landmarks, High Tor offers outstanding views of the Hudson River and the town of Haverstraw below. During the Revolutionary War, beacons were placed on the summit to alert the Colonists of approaching British troops. It was also used as an air raid watch during World War II.
Like Tallman or Hook Mountain, this chunk of South Mountain was, by virtue of its trap rock composition, faced with the threat of destruction by quarrying. On numerous occasions, quarry operators sought to buy the property from its owner, Elmer Van Orden. While Van Orden always refused to sell, his death in 1942 revived fears that High Tor might end up defaced by quarrying. One of Rockland County’s most beautiful sites, it had inspired countless poets, artists, and even playwrights. Among them Maxwell Anderson, whose well-known 1937 play, High Tor, is the basis of a 1956 movie with Bing Cosby and Julie Andrews.
High Tor – courtesy of Historical Society of Rockland County
At Van Orden’s death, the Palisades Interstate Parks Commission immediately sought to acquire the property. A campaign led by the Hudson River Conservation Society and the Rockland County Conservation Association, and supported by dozens of groups and individuals, raised sufficient funds to purchase the property, which was transferred to the Commission in April, 1943. At the same time, Archer Huntington decided to donate his own 470-acre estate, which included Little Tor.
High Tor summit
The park is traversed by a 3.5-mile section of the Long Path. In addition, a woods road leads north from the parking lot to cross the Long Path along the ridge top and continues north to the top of the promontory known as Little Tor. High and Little Tor comprise the major part of South Mountain, which is the northern boundary of the Palisades.
On the day of this hike, the weather forecast called for rain and fog. There was a window of several hours where I felt that we could get a short hike in before it began to rain. Having hiked most of the Palisades, I decided on this short out and back on this Sunday Morning.
High Tor – Palisades Interstate Park
From the intersection of Ridge Road (CR 23), we proceeded west on Old Route 304.
intersection of Ridge Road (CR 23)
Just beyond the fourth telephone pole from the intersection, a double blaze on a tree indicates that the Long Path (which has been running along the road) turns right and enters the woods. We would be following the aqua-blazed Long Path all the way to the summit.
Long Path
After leaving the road, the Long Path crosses several wet areas on puncheons and soon begins a moderate climb on a rocky footpath.
Long Path
A short distance beyond, the trail bears left, crosses a stream on a wooden bridge, briefly levels off, then continues to climb. In half a mile, after gaining about 250 feet in elevation, the trail bears left and levels off again. It was at about this time that I saw a Coyote, just ahead, about 30 feet to my right. I stopped to try to raise my camera, but it saw me and took off into the woods.
Long Path
The Long Path descends a little to reach a junction with the white-blazed Spur Path, which begins on the left (the junction is marked by two signposts and a triple white blaze on a tree).
junction with the white-blazed Spur Trail
On the way back down, we would venture down the Spur Trail, but for now, we proceeded ahead on the Long Path, which now resumes a gradual climb. In another third of a mile, the Long Path reaches the crest of the ridge. To the right, the Hudson River is visible below through the trees. An unmarked woods road proceeds ahead, but we turned sharply left, continuing to follow the aqua blazes of the Long Path. After a short gentle uphill stretch, we reached the base of a steep talus slope.
Long Path
The trail now begins a steep climb of High Tor.
Long Path
The grade moderates as the trail skirts a rocky knob on the left and descends a little into a ravine, but the climb soon resumes, with a number of steep sections.
Long Path
After passing through a grassy area,
Long Path
Long Path
The Long Path emerges on the 832-foot-high summit of High Tor, having climbed over 600 vertical feet from the start of the hike.
summit of High Tor
Even on this overcast morning, the views from High Tor are spectacular. Directly below to the northeast is the town of Haverstraw, with the Hudson River to the east.
Haverstraw, with the Hudson River to the east
To the south, you can see the large Lake DeForest.
Lake DeForest
To the north and west are the rolling hills of Harriman State Park, visible on a clear day. An aircraft beacon was once located on the summit, and the anchors of the beacon are still visible.
anchor – High Tor summit
There is also plenty of graffiti at the summit as well.
graffiti – High Tor summit
We spent quite some time at the summit, hoping for the sky to clear. Instead, some dark clouds appeared and we decided to make our way down the mountain before we got caught in a downpour. We retraced our steps on the Long Path, to the junction with the Spur Path.
junction with the Spur Path
junction with the Spur Path
We turned right onto the white-blazed Spur Path which heads gently downhill in a westerly direction.
Spur Path
The trail travels through the woods then comes out on an open field and ends at an informational sign with history about the property.
Spur Path
Spur Path
The ruins of the Youmans-Van Orden House are just beyond the sign. The area is overgrown and they are best viewed in the winter months. Behind the fireplace, there are more remnants of the house, but they are difficult to see with all the heavy foliage surrounding them.
Youmans-Van Orden House
Youmans-Van Orden House
Youmans-Van Orden House
I found what appears to be a Deer skull in the fireplace.
Deer skull
We sat here for a short time and then felt some drops. That was our cue to get it in gear and finish up this hike. We retraced our steps back to the Long Path and turned right. From there it was an easy walk down, the same way we came up. We then walked about 100 feet on the road and back to the parking area, where our hike began.
Long Path
This is a great short hike with some semi-challenging areas. On the day we visited, we passed several hikers, but while at the summit, several others arrived. This is a great spot with excellent views of the Hudson Valley. The ruins are better visited when they are not covered with vegetation. I plan on going back soon and including Low Tor on my subsequent hike.
Pros: Fantastic views, Long Path, well blazed trails, Hudson River, the Palisades.
The Shawangunk Ridge has become one of my favorite places to hike. “The Gunks” contain mainly public lands that are open to hikers. Most of the northern Ridge is protected by Minnewaska State Park Preserve, which now also manages Sam’s Point Preserve with more than 100 miles of hiking trails. With the network of trails and carriage roads available in Minnewaska State Park Preserve, hikers can connect to the various other preserves on the ridge.
This moderate loop hike was done using a combination of carriage roads and footpaths. Other trails and/or carriage roads can be used to shorten or lengthen this route. Last November I did a loop hike using the Mossy Glen Footpath and really enjoyed this scenic trail. I decided to map out a different hike that included this trail once again. We hiked the full length of the Mossy Glen Trail and used parts of the other trails and carriage roads to complete the loop.
Rainbow Falls Loop
Trails used: The distances shown in parentheses are approximately the distances traveled during this hike and not necessarily the total length of the actual trails.
Mossy Glen Footpath (1.7 miles) – This yellow-blazed trail travels near the scenic Peters Kill and is accessed from the Lower Awosting Carriage Road parking area.
Blueberry Run Footpath (0.3 mile at start, 0.3 mile on return) This blue-blazed trail intersects the Upper Awosting Carriage Road, Lower Awosting Carriage Road and the Jenny Lane Footpath. It also forms a T-intersection with the end of the Mossy Glen Footpath.
Jenny Lane Footpath (1.09 miles) This light-blue-blazed Footpath intersects with the terminus of the Blueberry Run Trail. This footpath follows along the crest of a modest ridge until descending to its terminus at the Lower Awosting carriage Road.
Rainbow Falls Trail (1 mile) – This orange-blazed interior trail located near Lake Awosting, travels by Rainbow Falls. The waterfall can be dry in the summer months.
Upper Awosting Carriage Road (0.8 mile) This green-blazed road travels from Lake Minnewaska to Lake Awosting and intersects numerous trails, making loop hikes possible.
Lower Awosting Carriage Road (1.5 miles) – This black-blazed old road takes visitors from Lower Awosting Lot, off US 44 to Lake Awosting following the Peter’s Kill.
A new feature that I have added is the Google Earth Fly-Through. It follows the path that we hiked and it gives you a good idea of the terrain, layout, amount of parking etc. Check it out, it’s pretty cool.
View the Google Earth Fly-Through video of the hike below.
I love to hit the trails early, but like most of the preserves in The Gunks, Minnewaska doesn’t open until 9:00 am. Nevertheless, we got there just after 9:00 am and the lower lot, where we parked, was already starting to fill up. From the kiosk at the rear of the parking area, we walked past the gate onto the Lower Awosting Carriage Road.
Lower Awosting Carriage Road
Almost immediately, we turned left onto the yellow-blazed Mossy Glen Footpath.
Mossy Glen Footpath
The trail passes through an attractive forest of hemlock and mountain laurel.
Mossy Glen Footpath
In about 0.5 mile, the trail approaches the carriage road, then turns left and descends to the Peter’s Kill, crossing it on a one-log footbridge.
one-log footbridge – Mossy Glen Footpath
After crossing the bridge, the trail turns right and continues southwest, along the Peters Kill. For the next mile or so, it hugs the stream and comes out on rock slabs near the edge of the water.
Mossy Glen Footpath
The Peter’s Kill was mostly dry on this day, but on previous visits, the flow was much stronger.
Mossy Glen Footpath
After passing through a relatively open area, with stunted pitch pines and an understory of blueberries,
Mossy Glen Footpath
the Mossy Glen Trail ends at a T-intersection with the blue-blazed Blueberry Run Footpath.
terminus of Mossy Glen Footpath
We turned right and followed this blue-blazed trail downhill,
Blueberry Run Footpath
The trail comes out onto open rock with an attractive cascade of the Peter’s Kill. The flow was light on this day, but I have been here before when the cascade spanned the entire width of the rocks. We stopped here briefly to enjoy this spot.
cascade – Blueberry Run Footpath
The Blueberry Run Footpath crosses the Peter’s Kill on another one-log footbridge, with the attractive cascade on the left.
one-log footbridge – Blueberry Run Footpath
The trail climbs rather steeply……
Blueberry Run Footpath
to cross the Lower Awosting Carriage Road,
Blueberry Run Footpath crosses the Lower Awosting Carriage Road
then continues through mountain laurel and hemlock.
Blueberry Run Footpath
After another steep climb, the Blueberry Run Footpath ends at a junction with the blue-blazed Jenny Lane Footpath.
turn left onto the Jenny Lane Footpath
Standing on the Jenny Lane Footpath, looking back at the Blueberry Run Footpath, with the blue blazes visible on a tree, just beyond.
junction with the Jenny Lane Footpath
We turned left, now heading southwest and followed the Jenny Lane Footpath, which soon begins to run close to the edge of the ridge, coming out occasionally on open rocks, with views over Litchfield Ledge to the east.
view east – Jenny Lane Footpath
In about three-quarters of a mile, the trail reaches a power line.
power line – Jenny Lane Footpath
We followed the trail as it turns right, runs along the power line for a short distance, then turns left and continues on a wide path, the remnants of an old woods road.
Jenny Lane Footpath
The trail soon begins to descend. As it goes down a badly eroded section of the old road, the trail has been rerouted onto a footpath to the left. At the base of the descent, the Jenny Lane Footpath turns left onto a grassy woods road, which soon reaches the Lower Awosting Carriage Road, where we turned right.
turn right onto Lower Awosting Carriage Road
We followed the Lower Awosting Carriage Road, crossing a causeway and concrete bridge over Fly Brook.
Lower Awosting Carriage Road
Just past the brook crossing, the orange-blazed Rainbow Falls Footpath begins on the left.
turn left on Rainbow Falls Footpath
The orange-blazed Rainbow Falls Footpath is also the route of the Shawangunk Ridge Trail (SRT).
Rainbow Falls Footpath
We turned left, leaving the carriage road, and followed the Rainbow Falls Footpath, which descends briefly, then ascends steadily over slanted slabs of conglomerate rock dotted with pitch pines.
Rainbow Falls Footpath
The trail turns left, crosses a small stream, and continues to climb over slanted rock ledges. From the top, the Catskills may be seen in the distance.
Catskills – Rainbow Falls Footpath
After a short but steep descent, the trail comes out on an open rock ledge. To the right is Huntington Ravine, with Litchfield Ledge beyond.
Rainbow Falls Footpath
The trail continues over open rock ledges, with Rainbow Falls just below.
Rainbows Falls Footpath
The trail ducks back into the woods and we happened to pass a Deer grazing, just off the path.
Deer – Rainbows Falls Footpath
The trail soon bears sharply right and descends very steeply, with cliffs to the right. At the base of the descent, Rainbow Falls comes into view.
Rainbow Falls
Although the falls were nothing more than a trickle on this hot and humid day, it was a perfect place to relax for a few minutes. Here the water drops from overhanging rock ledges, forming a cool mist.
Rainbow Falls
The trail now bears left, descends to cross a small stream, then climbs steadily to reach the Upper Awosting Carriage Road.
Rainbows Falls Footpath
Once on Upper Awosting Carriage Road, I turned right and wandered down the road searching for views, but did not find any, so I turned around. I also walked a bit further on the Rainbows Falls Footpath, but turned around when I didn’t see any viewpoints close by. I then returned to the Upper Awosting Carriage Road and began heading downhill (east).
Upper Awosting Carriage Road
After approximately 0.8 mile from the junction with the Rainbow Falls Footpath, the carriage road comes to a junction on the left, with the Blueberry Run Footpath.
Blueberry Run Footpath
The Blueberry Run Footpath heads north and descends steadily through mountain laurel and blueberries.
Blueberry Run Footpath
In about 430 yards, the trail passes the junction with the Mossy Glen Footpath, from earlier in the hike. In a short distance, we re-crossed the one-log footbridge over the Peter’s Kill.
one-log footbridge – Blueberry Run Footpath
After crossing the footbridge, we climbed the hill to the Lower Awosting Carriage Road and turned right. We then walked northeast along this carriage road for approximately 1.4 miles, as it descends gently, back to the parking area, where the hike began.
Lower Awosting Carriage Road
This was a pretty nice hike, which would have been much nicer with more water flowing through the Peter’s Kill and Rainbow Falls. Much better to do this hike in the Spring or after some heavy rain. The trails and the surrounding area are quite beautiful and we only ran into a handful of people and that was near the falls and on the carriage roads.
Pros: The Gunks, lesser traveled trails, well maintained trails.
With over 8,000 acres on the Shawangunk Ridge, Mohonk Preserve is the largest member and visitor-supported nature preserve in New York State. The Mohonk Preserve is a private land conservation organization established to protect the Shawangunk Ridge, it is not public land funded by the government. Therefore, there is a day use fee to use the preserve which funds its maintenance and programs.
Mohonk Preserve
Having received an annual Mohonk Preserve membership for Christmas, it was high time that I used it. I normally prefer to hike the Mohonk/Minnewaska area on a weekday due to the large crowds on weekends. With that in mind, I tried to design a hike that utilized some of the lesser used trails. Not an easy task, but it worked out well on this day. Although this hike began in the Mohonk Preserve, it travels into Minnewaska State Park through the Peter’s Kill area as well.
This hike began from the West Trapps Parking Area, but passes through the Coxing Kill and Peter’s Kill parking areas, which can be used as alternative starting points. The West Trapps lot opens at 9:00 am and we arrived at 9:03 am. There were only a few spaces left by that time. This hike was done in a counterclockwise fashion, but if done in reverse order, it will be the same amount of elevation gain. I wanted to get to Split Rock early since it attracts crowds, being so close to the Coxing Kill Parking Area.
High Peter’s Kill and Millbrook Ridge Loop
Trails used: The distances shown in parentheses are approximately the distances traveled during this hike and not necessarily the total length of the actual trails.
West Trapps Connector Trail – (600 ft. at start) (0.3 mile on return) This yellow-blazed gravel Road connects the West Trapps parking area to Overcliff and Undercliff Roads and also the Trapps Bridge over Route 44/55, which gives access to Trapps Road and the Millbrook Ridge Trail.
Shongum Path – (0.8 mile) Marked by signs and red blazes, the 0.8 mile long Shongum Path connects the yellow-blazed West Trapps Connector Trail with the Old Minnewaska Trail, linking the West Trapps parking area with the Coxing Kill area.
Old Minnewaska Trail – (550 ft.) Marked by signs and light blue trail blazes, this trail runs from Laurel Ledge Road and continues to opposite the Coxing Kill parking area.
High Peter’s Kill Trail– (1 mile) Marked by signs and light blue trail blazes, this trail can be accessed from either Mohonk Preserve at the Coxing Kill parking area or from Minnewaska State Park.
Bull Wheel Footpath – (0.5 mile) This white-blazed trail begins at the intersection with the High Peter’s Kill Footpath. The trail gradually descends through a former ski area and ends at an intersection with the Red Loop Trail.
Awosting Falls Connector Footpath – (0.15 mile) This white-blazed footpath connects the Peter’s Kill Parking Area to the Awosting Falls Carriage Road.
Awosting Falls Carriage Road – (1.9 miles) At the eastern boundary of the park preserve, this carriage road provides a multi-use connection between Minnewaska State Park Preserve and the Mohonk Preserve.
Trapps Road – This unmarked wide gravel road begins on the south side of the Trapps Bridge over US-44/NY-55. The trail continues along US-44/NY-55 and dead ends into Lyons Road. This is the point at which it leaves Mohonk Preserve and enters Minnewaska State Park.
Bayards Path – (0.21 mile) A red-blazed trail that connects Trapps Road to the Millbrook Ridge Trail, near the saddle in the ridge.
Millbrook Ridge Trail– (0.8 mile) Marked by light blue blazes, the trailhead starts at Trapps Road just beyond the bridge over 44/55 and leads to the summit of Millbrook Mountain.
A new feature that I have added is the Google Earth Fly-Through. It follows the path that we hiked and it gives you a good idea of the terrain, layout, amount of parking etc. Check it out, it’s pretty cool.
View the Google Earth Fly-Through video of the hike below.
The hike begins at the eastern end of the parking area at the kiosk.
West Trapps Connector Trail
We followed the yellow-blazed West Trapps Connector Trail, which heads east, parallel to Route 44/55.
West Trapps Connector Trail
In about 600 feet, we turned left onto the start of the red-blazed Shongum Path, the route of an old Lenape Indian trail.
Shongum Path
The Shongum Path descends gradually over bare rock at first, as it heads north. Along the way, I heard a loud commotion in the woods. I saw what appeared to be a Black Bear about 30-40 yards ahead of me, to the left of the trail. I saw black fur through the trees and at first thought it was a large dog, but by the time I got near to where I first saw it, there was no trace of anyone or anything.
Shongum Path
The trail travels through several wet areas on wooden planks. Eventually the trail veers to the northeast and parallels the Coxing Kill (creek), which is visible through the trees.
Shongum Path
After about 0.8 mile, we came to the terminus of the Shongum Path at a T-intersection with the blue-blazed Old Minnewaska Trail, a gravel road, and turned left.
Shongum Path
Now heading southwest, we crossed a wooden bridge that spans the Coxing Kill. We turned right and walked down to check out Split Rock.
Old Minnewaska Trail
The Coxing Kill plunges into a small gorge of solid rock and streams out on the other end into a pool.
Split Rock
Located at the site of the former Enderly Family sawmill, Split Rock has long been a favorite place for picnicking by the Coxing Kill. Luckily, we arrived at this spot at approximately 9:30 am and had the place to ourselves.
Split Rock
While there is no “official” swimming area or lifeguard, swimming seems to be allowed and this is a very popular swimming hole. The channel flows into a small sloped pool that is about 3-4 ft deep with a sandy/small rock bottom.
Split Rock Swimming Hole
We walked back up to the Old Minnewaska Trail and turned right. Alongside the trail are the Fieldstone foundations of a house and barn, and other outbuildings, which tell of the Enderly family farm, which occupied this place in the 19th century.
The Enderly House
For about a century, the Enderly family operated their farm, sawmill, and blacksmith forge on the Coxing Kill.
The Enderly Barn
A short distance ahead, we reached Clove Road and the end of the Old Minnewaska Trail. Just across the road is the Coxing Kill Parking Area.
Coxing Kill Parking Area
At the southern end of the parking area, there is a kiosk, which marks the start of the light-blue-blazed High Peter’s Kill Trail. This is also the route of the blue-blazed Shawangunk Ridge Trail (SRT).
High Peter’s Kill Trail – Coxing Trailhead
The High Peter’s Kill Trail follows a woods road, passing the Enderly Burial Ground on the right.
Enderly Burial Ground
Enderly Burial Ground
The High Peter’s Kill Trail heads southwest then turns right, crosses a stream on rocks then turns left, now heading in a westerly direction.
High Peter’s Kill Trail
The trail gradually ascends through the woods……
High Peter’s Kill Trail
and passes a junction with the King’s Lane Trail.
junction with the King’s Lane Trail
The ascent steepens as we continued heading west on the High Peter’s Kill Trail and entered Minnewaska State Park Preserve.
High Peter’s Kill Trail
The climb becomes very steep, with the trail routed over stone steps in places. For part of the way, the trail follows the Dugway, a 19th century woods road used to transport millstones quarried near here.
High Peter’s Kill Trail
High Peter’s Kill Trail
After passing lichen-covered rock outcrops and an interesting “cave” formed by an overhanging rock, the grade moderates.
High Peter’s Kill Trail
A short distance beyond the end of the steep climb, as the High Peters Kill Trail turns left, we veered right on an unmarked trail. In about 150 feet, there is an expansive east-facing viewpoint over the Trapps ridge, with the Sky Top tower of the Mohonk Mountain House visible to the northeast.
looking northeast with Dickie Barre on the left and Skytop (center) in the distance
Sky Top tower
Sky Top tower
The cliffs of Dickie Barre.
cliffs of Dickie Barre
We sat here and took a short break while enjoying the view. To the left is the southern end of the Trapps ridge and the northern ridge of Millbrook Mountain is on the right. The Village of New Paltz may be seen through the narrow notch between The Trapps and Millbrook Mountain.
east-facing view
We returned to the High Peter’s Kill Trail and turned right. The trail now follows a relatively level path through blueberries and mountain laurel, with some pitch pines.
High Peter’s Kill Trail
Just below the crest of the rise, the white-blazed Bull Wheel Trail, which leads to the Peters Kill parking area on Route 44/55, begins on the left.
Bull Wheel Trail
Bull Wheel Trail
The Bull Wheel Trail descends gradually on an eroded woods road.
Bull Wheel Trail
In some sections, the trail narrows to a footpath.
Bull Wheel Trail
There are dual-colored-blazes on either side of the trail that are not on the hiking map. These trails are designated for rock climbing and bouldering, which require a permit, which can be purchased at the Peter’s Kill Parking Area.
rock climbing and bouldering trail
The trail then passes through a flat open area over rock slabs.
Bull Wheel Trail
The trail passes a concrete slab, with steel bolts protruding. A tower that was anchored to the slab via the bolts once supported a pulley for a ski lift, part of the Ski Minne downhill ski area, which operated from 1964 to 1978. The pulley is commonly referred to as a “bullwheel,” hence the name for the trail.
Bull Wheel Trail
The trail then widens back to a gravel road as it descends.
Bull Wheel Trail
After about 0.5 miles on the Bull Wheel Trail, it ends at a T-intersection with the Red Loop Trail.
T-intersection with the Red Loop Trail
We turned left on the Red Loop Trail and walked a short distance on the gravel road to the Peter’s Kill Parking Area. We took a short rest at a picnic table and enjoyed a snack.
Red Loop Trail
When we were ready to resume our hike, we walked out to Route 44/55 via the entrance road to the Peter’s Kill Area.
Peter’s Kill Area
Directly across the road from the entrance is the start of the white-blazed Awosting Falls Connector Footpath.
Awosting Falls Connector Footpath
This short white-blazed footpath connects the Peter’s Kill Parking Area to the Awosting Falls Carriage Road.
Awosting Falls Connector Footpath
We took this trail a short distance to its terminus, at a T-intersection with the red-blazed Awosting Falls Carriage Road.
Awosting Falls Connector Footpath
We then turned left on the Awosting Falls Carriage Road and walked about 350 feet to the paved Lyons Road. Just beyond, the carriage road crosses paved Lyons Road and re-enters the Mohonk Preserve (the red blazes end here).
Lyons Road
The carriage road, now known as Trapps Road,
Trapps Road
continues around a hairpin curve….
Trapps Road
and in another two-thirds of a mile, crosses the Coxing Kill on a wooden bridge.
wooden bridge – Trapps Road
Coxing Kill
Trapps Road continues to parallel Route 44/55, but for most of the way, the highway is located some distance from the carriage road and cannot be seen (although sounds of traffic can sometimes be heard).
Trapps Road
Along the way, we passed a junction for the Coxing Trail and about 0.5 mile later, we reached the junction with the red-blazed Bayards Path.
Bayards Path
Although carriage roads are normally nice to walk on, I was glad to leave it and jump back on a trail.
Bayards Path
The red-blazed Bayards Path ascends on a moderate grade to the saddle of Millbrook Mountain.
Bayards Path
The narrow footpath is overgrown in some spots.
Bayards Path
In about 0.21 mile, the trail ends at a T-intersection with the Millbrook Ridge Trail.
terminus of Bayards Path
Millbrook Ridge Trail
We turned left on the Millbrook Ridge Trail and began heading northeast along the ridge of Millbrook Mountain.
Millbrook Ridge Trail
This was the best part of the hike for me. The ridge walk was quite scenic and I enjoyed it very much. With no more real elevation gain, it was now a walk in the park, sort of speak.
Millbrook Ridge Trail
Millbrook Ridge Trail
Millbrook Ridge Trail
The trail passes some partial views along the ridge then comes to open rock ledges with more expansive views.
Millbrook Ridge Trail
Millbrook Ridge Trail
The trail continues over rock slabs along the ridge, with pitch pines.
Millbrook Ridge Trail
More views open up along the ridge, with the Catskill Mountains visible to the north. The Devil’s Path range of the Catskills.
Devil’s Path range of the Catskills – Millbrook Mountain
Directly northeast is the southern end of the Trapps.
Trapps – Millbrook Mountain
The trail comes out onto slanted rock with more views. The trail then descends steeply to the left of the boulder.
Millbrook Ridge Trail
I happened to see a survey marker along this spot as well.
Millbrook Ridge Trail
There are still more views as the trail descends. Below, the cliffs of Dickie Barre.
the cliffs of Dickie Barre
Ashokan Highpoint is visible to the right of Dickie Barre.
Ashokan Highpoint
The trail continues its steep descent over open rock slabs. This part of the hike was fun, especially because we didn’t have to climb up this way.
Millbrook Ridge Trail
After almost a mile of hiking the ridge, we descended to Trapps Road.
Trapps Road
We turned right on Trapps Road and walked about 150 feet to the Trapps Bridge.
Trapps Bridge
After crossing the Trapps Bridge over Route 44/55, we turned left, descended stone steps, and turned right on the yellow-blazed West Trapps Connector Trail that leads back to the parking area where the hike began.
On the way out, while driving by the visitor center on Route 44/55, a Black Bear came rolling down the hill and landed on the road. It promptly got up and crossed the road and I believe walked down into the visitor center parking area. I watched this through the rear view mirror as I drove.
This was another great hike in the Gunks. I was surprised at the lack of crowds along the way. We passed a few groups on the Millbrook Ridge Trail as we neared the end and several other hikers earlier. For a Saturday, we mostly had the trails to ourselves.
Pros: The Gunks, views, Split Rock, cliffs, well marked trails.
Cons: A little road noise along Trapps Road.
Take a hike!
High Peter’s Kill and Millbrook Ridge Loop – Mohonk Preserve
Cranberry Lake Preserve is a 190-acre park operated by the Westchester County Department of Parks, Recreation and Conservation. Since 1967, this park has been a safe haven for migratory birds, turtles, and dragonflies. The varied landscape includes a four-acre lake, cliffs, scrubland, mixed hardwood forest, vernal pools, and a swamp. Biking, fishing and dogs are prohibited to protect the nature reserve.
Cranberry Lake Preserve
Before Westchester County purchased much of what is now Cranberry Lake Preserve in 1967, the area played an instrumental role in the building of the Kensico Dam. Completed in 1917, the dam stands less than a mile away. Most of the stone used to build it, was mined from the area that is now the preserve.
Kensico Dam
The dam was completed in 1917. It is 307 feet high and 1,843 feet long, and forms the Kensico reservoir. The construction of the dam began in 1913 and was concluded in 1917, three years ahead of schedule.
Kensico Dam
The history of the preserve and its role in the building of Kensico Dam, makes this place worthy of a visit in itself. There is a network of trails at the preserve and trail junctions are marked by numbered signs. This makes it easier to navigate the preserve with so many trails that intersect each other. The online map does not show the numbered junctions, but the kiosk near the nature center had plenty of maps that do.
kiosk – Cranberry Lake Preserve
We arrived at the upper parking area, near the nature center, just before 8:30 am. The forecast was calling for possible showers around midday and I was trying to get a short hike in before the rains fell. Since this was close by, it was the perfect place to hike on this day. My thinking was that if the weather cooperated, we could extend the hike and if it rained, we could use any one of the number of connector trails to make a beeline back to the vehicle. We did this hike in a counterclockwise fashion from the nature center.
Cranberry Lake Preserve Loop
A new feature that I have added is the Google Earth Fly-Through. It follows the path that we hiked and it gives you a good idea of the terrain, layout, amount of parking etc. Check it out, it’s pretty cool.
View the Google Earth Fly-Through video of the hike below.
After obtaining a map at the kisok, we checked out the nature center briefly, then proceeded south on a wide yellow-blazed path.
Yellow Trail
At a blue sign to the “Lake” (junction #4), we turned left and followed an orange-blazed trail downhill to the shore of Cranberry Lake.
junction #4
Orange Trail
We then turned right (at junction #26) onto a trail with blue and yellow blazes, heading south along the west bank of Cranberry Lake.
Blue and Yellow Trail
After briefly following the lake shore, the trail climbs to ledges that overlook the lake. Cranberry Lake was carved out more than 18,000 years ago by a glacier during the last Ice Age. That glacier is estimated to have been one mile high and is the same one that formed Long Island. The lake is four acres with a maximum depth of 14 feet.
Cranberry Lake
At the end of the lake, the trail descends, crosses a boardwalk and arrives at junction #6. We turned left onto a wide path, following blue, purple and red blazes, then turned left at the next junction (#7) onto an orange-blazed trail.
junction #7
junction #7
The trail immediately crosses the Bent Bridge over a swamp.
Bent Bridge
swamp
Bent Bridge
The trail runs along old stone walls and passes a stone chamber, possibly an old root cellar.
stone chamber
At the end of the orange trail (junction #16), we turned right onto a wide path (an old railroad bed) and followed it a short distance to a Y-intersection, with a sign for the New York City Watershed grown into a tree (junction #8).
junction #8
Bearing left here, we were now following the Red Loop Trail. On the right, marking the boundary between the park and New York City Watershed lands, is an expertly-laid dry stone wall, built over a century ago and still in nearly perfect condition today (except where damaged by fallen trees). Soon, the trail bears left and heads south, continuing to follow the wall.
Red Loop Trail
At the southern end of the park, with private homes visible ahead through the trees, the red trail turns left and begins to head east. The trail arrives at a sharp right turn, marked by a red arrow on a tree to the left, and heads downhill toward Hush Pond. The Red Loop Trail crosses the outlet of the pond on puncheons, bears left (north), and soon begins to parallel a wetland on the left. In a short distance, it joins a level dirt road, with cliffs on the right.
Red Loop Trail
Soon, the cliffs are supplanted by a concrete wall. This is the foundation of the massive crusher used during the dam’s construction. It was built in 1912 and was capable of crushing 1000 cubic yards of gravel per day. Stone mined from the quarry that was too small to be used as dimension stone for the face of the dam was brought to the crusher to be minimized and used to make concrete.
crusher foundation – Red Loop Trail
Just beyond a crumbling section of the wall, the trail reaches junction #13, where a blue-blazed trail leads left to a wooden observation platform. Unfortunately, the view over South Pond is largely obscured by vegetation.
wooden observation platform
We returned to the main trail and turned left (north), now following both blue and red blazes. Soon, we reached a small cascade with a bench (junction #14).
junction #14
Here we turned right onto the Purple History Loop, marked with purple-on-white blazes, as it leads uphill.
Purple History Loop
The trail climbs briefly then levels off. It continues over a wet area on puncheons, then passes alongside an abandoned tennis court on the left.
Purple History Loop
The Purple History Loop continues past a junction with the White Trail and turns right. It then travels alongside the larger of the two quarry ponds. Formed during excavation, the larger pond was used by local residents in the 1960’s and became the “Birchwood Swim Club.” Up until its closure in the late 1990’s, members of the club also enjoyed use of the tennis courts, which we passed earlier.
quarry pond
As the trail continues into the quarry area, it passes by a wheelset, the wheel and axle assembly of a railroad car. 17 miles of railroad tracks once weaved through the area to deliver the stone while construction of the Kensico Dam was underway.
wheelset – Purple History Loop
Just past the wheelset, the trail climbs the quarry cliffs.
Purple History Loop
The first blast in the quarry occurred in 1913. A dozen huge derricks (large hoisting machines) were used to lift and load large stones for the face of the dam. In 1914, over two months time, 32.5 tons of dynamite were loaded into the
rock, creating the largest blast in the quarry, breaking up approximately 117,000 cubic yards of rock, that’s over 179 million pounds of stone.
quarry cliffs – Purple History Loop
The trail continues to the top of the quarry cliffs which offers partial views of the surrounding area. It also makes a nice place to take a break.
quarry cliffs – Purple History Loop
We wandered around the top of the cliffs for a bit. There is a lot of loose stone and we were careful near the edge not to lose our footing. I had read that over the years, there have been accidents where children and adults alike, have fallen here.
quarry cliffs – Purple History Loop
The quarry area was my favorite part of the hike. Even though the cliffs are not very high, they offer such a contrast to the woods trails we were previously on and are quite scenic.
quarry cliffs – Purple History Loop
Black Vultures soared above us as we sat, and one of them landed on a ledge and posed for me.
Black Vulture
With the absence of trees on top of the cliffs, the purple blazes are painted on the ground and at times are hard to locate. We spotted several and they lead into the woods as the trail begins to descend.
Purple History Loop
We followed the purple blazes downhill, past some foundations. The trail turns left and heads south on a wide path.
Purple History Loop
The trails passes by the remains of a couple of abandoned vehicles.
abandoned vehicle – Purple History Loop
Years after the completion of the dam, locals, whether for fun or for easy disposal of their old cars, sent them zooming off the cliffs of the abandoned quarry.
abandoned vehicle – Purple History Loop
The trail loops around and passes by the smaller quarry pond. Its cliffs make for some fun climbing if you are so inclined.
smaller quarry pond
The Purple History Loop, loops back around and reaches junction 20, which intersects with the Red Loop Trail and turns right. The trail descends as it heads north through the woods. At the base of the descent (junction #21), the blue trail joins from the left, and the trails cross a boardwalk. Just beyond, at junction #22, the trails again split. Bearing right, to continue to follow the red and purple-on-white trails, which cross another boardwalk. We veered right at junction #23, continuing to follow the red and purple-on-white blazes.
Red Loop Trail/Purple History Loop
We looked up the hill to the right to see an old concrete facade. This remnant was once part of the area where the stone cutting shed stood, where large dimension stones were sculpted and transported to the dam.
stone cutting shed
After curving to the left, the trail reaches a T-intersection (junction #34), with cliffs ahead. Here, the red and purple-on white trails turn right, but we turned left, now following the yellow blazes.
junction #34
At the next junction (#33), we veered left again, continuing to follow the yellow blazes and descend to the lake. At junction #24, we turned right and followed the yellow and blue blazes, with the trail paralleling Cranberry Lake. After passing junction #27, we reached a viewpoint over the lake from a rock outcrop, just off the trail.
Cranberry Lake
While at the edge of the lake, I walked past a Black Rat Snake without even noticing it. I was able to capture an image of it as I made my way back to the trail.
Black Rat Snake
Just beyond, we reached junction #26. Turning right onto the orange trail, we followed it back up to the yellow trail at junction #4, and turned right on the yellow trail to return to the Nature Center where the hike began.
Nature Center parking
This was a really good hike and surprisingly there was not much foot traffic on the trails. With the vast network of trails in the preserve, any number of loop hikes can be done. Most junctions are numbered which correspond to your current location on the trail map. These numbers are found on trees or wooden posts alongside the colored blazes. Please note: the numbers do not appear on the online version of the trail map. For best results, pick up a map onsite at the kiosk or nature center.
Popolopen Torne, officially called “The Torne,” is a small mountain with a relatively sharp and bald peak, part of the Hudson Highlands, with a summit 942 feet above sea level. It is located in Bear Mountain State Park and has 360° views, with the Hudson River and the Bear Mountain Bridge to the east, the hills of the West Point Military Reservation to the west and Bear Mountain to the south.
The Torne as viewed from Long Mountain
A memorial for fallen soldiers sits at the summit of The Torne and since this was Memorial Day weekend, I wanted to pay my respects to all the men and women that paid the ultimate sacrifice to defend and protect the freedoms that we are able to enjoy.
Fallen Soldiers Memorial – The Torne
Since I had hiked The Torne before, I wanted to change it up a little. The previous hike was longer and included more elevation gain as well. I decided that this hike would begin and end at Brooks Lake since I have never been there. The hike is a double-lollipop, with the stem in the middle.
Brooks Lake and The Torne
A new feature that I have added is the Google Earth Fly-Through. It follows the path that we hiked and it gives you a good idea of the terrain, layout, amount of parking etc. Check it out, it’s pretty cool.
View the Google Earth Fly-Through video of the hike below.
Arriving at Brooks Lake at approximately 9:00 am on a beautiful Saturday morning, the parking area was nearly empty. This was the warmest day of the year thus far and on the drive to the trailhead, I received a poor air quality alert, but paid it no mind. I have struggled in the past on just such days, but they occurred in July during extreme heat.
Brooks Lake and about 100 acres to the north were acquired by the Park in 1918 from the heirs of Eliza Brooks. In 1925, there were five camps at Brooks Lake. The area around the lake was improved in 1934 for camping, bathing and picnicking.
Brooks Lake
We began our hike by proceeding counter clockwise on the red-square-on-white blazed Brooks Lake Trail. The Brooks Lake Trail was established in 2004 at the suggestion of local residents. The construction was financed with a grant from the New York Recreational Trails program.
Brooks Lake Trail
The Brooks Lake Trail crosses a grassy field with a wooden picnic pavilion on the left. It then enters the woods and at approximately 0.4 mile, crosses a stream on rocks.
Brooks Lake Trail
The trail is well marked and there are large cliffs to right of the trail, with the lake on the left. There are several viewpoints over the lake along the way.
Brooks Lake
Looking southwest, Bear Mountain can be seen in the distance.
Brooks Lake
The trail is very scenic and with the exception of a female hiker and her dog, we didn’t encounter anyone else along this stretch. The Brooks Lake Trail is well marked and easy to follow. For the most part it travels near the edge of the lake with several stream crossings (they were dry on this day) and just the right amount of ruggedness to keep it interesting.
Brooks Lake Trail
We came a cross a Garter Snake that was coiled up on the leaves.
Garter Snake – Brooks Lake Trail
At the southern end of the lake, we came to a junction of three co-aligned trails: the 1777W and 1779 Trails (which commemorate Revolutionary War events) and the blue-blazed Timp-Torne Trail.
1777W, 1779 and Timp-Torne Trails
We turned right and climbed the hillside with Brooks Lake visible through the trees below on the right.
Timp-Torne Trail
Although the three trails run together, we only concerned ourselves with the blue-blazed Timp-Torne Trail, which eventually breaks off from the other two and climbs The Torne. The trail levels off as it passes through the woods, then turns left and comes out onto Mine Road, where we turned right. There are blazes painted on the telephone poles to point the way.
Mine Road
In approximately 500 feet, immediately after Wildwood Ridge, the three trails go off to the left and reenter the woods.
Wildwood Ridge
Wildwood Ridge
The trails soon cross a stream on rocks and joins a wide woods road, the route of the West Point Aqueduct, built in 1906. At first, the route climbs steeply, then descends and eventually levels off. The trails begin to parallel Popolopen Gorge, with the rushing waters of Popolopen Creek visible in places through the trees on the left. We saw what appeared to be a Red Fox just off the trail, but no one was able to capture a good image of it.
1777W, 1779 and Timp-Torne Trails
After reaching a bench along the West Point Aqueduct, just ahead is a trail junction. The 1777W and 1779 Trails continue ahead, following the aqueduct.
1777W, 1779 and Timp-Torne Trails
Here the blue-blazed Timp-Torne Trail turns sharply right and leaves the aqueduct.
Timp-Torne Trail
The Timp-Torne Trail climbs gradually on a woods road and comes out to a small parking area on Mine Road.
Timp-Torne Trail
We rested for a few moments in the parking area before we tackled the tough climb up to the summit of The Torne. For a really short hike, you can park in this pullout (limited parking available) and begin the hike here. Leaving the parking area, we turned left and and walked a short distance uphill on Mine Road.
Timp-Torne Trail
A short distance ahead, the Timp-Torne Trail leaves the road at a wooden kiosk.
Timp-Torne Trail
From here the trail climbs more than 500 feet in just under 0.6 mile. It’s the toughest stretch of the hike, but it is manageable. Almost immediately upon entering the woods and beginning the climb up, I started to feel weak. I attributed my lack of strength and energy to numerous factors, including having skipped breakfast (dumb move) and the poor air quality. I knew I was going to have some difficulty making it to the summit, but I was determined and was not about to quit. We stopped frequently to rest and catch our breath, but eventually came out to an east facing viewpoint. The Hudson River, Bear Mountain Bridge and Anthony’s Nose are clearly visible from a rock outcrop alongside the trail.
east facing viewpoint – Timp-Torne Trail
We continued ahead on the trail, which makes a sharp bend to the south and continues to climb over rock ledges.
Timp-Torne Trail
Reaching the summit, there were quite a few people there already. I stopped at the fallen soldiers memorial and paid my respects to all that gave their lives defending our freedoms.
Fallen Soldiers Memorial – The Torne
Looking south, Bear Mountain is visible close by.
view south from The Torne
This is one of my favorite spots in the Hudson Valley. The summit has some of the best views around. Even on a hot and hazy day, the view of the Hudson River was impressive.
Looking southeast from the summit of The Torne
The 360° views are spectacular, but don’t expect much shade up here.
Looking north from the summit of The Torne
Looking northwest, Turkey Mountain is visible in the center, with Long Mountain to the left.
Looking northwest from the summit of The Torne
No matter how grand the view, the best part of this hike is seeing the memorial for fallen soldiers. The 400 lbs. benches that were placed here, were part of an Eagle Scout project.
Fallen Soldiers Memorial – The Torne
Known as the “Trail of the Fallen,” Every rock that has been placed here has been carried up from the base of The Torne. Some as heavy as 200 lbs.
Fallen Soldiers Memorial – The Torne
After spending quite some time at the summit, we began our descent. The trail steeply descends the mountain on rock ledges. The descent is much steeper than the climb and we had to use both our hands and feet in places. It is only 0.3 mile to Mine Road, but it felt like much longer.
Timp-Torne Trail
We saw several hikers ascending from this side as we made our way down. Although it is much shorter going this way, it appears to be more difficult to ascend. There were plenty of lizards out and about on the rocks.
Timp-Torne Trail
On the way down there is one last view from a rock ledge along the trail.
Timp-Torne Trail
About halfway down, the trail reenters the woods and continues to descend more moderately on stone steps and switchbacks. We came out on Mine Road where the Timp-Torne Trail crosses the road and goes over the guard rail and descends to rejoin the 1777W and 1779 Trails at the West Point Aqueduct. I was pretty much done at this point so we walked on the road, back to the small parking area on Mine Road. From there we walked down to the three co-aligned trails on the West Point Aqueduct and retraced our steps back to the Brooks Lake Trail and completed the loop around the lake and back to the parking area, where our hike began. I stopped taking photographs because I was out of gas and just wanted to concentrate on not tripping. This wasn’t that difficult of a hike, but the way I was feeling, it was a major accomplishment to complete it. I definitely plan on doing this hike again, but I will probably try climbing up the steeper side. This is a hike that everyone should do at least once.
Pros: Fallen soldiers memorial, views galore, slight rock scrambling, wildlife.
Cons: Short road walk, traffic noise from Palisades Interstate Parkway.
Disclaimer: Exploring abandoned and/or ruined structures can be dangerous and you could be trespassing. Should you choose to enter the property of any of the places featured on this site, do so legally.
Camp LaGuardia straddles the towns of Chester and Blooming Grove. Built in 1918, the complex first served as Greycourt, a women’s penitentiary. After a sharp spike in the criminal activity of young women in New York City during and after World War I, the Women’s Farm Colony in the Town of Chester, Orange County, NY, received its first female inmates in 1924. A decade later, criminality among women was on the wane. But now, it was the depths of the Depression, homelessness and alcoholism among men were rampant.
Camp LaGuardia
In response, the city repositioned the property, shut down the prison, transferred title from the Department of Correction to the Department of Welfare, and in 1934, cut the ribbon for Camp Greycourt.
Camp LaGuardia
Mayor Fiorello LaGuardia was facing staggering poverty and unemployment. He loved the idea. He called the camp a “human repair shop,” and testified at federal hearings that 40% to 50% of residents left for full-time work. In 1935, the New York Times detailed the story of 28-year-old Ralph Rinaldo, former resident of New York’s skid row: “City Camp Farmer Wins Job and Wife,” read the headline. “Weds Onion Grower’s Daughter – Couple Get Gift of a Goat, a Pig and a Sheep.” A year after the camp opened, its residents voted to name it for LaGuardia.
Camp LaGuardia
The 1,001 bed camp was such a showcase of progressive thought that a scale model was exhibited at the World’s Fair. It is a collection of a half-dozen buildings, centering on the austere brick headquarters of Greycourt Prison and set on 258 acres of black soil.
Camp LaGuardia
After the Depression, older alcoholics replaced the merely out-of-work. It was a long-term place to be safe for Bowery drunks, healthier than the streets and cheaper for the city than jails. The place seemed to survive because it attracted so little notice.
Camp LaGuardia
That ended in the 1980’s. Drugs had transformed street life in New York. As mental hospitals closed, chronically ill men joined the ranks of the homeless. Chester homeowners began to complain about finding syringes on their lawns, and police made regular sweeps of the camp, frequently finding fugitives. In 1999, as part of a settlement with Orange County, the city turned the facility over to Volunteers of America, which imposed tougher screening and safety measures. In 2002, for the first time, a fence was erected around the camp’s perimeter.
Camp LaGuardia
As crack cocaine overtook booze as a drug of choice for the homeless, the shelter became an incubator for criminality, muggings took place along the old Erie Railroad tracks, and public lewdness and narcotics in the area were all too common.
Camp LaGuardia
Camp LaGuardia became the city’s single biggest shelter for homeless adults. At full capacity, the facility was nearly a third of the size of the Village of Chester.
Camp LaGuardia
Relations between the city and local communities began to fray as encounters between locals and camp residents, who would walk daily to Chester’s stores, grew ominous. Increased complaints of lewdness, harassment and public drunkenness prompted crackdowns by local police. Calls for greater oversight at the camp intensified in 1994, after a resident strangled a pet rabbit in front of a Greycourt Road woman.
Camp LaGuardia
Prompted in part by the changing demographics of the camp, as well as, the aforementioned incidents, local opposition to the facility grew throughout the 1980’s until its closing.
Camp LaGuardia
The closure of Camp LaGuardia was announced in November 2006 by New York City officials as part of Mayor Michael Bloomberg’s five-year plan to reduce homelessness in New York City. In 2007 the Bloomberg administration began moving camp residents to subsidized housing or other shelters in preparation for the decommissioning. The facility was closed in 2008 and the buildings have remained empty since.
Camp LaGuardia
The now abandoned campus consists of roughly a dozen structures, including the three-story, 70,836-square-foot Main Building, an East Barracks and a West Barracks, plus a Warehouse Building, Fuel Depot Building, Pump House and Recreation Building.
Camp LaGuardia
There are access roads leading both to the Main Building and some outbuildings, including LaGuardia Road, a winding roadway that accesses the complex from Greycourt Road.
Camp LaGuardia
Orange County purchased the campus for $8.5 million in 2007.
Camp LaGuardia
County efforts to market the property were a disaster. In 2008, the county authorized its sale for $8.5 million to Scarsdale-based Mountco Construction Corp., who initially planned to build 807 homes or apartments and 170,000 square feet of commercial space on the site.
Camp LaGuardia
For eight years, those plans were debated, contested and downsized. Everything from sewerage infrastructure to housing scale and quantity were fought over. Still, Chester and Blooming Grove balked, and absent their approvals, the project went nowhere.
Camp LaGuardia
In June 2016, the county paid Mountco $1.2 million to break the contract of sale, kill the long-stalled deal and basically buy back the development rights.
Camp LaGuardia
Department of Public Works crews began cleaning up the property in 2016. They cut away overgrown brush, cleaned the interior, and secured the buildings. An effort to make the property presentable for real estate brokers to show the site to potential commercial owners.
Camp LaGuardia
The century-old buildings of Camp LaGuardia are abandoned and run-down. Stripped by vandals, scorched by arsonists, neglected by owners and battered by Mother Nature.
Camp LaGuardia
Thanks to sturdy support beams and load-bearing walls, built-to-last design and stolid civic architecture, the old buildings have remained structurally intact.
Camp LaGuardia
Orange County is now intensifying its efforts to sell the undeveloped site.
Camp LaGuardia
Orange County officials have been waiting 10 years to get these parcels back on the tax rolls and have already lined up some interested businesses through their Orange County Partnership connections and the IDA (Industrial Development Association).
Camp LaGuardia
As of this writing, the property remains abandoned.
Camp LaGuardia
Orange County Executive Steven M. Neuhaus: “If there’s a developer out there who has a vision for that property and credibility and a track record, we’d meet with them tomorrow,” he said.
Camp LaGuardia
Orange County, over the years, has rented out the former Camp Laguardia to a private company hosting paintball events and for filming.
Camp LaGuardia
For years local residents and government leaders had tried unsuccessfully to convince New York City to shut down the shelter. They got their wish.
With more than 5,400 acres, Norvin Green State Forest has one of the largest concentrations of trails in the state. Norvin Hewitt Green, nephew of Ringwood Manor owner Abram S. Hewitt, donated much of this land to the State of New Jersey in 1946. Part of the Wyanokie Wilderness Area, the forest is near Wanaque Reservoir and is home to an extensive trail system built from old logging roads, which can be combined to form a variety of loop hikes. With hills ranging from 400 to 1,300 feet in elevation, Norvin Green provides the avid hiker with multiple scenic vistas. The park is operated and maintained by the New Jersey Division of Parks and Forestry.
Wyanokie High Point despite its name, isn’t the highest point in the Wyanokies, but it offers one of the finer views in New Jersey. Its nearly bald summit provides 360° views of the surrounding area, including the Wanaque Reservoir and the Manhattan skyline.
Wyanokie High Point
The Blue Mine, which is also known as the London, Iron Hill or Whynockie Mine, undoubtedly received its common name from the varying dark blue color of its ore. This ore deposit was first discovered and opened by Peter Hasenclever around 1765. During the early 19th century, the mine was worked by Peter M. Ryerson. This trench is fifty feet long, twenty-five feet wide and fifteen feet deep, and is filled with water.
Blue Mine – Norvin Green State Forest
I was looking to do a somewhat moderate hike with some views and after a little research, I decided on this hike. This is one of the more popular hiking areas in New Jersey, but does not get nearly as crowded as Harriman State Park. Wyanokie High Point is similar to Popolopen Torne, as that both have a short but steep climb to a bald summit and offer 360° views. The hike didn’t go exactly as planned because we turned when we should have continued straight and included a road walk at the end. The wrong turn took us to another mine that we wouldn’t have found if we stayed on the planned route. This hike was done in a counterclockwise fashion from the New Weis Center.
Wyanokie High Pointt and Blue Mine Loop
A new feature that I have added is the Google Earth Fly-Through. It follows the path that we hiked and it gives you a good idea of the terrain, layout, amount of parking etc. Check it out, it’s pretty cool.
View the Google Earth Fly-Through video of the hike below.
The parking area is located just before the entrance to the New Weis Center. The buildings are currently closed to the public, but the parking area is open to hikers.
New Weis Center
The hike begins at the western end of the parking area, where a gatepost with triple light-green blaze marks the start of the Otter Hole Trail. We would be following this trail for the first third of a mile (other trails, such as the “L” Trail and the “W” Trail, are co-aligned for part of the way).
start of the Otter Hole Trail
start of the Otter Hole Trail
We continued on the entrance road, following the green blazes. Just ahead is a kiosk and just to the right is the Nature House. The New Weis Center property was a farm in the 1800’s. It was purchased by the Carrigan family in 1866, and the belief is that the old farmhouse (the “Nature House”) dates back to that era, if not earlier.
Nature House
The Otter Hole Trail then leaves the entrance road and runs along Blue Mine Brook on a wide footpath, lined with Norway Spruce.
Otter Hole Trail
Soon, the trail bears right to skirt the Highlands Natural Pool. Built about 70 years ago, this pool is fed by the brook and is not chlorinated. The trail briefly joins a dirt road, then bears left and ascends on a footpath and reaches a footbridge.
footbridge – Otter Hole Trail
After crossing a footbridge over Blue Mine Brook, the green-blazed Otter Hole Trail ascends through a rocky area on a footpath.
Otter Hole Trail
The trail reaches a wide woods road, the continuation of Snake Den Road. Here, the Otter Hole Trail turns right and follows the road, but we crossed the road and proceeded ahead to the kiosk.
junction
The co-aligned Mine (yellow-on-white) and Hewitt-Butler (blue) Trails begin here.
start of joint Mine and Hewitt-Butler Trails
The joint trails ascend on a footpath through mountain laurel and then climb more steeply through a rocky area.
joint Mine and Hewitt-Butler Trails
The trails level off and reach a junction where they split. The Mine Trail turns left, but we continued ahead following the blue blazes of the Hewitt-Butler Trail.
continue straight on Hewitt-Butler Trail
After a short level section, the trail begins a steady climb.
Hewitt-Butler Trail
At the top, a rock outcrop to the right of the trail offers a west-facing view, with Assiniwikam Mountain visible to the right (northwest). Just beyond, the white-blazed Macopin Trail begins to the right, but we continued ahead on the Hewitt-Butler Trail. Soon, we came to a balanced rock atop a rock ledge, with views west, east and north.
balanced rock – Hewitt-Butler Trail
balanced rock – Hewitt-Butler Trail
After a relatively level stretch, we reached a junction with the red-on-white-blazed Wyanokie Circular Trail (also the route of the teal-diamond-blazed Highlands Trail).
Wyanokie Circular Trail
The sign on the side of the tree helps point the way.
Wyanokie Circular Trail
Turning left, we followed these trails, which make a short but steep climb to the summit of Wyanokie High Point.
Wyanokie Circular Trail
The trail is steep, but it is not as difficult as it looks.
final ascent to Wyanokie High Point
The last part of the climb is over bare rock, with the trail marked by blazes painted on the rock.
final ascent to Wyanokie High Point
We arrived at the summit and were all alone. I guess timing is everything.
Wyanokie High Point
The nearly bald summit offers panoramic views to the southeast over the Wanaque Reservoir. The Wanaque Reservoir is the largest one in New Jersey. It supplies water for Newark, Paterson, Passaic, etc. Work began in 1920, which required replacing 4 miles of railroad and highway. It was completed in 1928 and can hold 27 billion gallons of “drink.” Nine dams hold the water in check.
Wyanokie High Point
On a clear day, the Manhattan skyline may be seen on the horizon.
Manhattan skyline – Wyanokie High Point
The true summit of Wyanokie High Point is marked by a protruding steel bar.
Wyanokie High Point
There is also a monument at the summit.
monument – Wyanokie High Point
We stayed at the summit for quite some time enjoying the sunny, but breezy weather. The views here are about as good as it gets. It was nearly noon when other hikers start arriving. That was our cue to get moving. We had enjoyed this spot for long enough and we still had a hike to complete.
Wyanokie High Point
We followed the red-and-white and teal diamond blazes as they descend from the summit, passing more views of the Wanaque Reservoir along the way.
Wanaque Reservoir
The trail eventually goes back into the woods and bears left, with the descent becoming less steep. At the base of the descent, the white-blazed Lower Trail begins to the right. Just beyond, the trail crosses a stream, and soon afterwards, the yellow-on-white Mine Trail joins from the left. We proceeded ahead, now following three different trail blazes.
Wyanokie Circular Trail
A short distance ahead, to the left of the trail, are the ruins of a stone shelter, constructed by members of the Green Mountain Club in the 1930’s.
ruins of a stone shelter
The trail now approaches Blue Mine Brook. Just before reaching the brook, there is a circular mine pit to the right of the trail, with a small pile of tailings (discarded waste rock) to its left. The trail crosses the brook on a wooden footbridge, built as an Eagle Scout project in 2002.
wooden footbridge
Immediately after crossing the bridge, we turned right and proceeded ahead for about 100 feet. To the left is the Blue Mine, filled with muddy water.
Blue Mine – Norvin Green State Forest
This ore deposit was first discovered and opened by Peter Hasenclever around 1765 and was worked intermittently throughout the 19th century. By 1890 it had yielded 800 tons of ore. It was shut down for good in 1905.
Blue Mine – Norvin Green State Forest
A large concrete pad at the entrance to the mine, with protruding iron rods, once served as a base for steam-operated equipment.
concrete pad – Blue Mine
We went back to the footbridge (did not recross it). Just beyond, the teal-diamond-blazed Highlands Trail leaves to the right, but we continued ahead on the joint Mine/Wyanokie Circular Trails, which follow a rocky woods road. Bearing left at a fork and continuing ahead for about a quarter of a mile until the two trails separate. Here, we turned right and followed the yellow-on-white blazes of the Mine Trail, which climbs on a narrow woods road. At the top of a rather steep pitch, the Mine Trail turns sharply right, but we should have continued ahead on the orange-blazed Roomy Mine Trail. Here is where I screwed up. I was under the assumption that when the orange and yellow trails meet, we should follow the co-aligned trails until they split. I was wrong. After a while, I was pretty sure we were off the planned route, but it wasn’t all bad. We hiked through a a beautiful stretch of trail without running into anyone.
co-aligned Mine and Roomy Mine Trails
We also came across another mine that I didn’t know anything about. It could be another adit from the Roomy Mine, but I am not quite sure. While reviewing the track recorded by my GPS, post hike, I discovered that this mine was on the ridge above the Roomy Mine.
UPDATE: In the process of writing this post, I contacted the New Jersey Division of Parks and Forestry and they responded: “the opening you have questioned is not a separate mine but rather a shaft associated with the Roomy Mine itself.” They are going to further explore this matter and will notify me if any additional information arises.
iron mine – co-aligned Mine and Roomy Mine Trails
While checking out this mine, I heard and saw two people down below and was going to climb down to see if the Roomy Mine was down there, but if I was wrong, it would have been a steep climb back.
iron mine – co-aligned Mine and Roomy Mine Trails
Instead we continued on the co-aligned Mine and Roomy Mine Trails until they split. We then followed the orange-blazed Roomy Mine Trail which had several ups and downs, but eventually leveled off.
Roomy Mine Trail
We followed the orange blazes until its terminus at a junction with the teal-diamond-blazed Highlands Trail. There we had a decision to make, take a left on the Highlands Trail out to Townsend Road and road walk back up the hill to the parking area or turn right and end up back near the Blue Mine and then make our way through the woods back to where we started. It was an easy choice. Road walk it was. Once out on Townsend Road, we walked downhill to the stop sign and turned left on Westbrook Road. We then turned left on Snake Den Road. Along the way there were a few interesting things to see.
Townsend Road
Townsend Road
purple quonset hut – Snake Den Road
We then returned back to the parking area, where our hike began. It was about 2:20 pm when we got back and the lot was just about full.
New Weis Center parking – Snake Den Road
Despite the wrong turn, this was a really good hike. I was in a zone and just enjoying being in the woods and not paying attention when I should have. Since the trail we missed and the trail we were on were pretty much parallel, my compass read that we were going in the right direction. Another lesson learned out on the trail. I plan on going back sometime soon and doing a different hike, but visiting the Roomy Mine.
Pros: Well marked trails, gorgeous views, iron mines, rock formations.
West Mountain is a peak that is located in both Orange and Rockland County, NY, just east of the Palisades Interstate Parkway. Most of the mountain is within the boundaries of Bear Mountain State Park, but part of it is in Harriman State Park as well. In November 1923, the Palisades Interstate Park Commission decided that “all of the Park lying west of Bear Mountain (later, west of West Mountain) shall be designated Harriman State Park.” The summit is at an elevation of 1,257 ft. and the western ridge (the section that is part of this hike), is about 1.5 miles long. The narrow ridge offers hikers many fine outlooks both to the west and to the east as the trail jogs from one side of the ridge to the other.
West Mountain as viewed from The Timp
Exactly one year ago to the day of this hike, I did a longer loop of West Mountain. Now I was looking to do a shorter loop with views and this place was worth a return visit. From the ridge there are views in all directions and it was fun to locate and point out the many peaks in the surrounding area that I have already hiked. The mini rock scrambles were also a blast. This hike was done in a counterclockwise direction.
West Mountain Short Loop
A new feature that I have added is the Google Earth Fly-Through. It follows the path that we hiked and it gives you a good idea of the terrain, layout, amount of parking etc. Check it out, it’s pretty cool.
View the Google Earth Fly-Through video of the hike below.
We got a later start than usual due to the early morning rain, but it cleared up and we arrived at the Anthony Wayne Recreation Area shortly before 10:00 am. We walked to the kiosk at the southern end of Parking Area 2 and picked up the Horn Hill Loop Mountain Bike Trail which also runs through both parking lots.
Trailhead – Anthony Wayne South Lot
The 4.8 mile Horn Hill Loop Mountain Bike Trail, with blue-on-white diamond blazes, forms a figure-eight loop which begins and ends here. It is the only trail in Harriman-Bear Mountain State Parks on which bicycles are permitted.
Horn Hill Loop Mountain Bike Trail
The trail enters the woods and travels through a pine forest. With all the rain that fell, the trail was swampy and in some places, large pools of water formed.
Horn Hill Loop Mountain Bike Trail
Shortly after entering the woods, we walked by what appeared to be someone’s art project.
art project? – Horn Hill Loop Mountain Bike Trail
The trail continues through the woods and crosses several bridges.
bridge – Horn Hill Loop Mountain Bike Trail
bridge – Horn Hill Loop Mountain Bike Trail
In about 0.5 mile from the kiosk, the trail comes to an intersection with the white-blazed Appalachian Trail. From this direction, only the back of the sign is visible.
intersection with the Appalachian Trail
intersection with the Appalachian Trail
The section of the Appalachian Trail that passes through Harriman and Bear Mountain State Parks is the oldest section of the trail, completed in 1923. The AT ascends gradually at first…..
Appalachian Trail
Then steepens as it crosses Beechy Bottom West Road (also part of the Horn Hill Loop).
Appalachian Trail at Beechy Bottom West Road crossing.
There are several stream crossings in this area which were made easier by the NY/NJ Trail Conference’s Long Distance Trails Crew.
stream crossing – Appalachian Trail
The Long Distance Trails Crew (LDTC) is made up of volunteers dedicated to the construction and rehabilitation of foot trails along the Appalachian Trail, Long Path and Highlands Trail in New York, west of the Hudson.
Appalachian Trail
The LDTC have relocated some sections of the heavily eroded trail and have installed switchbacks to eliminate some of the steeper sections in this area. Their work began in 2014 and are currently working on phase 3 of the project. After having climbed West Mountain a year earlier via the Ramapo-Dunderberg Trail, I expected the AT to be just as challenging. Thanks to the hard work and sweat of some dedicated volunteers, this ascent was made much easier. After approximately 0.8 mile on the AT, we came to our first view of the day. A rock outcrop alongside the trail made for a good place to stop and take a breather.
view southwest from Appalachian Trail
Nearing the ridge of West Mountain, we came to the section of the AT that is currently being worked on. The new treadway will include water bars and running steps.
Appalachian Trail
Much of the work involves using heavy hand tools and some rigging with a high line (overhead cable) to move heavy rocks.
high line – Appalachian Trail
We climbed the recently installed stone steps as we neared the top of West Mountain.
stone steps – Appalachian Trail
We then reached the junction where the AT meets the blue-blazed Timp-Torne Trail. The rock outcrop affords hikers a great west-facing view, with Black Mountain visible straight ahead.
junction with the Timp-Torne Trail
In approximately the first mile of the AT, we gained about 600 feet of elevation. It was well worth it. The AT now joins the blue-blazed Timp-Torne Trail as it heads north along the edge of the ridge. The Timp-Torne Trail was the second trail built by the new Palisades Interstate Park Trail Conference, in the winter of 1921.
coaligned AT/Timp-Torne Trail
The trail passes another west-facing view, veers slightly right and approaches some massive rock formations.
coaligned AT/Timp-Torne Trail
After passing the rock formations, the trail leads to an east-facing viewpoint. With Anthony’s Nose in the center, surrounded by the rest of the East Hudson Highlands. Bear Mountain is to the left with the tower of the Bear Mountain Bridge peeking out from the Hudson River.
Continuing north along the ridge, there is a north facing viewpoint, with Bear Mountain and Perkins Tower visible on the summit.
Bear Mountain
The trail then veers to the left and continues along the western edge of the cliffs as it continues heading north.
coaligned AT/Timp-Torne Trail
At another rock outcrop is Balancing Rock, a glacial erratic that looks out of place here.
Balancing Rock – coaligned AT/Timp-Torne Trail
We stopped here and took another short break, admiring the view.
Balancing Rock – coaligned AT/Timp-Torne Trail
A little further north, another large rock outcrop with a great view west of the Harriman Hills.
west-facing view – coaligned AT/Timp-Torne Trail
The trail then travels over some rock ledges…….
rock ledge – coaligned AT/Timp-Torne Trail
and passes through a level area as it approaches some large cliffs.
coaligned AT/Timp-Torne Trail
The coaligned AT/Timp-Torne Trail climbs through the crevices in the large rocks.
coaligned AT/Timp-Torne Trail
The trail then travels over open rock slabs, but in certain spots there is a well worn path that bypasses the more difficult sections…….
coaligned AT/Timp-Torne Trail
with more views along the way.
coaligned AT/Timp-Torne Trail
The trail then comes to a north facing viewpoint, with Bear Mountain directly ahead.
view north of Bear Mountain
Perkins Memorial Tower is clearly visible at the summit.
Perkins Memorial Tower
To the southeast, the Hudson River can be viewed from this spot.
Hudson River
When we reached a y-intersection where the white-blazed Appalachian Trail veers right, we stayed left to remain on the blue-blazed Timp-Torne Trail.
veer left on Timp-Torne Trail
The trail changes from open rock to a rocky footpath over undulating terrain as it passes several more viewpoints.
Timp-Torne Trail
Perkins Memorial Tower from the Timp-Torne Trail
The Timp-Torne Trail passes through some large rock formations……
Timp-Torne Trail
with a short rock scramble just ahead.
Timp-Torne Trail
Another west-facing viewpoint with the Palisades Interstate Parkway and the Anthony Wayne Recreation Area north lot, visible below.
Timp-Torne Trail
The trail then begins a rather steep descent over open rock slabs. Relying on the grip of our boots, this section would be difficult if not hazardous, in wet conditions. There is a dirt path that bypasses some steep sections along this descent.
Timp-Torne Trail
On the way down, there is a great view of Popolopen Torne. The first time I hiked West Mountain, this view was the motivating factor in wanting to hike “The Torne.”
Timp-Torne Trail
At the base of the descent, a view back at the spot we were at, just moments earlier.
Timp-Torne Trail
After another steep descent, we came to an intersection with the red-“F”-on-white blazed Fawn Trail. Here we turned left and began heading west.
Fawn Trail
The Fawn Trail was shown on the first Park trail map in 1920. The Fawn Trail provides an easy route from the Appalachian Trail (AT) and Doodletown Road to the Anthony Wayne Recreation Area on the other side of West Mountain. It is a fairly level trail, and in June it passes through masses of laurels in bloom.
Fawn Trail
The Fawn Trail heads downhill, descending gradually towards the base of West Mountain.
Fawn Trail
The Fawn Trail ends at a junction with the white-blazed Anthony Wayne Trail at Beechy Bottom East Road.
Fawn Trail terminus
We then turned left onto Beechy Bottom East Road, which is also the route of the Horn Hill Loop Mountain Bike Trail. The trail continues straight ahead along the gravel road. The large pipe along the road goes up to a concrete reservoir. We followed this road south until we passed the north parking lot, which is visible through the trees. We then veered right on a park road that leads through a picnic area. We then crossed the bridge over Beechy Bottom Brook and back to the south parking lot, where our hike began.
Beechy Bottom East Road
This is one of my favorite Harriman hikes. Now having done two variations of it, I plan to do it again sometime, but in reverse. The views are nonstop, the terrain is varied and the light rock scrambling is enjoyable. This short loop is challenging, but not to the point of being overwhelming. I truly enjoyed being able to see all the hills in Harriman-Bear Mountain State Parks that I have hiked.
Pros: Views galore, light rock scrambling, varied terrain, well marked trails.
Cons: Some road noise from the parkway, Some sections of the trail can be hazardous when wet or icy.
Long Pond Ironworks was founded in 1766 by the German ironmaster Peter Hasenclever. With financial backing from British investors, Hasenclever purchased the existing Ringwood Ironworks as well as huge parcels of land, including the 55,000-acre Long Pond Tract. He also imported more than 500 European workers and their families to build ironmaking plantations at Ringwood, Long Pond and Charlottenburg in New Jersey and at Cortland in New York. From the wilderness they carved roads; built forges, furnaces and homes; and created supporting farms. At Long Pond, they dammed the river in order to provide water power to operate the air blast for a furnace and a large forge.
Long Pond Ironworks
Within the 175-acre Long Pond Ironworks Historic District lie the ruins of three iron blast furnaces, including the original Colonial-era furnace constructed in 1766, and two larger furnaces built for Civil War production; evidence of iron forges; remains of water power systems; and a variety of workers’ homes and commercial buildings that were critical parts of the ironworking village.
Long Pond Ironworks Historic District
This area is loaded with history and I have wanted to hike it, but the footbridge over the Wanaque River was swept away by Hurricane Irene in 2011 and hadn’t been replaced. That made this hike impossible to do. The bridge was replaced in late 2016 and when I read that, I scheduled a hike.
wood-truss footbridge
It was a beautiful day for a hike with temps in the mid 50’s and sunny. After the harsh winter, I was raring to get in the woods without any snow on the ground. We arrived at the Visitor Center and Museum just after 9:00 am on Sunday morning. I usually take a photograph of the area I will hike on my NY/NJ Trail Conference maps, then crop and print them. This makes viewing them much easier. I also like to print a copy of the trails and turns as a quick reference. Unfortunately the maps and directions were left behind, through no fault of my own. I still had the original maps in my backpack and I wasn’t about to turn around. The Visitor Center is open on weekends and they have great maps and brochures. We did this loop hike counterclockwise from The Visitor Center.
Long Pond Ironworks Visitor Center and Museum
Patterson Mine Loop – Long Pond Ironworks State Park
A new feature that I have added is the Google Earth Fly-Through video. It follows the path that we hiked and it gives you a good idea of the terrain, layout, amount of parking etc. Check it out, it’s pretty cool.
View the Google Earth Fly-Through video of the hike below.
From the parking area, we proceeded west, crossing a grassy area in front of an historic home, the Sommers Stites House which dates back to the 1860’s.
Sommers Stites House
Continuing on a footpath that passes behind a second home, the Laird-West House.
Laird-West House
This house also dates back to the 1860’s, but portions of the house may be older.
Laird-West House
Then the path passes in front of three other historic buildings, including the Ward-Ryerson-Patterson House which was built around 1780 and functioned as a farmstead and country inn until 1980. The relocated house and 240 acres of land were purchased in 1842 by George Patterson and remained in the Patterson family for eighty-one years. The Patterson House served as a restaurant in the twentieth century under names such as the Wanaque Valley Inn, the Copper Kitchen, the Paul Bunyan Inn and the Holy Mackerel Seafood Restaurant.
Ward-Ryerson-Patterson House
The Patterson House, circa 1780, and the Whritenour House, circa 1810, were privately-owned satellite farms that provided goods and services to those living in Long Pond. The Patterson House and the Whritenour House were relocated to Long Pond in 1985 before the Monksville Reservoir was flooded in 1987.
Whritenhour House
The Harty-Milligan House is a two-story, two bay, and worker’s cottage that dates to back to 1861.
Harty-Milligan House
Approaching the third building, the footpath joins an old woods road and curves to the right, soon passing two more historic buildings. The Stone Double House was built before the Revolutionary War. It is the only surviving building which was here at the time of the Revolutionary War.
Stone Double House
Owl Peak Brook runs alongside the Stone Double House. The brook was dammed behind the cascade to create an ice pond from which ice was then harvested.
cascade – Owl Peak Brook
Mule Barn
We then crossed a bridge over Owl Peak Brook. This is a rebuild of the last one whose design probably dates to the early part of the 20th century. The bridge is very strong with huge timbers spanning the stone abutments.
Owl Peak Brook Bridge
Owl Peak Brook
After crossing Owl Peak Brook (also known as Hewitt Brook) on the bridge, the blue-on-white-blazed Sterling Ridge Trail and the teal-diamond-blazed Highlands Trail join from the left. Just ahead are the ruins of the company store and Hewitt Post Office. The Company Store was a center of village life for over 160 years. Containing not only a wide assortment of merchandise, but also the post office and company bookkeeper’s office. Purchases at the store were deducted from workers’ wages.
Company Store
Just past the Company Store is the Ice House. Built into the hillside and about two feet into the ground, the ice house provided a location to store ice harvested from nearby ponds.
Ice House
When we were done checking out these structures, we took a footpath down the hillside to see the furnaces.
footpath
The stone blast furnace was built by Hewitt and Cooper Company at the outbreak of the American Civil War. Originally, this furnace stood over 60 feet high. A high quality gun metal was processed here; in fact the furnace became known as the Gun Metal Furnace. Abram Hewitt was a major supplier of gun metal to the Union Army and so contributed to the North’s important industrial advantage over the Confederacy.
Civil War era blast furnace
Continuing along the edge of the Wanaque River, we approached the Hewitt era waterwheel houses.
waterwheel houses
Once the fires were lit in the furnaces, oxygen was blown into the furnace with two 20-foot bellows run by cams on revolving shafts powered by a waterwheel.
south waterwheel
In 1957, vandals set fire to the two waterwheels, but the Friends of Long Pond Ironworks (FLPI) obtained funds to preserve one wheel in its charred condition with the original iron axle, and rebuild the second 25 ft. diameter wooden wheel on a cast iron axle.
south waterwheel
Today both waterwheels sit under a protective covering, but can be easily viewed.
north waterwheel
On April 30, 1882, the furnaces were extinguished, ending more than 120 years of ironmaking at Long Pond.
north waterwheel
When we were done exploring these interesting ruins, we walked back to the wood-truss footbridge. The 60 ft. bridge was constructed in the fall of 2016, through the efforts of the New York-New Jersey Trail Conference, to replace a bridge that was washed away by Hurricane Irene in 2011.
wood-truss footbridge
The view north of the Wanaque River with the waterwheel houses visible through the trees in the distance.
Wanaque River
After crossing the footbridge, in addition to the Sterling Ridge and Highlands Trails, we were now also following the yellow-blazed Hasenclever Iron Trail, which begins on the west side of the footbridge.
yellow-blazed Hasenclever Iron Trail
In about 300 feet, we followed the yellow blazes as the Hasenclever Iron Trail turns right, leaving the Sterling Ridge/Highlands Trail.
yellow-blazed Hasenclever Iron Trail
This yellow blazed trail follows, for the most part, a road built in the 1770’s, between the ironworks here at Long Pond and those at Ringwood Manor five miles away. Ironmaster Peter Hasenclever was running operations at both sites. This road was abandoned many years ago, and today, some sections are barely recognizable, while others are badly eroded. While the marked trail generally follows the road, there are places where it detours slightly to avoid wet or eroded sections.
Hasenclever Iron Trail
In a short distance we reached Stop 1 of the Hasenclever Iron Trail, marked by a laminated sign which provides informative historical details. We would be passing six such signs along the route of this hike.
Hasenclever Iron Trail
To the left of the trail, I spotted an abandoned vehicle behind a mound of dirt. It turns out that it is an early 60’s Chevy Corvair.
early 60’s Chevy Corvair
Continuing on the Hasenclever Iron Trail, we then rock hopped a stream.
Hasenclever Iron Trail
The Hasenclever Iron Trail then begins a steady ascent for about 0.5 mile.
Hasenclever Iron Trail
The trail then begins a steady descent heading south, with imposing cliffs and rock formations to the left of the trail. The Monksville Reservoir becomes visible through the trees.
Hasenclever Iron Trail
Just before reaching the reservoir, the trail turns sharply left and begins to parallel the reservoir. A short distance ahead, is Stop 2 of the trail, where the stone ruins of a building used to process or store limestone are barely visible on the left.
Hasenclever Iron Trail
Next is Stop 3, near where the trail departs from the original route of the Ringwood-Long Pond road, which is now submerged under the reservoir. In a short distance, the trail turns left and leaves the woods road it has been following. It now enters the woods on a footpath to skirt a private home. To the left of the trail, there are huge rock formations and and cliffs visible through the trees.
Hasenclever Iron Trail
The trail eventually curves to the right and descends to reach a junction with the dirt Beech Farm Road, which is Stop 4 on the trail. To the north (left), the road leads to the remains of Beech Farm, a homestead that dates back to Colonial times. We turned right onto Beech Farm Road, following the yellow blazes with Beech Brook on our left.
Hasenclever Iron Trail
A short distance ahead, we crossed Beech Brook on a wide concrete bridge with a guardrail.
concrete bridge – Hasenclever Iron Trail
Beech Brook
After crossing the bridge, the trail enters Tranquility Ridge County Park.
Hasenclever Iron Trail – Tranquility Ridge County Park
About 500 feet beyond the bridge, the trail turns left, leaving the road, and reaches Stop 5, where a 200-year-old tree on the right marks the site of an old homestead. The trail now ascends gradually along a woods road, with a detour around an eroded section. In about 0.3 mile, we reached Stop 6. Here, the yellow-blazed Hasenclever Iron Trail bears right, but we turned left onto an unmarked woods road which heads downhill towards Beech Brook (further upstream than the earlier crossing). This crossing can be tricky in times of high water, and we walked a short distance upstream and crossed just below a cascade.
Beech Brook
Just beyond the brook, we reached a T-intersection, where we turned left on another woods road. In about 200 feet, we reached a fork, where we veered right. The woods road now climbs along the side of a mountain, first rather steeply, then more gradually.
woods road
At the crest of the rise, there is a mine pit to the right of the trail which is filled with leaves. This is one of the openings of the Patterson Mine, which was opened around 1870 and last worked in 1903. To the left of the trail are two water-filled pits, also part of the mine complex. Adjacent to each opening is a pile of tailings, the waste rock excavated during the mining process.
Patterson Mine
The Patterson Mine is associated with the Ward-Ryerson-Patterson House, which formerly stood on the north side of the Greenwood Lake Turnpike opposite the Whritenour House.
Patterson Mine
When we were done exploring this interesting area, we returned to the woods road and continued ahead, now proceeding downhill. Soon, the joint Sterling Ridge/Highlands Trail (blue-on-white and teal diamond blazes) joins from the right. At this junction, the trail leaves Tranquility Ridge County Park and re-enters Long Pond.
joint Sterling Ridge/Highlands Trail
We Continued along on the marked trail, which heads downhill, paralleling a stream on the right. At the next junction, marked by a triple yellow blaze, the Jennings Hollow Trail begins on the right, but we continued ahead on the joint Sterling Ridge/Highlands Trail, passing through a hemlock grove.
joint Sterling Ridge/Highlands Trail
In three-quarters of a mile, we reached the wood-truss footbridge over the Wanaque River. Crossing the bridge, we turned left and began retracing our steps back to the parking area where the hike began. On the way there we took a right and walked up the driveway of a dilapidated house. It is known as “The Manager’s House.”
The Manager’s House
This is a large wood frame building constructed around the time of the Civil War for use by the on-site manager of the ironworks. According to the Friends of Long Pond Ironworks website, “this was the nicest house in the village and structurally is holding its own. We do hope to restore the building and perhaps come up with an adaptive reuse for it.”
The Manager’s House
The Manager’s House
We returned to the road and made our way back to the visitor center. There we took a break then took a walk behind the building to get a look at the Monksville Reservoir. Known for its trophy size muskellunge, walleye, bass and trout, Monksville Reservoir is heavily used by anglers, sporting clubs and the US Sailing Association. It was created in 1987 by damming the Wanaque River. It is named after the former community of Monksville, which was relocated and flooded upon its completion.
Monksville Reservoir
While at the reservoir I spotted a Tree Swallow sitting on a tree in the water. I also saw a Great Cormorant a little farther away.
Tree Swallow
Walking back out towards the road, we passed the very dilapidated Stephens-West House.
Stephens-West House
The inside wasn’t much better.
Stephens-West House
Right across the road is the Hewitt Methodist Church, built in 1895.
Hewitt Methodist Church
The historical value of Long Pond Ironworks is paralleled only by its natural beauty. The forests that were once cut down to make charcoal for the furnaces have returned, and the river that was once diverted into the hydropower systems
again cascades over ancient rock formations. This hike is a great introduction to Long Pond Ironworks State Park. There are numerous trails and mines to explore and I will be back to do some more exploring.
Pros: Historical features, stream crossings, well marked trails, ruins.
The Camp Smith Trail is approximately 3.7 miles long and extends from the Historic Toll House (Visitor Center) on Route 6-202 to the Appalachian Trail (AT) on Anthony’s Nose. As described by the New York-New Jersey Trail Conference: “Without a doubt, the most rugged trail in Westchester County is the Camp Smith Trail, which rewards a hiker with many panoramic views along its route.” Camp Smith (military reservation) is about 50 feet to the right of the trail in most places on the way to Anthony’s Nose. It is heavily used by the military and may include live gunfire. Many places to the left of the trail, there are steep cliffs that drop down to Bear Mountain Road.
Camp Smith Trail
Anthony’s Nose is a peak along the Hudson River at the north end of Westchester County, New York. Together with Dunderberg Mountain, it comprises the South Gate of the Hudson Highlands. The 910 ft. peak has been known as Anthony’s Nose since at least 1697, when the name appears on a grant patent. Pierre Van Cortlandt, who owned this mountain, said it was named for a pre-Revolutionary War sea captain, Anthony Hogan. This captain was reputed to have a Cyrano de Bergerac type nose.
Anthony’s Nose from the overlook – Trailside Museums and Zoo
Anthony’s Nose is one of the more popular hikes in the Hudson Valley and on weekends the cars are lined up along Route 9D as a testament to its popularity. I have wanted to do this hike for quite some time, but I consider this a weekday hike in order to minimize the crowds. With that being said, I chose this as my birthday hike. Having lived in Westchester County for most of my life, it was fitting that I hike the Camp Smith Trail. My intention was to hike it from the Historic Toll House to Anthony’s Nose and back. A tall order for an old guy like me, but I was going to give it a shot. Another option was hiking it in its entirety and descending on the Appalachian Trail to 9D after stopping at Anthony’s Nose. As it turned out we ended up doing the second option.
Camp Smith Trail – Hudson Highlands State Park Preserve
Check out the Google Earth Fly-Through video of the hike below.
Since I was feeling optimistic, we only used one car. This hike is better done with a car parked at each end. We parked at the historic Bear Mountain Bridge Toll House, 0.7 mile north of the entrance to Camp Smith on Bear Mountain Road, Route 6/202. The Toll House currently serves as the trailhead for the Camp Smith Trail.
Bear Mountain Bridge Toll House
The Toll House and Bear Mountain Road were constructed between 1923 and 1924 to connect the newly constructed Bear Mountain Bridge with Route 9. The Road and Bridge were privately owned and tolls for such were collected at the Bear Mountain Road Toll House and at the Bridge itself.
Bear Mountain Bridge Toll House
The one-story Tudor-style Toll House has a gabled slate roof, exposed timbers, and smooth stucco finish. The west bay of the Toll House housed the office and collection area for tolls. In 1940, the Bridge and Road were sold to the State of New York. Under ownership of the State, collection of tolls for the Road ceased and the Bear Mountain Road Toll House was essentially left vacant. Restored in 2002, the Toll House is now used as a Tourist Information and Welcome Center. The Bear Mountain Bridge, Route 6/202 (Bear Mountain Bridge Road) and the Toll House were listed on the National Register of Historic Places in 1982 as part of the Hudson Highlands Multiple Resource listing.
Bear Mountain Bridge Toll House
Since there was rain in the forecast for the afternoon, we decided to get an early jump and arrived at approximately 8:15 am. It was in the high 30’s and windy when we began the hike and rose to the mid 40’s throughout the day. The blue-blazed Camp Smith Trail starts behind the historic Bear Mountain Bridge Toll House.
Start of Camp Smith Trail
The triple blazes, which signify the start of the trail, are visible on a tree just past the brown shed on the right. We would be following the blue blazes until its terminus at the Appalachian Trail.
blue-blazed Camp Smith Trail
At first, the trail parallels the road, climbing steadily.
Camp Smith Trail
There are numerous signs alongside the trail, which borders Camp Smith. Camp Smith is a military installation of the New York Army National Guard and consists of 1,900 acres.
Camp Smith Trail
The trail travels past large boulders and rock formations as it ascends Manitou Mountain.
Camp Smith Trail
It drops steeply through a rock field and turns left before reaching a massive cliff.
Camp Smith Trail
Staying within sight and sound of the road, it works its way gradually uphill, crossing small ridges.
Camp Smith Trail
At 0.6 mile, it begins a serious ascent of Manitou Mountain.
Camp Smith Trail
It then soon climbs very steeply on a series of rock steps.
Camp Smith Trail
The trail continues to climb over jumbled rocks.
Camp Smith Trail
It turns left to reach a viewpoint to the south.
southern viewpoint – Camp Smith Trail
southern viewpoint – Camp Smith Trail
Turning right, it crosses the top of an open rock face.
Camp Smith Trail
open rock face – Camp Smith Trail
The Camp Smith Trail drops slightly and resumes its steady ascent of Manitou Mountain.
Camp Smith Trail
It passes through a gully as it approaches viewpoints on the brow of the mountain. At 0.9 mile, we stopped for a few minutes to enjoy the view of Iona Island with West Mountain in the background. In 1899, Iona Island was bought by the U.S. Navy for use as a naval ammunition depot, becoming one of the largest ammunition facilities in the nation, at that time. The depot supplied much of the munitions for both World War I and II, and remained in service until 1947.
Iona Island – Camp Smith Trail
The island was bought by the Palisades Interstate Park Commission in 1965. In 1974 it was named a National Natural Landmark by the National Park Service. As an active wildlife sanctuary, Iona Island is currently closed to the public.
Iona Island – Camp Smith Trail
Approximately five of the original 164 arsenal buildings remain, which the park now uses for storage.
Iona Island – Camp Smith Trail
The trail turns away from the river and then left again toward a rock outcropping with views. To the north, Bear Mountain is visible on the left and Anthony’s Nose on the right, with the Bear Mountain Bridge in the center.
view north – Camp Smith Trail
The Camp Smith Trail then turns right and away from the views to begin its descent. The rock steps, switchbacks, and sidehill construction make it possible to safely descend the extremely steep talus slope. At the base of the descent I took quite a tumble. I rolled my ankle and smashed my shin on a rock. For a few seconds I thought that my hike was done. I cleaned off the wound, applied a bandage and hobbled off to continue the hike.
wounded knee – Camp Smith Trail
At 1.2 miles, the Camp Smith Trail reaches the bottom of the slope, crosses a flat area, turns gradually left, and arrives at a small rock outcropping with a view. From the viewpoint, the trail leads inland and then turns once again towards the river for another view to the west. Leaving the view, the trail continues the gradual descent, crossing intermittent brooks.
Camp Smith Trail
At 1.9 miles, it reaches a parking area on Route 6/202 at a large bend in the road, 2.2 miles north of the entrance to Camp Smith.
Camp Smith Trail
Continuing north to Anthony’s Nose, the trail crosses Broccy Creek and heads gradually uphill, parallel to the road.
Broccy Creek – Camp Smith Trail
After turning away from the road, it joins and leaves woods roads and crosses streams.
woods road – Camp Smith Trail
stream – Camp Smith Trail
Rising out of a ravine, the trail turns right at 2.4 miles, onto a rock outcropping with views of the Hudson River, Iona Island, and Bear Mountain-Harriman State Park.
Camp Smith Trail
view of Iona Island – Camp Smith Trail
view of Bear Mountain – Camp Smith Trail
Paralleling the river high over the road, the trail first drops slightly then begins to climb steeply.
Camp Smith Trail
Camp Smith Trail
At 2.7 miles, another rock outcropping with a view offers an excuse to stop before tackling the remaining unrelenting assault up Anthony’s Nose.
Camp Smith Trail
Along the last 0.4 mile, there are both seasonal and year-round views from open rock slabs.
turning around and looking south from the Camp Smith Trail
The trail drops down off the summit to join a woods road. Following it straight ahead leads to Anthony’s Nose and panoramic views of the Hudson River, Bear Mountain-Harriman State Park, Hessian Lake and the Bear Mountain Bridge.
Hudson River, Bear Mountain and Hessian Lake from Anthony’s Nose
Bear Mountain Bridge from Anthony’s Nose
Looking southwest, a view of Iona Island from Anthony’s Nose.
Iona Island from Anthony’s Nose
We stopped here for a while, but it was very windy so we took refuge away from the views. There was not a single soul in sight as we sat there and that was just fine by me. At this point my ankle was swollen and my shin was throbbing from the spill I took earlier. Not having another car parked nearby was a dilemma. I didn’t have it in me to retrace my steps back the way we came so it was either a dangerous road walk back to the car along Route 6/202 or call for a ride. Luckily, we called a friend who happened to be driving nearby and he agreed to pick us up at the trailhead on Route 9D. We then followed the blue blazes, which travels on a woods road, to the Appalachian Trail, where the Camp Smith Trail ends at 3.7 miles.
Camp Smith Trail
We then followed the white blazes to the left where the AT descends steeply for 0.6 mile to Route 9D. We then met up with our ride and he dropped us off back at the Toll House.
Pros: Scenic views, great weekday hike, rugged trail, numerous stream crossings, well blazed trail, Hudson River, Anthony’s Nose.